
I’ve been working with the Grove series of sensors lately as I previously covered in my K1100 Grove Sensor prototyping kit article. The next step after getting my prototyping kit set up was to try some of the expansion shields for the Seeed Studios XAIO modules such as the ESP32-C3. This will allow me to connect a whole bunch of sensors to a single board.
We used LoRa in the last article to upload sensor data to the cloud. Today we’re going to take the complete opposite approach. We are going to use the open-source Home Assistant suite to upload data to a locally running Home Assistant server. Home Assistant already integrates nicely with everything in my home letting me access it all in one place.
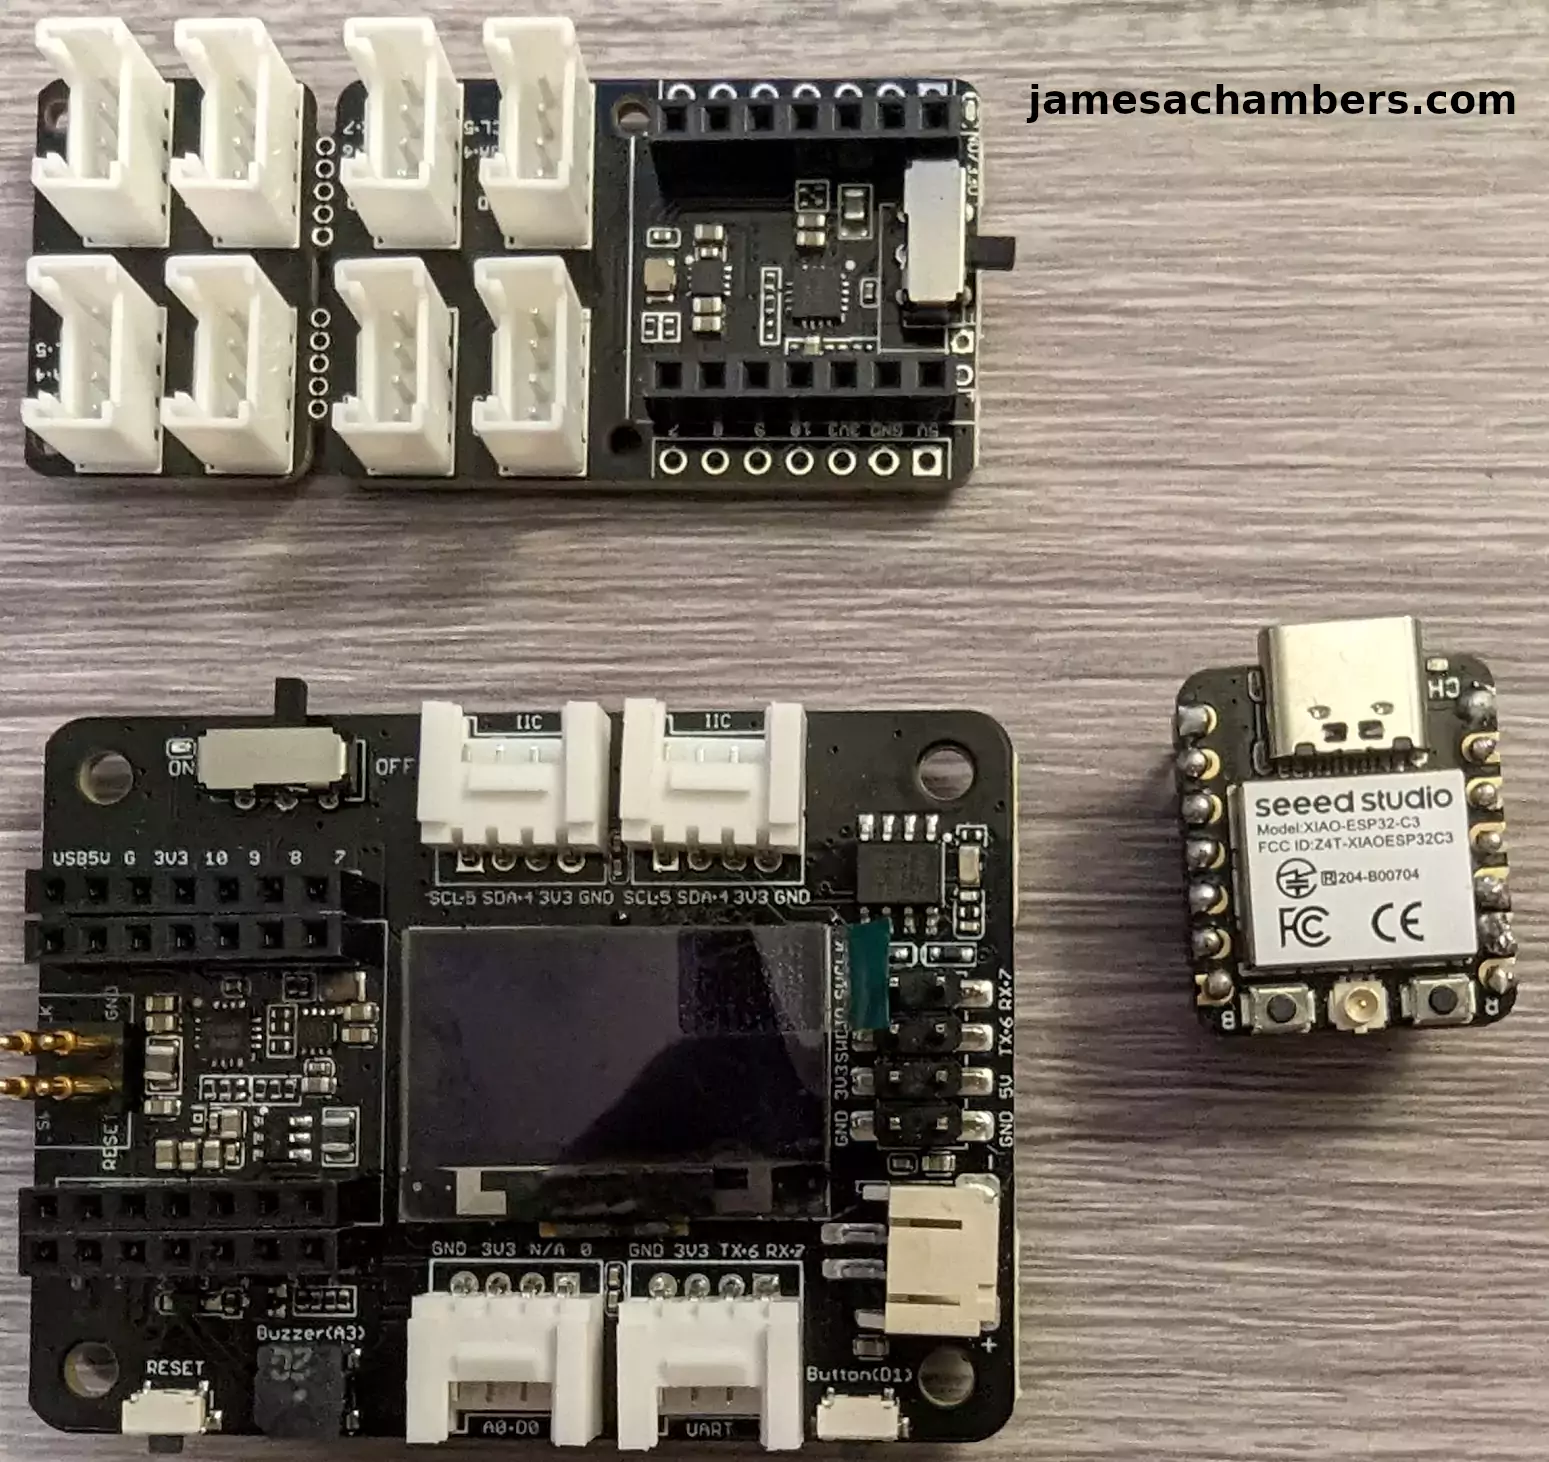
In this article we’re going to take the next step after prototyping one sensor at a time and try using a XAIO Grove expansion shield to connect a whole bunch of sensors to a single board and then view all of their data within Home Assistant. Let’s get started!
Hardware Used
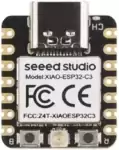
The Seeed Studios XAIO-ESP32-C3 is a microcontroller board that uses the RISC-V architecture. It has Bluetooth and WiFi capabilities and includes an external antenna.
Links: Amazon.com*, AliExpress*, *Amazon.ca*, Amazon.co.uk*, Amazon.com.au*, Amazon.de*, Amazon.es*, Amazon.fr*, Amazon.it*, Amazon.nl*, Amazon.pl*, Amazon.se*, Amazon.sg*

The Seeed Studios XAIO series expansion boards give you a lot of ports to connect Grove sensors and other devices to your XAIO device
Links: Amazon.com*, AliExpress*, Amazon.ca*, Amazon.co.uk*, Amazon.com.au*, Amazon.de*, Amazon.es*, Amazon.fr*, Amazon.it*, Amazon.nl*, Amazon.pl*
Adding ESPHome to Home Assistant
We are going to assume you have Home Assistant installed as installing Home Assistant is outside the scope of this guide. You can absolutely follow along though and see if it looks like something you’d like to explore. I have it installed as a supervised installation on an Orange Pi 5.
Sign into your Home Assistant instance and go to “Settings” and then “Add-ons”. Next click the “Add-on Store”.
ESPHome has it’s own section like this:
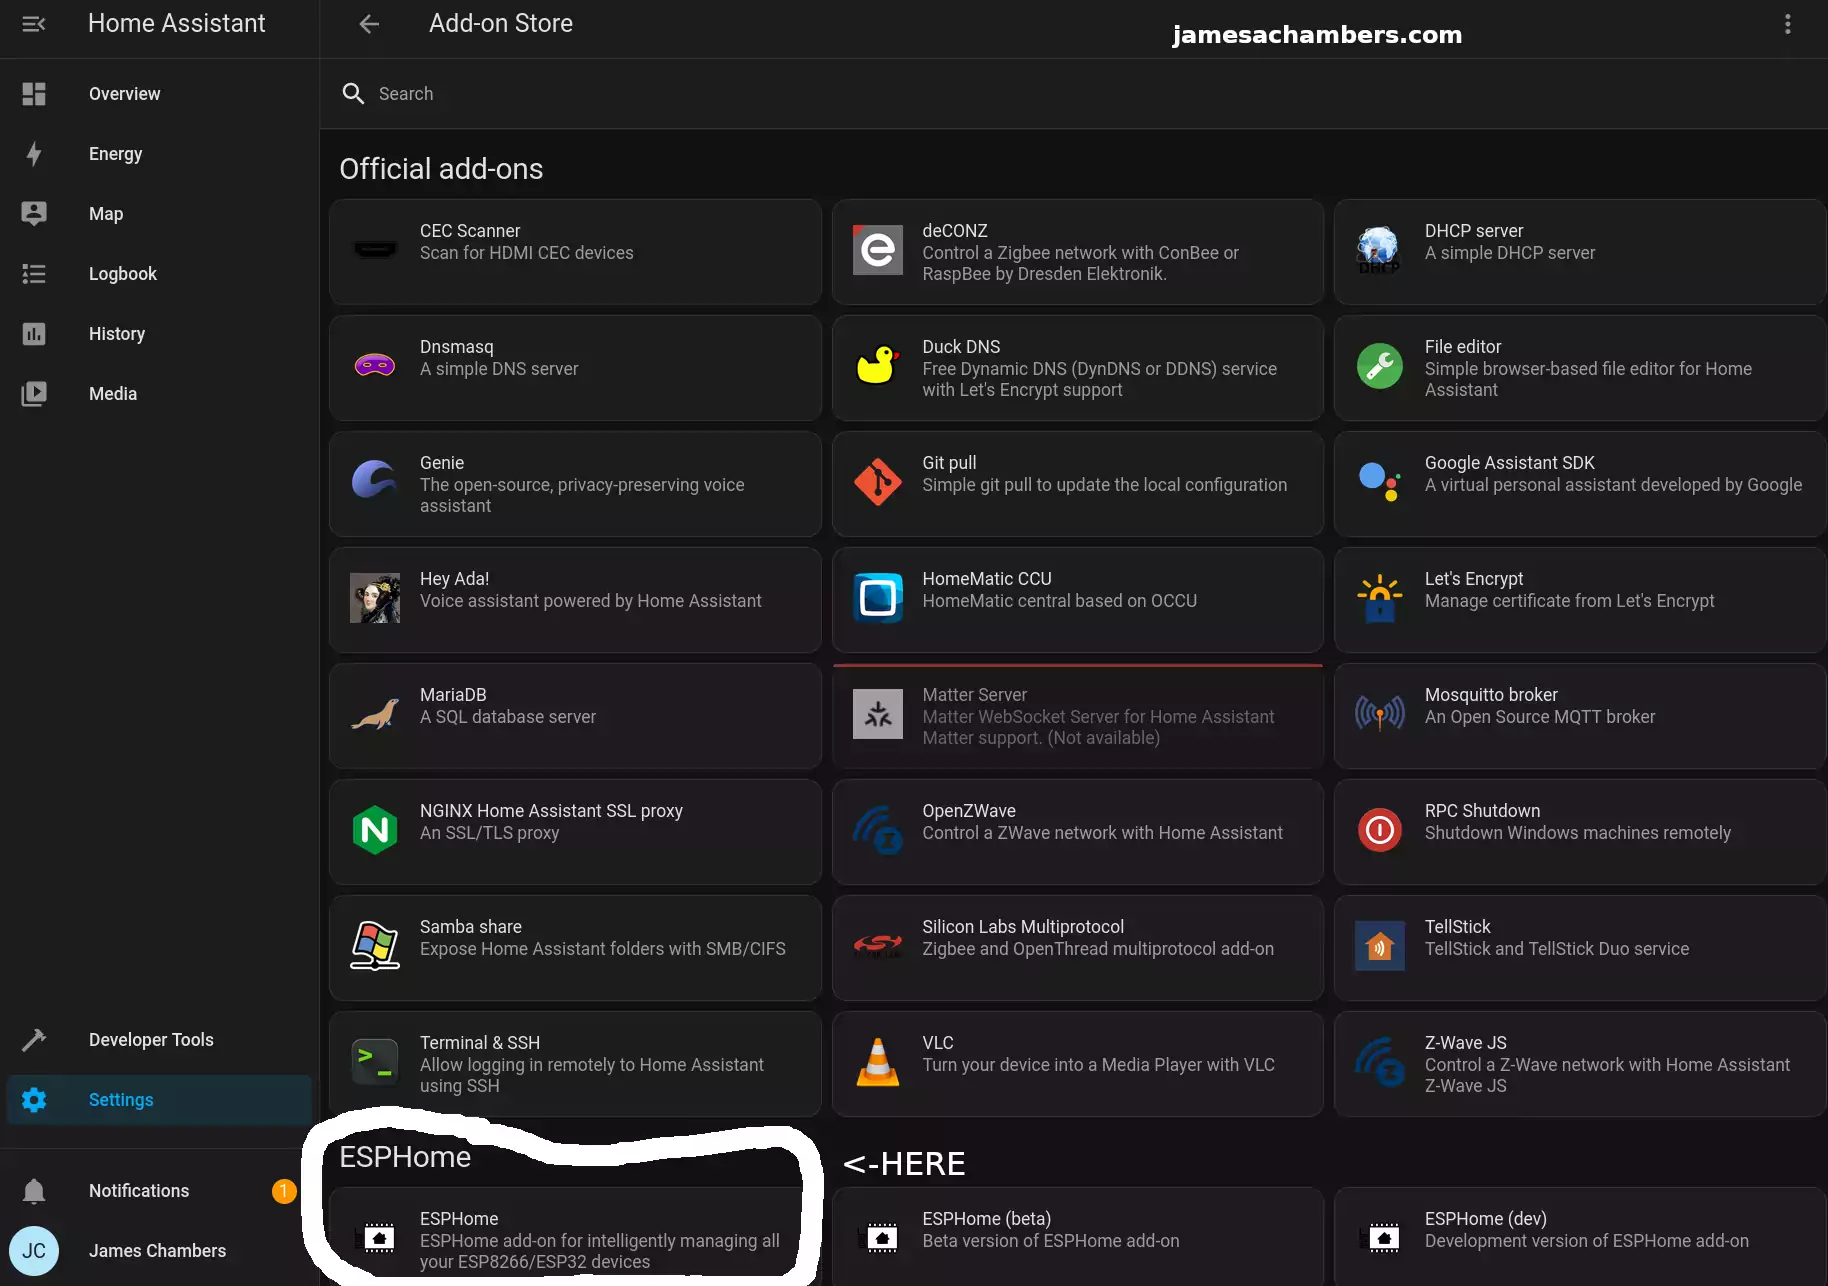
Select ESPHome and then click “Install”. Once the installation is finished you can click “Start” to start the service.
To make things easier choose to add the ESPHome option to your sidebar. That way you’ll see a menu choice specifically for ESPHome going forward.
Configuring ESPHome
First head to the ESPHome menu option:
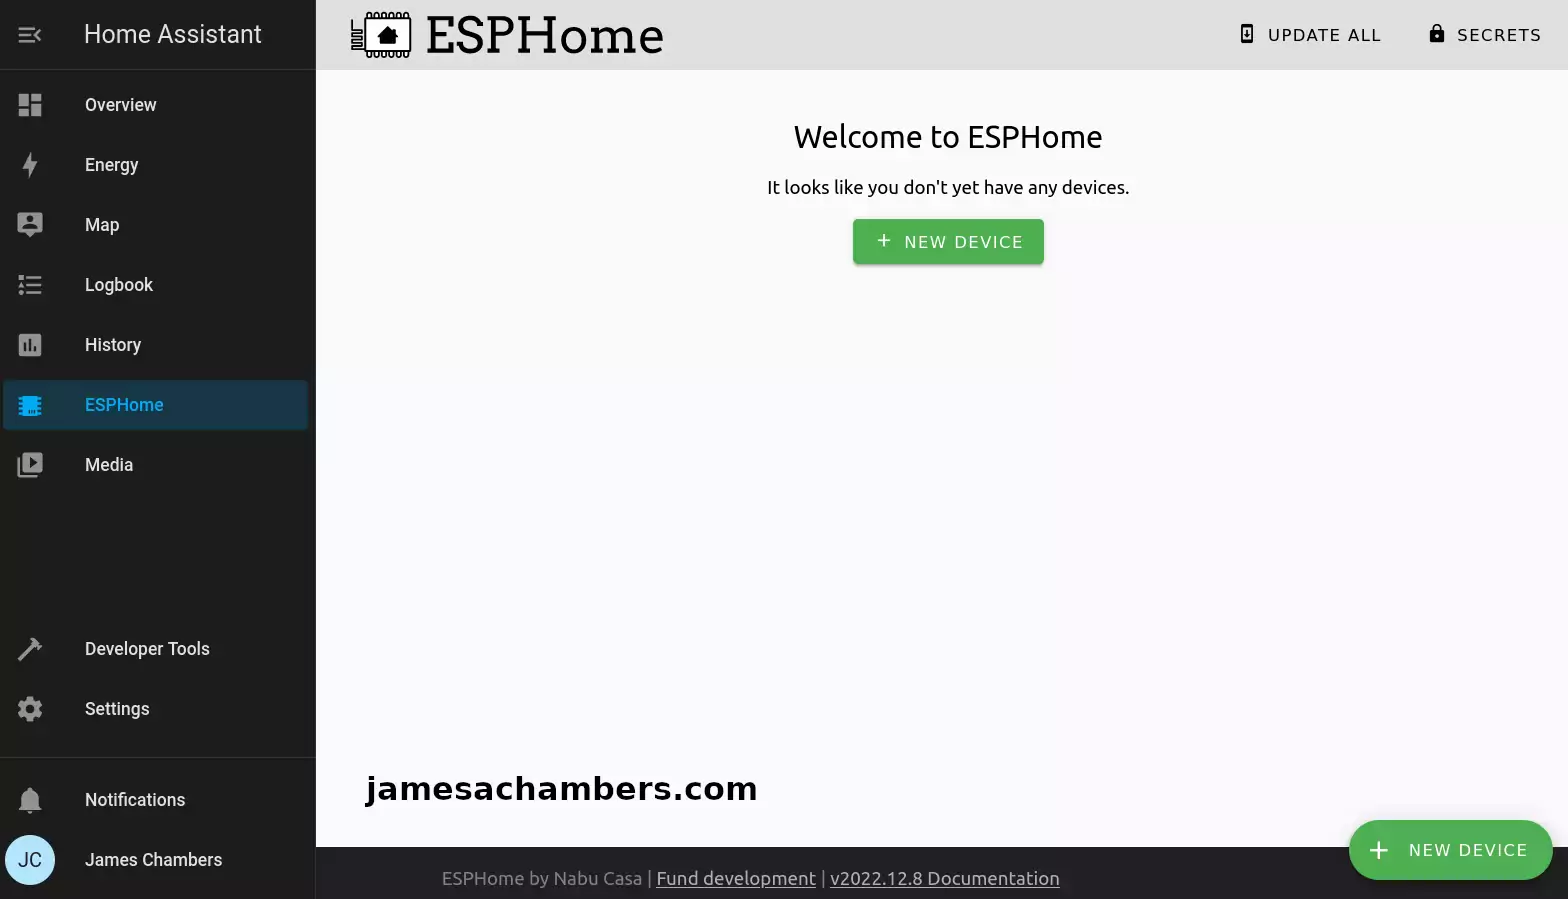
If you don’t see the ESPHome menu option then go back to the “Add-on Store” from the previous step. Select ESPHome and enable “Show in sidebar”.
For setup we need to connect your XAIO-ESP32-C3 to your device running Home Assistant with USB. This is only required for setup. It will communicate wirelessly after you’ve completed setup (if you configure it that way).
You also have the option of connecting it to a different computer but *only* if your Home Assistant instance is configured to run in HTTPS. For this guide I didn’t have HTTPS enabled and chose to connect it directly to the Tinker Board running Home Assistant for this step.
Click to add a new device. The first step will ask you for a configuration name and your wireless network SSID and password. Enter that and it will take you to the step to select your device type:
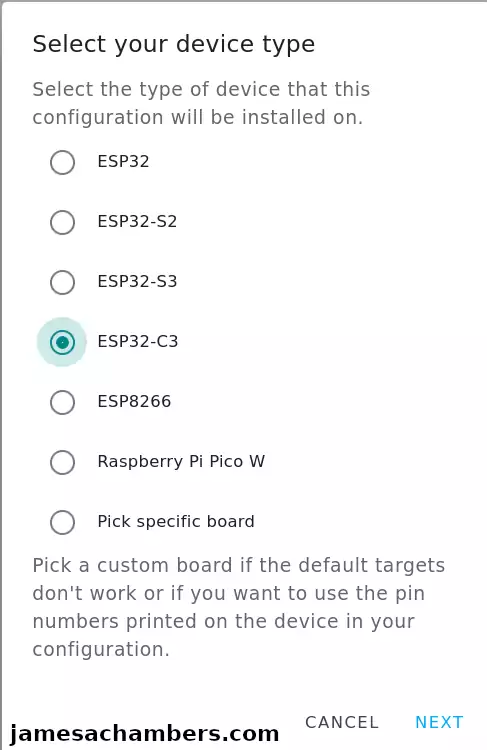
Select ESP32-C3 if you are using the same device as me. It’s fine if you are using another type and are using this guide to follow along.
It will ask you how you want to connect the device to the computer for the first time and give you an encryption key. I recommend using the “Connect to the server running Home Assistant with USB” option. It will then have you select your device. Mine showed up as a USB serial debug device on /dev/ttyACM0.
Once you select next it will give you the option to start the configuration or to skip. Choose skip. We are going to edit the configuration manually first.
Editing YAML Configuration
Click “Edit” on the new sensor/device you created. We are going to change the esphome and esp32 section to this:
esphome:
  name: sensors
  platformio_options:
    board_build.flash_mode: dio

esp32:
  board: seeed_xiao_esp32c3
  variant: esp32c3
  framework:
    type: arduino
    version: 2.0.5
    platform_version: 5.3.0
This is as per the Seeed Studios wiki page for Home Assistant integration.
Note that YAML is very sensitive to spacing. The editor will underline errors in red for you which definitely helps to spot them as long as you’re watching for them.
While we are in here you should save your encryption key to your clipboard or keep it handy for reference. We are going to need it in the step to add the device to Home Assistant later.
Install Configuration to Device
Finally you can begin programming the device. Click to “Install”. Select the device type and your USB device again and with any luck:
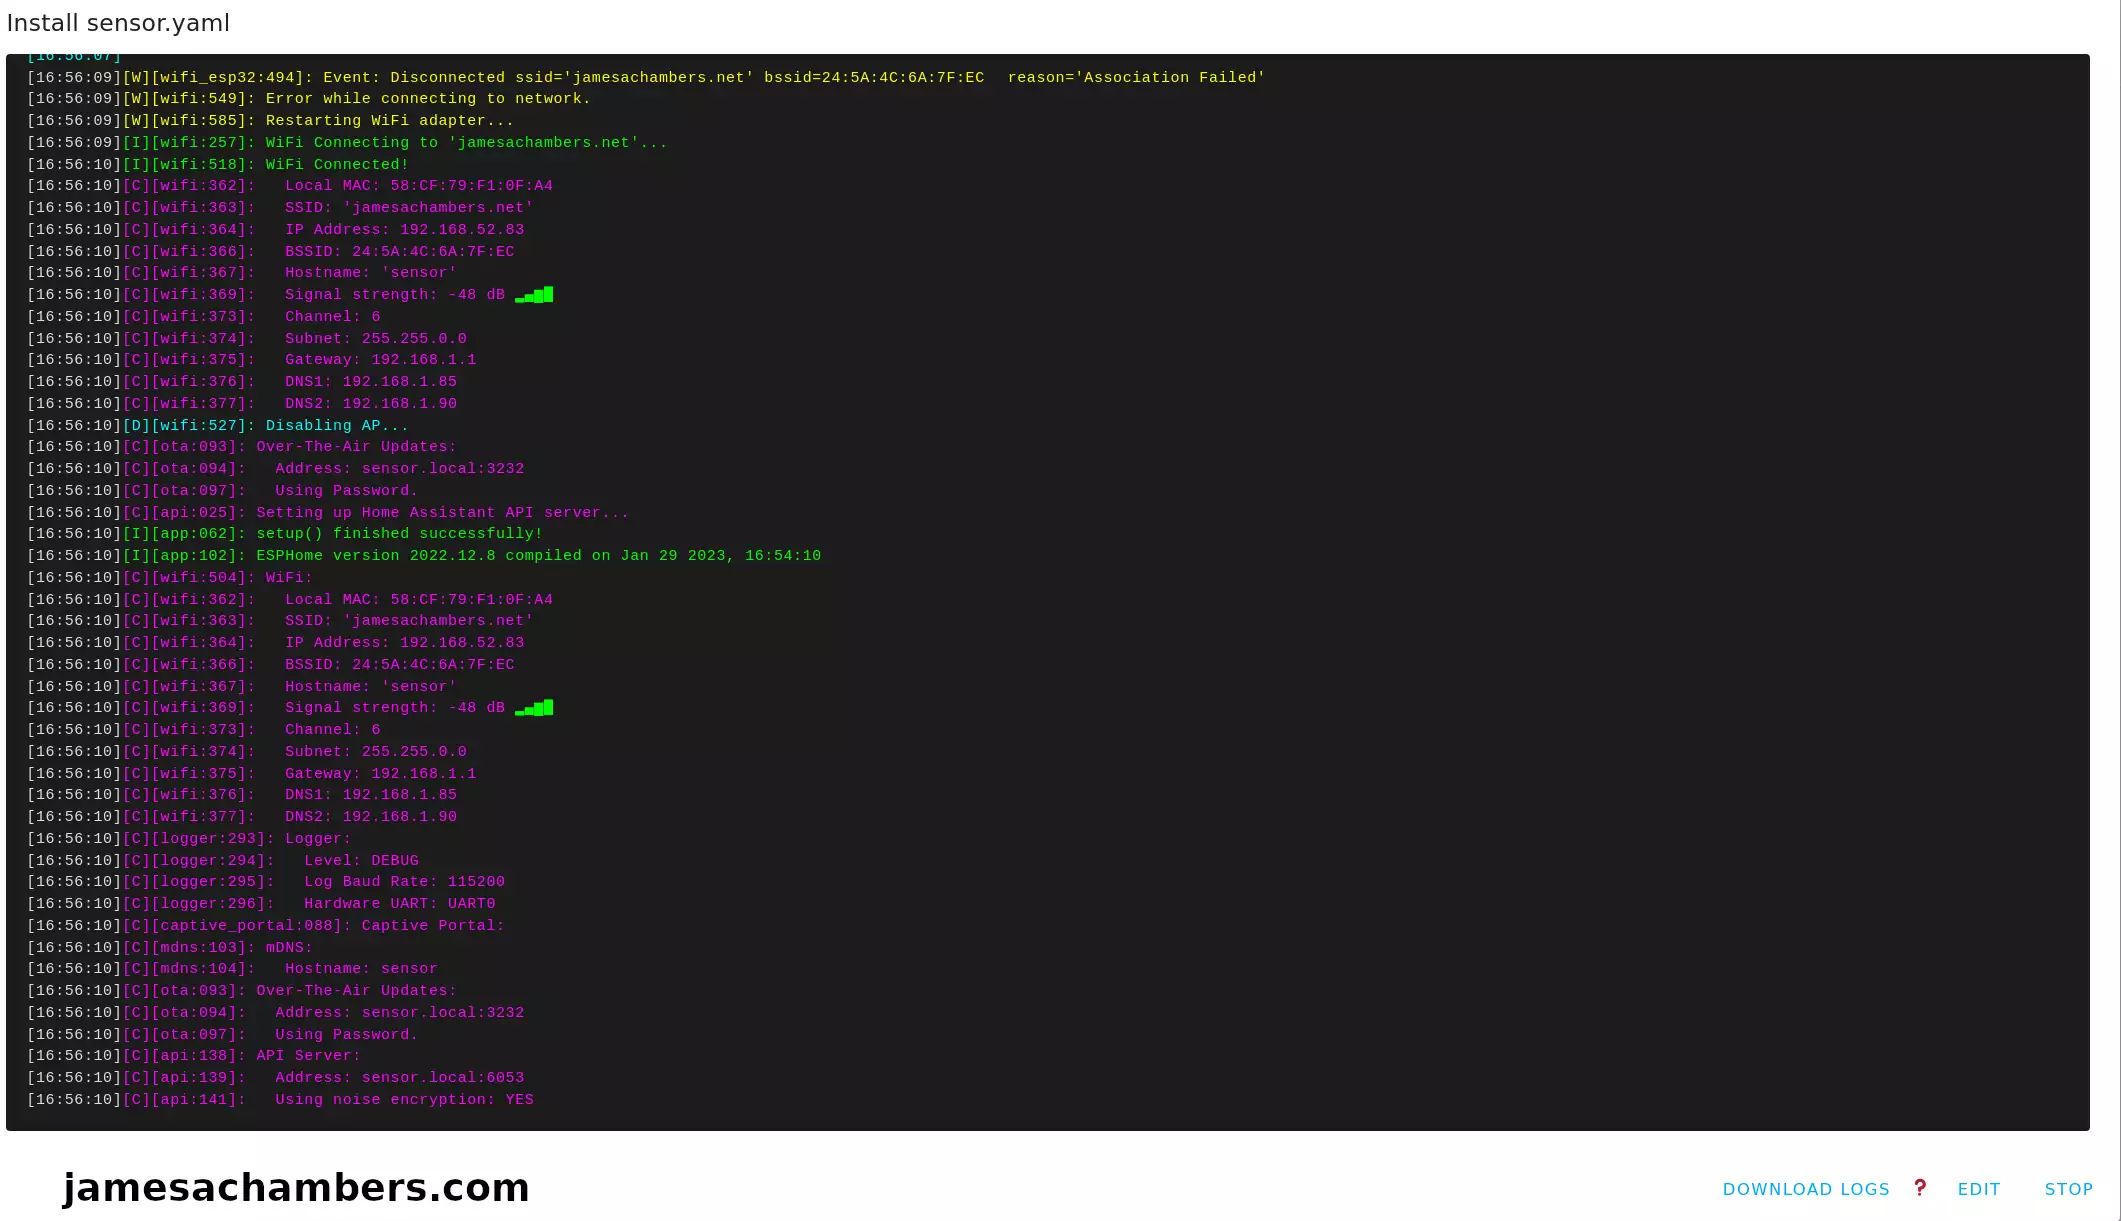
Above you can see it connected to my WiFi point and that everything ran successfully. That is without ever programming the ESP32. ESPHome did all of the programming for us!
Adding Device to Home Assistant
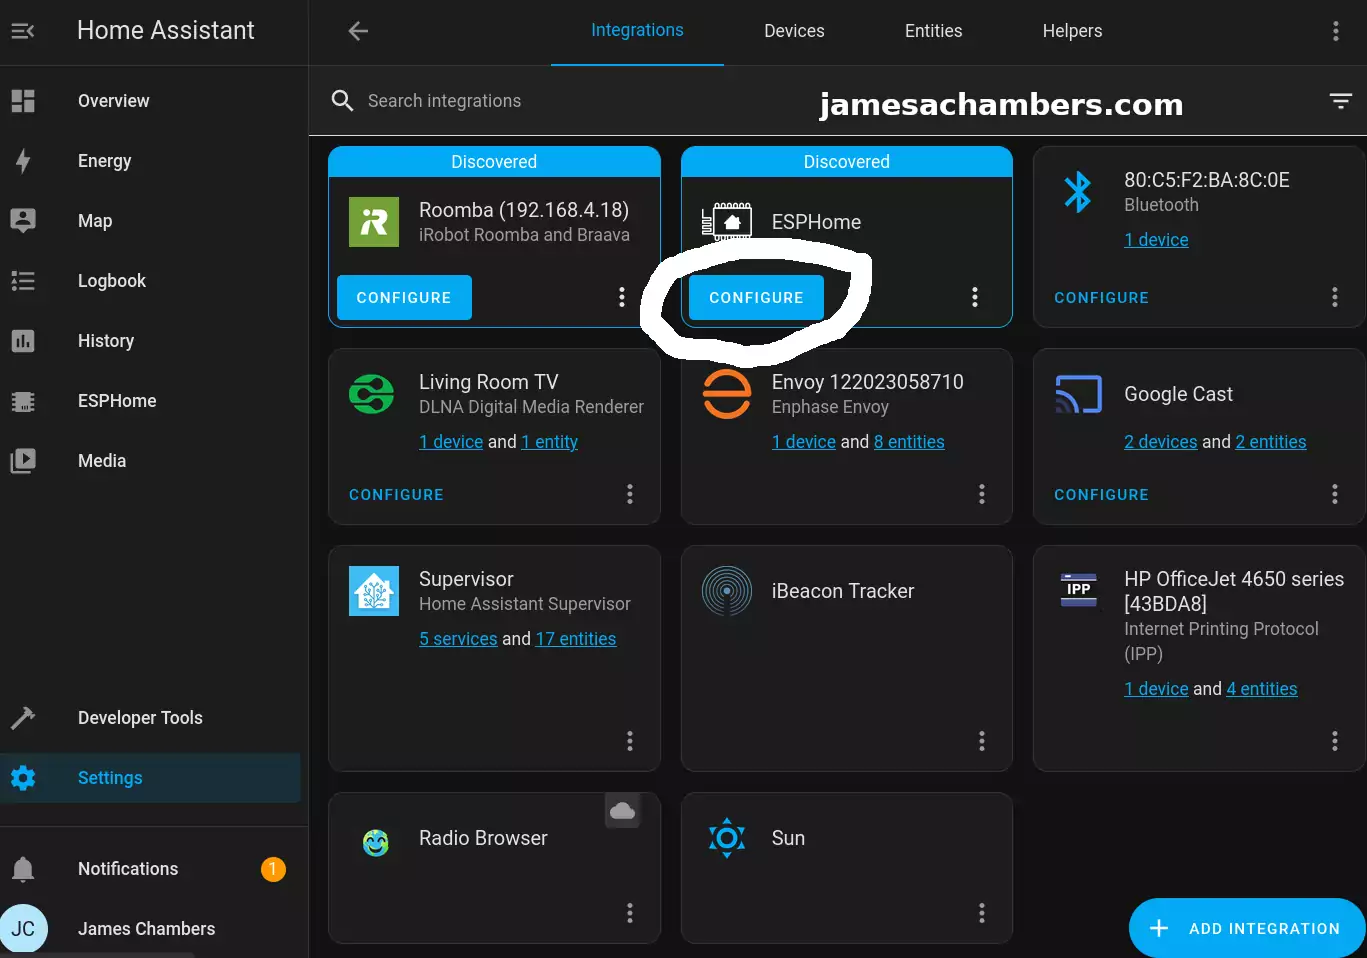
Now head back to your “Settings” menu for Home Assistant and click “Devices”. You should see your new sensor with the name you specified in the configuration.
Check to see if the sensor is online. With any luck it is like my example above. Now click “Configure”:
It should ask you if you want to add the node to Home Assistant. Select “Submit” and then it will ask you for your encryption key it gave us earlier. If you don’t have this just go back to the ESPHome menu and select “Edit”. You will see the key in plain text under “encryption” and then “key”.
If everything goes well the device should come online and be successfully paired with Home Assistant. From this point forward we will be able to update and push the configuration wirelessly to the device.
You won’t be able to see any sensors yet though. We are going to add those next.
Adding Sensors to YAML Configuration
Now we need to configure the board correctly for the amount of sensors that you have. This will vary depending on what you are using.
First make sure you check the ESPHome Grove sensors compatibility list here. If it’s on there you shouldn’t have any trouble and it’s just a matter of getting it configured.
Keep the documentation open as they describe how to configure a whole bunch of different Grove sensors there (some of which I won’t be covering). For this guide I’ll be using a temperature and humidity Sensor (SHT40) as well as the VOC and CO2 sensor (SGP30).
Essentially we need to add some sections to the YAML file. I followed the Seeed Studios documentation above and combined the YAML into this:
i2c:
  sda: 6
  scl: 7

sensor:
  - platform: sgp30
    eco2:
      name: "eCO2"
      accuracy_decimals: 1
    tvoc:
      name: "TVOC"
      accuracy_decimals: 1
  - platform: sht4x
    temperature:
      name: "Temperature"
    humidity:
      name: "Humidity"
Feel free to try different things because if it’s wrong you’ll get errors compiling so you will know it won’t work. This was a working configuration for the two sensors I wanted to do for this test.
Final Result
After a successful upload and configuration here is my finalized Home Assistant panel for the new sensors:
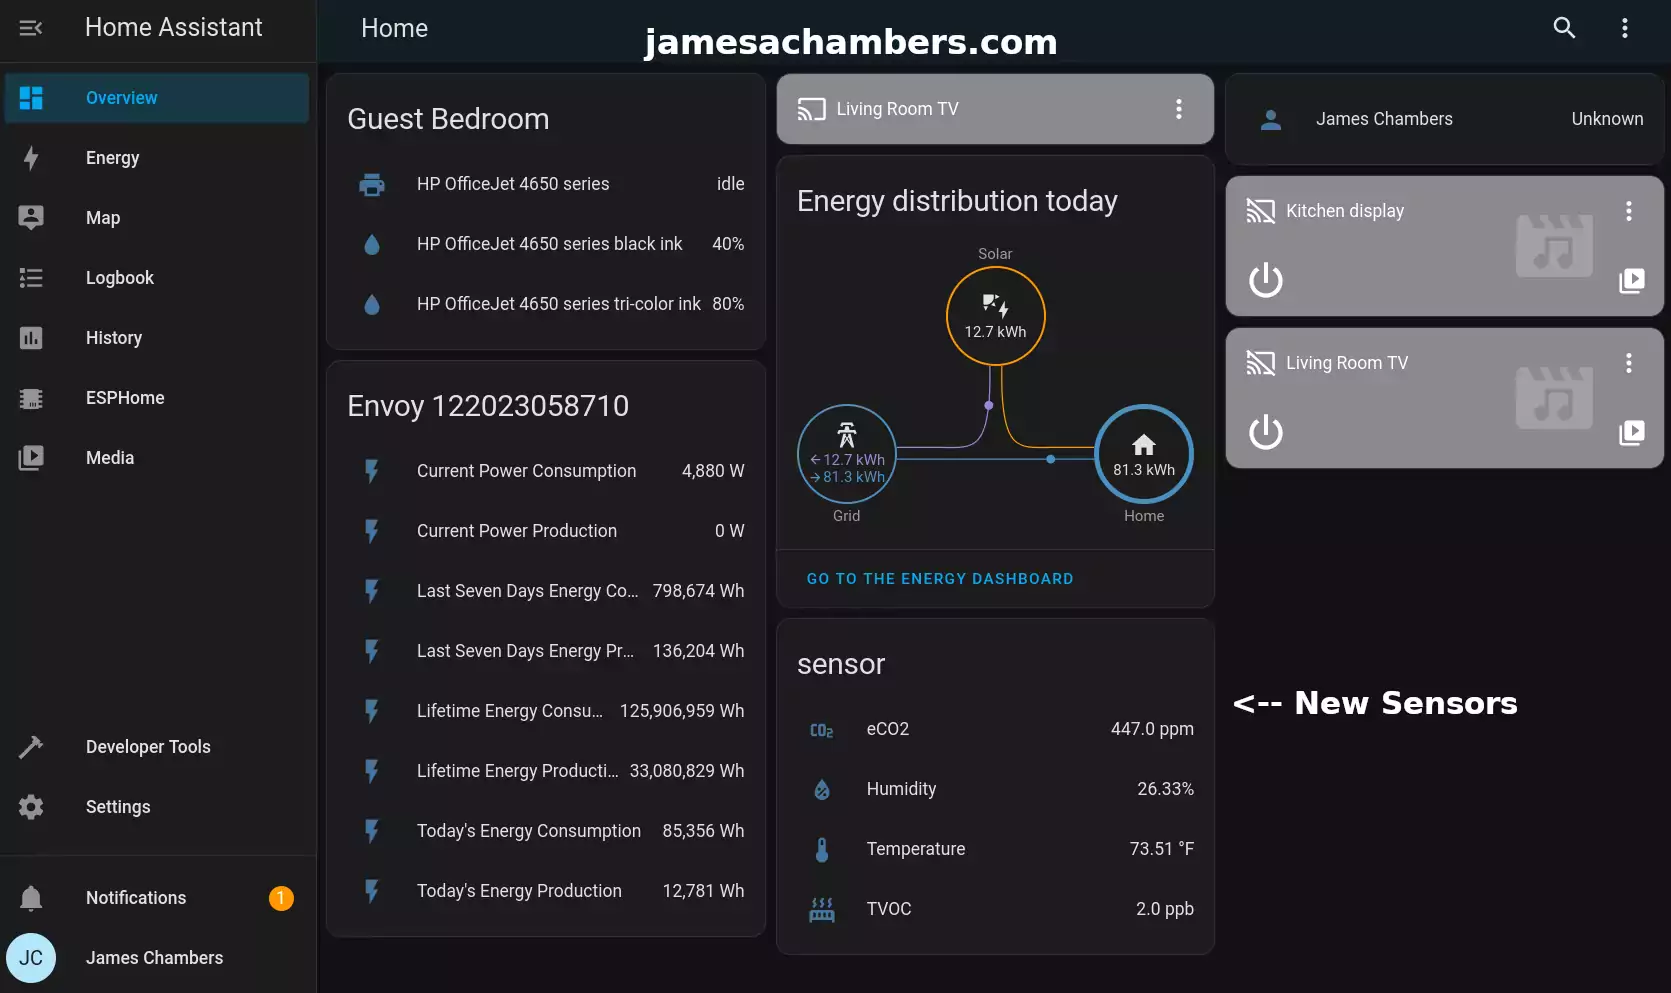
This is exactly what I wanted. I can see it right alongside my solar and all my other smart devices I’ve configured with Home Assistant so far.
Conclusion
I’m really impressed by ESPHome’s integration within Home Assistant. It is actually capable of programming the board for you and it works really well! The integration with Home Assistant is great and the sensors show up alongside everything else that I’m slowly unifying in one place. That’s all using an open-source system to manage it.
These Grove expansion shields are only $7.90 on Amazon at time of writing*. The XAIO-ESP32-C3 chip is only $9.90*. The sensors are similarly as cheap for each sensor module. This is a very affordable ecosystem to participate in. Some of the Grove sensor boards are easier to find directly from Seeed Studios but the XAIO modules and related expansion boards seem to be incredibly reasonably priced on Amazon where available.
This will also scale to as many sensor stations as I’d like to do in the house. I know I want to have one in my garage which has been so cold this winter that my battery chargers won’t function unless I bring the equipment inside to warm up. Monitoring the garage for CO2 levels as well as TVOC (Total Volatile Organic Compounds) seems like a smart idea as well. If they’re particularly high I know I need to go air out (and potentially clean) the garage which will almost certainly improve the health of everyone living here.
There’s other Grove gas sensors that make a lot of sense as well for not only the garage but also in places such as near 3D printers or other equipment known to have certain types of potentially harmful emissions that may be in an enclosed space. It’s really helpful to have a dashboard you can look at to see if the levels are getting high because usually taking care of it is as easy as opening a window / door or turning on a fan. The danger is not realizing you’re working around such high levels.
Most people would probably take care of it if they knew the levels were that high when it’s probably an easy fix like opening a window. The issue is without a sensor it’s hard to tell and they just don’t realize it. You can get used to working around those types of emissions where you don’t notice them / they don’t bother you but they’re definitely still there and they definitely still impact you.
I’m going to prototype more sensors and see what else I might want to pack into one shield. At that point I’ll expand. The Grove sensor boards vary in price but the ones I used in this article are relatively inexpensive. It might cost me around <$35 per full sensor station to duplicate what I’ve done here to as many places around the house as I’d like (including the XAIO-ESP32-C3 + Grove Expansion Board + 2 sensor boards).
I’d be hard pressed to find a proprietary solution that would scale as cheaply and as easily. They would also undoubtedly want to store all the data in the cloud which is not what I wanted for this project / my home’s sensors over the long term. This is an open-source solution I know will work over the long term without having to worry about planned obsolescence from manufacturers or cloud servers being shut off.
The beauty of this solution is you may have totally different sensor needs / wants than I do. There’s hundreds of different Grove sensors available (check the compatibility list from earlier sections). I’m sure I can’t even imagine some of the sensor needs that some of you may have but I would encourage you to check the list and see if it’s on there if you want to use ESPHome. If it’s on the list then getting it to work within ESPHome should look very similar to what I’ve done here for most sensors.
I have another XAIO series expansion shield I’ll be covering soon (featured in the picture at the beginning of the article with the peel still over the LCD) as I continue to explore the ESP32 microcontrollers and other RISC-V hardware on the site. I’ll definitely be doing more Home Assistant coverage as I continue to integrate the rest of my home into it. Stay tuned!
Other Resources
I’ve also covered the larger expansion board for the XAIO series here
Don’t miss my sensor prototyping setup guide using the K1100 sensor prototyping kit
See here for all of my articles regarding RISC-V open hardware


")


Wow I wasn’t expecting such a detailed introduction to ESPHome and the fact you demonstrate how well it works with Home assistant has me excited to try it out on my RPi 4B or even the Orange Pi 5 as I see some chatter in the HA forum with one user who managed to clone it successfully thanks in part to your Orange Pi 5 NVMe/SATA SSD Boot Guide. You have to hand it to Seeed as they produce so many interesting gadgets and the Grove range alone is first rate with a sensor for just about anything and most things are well priced and easy to set up with supporting documentation and user guides.
My first order of Seeed goodies arrived today and you weren’t wrong in describing the size of the XIAO dev board as its ‘small’ yet I’m still struggling to comprehend how something so tiny can do so many cool tasks and I really believe we’re spoiled for choice when it comes to microcontrollers be they Arduino, RPi 2040 variants, ESP32 and the clones with advancements in power, memory and sensors that work with different programming platforms allowing the maker to mix and match easier than a traditional SBC. Thanks for sharing what I hope is the first of many Home Automation posts and I eagerly wait to see what you do next with the XIAO ESP32-C3 and LCD expansion board as size alone makes it the perfect portable weather station when paired with a Lipo battery… Fantastic work!
Hey Razor Burn,
I’m glad you saw it already! I wasn’t planning on having it done so fast. After I soldered my XAIO-ESP32-C3 though and just tried it things were so easy and such a pleasure that I just ended up writing the whole thing on a Sunday. I basically didn’t have any trouble at all.
I couldn’t recommend Home Assistant more highly! The Raspberry Pi is a great choice to run Home Assistant. The reason I’m using my Tinker Board S is that my Tinker Board is old enough that there are actually native images still available for it. Home Assistant gave up trying to make images for every single board years ago but my Tinker Board is grandfathered in and has prebuilt images available (as does the Raspberry Pi). It can be manually installed on anything but it sure is nice to use the prebuilt image. It took almost no time to set up with a prebuilt image.
You’re so right about the size of the XAIO modules. It’s really crazy. I honestly don’t think I really appreciated how powerful they are. This is so much easier and better of a system than having a full blown Raspberry Pi for each sensor station or anything like that which is exactly what we would have done 2-3 years ago. Just think about it. The Raspberry Pi needs constant security updates and patching. It’s running a full blown operating system. It needs to continue to be secured.
These ESP32 chips have none of those problems whatsoever. They only run one application generally within a framework. They don’t expose any attack surfaces like a Raspberry Pi does which is running a whole bunch of different services to make an operating system work. These are dirt cheap solutions that use open-source software and open-hardware. The power requirements are even lower than a Raspberry Pi (much lower actually). This is why running off a battery like you were talking about with the larger expansion board is possible. These chips make the Raspberry Pi look like a pig on power. These ESP chips can be configured to run for years off a battery if you set them in specific low-power operating modes and are using something like BLE (Bluetooth low energy).
Thanks for your kind words as always, definitely let me know what kind of stuff you end up doing with your ESP32! I’m always interested in what you’re trying and hearing about. Soon I’ll be reviewing the Pinecil which is also thanks to one of your comments. Take care!