
I recently covered using the XAIO-ESP32-C3 with the Grove Expansion shield to create a sensor panel to be used within Home Assistant via ESPHome. That shield is only around $7 and doesn’t have very many bells and whistles on it. That is a really fantastic and inexpensive solution to expand your available Grove ports and add more sensors or other Grove accessories to your build.
Today I want to cover Seeed Studio’s larger and more capable expansion shield. Instead of using ESPHome to program the device for us though we’re going to set up the Arduino IDE to work with the XAIO-ESP32-C3. That means we’ll be able to run our own code and test out the various capabilities of the larger expansion board.
Let’s get started!
Hardware Used
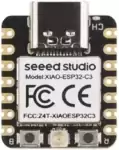
The Seeed Studios XAIO-ESP32-C3 is a microcontroller board that uses the RISC-V architecture. It has Bluetooth and WiFi capabilities and includes an external antenna.
Links: Amazon.com*, AliExpress*, *Amazon.ca*, Amazon.co.uk*, Amazon.com.au*, Amazon.de*, Amazon.es*, Amazon.fr*, Amazon.it*, Amazon.nl*, Amazon.pl*, Amazon.se*, Amazon.sg*
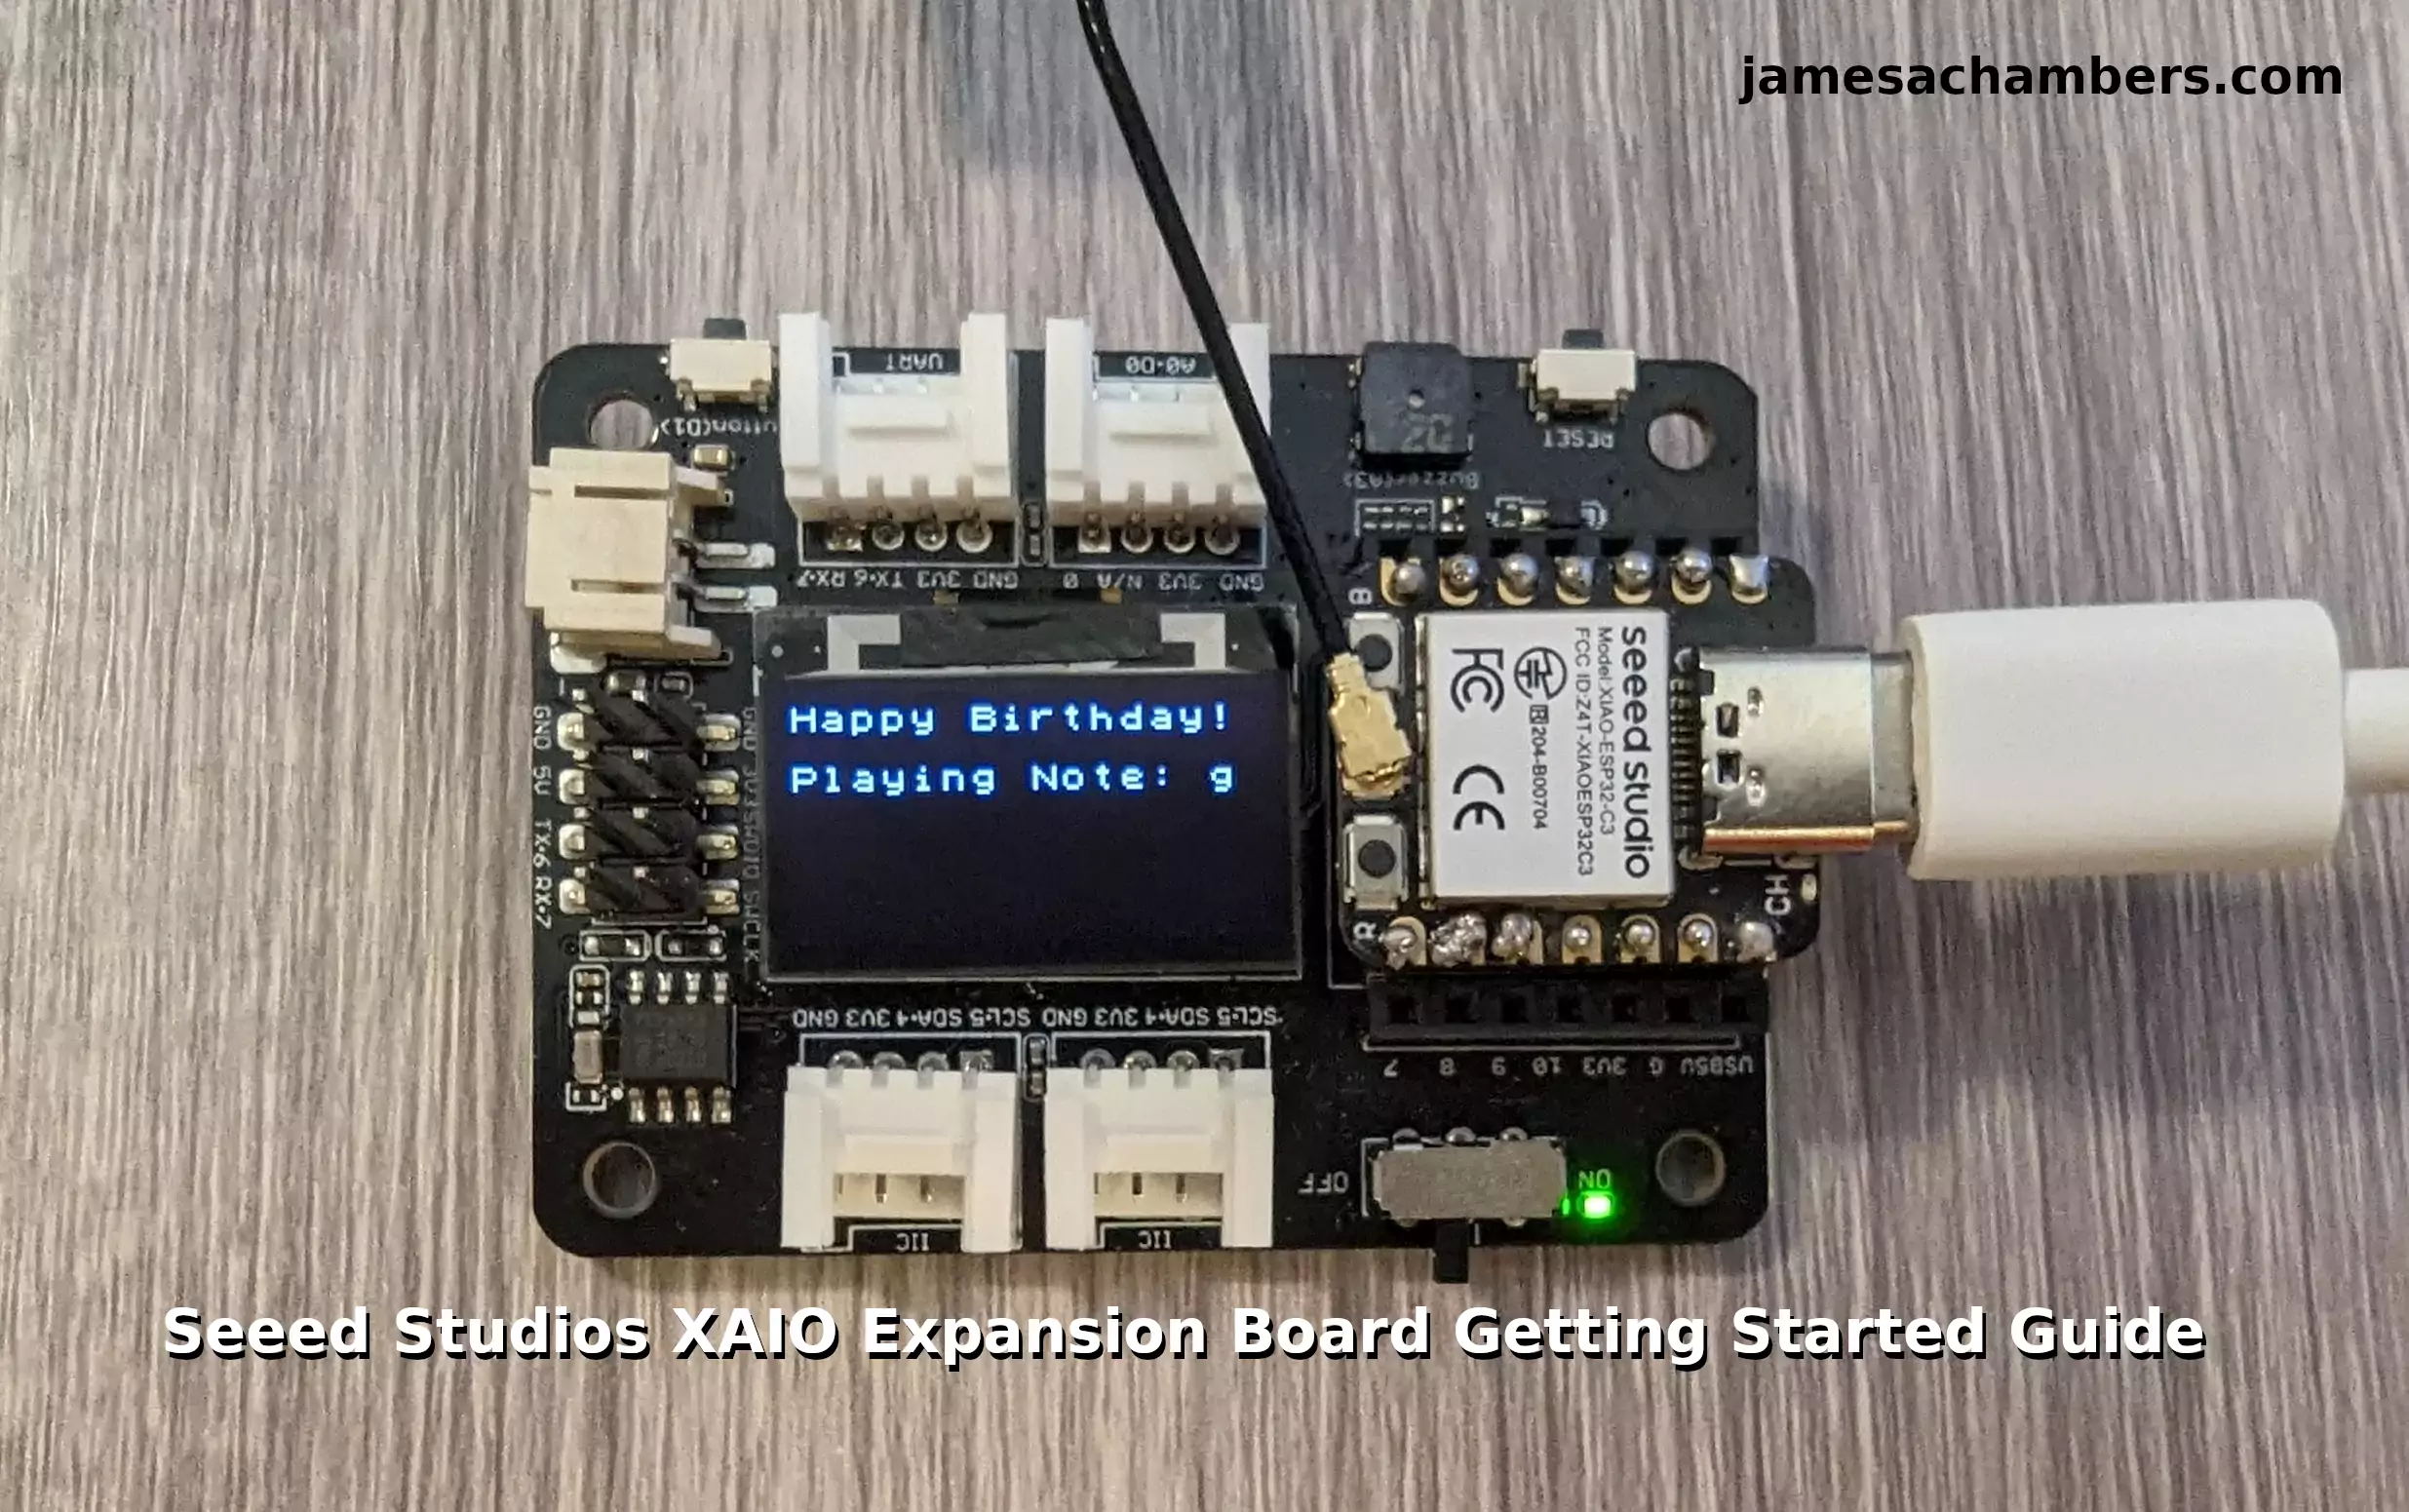
The Seeed Studios XAIO Expansion board has a screen and several expandable connectors. It also features a battery connector.
Links: Amazon.com*, AliExpress*
Getting Arduino IDE
First we need to get the Arduino IDE. On Linux this is usually as simple as typing:
sudo apt install arduinoIf you are using a different operating system or your Linux distribution doesn’t have the package available the Arduino official download page is available here with downloads for all platforms.
Download and install the Arduino IDE for your platform.
Adding Board Configuration
Now we need to add the board configuration to the Arduino IDE. To do this go to File -> Preferences. You should see an “Additional Boards Manager URLs” section like this:

Click the icon to the right that I’ve circled in the screenshot above and add the following URL:
https://raw.githubusercontent.com/espressif/arduino-esp32/gh-pages/package_esp32_dev_index.json
Now press OK.
Next click “Tools” then “Board” followed by “Arduino ESP32”. Now scroll all the way down the list until you find XAIO-ESP32-C3. Once you select that you are all set!
Testing Display
Let’s start with the screen. To use the screen we need to download an additional library from GitHub here. Go to the bottom of the page and download the latest version. It will come as a zip file.
Now within the Arduino IDE choose “Sketch” from the menu and then choose “Include Library” and then “Add .ZIP library”. Select the zip file you downloaded and it should add the library to the sketch.
Now paste the following code into your sketch:
#include <Arduino.h>
#include <U8x8lib.h>
#include <Wire.h>

U8X8_SSD1306_128X64_NONAME_HW_I2C u8x8(/* reset=*/ U8X8_PIN_NONE);

void setup(void) {
  u8x8.begin();
  u8x8.setFlipMode(1);   // set number from 1 to 3, the screen word will rotary 180
}

void loop(void) {
  u8x8.setFont(u8x8_font_chroma48medium8_r);
  u8x8.setCursor(0, 0);
  u8x8.print("Happy Birthday!");
}
Now upload your sketch to the device by pressing the upload button and you should see “Happy Birthday!” on the screen!
Note: If you get an error that you are missing the “serial” library my system needed a:
pip3 install pyserial
After that the sketch would compile.
Testing Buzzer
The board includes a buzzer that can play different tones. The Seeed Studios Wiki has a pretty basic example that plays Happy Birthday on this buzzer. It shows nothing on the screen though and leaves it completely blank.
That’s pretty lame so I decided I wanted to combine the two examples and have it play Happy Birthday but also tell me what note it is playing on the screen (or if it is resting).
Here is the code for the sketch:
#include <U8x8lib.h>
#include <U8g2lib.h>
#include <MUIU8g2.h>

#include <Arduino.h>
#include <Wire.h>

U8X8_SSD1306_128X64_NONAME_HW_I2C u8x8(/* reset=*/ U8X8_PIN_NONE);

char names[] = {'C', 'D', 'E', 'F', 'G', 'A', 'B',
                'c', 'd', 'e', 'f', 'g', 'a', 'b',
                'x', 'y'
               };

int speakerPin = A3;
int length = 28; // the number of notes
char notes[] = "GGAGcB GGAGdc GGxecBA yyecdc";
int beats[] = { 2, 2, 8, 8, 8, 16, 1, 2, 2, 8, 8, 8, 16, 1, 2, 2, 8, 8, 8, 8, 16, 1, 2, 2, 8, 8, 8, 16 };
int tempo = 150;
void playTone(int tone, int duration) {
  for (long i = 0; i < duration * 1000L; i += tone * 2) {
    digitalWrite(speakerPin, HIGH);
    delayMicroseconds(tone);
    digitalWrite(speakerPin, LOW);
    delayMicroseconds(tone);
  }
}

void playNote(char note, int duration) {

  int tones[] = { 1915, 1700, 1519, 1432, 1275, 1136, 1014,
                  956,  834,  765,  593,  468,  346,  224,
                  655 , 715
                };
  int SPEE = 5;

  // play the tone corresponding to the note name

  for (int i = 0; i < 16; i++) {
    if (names[i] == note) {
      int newduration = duration / SPEE;
      playTone(tones[i], newduration);
    }
  }
}

void setup() {
  u8x8.begin();
  u8x8.setFlipMode(1);   // set number from 1 to 3, the screen word will rotary 180
  pinMode(speakerPin, OUTPUT);
}

void loop() {
  u8x8.setFont(u8x8_font_chroma48medium8_r);
  u8x8.setCursor(0, 0);
  u8x8.print("Happy Birthday!");
  for (int i = 0; i < length; i++) {
    if (notes[i] == ' ') {
      u8x8.drawString(0, 1, "Resting...      ");
      delay(beats[i] * tempo); // rest
    } else {
      u8x8.drawString(0, 1, "Playing Note: ");
      u8x8.drawString(14, 10, String(names[i]).c_str());
      playNote(notes[i], beats[i] * tempo);
    }
    // pause between notes
    delay(tempo);
  }
}
This should give you the following result:
If it won’t load you can view the short here on YouTube.
Conclusion
The XAIO series expansion board will give you a lot more I/O options. You could similarly use this for a sensor station like I did with my Grove expansion board. It would be nice because you could display the sensor information on the display.
As you can see the code is pretty easy to work with. The Arduino IDE makes it much easier to directly experiment with the different components.
Definitely make sure you check out the rest of Seeed Studio’s official examples here on the wiki. There’s a lot of other cool stuff you can do which I’ll definitely be covering on the site as I play around with them more!
Other Resources
You may also be interested in my Grove expansion board article using Home Assistant and ESPHome
Don’t miss my sensor prototyping setup guide using the K1100 sensor prototyping kit
See here for all of my articles regarding RISC-V open hardware


")

Hi interesting post thanks, I have tried the same thing with the ESP32-C3 xaio and the expansion board. However I cannot get the IRremote working with the relevant grove device. It seems that there is a library issue with the Arduino-IRremote which supports avr boards. If you could help I would apreciate. Regards.
Hey Guy,
I’d need to know a lot more to even venture a guess on this one. What is the code? What is not working? Are you getting any specific errors?
When I code stuff for these i usually have to play with the pin assignments and all sorts of other things. I can find a lot of references to people using this library. Have you tried the main Seeed tutorial for this?
There’s no end to what it could be to be honest. Are you using a Arduino 1.X compiler instead of Arduino 2.0.4? That old Arduino GUI doesn’t work with hardly anything for me. I always need to use the newer Arduino 2.X series for these to work properly. You also have to select exactly the right board in the Arduino GUI or all of the pin assignments will be wrong.
In other words if this is a really nasty looking build error that doesn’t make a lot of sense I’d expect it to be your Arduino environment. You are probably trying to use the older Arduino IDE with way too new of a board in that case. You’d get the same issue with a whole lot of libraries and components and it’s just likely you haven’t tried them yet but those wouldn’t build either with your current environment.
Can you at least share the error you’re getting?
Hello James thanks for your reply it is a bit complex to explain. I have tried the example in Speed tutorials when it compiles you get a message saying that you are using the old version of the Arduino-IRremote so I have switched to the new version 2. There is an example that I have opened with the new library called Simple receiver to check with my Xiao expansion board and the grove IR receiver. However it is strange since in the example they use a IR_RECEIVE_PIN, and in the pin definition file it is stated IR_INPUT_PIN for the ESP32C3. I have used both and always get a compilation error in reference to IRrecv::decodeHashOld(decode_result*) well I am not an expert in Arduino programming. Everything work fine in the Arduino IDE 2 oled screen, buzzer … Not the IRremote. Thanks in advance for your help. Guy
Hey Guy,
Thanks for the additional information. It just sounds like the example is outdated. Take a look at the library’s README:
Old decode(decode_results *aResults) function is replaced by simple decode(). So if you have a statement if(irrecv.decode(&results)) replace it with if (IrReceiver.decode()).In other words the example looks like it’s running on the 2.x version of the library and Seeed hasn’t updated their example code for the new version yet. It needs to be updated according to the linked README file from the library’s GitHub repository. That should take care of these. Your environment sounds totally okay here. You should probably read through the other things that have changed as it sounds like you may be getting a couple of other errors as well. That README should tell you everything you need to do to fix it for the new version.
You could alternatively choose to install a much older 2.x version of the library (if it’s available in the Arduino library installer). You can usually go back to older versions in there using a dropdown box that has the version you’d like to install. That would probably let you use the code as-is if the older library doesn’t cause a bunch of other issues (it probably won’t in a smaller example program like this).
Hopefully that helps!
Thanks I appreciate
I’ll admit when I saw you post the video on Youtube I had the sudden urge to check the blog for any new updates, so I was pleasantly surprised to see you had written a Starter Guide show casing some neat features of the XIAO Expansion board with example codes to use with Arduino IDE. I can’t wait to tinker with my unit over the weekend and greatly appreciate the easy-to-follow steps and pictures so thank you.
I much prefer the layout of this board compared to the other Grove Shield as its packed with cool features such as an SD Card slot, Lipo battery connection and the addition of the OLED screen is fabulous and at half the size of the Raspberry Pi 4 its perfect for wearable projects such as a heart rate monitor which I hope to tryout at a later date, with ultimate plans to use it as a mobile monitoring station for the garage/car until I get a more permanent setup installed on ESPHome as per your previous Guide.
I hope to see some interaction from other users who might have tried or own the XIAO range of products as they’ve been around a while and IMHO don’t get the attention they deserve as they’re well priced, fairly easy to setup with great documentation and for the compact size they offer excellent performance and having the additional access to 400+ Grove sensors means you’re covered for most DIY maker projects… Great tutorial James!
Hey Razor Burn,
It’s been a lot of fun to play with these! I’ll be completely honest with you and tell you that playing with these brings some of the magic of making back for me that has been lost over the years on single board computers. These boards make being a maker fun again (and cheap). I’m comfortable recommending these to anyone again whereas I pretty much think nobody should buy a Raspberry Pi anymore and don’t want to promote that at all with Amazon prices still $100+ for 4+ year old boards.
I needed to make this transition as a creator. I see that now. I see that I bought like 20-30 SBCs only to figure out that microcontrollers were the real successor for makers to the Raspberry Pi. There’s still lots of great single board computers like the Rock 5B but that product isn’t really trying to compete directly with the Raspberry Pi. It absolutely destroys the Raspberry Pi on performance but it costs more. It has twice the CPU cores. Raspberry Pi has definitely lost the high end and that probably happened last generation realistically when they were all 6 cores (and now they’re 8).
I think what has happened to this market is that Raspberry Pi is basically obsolete. If you need a powerful single board computer you should buy a Rock 5B or an Orange Pi 5 in 2023. If you don’t need a powerful single board computer you should be using something like this. You should absolutely be using a microcontroller. I really don’t see a place for the Raspberry Pi to fit in here these days very much (especially the Raspberry Pi Zero).
The ESP32 is where they’ve all gone. They all went to microcontrollers. It’s so much better of a world. The cool thing about these articles is that even if you chose a different ESP32 chip it really wouldn’t look much different than working on this one. You would just select a different board within the Arduino IDE. Your code wouldn’t change much at all (although the capabilities can vary like some don’t have any WiFi/BT).
I love being in a world where my modules cost less than $10 again (like for real). Not only that, it’s not just one company making them. Even if Seeed ran of out ESP32s there’s plenty of other manufacturers that make them and all you’d have to do is switch your Arduino IDE to that different ESP32 chip. You wouldn’t even need to change your Arduino code in many cases. The ESP32 code is ESP32 code for the most part (with some exceptions because there are some differences in capabilities between the microcontrollers). You have dozens of choices of boards you could use to use this exact same code I’ve shared here.
In other words not everyone went specifically to Seeed’s modules but they did go to microcontrollers. ESP32 for the most part but there’s a few others like the RP2040. Everywhere possible. Anywhere it’s not possible it probably makes more sense to buy an Orange Pi 5 or a Rock 5B these days. That will leave a few people held hostage by proprietary hats and accessories on the Raspberry Pi but in many of those cases replacements have been designed that take a ESP32 instead already and for the ones that haven’t yet it’s only a matter of time.
Thanks so much for your kind words as always, enjoy and take care!
You make plenty of valid points and I’ve been enjoying these reviews as not many of us have the expendable cash to drop on the latest/greatest SBCs yet for most smaller projects all you need is a microcontroller with many providing added RAM, storage and peripherals such as wireless/bluetooth and intergrade well with most of the standard programming SW be it Arduino IDE or Phython at a fraction of the cost!
As for the Rock 5Bi, I’m not sure if you saw Jeff Geerling’s latest video where I couldn’t help but feel his bias for RPi has tainted what could’ve been a more fairer review of the RK3588 devices and he highlights many of the glaring issues such as lack of kernel support, ease of use (bad boot loaders, broken software), poor documentation and overall cost where I agree 100% that many of the RK3588/s devices are way over priced with the exception of the OPi 5 which he somewhat praised but the Rock 5B is such an improvement over the RPi and comparing it to a mini PC for value left a bitter taste with me as I don’t see that comparison made when the PRi is mentioned as its no longer available for MRP and as you rightly say “obsolete” in 2023. I did see a commenter recommending the Libre board so it looks like you have some supporters but overall I was hoping for a fairer review and I do hope he comes back soon and does an update as many improvements have been made on these Rockchip devices providing a much better user experience!
Hey Razor Burn,
Absolutely, and with the new ones coming out that are absolute powerhouses they are going to be nearly as powerful than the Orange Pi i96 and Raspberry Pi Zero as far as CPU speeds. Buckle up for the new generation of 1 GHz RISC-V microcontrollers coming out! These aren’t very easy to find/buy right now but that’s where this is all going for sure. They will outclass the Orange Pi i96 and Raspberry Pi Zero within a generation on CPU power.
As far as Jeff’s latest video I absolutely did see it. Believe it or not that is the highest praise he has ever given an alternative board to the Pi that I can really think of. He actually said on his Twitter that “at least the Radxa Rock 5B is worth considering” when some of his fans were dismissing the board a little. Jeff is a big time Apple user so it’s not really in his nature to abandon ecosystems he is comfortable with very easily and he has some loyalty to Raspberry Pi as well that I don’t have (he knows some of their engineers, I don’t know them). Jeff still just has a lot of love in his heart for Raspberry Pi and is legitimately rooting for them to recover. I’d be lying if I said I still wouldn’t like to see them recover (I just haven’t seen any sign of it).
His coverage did do some legitimate good though for everyone. Jeff was investigating a discrepancy in performance between the Orange Pi 5 and the Radxa Rock 5B. You can see this interaction here.
I determined that the security settings were wrong and different between the two devices and that’s why the Orange Pi 5 was outperforming the Rock 5B. Once we updated the kernels they were both vulnerable.
This got Radxa’s attention (the real Radxa). You can see me have an interaction with a Radxa kernel developer in there. He fixed the security settings on the new Radxa Rock 5B kernel thanks to that post. Radxa literally saw it because it came up in Jeff’s stuff and it has a lot of visibility.
In other words having Jeff investigate these boards and bring attention to them does benefit their ecosystems. There’s a direct example of something that if I tried to contact Radxa myself I probably would have got nowhere. Because the guy saw it on Jeff Geerling’s GitHub repo where he documents a bunch of these issues though it got fixed immediately. Everyone with a Rock 5B is now going to have a more secure kernel because of that coverage. It’s one of those cases where any attention is good attention as far as exposure / building the ecosystem. It’s better to have people talking about it than ignoring it completely even if what they have to say doesn’t line up with what we think.
I definitely understand though that it’s tough to watch that review when from my perspective as well the Rock 5B is a no-brainer to buy over the Raspberry Pi at this point (even if it needs a firmware update). It’s not as hard as the VisionFive 2 or anything crazy to do the Rock 5B firmware (although I wish they had an option to just create a SD card that updates it like Raspberry Pi has for beginners). If he wouldn’t have acknowledged the Pi 4 launched with a lot of these same issues (he mentioned the USB-C power adapter one as well) the review would have tipped a lot more to the unfair side for me as well.
I think it will legitimately take a company getting the boot loader and everything right on a device before shipping it before Jeff would feel comfortable recommending it as a Pi alternative. Some of his firmware update issues soured him for sure with the boot loader. I don’t think he ever did do the update to get NVMe working (I believe he said in his video he didn’t end up doing that yet). If Radxa would have got the boot loader right for launch it would have eliminated Jeff’s #1 thing that soured him to the board. I get it too. Dealing with the boot loaders is not fun as we’ve had to do on the Orange Pi 5 as well. It’s part of why I keep railing on it too as I also keep saying they have to get the boot loader right if I’m going to be able to recommend it to absolute beginners.
He’ll get there if Raspberry Pi keeps flailing (and alternative board vendors keep improving)! It’s in his self-interest to investigate and get familiar with these boards the same as me at this point no matter how much better he thinks Raspberry Pi’s ecosystem might be. Nobody can get them and that has been going on for so long that a lot of people aren’t trying and found alternatives like microcontrollers or more powerful SBCs (and he sees that too).
Jeff is also a big open-source advocate which puts him in natural conflict with Raspberry Pi at the moment with them dragging their feet (to say the least) on shipping any open-source hardware or even apparently working on plans to do so best we can tell so far. There’s a lot of developers going through this conflict right now and a lot of them are just not ready to break up with Raspberry Pi over this yet. It’s only going to get harder though. Every single day.
There are more open-hardware RISC-V devices everywhere I look every single day. It’s going to become exhausting to ignore it. Fast. As long as he keeps honestly investigating them I have no doubt he will find himself being an ally of open-source hardware just as he has been for software as things continue to develop with it. The ecosystem is young and still has some growing pains for the RISC-V side but it’s overcoming them incredibly quickly.
I definitely expect Jeff to warm up much more quickly to the RISC-V devices as they improve than to some of the competing ARM boards due to his open-source ideals. I know he’s done some investigation with the VisionFive 2. That one even I was pretty hard on though for the shape it launched in with the firmware but it is RISC-V that I expect to win Jeff’s heart and not the alternative ARM boards. It’s just a lot more compatible with his open-source ideals to go to RISC-V for him than to go to an alternative ecosystem (because Orange Pi and Radxa are still ecosystems with their own accessories, etc.).
It’s the next logical step to make your hardware/firmware/architecture as open-source (and open design) as the software which has been revolutionary for software. It’s just going to be a question of when they’re good/stable enough out of the box for the average buyer (at least when it comes to SBCs, for microcontrollers we’re already there).
In other words going to Orange Pi or Radxa is kind of a “sidegrade” vs. going to RISC-V which is actually an upgrade because it means that your architecture / hardware / firmware is now open-source and open-design. That is objectively an upgrade and not a sidegrade. You aren’t switching from one ARM board to another at that point or switching from Raspberry Pi’s ecosystem/accessories to Orange Pi’s or anything like that. You are switching hardware philosophies to an open-source firmware/hardware design. It’s an architectural leap. The only thing holding it back is the devices are not exactly consumer-friendly for SBCs yet or at least nobody has got one perfectly right yet for a launch.
This isn’t a perfect analogy because I have no doubt that all of these companies (Radxa, Orange Pi, etc.) will be shipping their own RISC-V boards eventually. I’m sure they’re in the works right now (except Raspberry Pi apparently). I just mean that is how it seems to someone who has been in an ecosystem for a long time and doesn’t see much reason to switch ecosystems and start over (even for the higher performance which was enough for a lot of people but not everyone as some people value ease of use / support more). It becomes a lot easier / makes more sense to take this step once you are getting some kind of additional benefit than just switching to a different brand. You are getting a more open/friendly architecture at that point that Raspberry Pi will not give you and then I think we will see it start to make sense to more people.
I originally had to be dragged kicking and screaming out of the Pi bubble as well. Maybe I’m being too easy on him but like I said I was where Jeff is at a couple of years ago. Hell, I was worse than him. I was not at all prepared to even look at another board. It took external pressures to snap me out of it such as my traffic declining 50% with no prospect of returning any time soon since nobody could buy Raspberry Pis. It’s not hard for me to imagine that a lot of people who weren’t subject to those kind of pressures have had no reason to have this kind of reckoning with themselves about Raspberry Pi and could just continue to ignore it and hope they turn it around. All public interviews with their CEO are showing absolutely no sign of that happening though.
I definitely want him to keep covering the boards and he should do it his way. He can call out Radxa and Orange Pi and all of those guys all day long. I love it because like my GitHub interaction showed it gets the manufacturer’s attention and then things get fixed. I know it will hurt this generation’s board sales that it happened instead of him giving it a ringing endorsement but honestly it’s almost more useful having him be the bad guy (at least for us, the consumers/users). The next generation of these boards (and actually this generation of the Rock 5B now when it comes to the kernel) will now not suffer from any of these issues and that’s what I want more than anything when I write my reviews for these alternative boards.
I’m kind of one of the the bad guys / haters of the Raspberry Pi world right now and if he wants to be the bad guy / hater of the alternative board world I promise that will only help everyone and turn up the heat on the manufacturers to improve their boards. I really believe Jeff is working toward the same goals as us even when it’s tough to hear for a board that we love! It’s just not always happening in his videos but he is working with the manufacturers to try to improve these. The investigations of them have value and real benefits (even when it’s a negative review).
Take care!
Hi James,
Thank you so much for the detailed reply as I didn’t mean to have a dig at Jeff as he’s a legend in the community and I value his input highly yet I still feel that the review could’ve been better balanced yet you’re link shows that he’s engaged with Radxa to address the real concerns that have been known since Rockchip released the RK3588 and frankly relying on 2.6.x/5.10.x kernel raises some serious red flags but I’m encouraged to see that work is being done behind the scenes to resolve the issues with hopes that we see stability much like other Rockchip SOCs so thank you for keeping the pressure on them to be accountable to the community through your rigorous testing and critical reviews!
I’m a relatively new adopter to Linux/ARM so its been a steep learning curve and I rely heavily on trusted sources for honest reviews and information so naturally it was easy to get excited about RPi as the alternatives were largely obscure yet having done proper research I tend to side with you and strongly believe that what we see with this generation of boards from Radxa and Orange Pi are a step in the right direction and even say the Pi800 is a welcomed alternative (although copied design) to the popular Pi400 so the common rational for staying with the RPi no longer seems convincing to me unless you’re reliant on them for your applications or a diehard fan who already has a RPi but what about newbies who can’t afford one and see a video like Jeff’s thinking that the RK3588 devices aren’t really worth a look at just yet which is hardly the case!?
I agree with your sentiments and appreciate the sacrifice you made as it proves to me your credibility as the previous work you did covering RPi is valuable yet you’re right to ask the difficult questions and I see smidgeons of that with Jeff who does equally wonderful work but I guess the last video rubbed me the wrong way as my experience using the RK3588S was far from perfect but its getting more use than my RPi 4B 8GB for the clear fact that its more powerful and I can see real dedication to the development which wasn’t the case with previous alt boards and I’m optimistic we’ll see even better support with the next generation of SBCs and if it means RPi actually give us a real upgrade that would be welcomed but I’ll hold my joy until then!!!
Keep up the excellent work and I’d love to see more RISC-V content as its unique so until then thanks and take care…
Hey Razor Burn,
I totally get it. The reason I wrote such a lengthy reply is that I had seen that behind-the-scenes-ish stuff on GitHub working with Radxa and even though the tone was pretty harsh it’s hard to argue with the results. It got their attention and we got fixes even. I just wanted to put that out there because I totally, totally understand why it would rub people the wrong way (in fact even to the extent that I think they might think really unfairly of him from what the reality is behind the scenes).
After I watched his video I was like, “am I mad”? And I wasn’t sure until I thought about it for a second because some of it was abrasive to me like it was to you initially watching. I thought through everything I just wrote to you. I then thought of our interactions behind the scenes related to Radxa and fixing issues with the board.
I kind of had the same feeling when watching Game of Thrones when they kill the Night King in the last season in like episode 3 or whatever it was. I wasn’t sure right away what I was feeling. I then said… “I think I hated it!”. And after thinking about it a little more I realized I did. I did hate it when it comes to the last season of Game of Thrones (and that was the episode when I gave up on it and only expected it to get worse from there). But it took some time to process initially and think through everything in context before I could really properly process / articulate it.
In this videos case though after stopping to think about it I actually did comment and we had a good interaction on the points we agreed on that were a pain / need improvement. Jeff and I always get along fine even though I know we absolutely don’t agree on everything.
That’s definitely why I wanted to share as much as I did. I know not everyone has the benefit of that context like I did which led me to take a step back and see him as an ally and not an enemy (which is one’s gut reaction to perceived unfair treatment). It helps to view it more like a roast which is more of how I view it in context. He definitely roasted them but it wasn’t out of hate or malice and he does work with them to fix some of this stuff. It’s also questionable whether without his roast some of that would have got fixed (or maybe how much longer it would have taken would be a better way to put it).
Thank you so much for continuing to follow the site. You’re truly valued around here. Take care!
Thanks for the clarification and kind works James and if Jeff reads this I hope he understands my criticism is not personal as he’s one of the true good guys and when he posts something it gets everybody’s attention so he has earned my respect just like you have and all I want to add is that I wish him good health and happiness as he never complains and uses his medical condition to fundraise which is a true reflection of his character! Peace!!!