

I recently covered the extremely cheap and popular ESP32-CAM here on the site. That is still a good choice but I wanted to evaluate some of the other camera options out there.
One of the camera modules I chose to try was the ESP-EYE. This is actually an official product by Espressif (the company who make the ESP modules). It comes as one solid piece unlike the ESP32-CAM. It also has beefier on-board specs than the ESP32-CAM.
In this guide I’ll show you how to set up a completely open-source Home Assistant camera view with the ESP-EYE using ESPHome. Let’s get started!
Hardware Used
The Espressif ESP-EYE is a camera module made by the same company that makes the ESP32 module itself. It has 8 MB of PSRAM & 4 MB of flash onboard.
Links: Amazon.com*, AliExpress*, Amazon.com.au*, Amazon.ca*, Amazon.co.uk*, Amazon.co.jp*, Amazon.de*, Amazon.it*
Overview
Let’s take a closer look at the ESP-EYE:
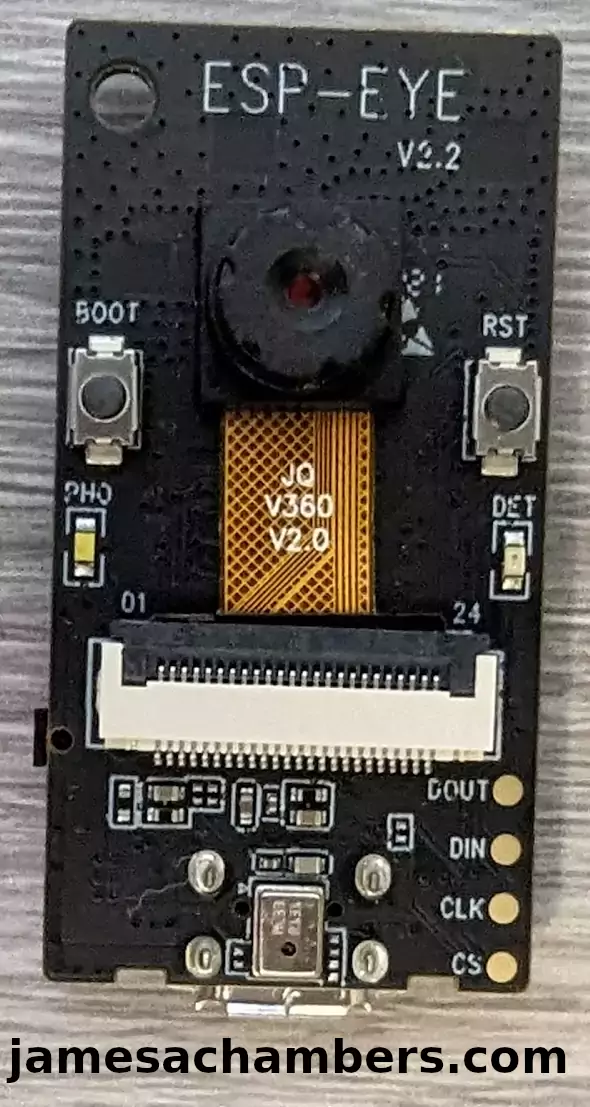
Here you can see the “BOOT” and “RST” (Reset) buttons on the board. The revision of the board I received was v2.2.
Now let’s take a look at the bottom of the board:
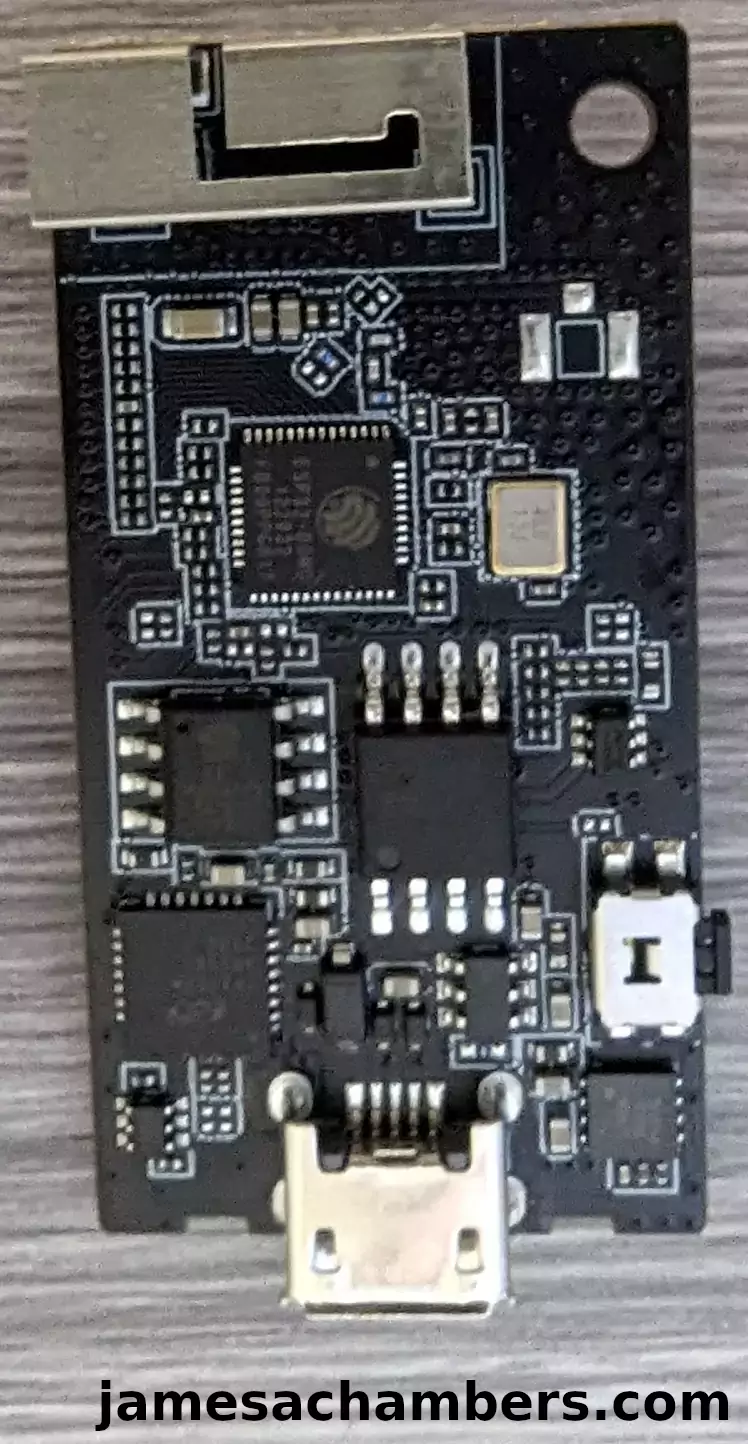
Here you can see another switch on the right hand side (used for face recognition). The ESP32 is actually soldered right on the board. You can see it sort of in the middle.
Also of note there is a pretty secure bracket at the top of the board. My plan is to add this as a camera to monitor my garage.
Adding ESPHome to Home Assistant
We are going to assume you have Home Assistant installed as installing Home Assistant is outside the scope of this guide. You can absolutely follow along though and see if it looks like something you’d like to explore. I have it installed as a supervised installation on an Orange Pi 5.
Sign into your Home Assistant instance and go to “Settings” and then “Add-ons”. Next click the “Add-on Store”.
ESPHome has it’s own section like this:
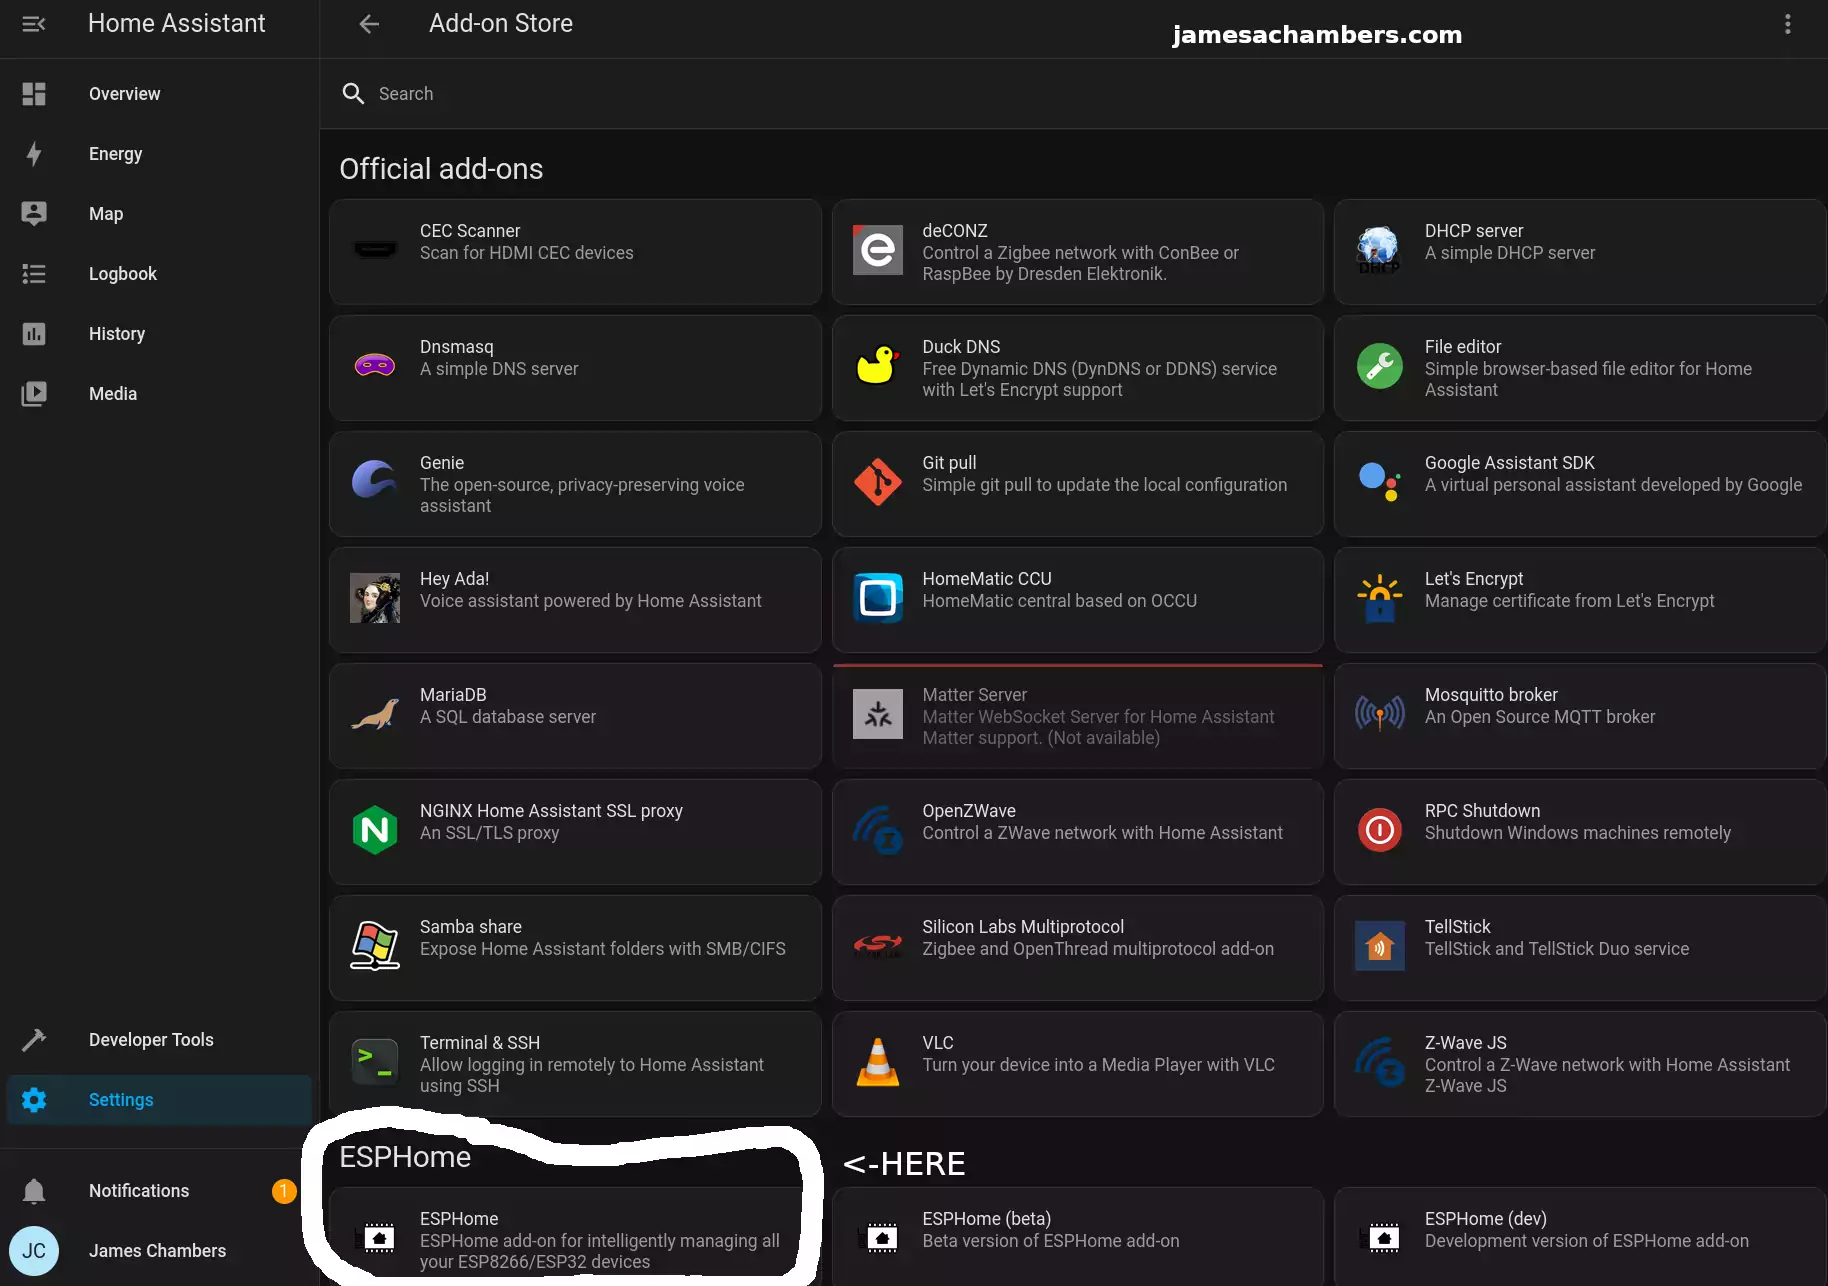
Select ESPHome and then click “Install”. Once the installation is finished you can click “Start” to start the service.
To make things easier choose to add the ESPHome option to your sidebar. That way you’ll see a menu choice specifically for ESPHome going forward.
Configuring ESPHome
First head to the ESPHome menu option:
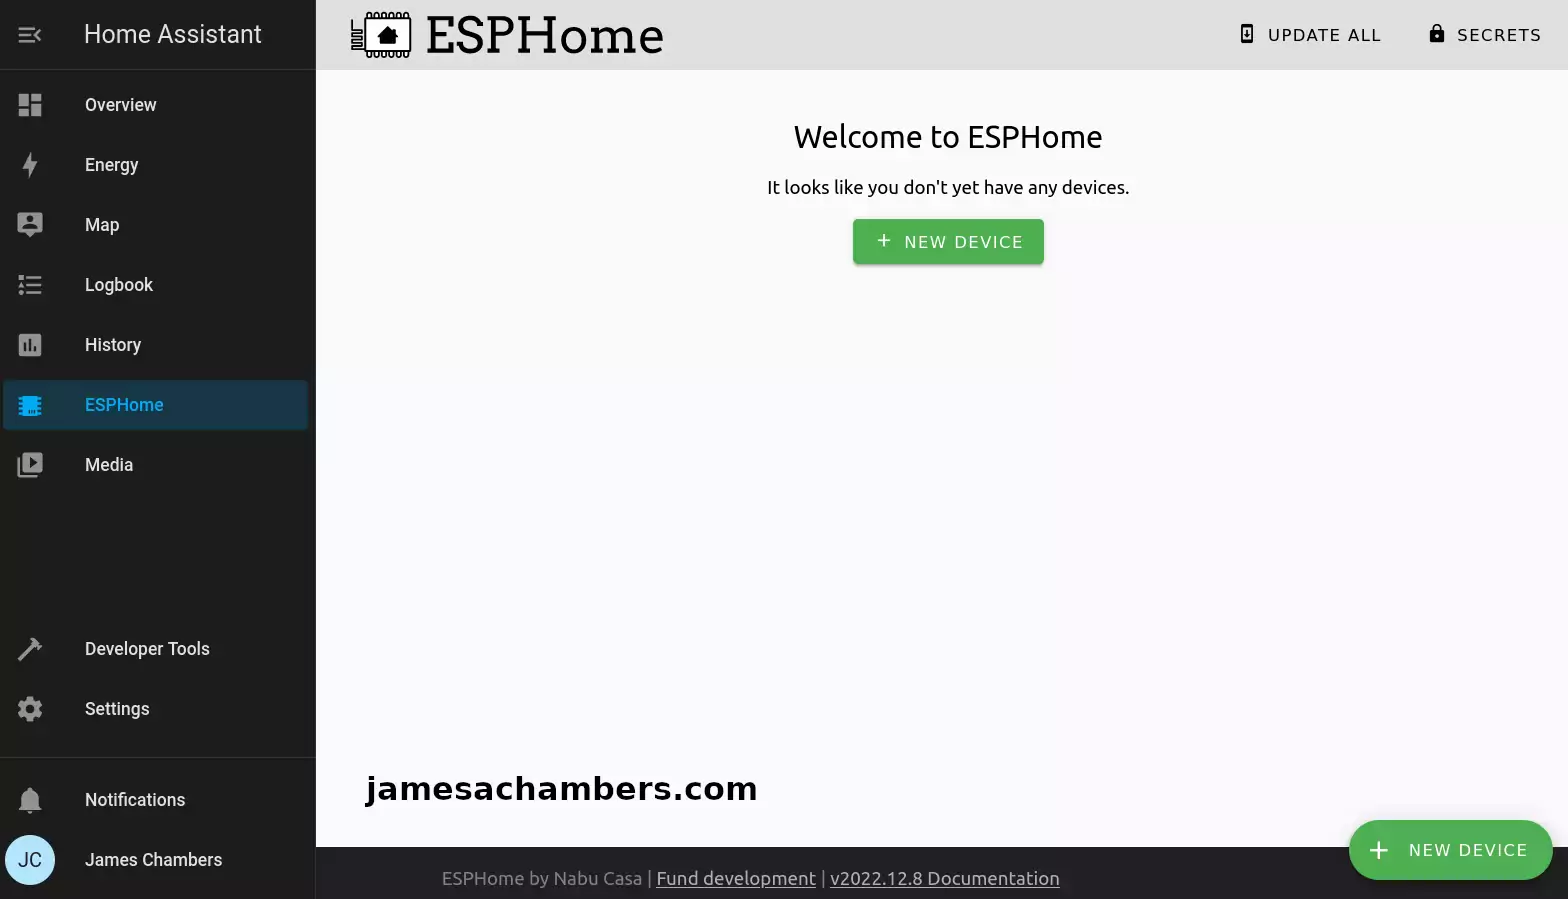
If you don’t see the ESPHome menu option then go back to the “Add-on Store” from the previous step. Select ESPHome and enable “Show in sidebar”.
For setup we need to connect your camera to your device running Home Assistant with USB. This is only required for setup. It will communicate wirelessly after you’ve completed setup (if you configure it that way).
You also have the option of connecting it to a different computer but *only* if your Home Assistant instance is configured to run in HTTPS.
Click “New Device” in the bottom right hand menu. Follow the menus to add the device into your ESPHome instance. Choose “ESP32” as the device type.
Now install the configuration to the device.
Adding Device to Home Assistant
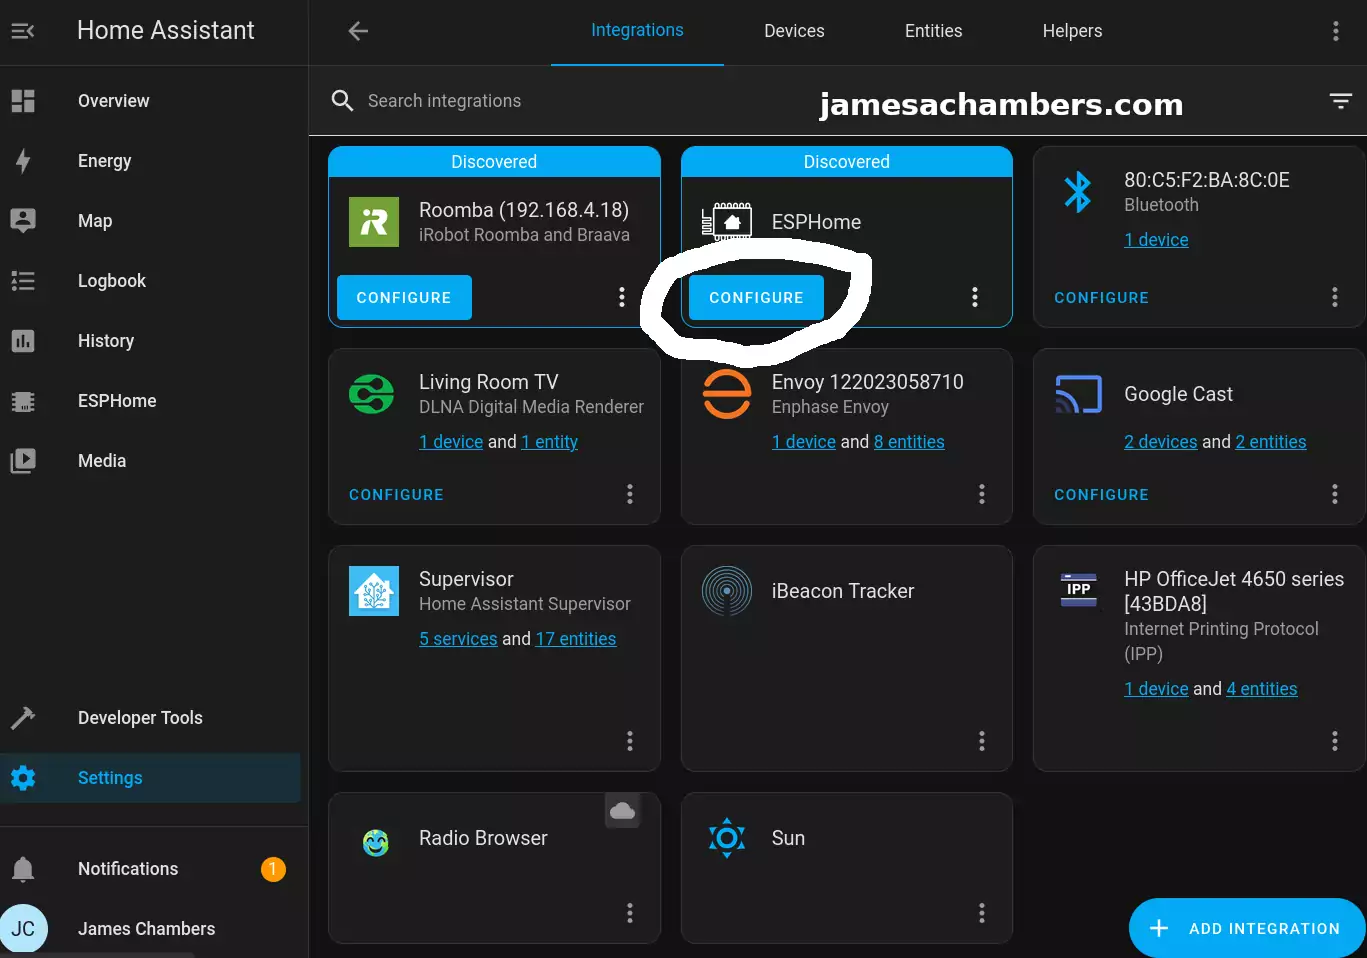
Now head back to your “Settings” menu for Home Assistant and click “Devices”. You should see your new sensor with the name you specified in the configuration.
Check to see if the sensor is online. With any luck it is like my example above. Now click “Configure”:
It should ask you if you want to add the node to Home Assistant. Select “Submit” and then it will ask you for your encryption key it gave us earlier. If you don’t have this just go back to the ESPHome menu and select “Edit”. You will see the key in plain text under “encryption” and then “key”.
If everything goes well the device should come online and be successfully paired with Home Assistant. From this point forward we will be able to update and push the configuration wirelessly to the device.
Adding Camera to YAML
Update 4/20/2026: I’ve updated this with the new YAML that adds i2c as it’s own section and gets rid of the deprecated i2cpins. The updated code is below!
Now your device should be available in Home Assistant but you won’t see a camera feed yet. We’re going to add that now. Go back to ESPHome and go to your new camera. Click “Edit”.
esphome:
  name: cam-garage
  friendly_name: cam-garage

esp32:
  board: esp32dev
  framework:
    type: arduino

psram:
  mode: quad

# Enable logging
logger:
  level: VERBOSE

# Enable Home Assistant API
api:
  encryption:
    key: "k40lcUnVxbGJJPzSo3B/VQhDSwXzvZnNZre2kiTlLMs="
  services:  # change camera parameters on-the-fly
  - service: camera_set_param
    variables:
      name: string
      value: int
    then:
      - lambda: |-
          bool state_return = false;
          if (("contrast" == name) && (value >= -2) && (value <= 2)) { id(espeye).set_contrast(value); state_return = true; }
          if (("brightness" == name) && (value >= -2) && (value <= 2)) { id(espeye).set_brightness(value); state_return = true; }
          if (("saturation" == name) && (value >= -2) && (value <= 2)) { id(espeye).set_saturation(value); state_return = true; }
          if (("special_effect" == name) && (value >= 0U) && (value <= 6U)) { id(espeye).set_special_effect((esphome::esp32_camera::ESP32SpecialEffect)value); state_return = true; }
          if (("aec_mode" == name) && (value >= 0U) && (value <= 1U)) { id(espeye).set_aec_mode((esphome::esp32_camera::ESP32GainControlMode)value); state_return = true; }
          if (("aec2" == name) && (value >= 0U) && (value <= 1U)) { id(espeye).set_aec2(value); state_return = true; }
          if (("ae_level" == name) && (value >= -2) && (value <= 2)) { id(espeye).set_ae_level(value); state_return = true; }
          if (("aec_value" == name) && (value >= 0U) && (value <= 1200U)) { id(espeye).set_aec_value(value); state_return = true; }
          if (("agc_mode" == name) && (value >= 0U) && (value <= 1U)) { id(espeye).set_agc_mode((esphome::esp32_camera::ESP32GainControlMode)value); state_return = true; }
          if (("agc_value" == name) && (value >= 0U) && (value <= 30U)) { id(espeye).set_agc_value(value); state_return = true; }
          if (("agc_gain_ceiling" == name) && (value >= 0U) && (value <= 6U)) { id(espeye).set_agc_gain_ceiling((esphome::esp32_camera::ESP32AgcGainCeiling)value); state_return = true; }
          if (("wb_mode" == name) && (value >= 0U) && (value <= 4U)) { id(espeye).set_wb_mode((esphome::esp32_camera::ESP32WhiteBalanceMode)value); state_return = true; }
          if (("test_pattern" == name) && (value >= 0U) && (value <= 1U)) { id(espeye).set_test_pattern(value); state_return = true; }
          if (true == state_return) {
            id(espeye).update_camera_parameters();
          }
          else {
            ESP_LOGW("esp32_camera_set_param", "Error in name or data range");
          }

ota:
  platform: esphome
  password: "b9f4d4b4f404ddcc664c6dbb246bc2e1"

wifi:
  ssid: !secret wifi_ssid
  password: !secret wifi_password
  domain: .jamesachambers.net
  power_save_mode: none

  manual_ip:
    static_ip: 192.168.1.213
    gateway: 192.168.1.1
    subnet: 255.255.255.0
    dns1: 192.168.1.1
    dns2: 8.8.8.8

i2c:
  id: bus_a
  sda: GPIO18
  scl: GPIO23

esp32_camera:
  id: espeye
  name: esp-eye
  external_clock:
    pin: GPIO4
    frequency: 20MHz
  i2c_id: bus_a
  data_pins: [GPIO34, GPIO13, GPIO14, GPIO35, GPIO39, GPIO38, GPIO37, GPIO36]
  vsync_pin: GPIO5
  href_pin: GPIO27
  pixel_clock_pin: GPIO25
  resolution: 1600x1200
  jpeg_quality: 10  # max. 63
  max_framerate: 5.0fps
  idle_framerate: 0.2fps
  vertical_flip: true
  horizontal_mirror: false
  brightness: 2
  contrast: 1
  special_effect: none
  # exposure settings
  aec_mode: auto
  aec2: false
  ae_level: 0
  aec_value: 300
  # gain settings
  agc_mode: auto
  agc_gain_ceiling: 2x
  agc_value: 0
  # white balance setting
  wb_mode: auto
binary_sensor:
  - platform: status
    name: esp-eye status
sensor:
  - platform: wifi_signal
    name: esp-eye WiFi Signal
Make sure to update with your own encryption keys (or use the ones that were automatically generated).
If you don’t want to use a static IP with the camera you can remove the entire “manual_ip” section above!
Final Result
Here’s how it looks within Home Assistant:
I ended up installing it like this in my garage:

Can you see it? I added a text hint but it’s on top of the fridge. The cable is firmly holding it in position. I didn’t do a permanent mount because I may change the angle slightly (or I may keep it mobile).
Conclusion
The ESP-EYE costs a bit more than the ESP32-CAM but it is a more powerful board with a lot more resources. I didn’t have any connection problems with ESPHome or Home Assistant with this board even at maximum resolution. I also experienced a really stable WiFi signal.
It has some tradeoffs. There’s no bright white LED on the ESP-EYE to provide illumination. My ESP-EYE image also seems to look a little clearer despite me being able to run this camera at a much higher resolution.
The upsides are that the higher specifications on the ESP-EYE let you run at higher frame rates and higher resolutions than the ESP32-CAM will run at (at least with the module they give you with them). It’s also nice that it’s so compact and one solid piece.
The ESP-EYE is showing as unavailable on Amazon all of the sudden even though I only bought mine March 4th here. Hopefully it will come back to Amazon before too long but it’s still available on AliExpress.
I’d recommend this as much as I’d recommend the ESP32-CAM for places where you don’t need a really high resolution or fancy camera. I already have some Unifi cameras for places I need really high quality shots. For my utilities and my garage the ESP32-CAM and ESP-EYE are both great choices!
Other Resources
Don’t miss my ESP32-CAM guide here for another Home Assistant cheap camera option
I’ve covered making a ESP32 air quality sensor (7-in-1) without soldering here


Finally and thank you!
I have a Waveshare ESP32 One with the OV2640 Camera option and have been trying to get the camera to work. You have accomplished what I was trying to do and more. It works perfectly!
Thanks!
Hello captncode,
I’m very glad it was helpful, thanks for the kind comment and take care!
Thanks for the setup. I’m relatively new to adding cameras to HA and have been experimenting with the ESP32 cam. Got it working on HA, but have the problem of staying connected to my WIFI. I don’t think I’m alone as I’ve read many blogs from folks with the same problem. The best solution was to “squeeze” the board with my fingers near the on-board antenna, which worked best (but not really practical), but even after adding an external antenna, I had the same problem. And my power supply was putting out a solid 5 Vdc, so low voltage wasn’t the problem.
I’m looking for a camera board where the communication problem doesn’t exist. Can you tell me if this ESP-EYE board exhibits any kind of communication/antenna behavior? I see there is only an on-board antenna (I think).
Thanks,
George
Hello George,
Yes, I’ve seen those issues with the ESP32 cam as well. I’ve covered how to fix some of them in another post. The config is pretty picky for it.
I’m pleased to report that I have not had any of those types of issues with the ESP-EYE. I did not have to do any special configuration for it either. I think the ESP32 cam boards are just so cheap (and made by so many other people as knockoffs) that the quality is just really, really low on them.
Hopefully that helps!
Hi!
thank you for the great post.
2 questions:
1/ how do mount multiple cameras in HA?
2/ about the ESP32-EYE specs, how much power does it require? can I run it be 20k mA battery powered for example?
Thank you!
Hey Kevin,
Great questions! So to add multiple cameras you will just follow the steps from the article multiple times. Home Assistant will have no trouble with it. I have several cameras and you just add them using this original process for as many as you have.
For the power draw on the board it’s available here in the specs:
Operating Voltage: 3.3VOperating Current: 0.5A
This is very low power draw that will definitely work with a battery. Someone has done it before here. That person was asking for tips to reduce draw though as they wanted to get more life out of their battery.
Hopefully that helps!