
I’ve been investigating ways to make my garage doors on my home “smart”. My overall goal is to implement them into Home Assistant. I’ve been investigating various options to do this including do-it-yourself with ESP modules (which I’ve used for a lot of other parts of my home automation).
My home is only about 3 years old and came preinstalled with a “dumb” Genie garage door system that does not have smart capabilities. I decided to investigate the official upgrade option offered by the company via their Aladdin smart home upgrade kit as it only cost about $60.
In this guide I’ll cover installing the upgrade kit for Genie garage doors and how well it performed. I’ll also cover implementing it within Home Assistant. Let’s get started!
Hardware Used

The Genie Aladdin Connect smart home upgrade kit can support up to 3 doors and works with Home Assistant as well as Alexa / Google Assistant / a cloud app / more.
Links: Amazon.com*, Amazon.ca*, Amazon.com.au*, Amazon.co.uk*, Amazon.co.jp*, Amazon.de*, Amazon.es*, Amazon.fr*, Amazon.it*, Amazon.sg*
Checking Existing Garage Doors
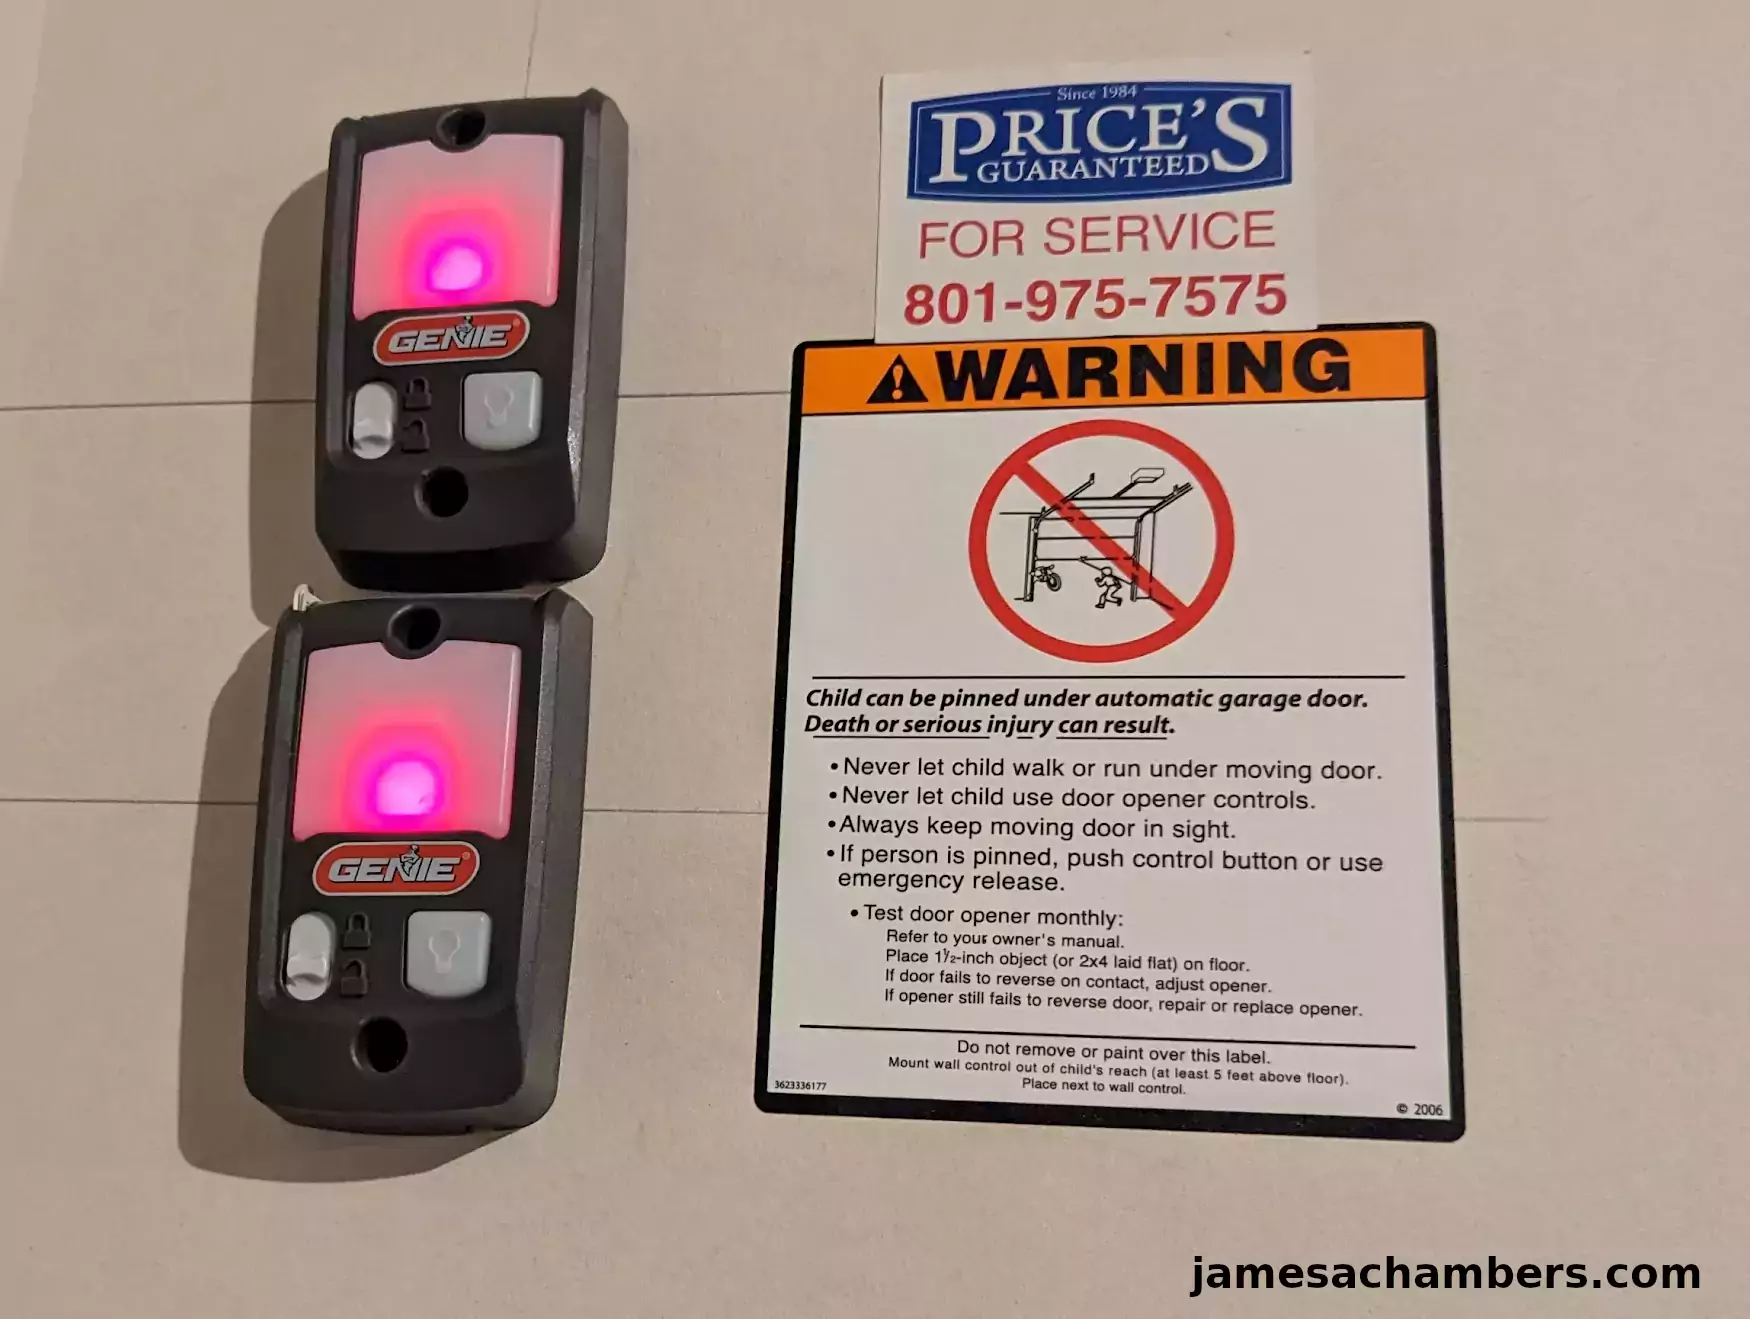
First you should make sure that you don’t already have a model of Genie garage door opener that already has WiFi / smart capabilities. The models that have it will look like this:

If your garage door openers have either the WiFi or Aladdin Connect logos on them (like the ones seen in the above picture) then you already have a WiFi / smart home enabled unit.
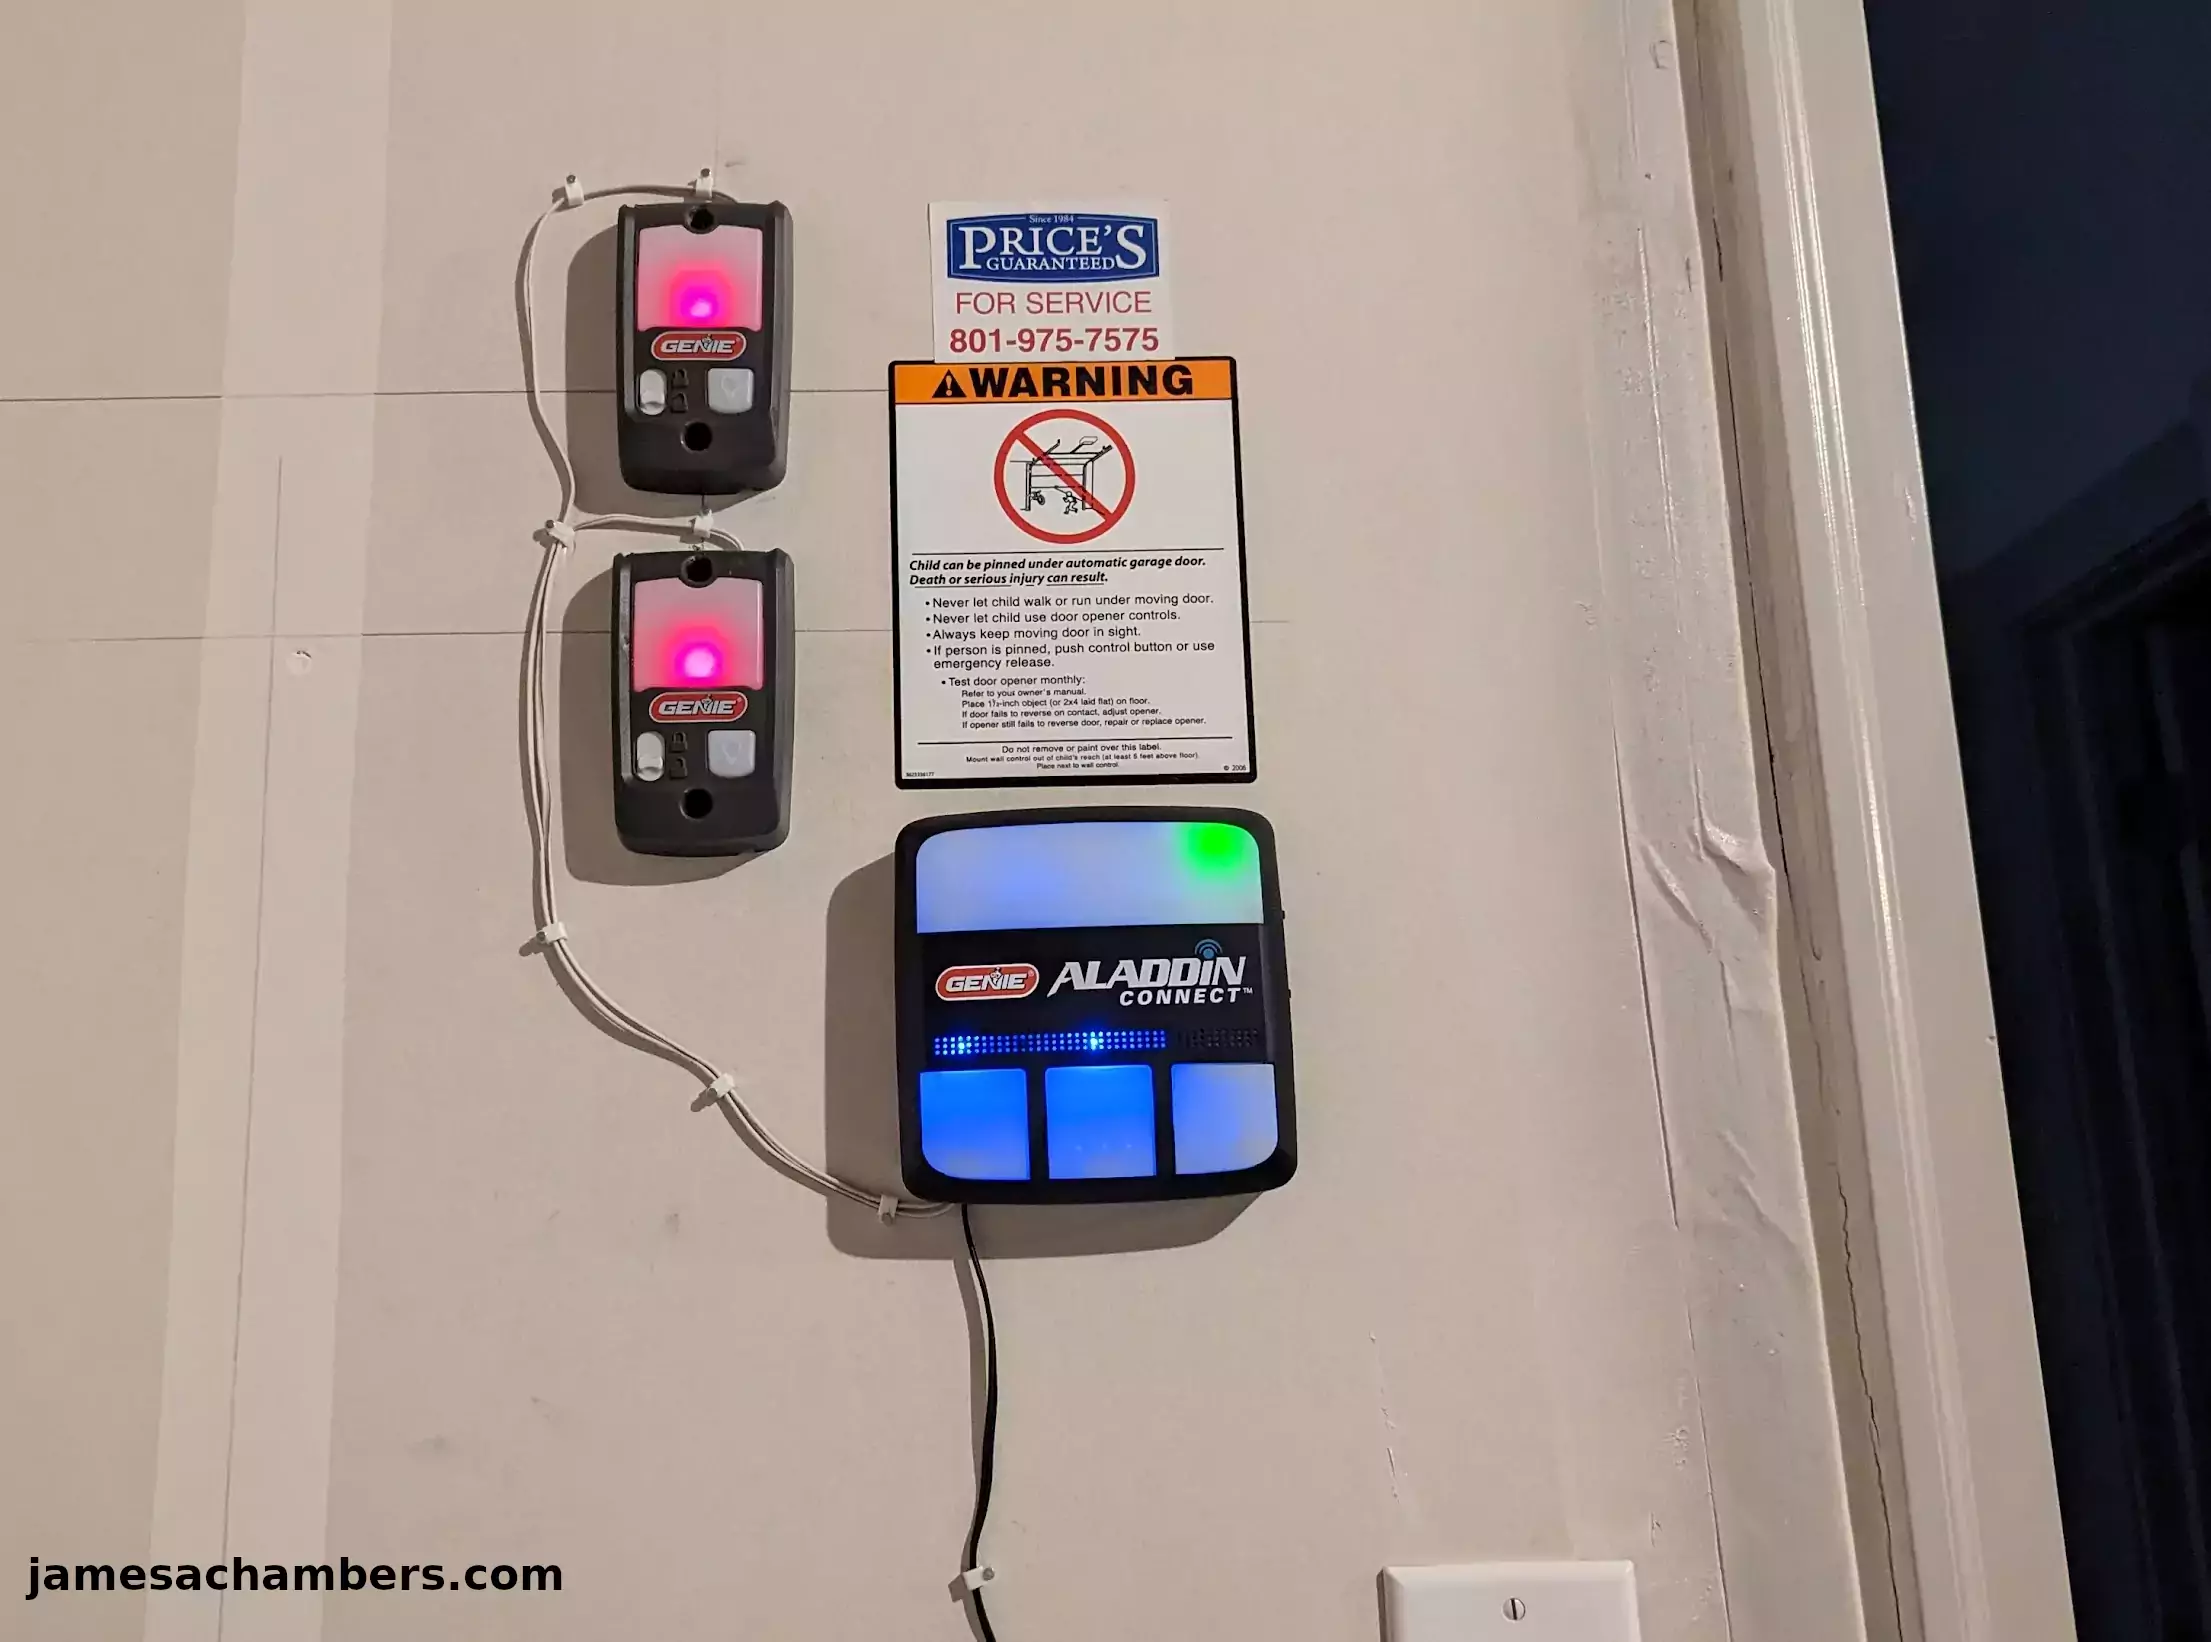
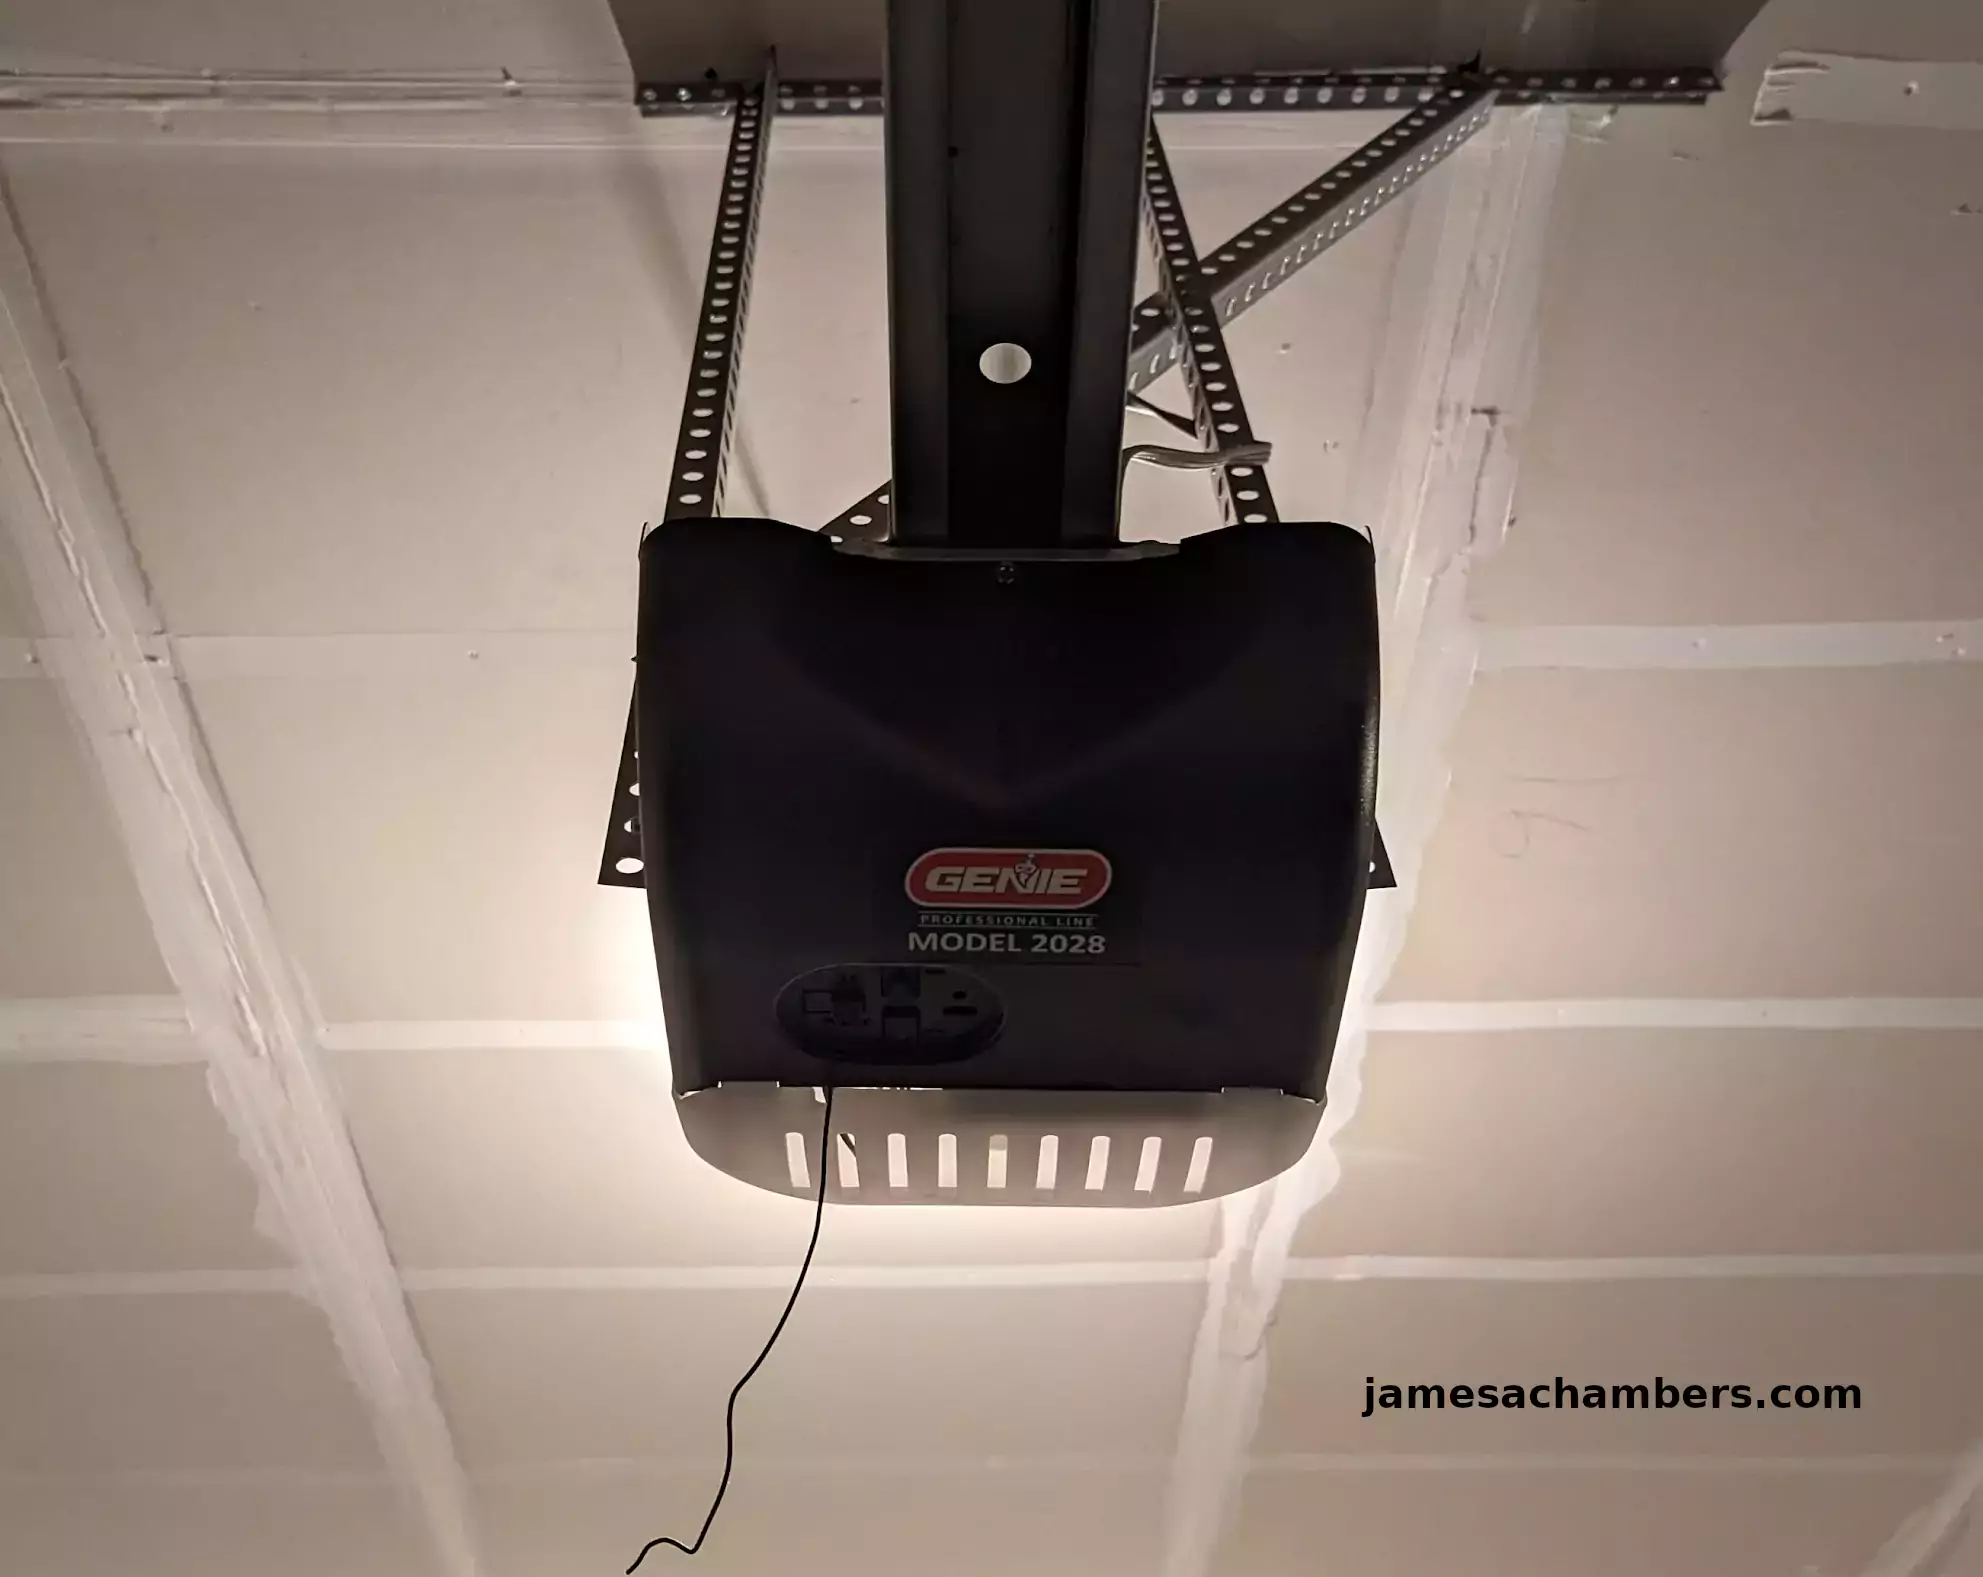
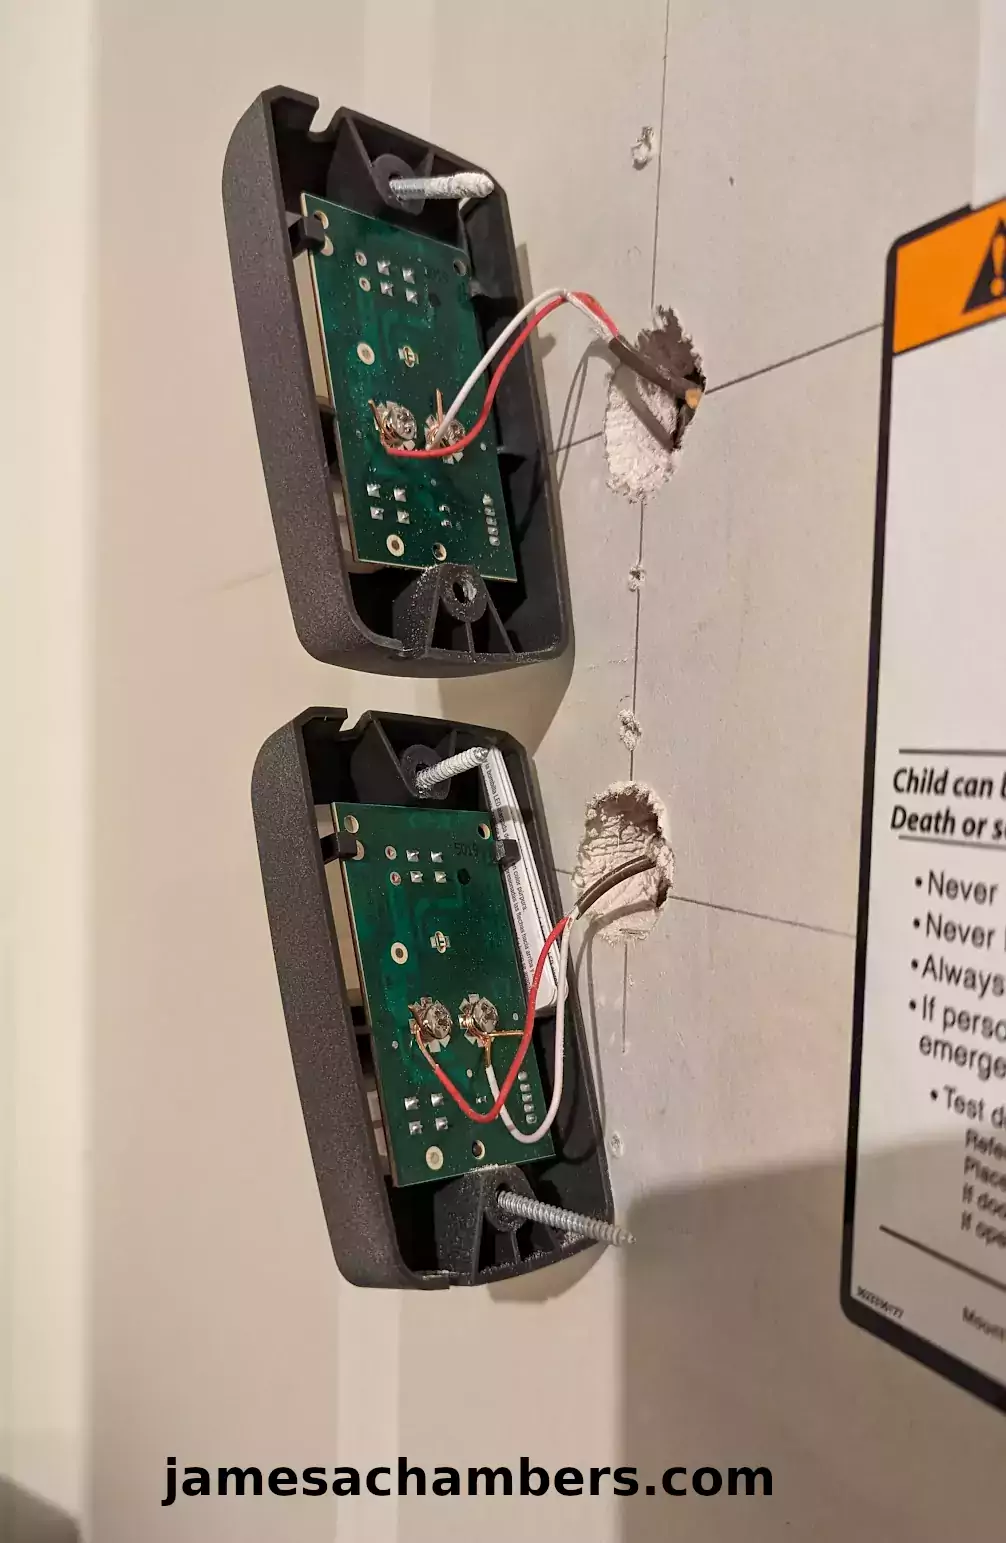
Unfortunately the ones that the builder used for my home look like this:
No WiFi icon in sight. The current opening system for the door looks like this on the wall:
You can see that all of my wiring is hidden in this setup behind the wall. Fortunately the Aladdin Connect unit can be wired directly to my existing control panels. My plan is to put the new panel right next to them.
Upgrade Kit
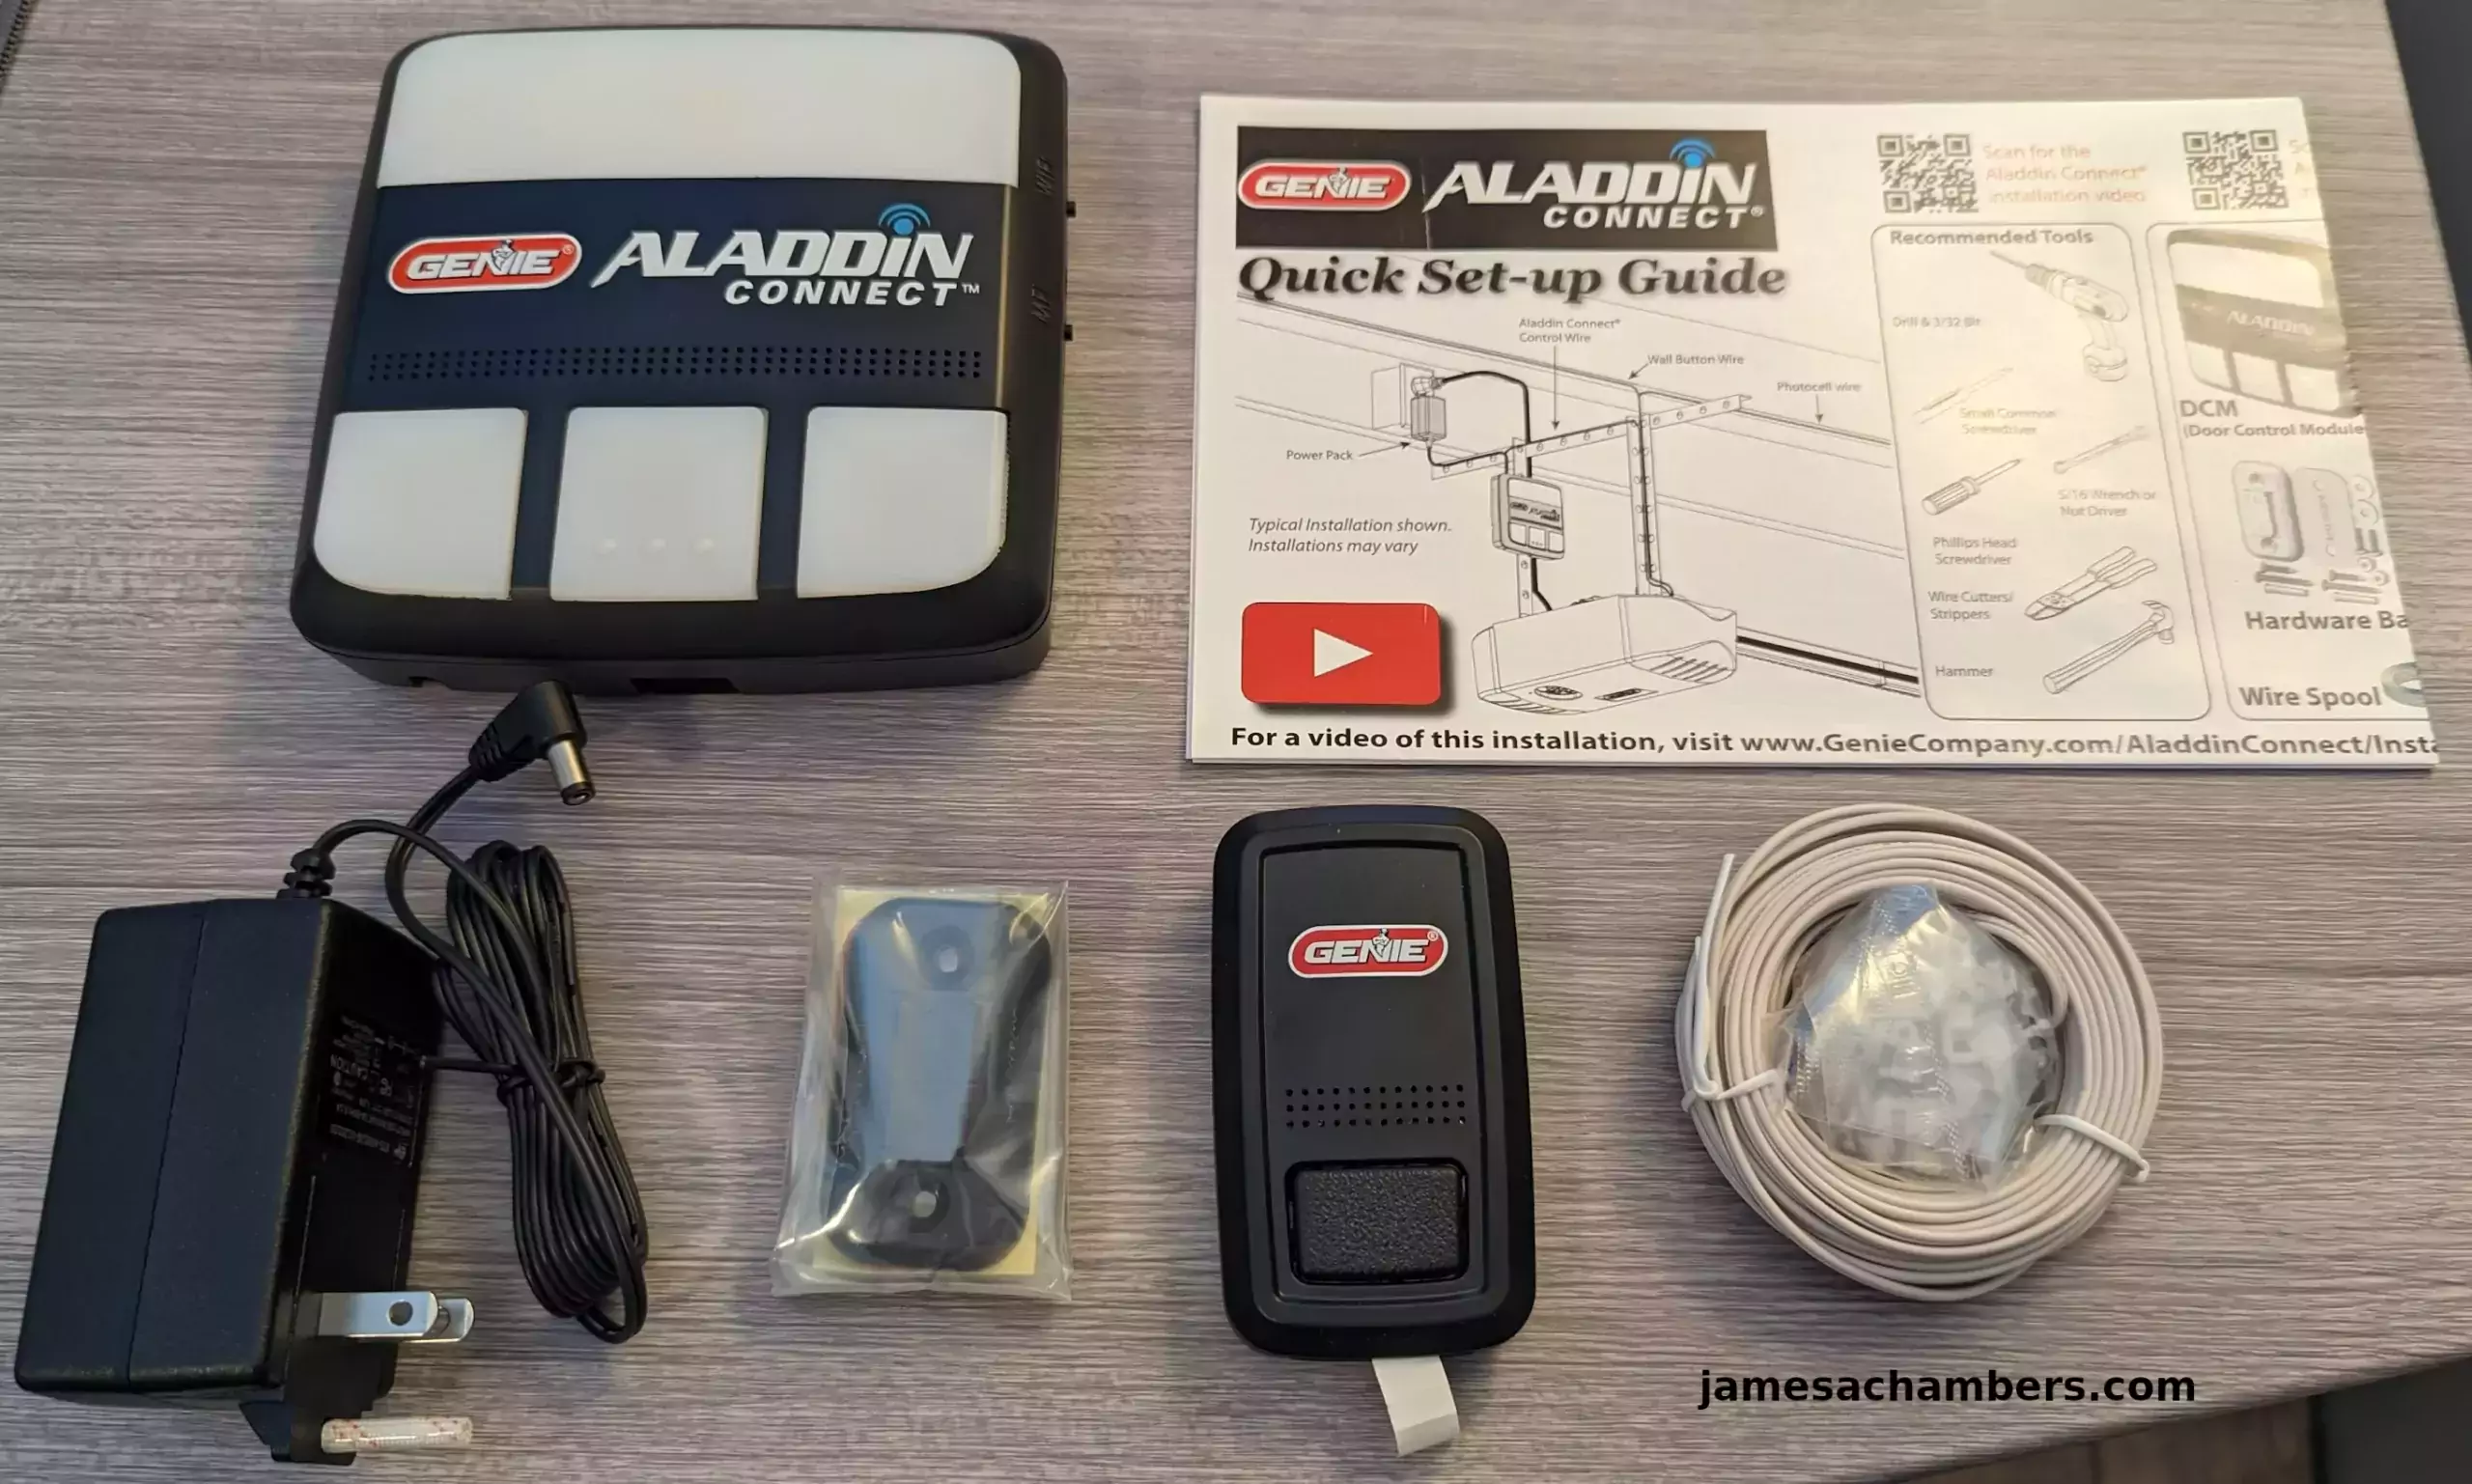
Now let’s take a look at the components in the upgrade kit:
There are a few different options available to wire the system. If you look at my picture of the quick start guide above one option is to mount the unit above the garage door unit. This may be a better option for some people and I’ve seen lots of installation videos where people did use a setup like that.
You can see the power brick on the left hand side. There’s some tape over what is actually a screw to help the unit stay securely plugged in even against the ceiling.
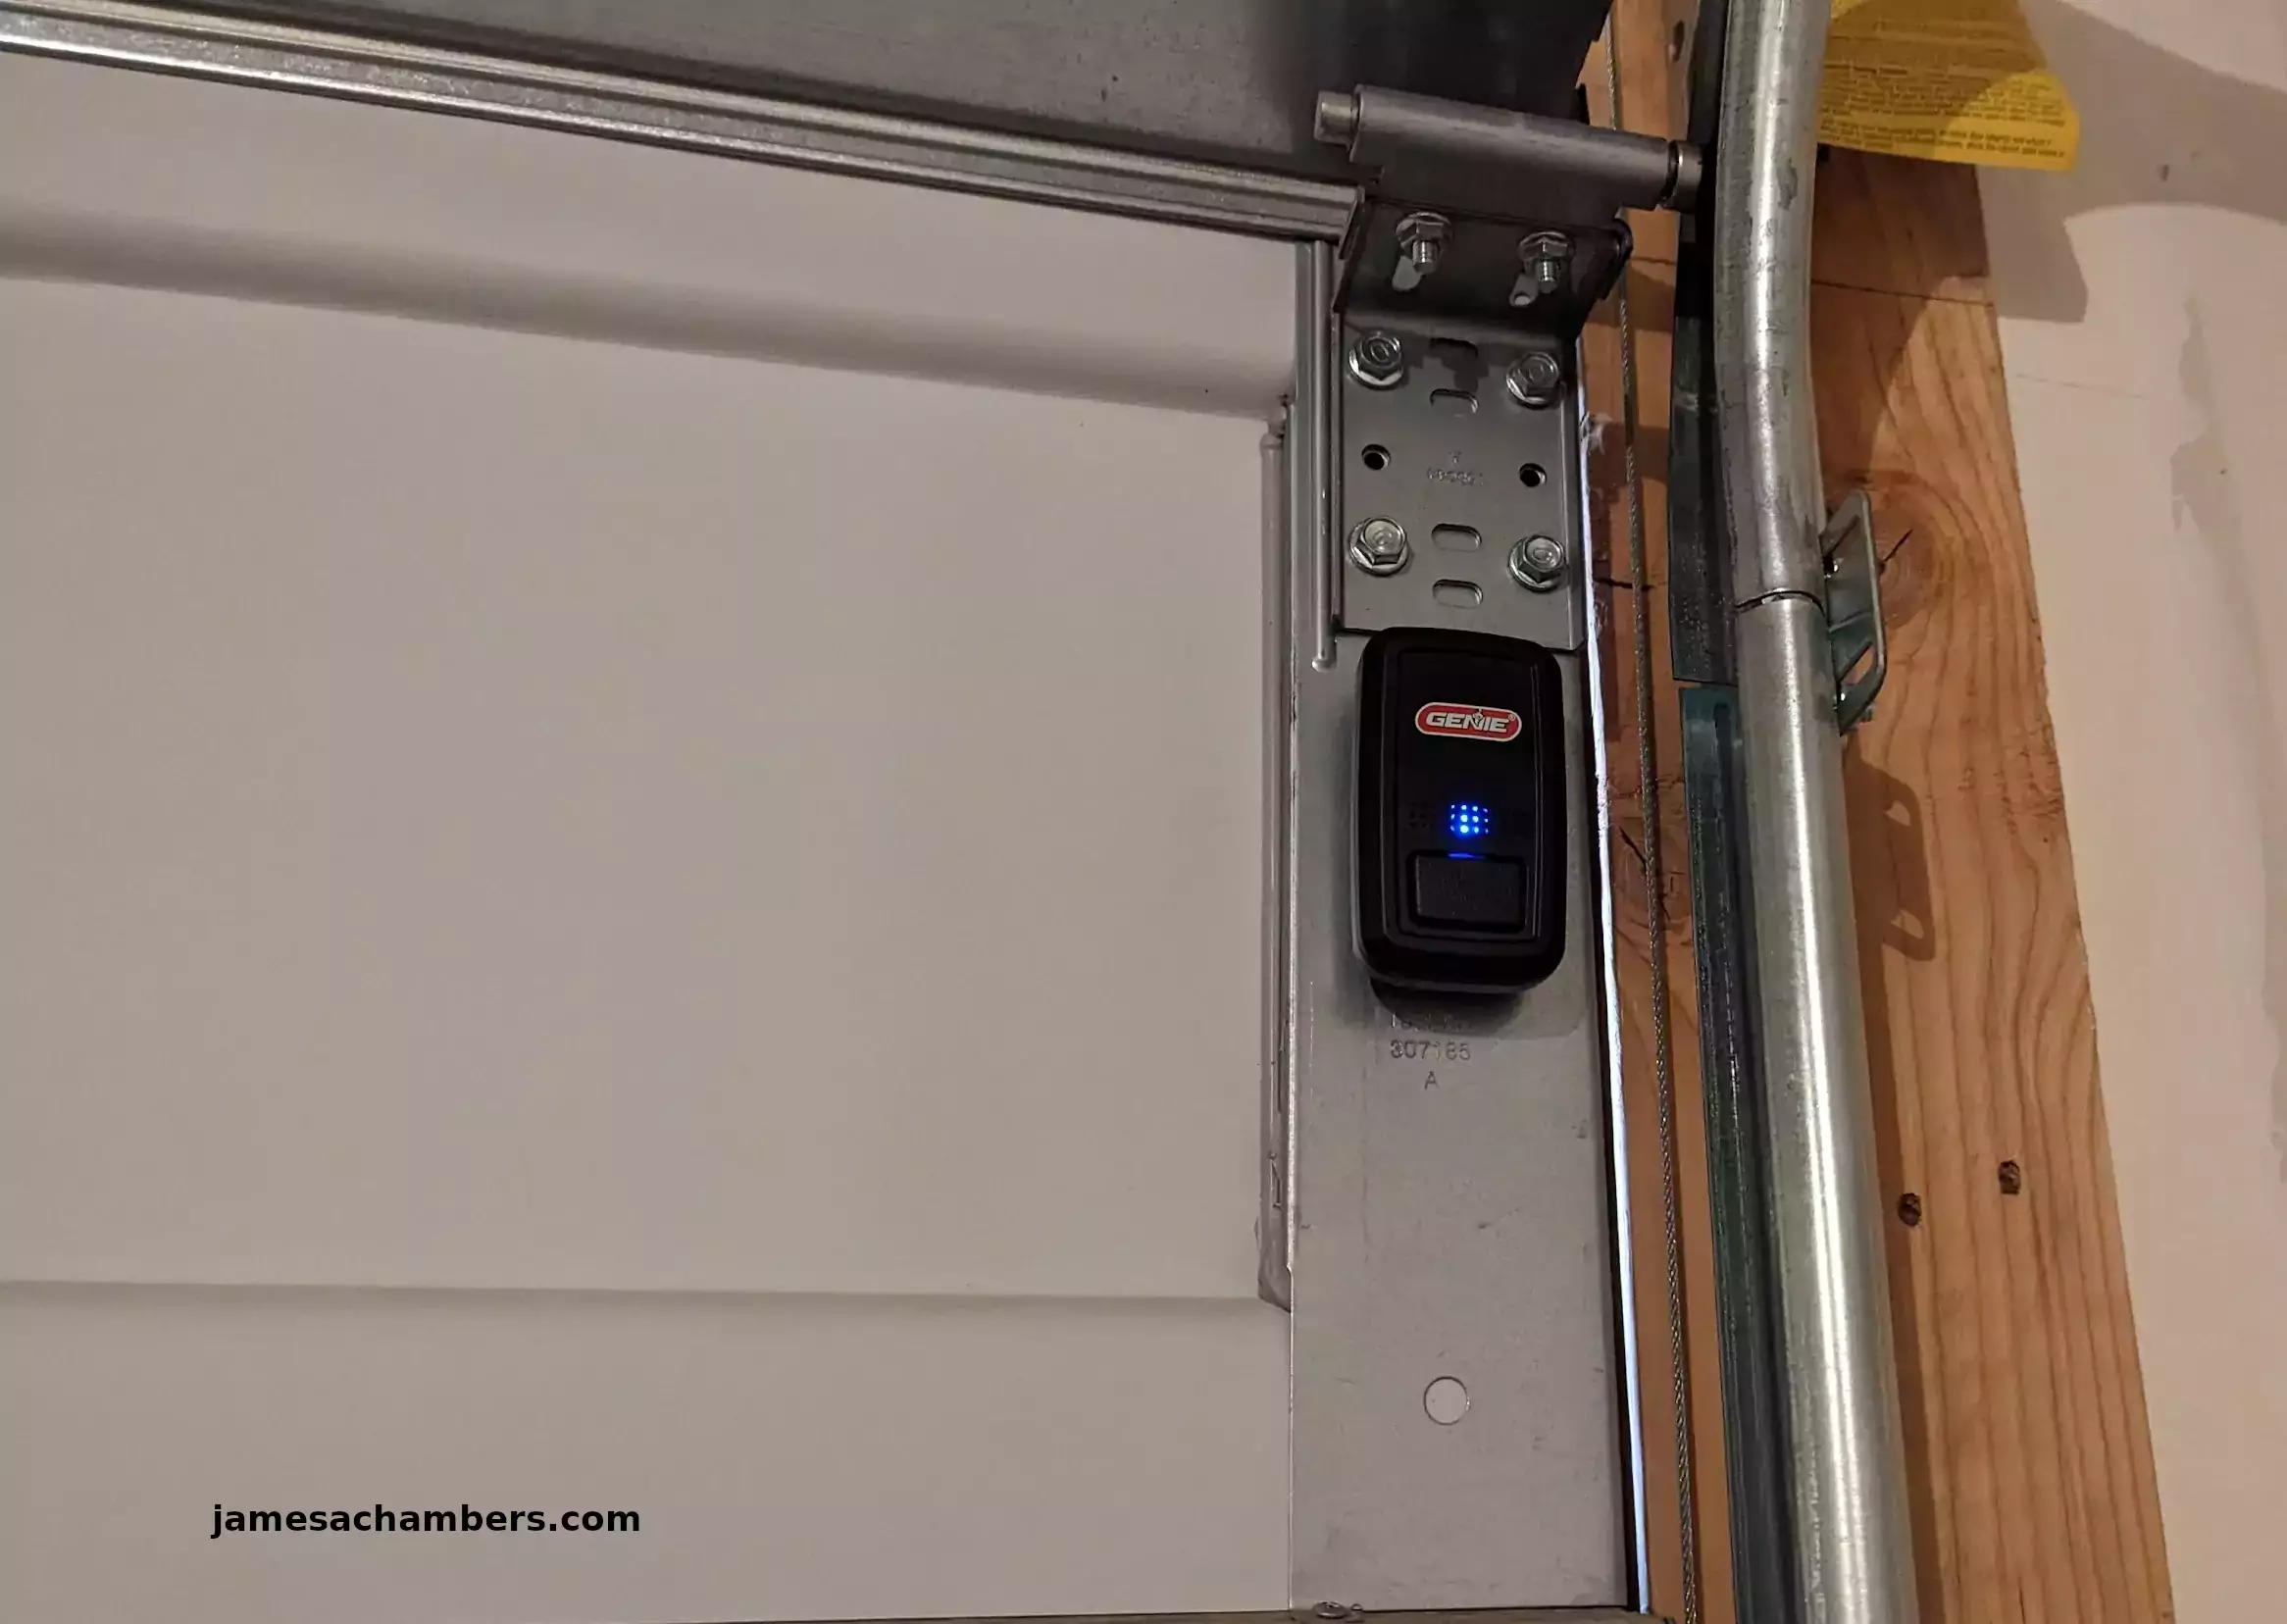
The garage door sensor that detects whether the door is open or not is in the center with the mounting bracket on the left hand side of it. We can also see the included wiring to wire the garage door unit to the WiFi-enabled control panel.
Installation
Genie says that I can wire this new unit right into the back of my existing units. This will allow me to not have to run any additional wires anywhere. My wiring is all hidden within the ceiling and behind the walls so this is a major plus.
First I needed to take out the screws of the existing panels so I can easily access the back and run some additional wires for me to plug the Aladdin Connect unit into. The back of my units looked like this:
Yep, that looks pretty easy! All I need to do is run wires from my existing units to the new unit to integrate the smart home capabilities into my existing system.
I used the provided wiring and hooked everything together in a test setup like this:
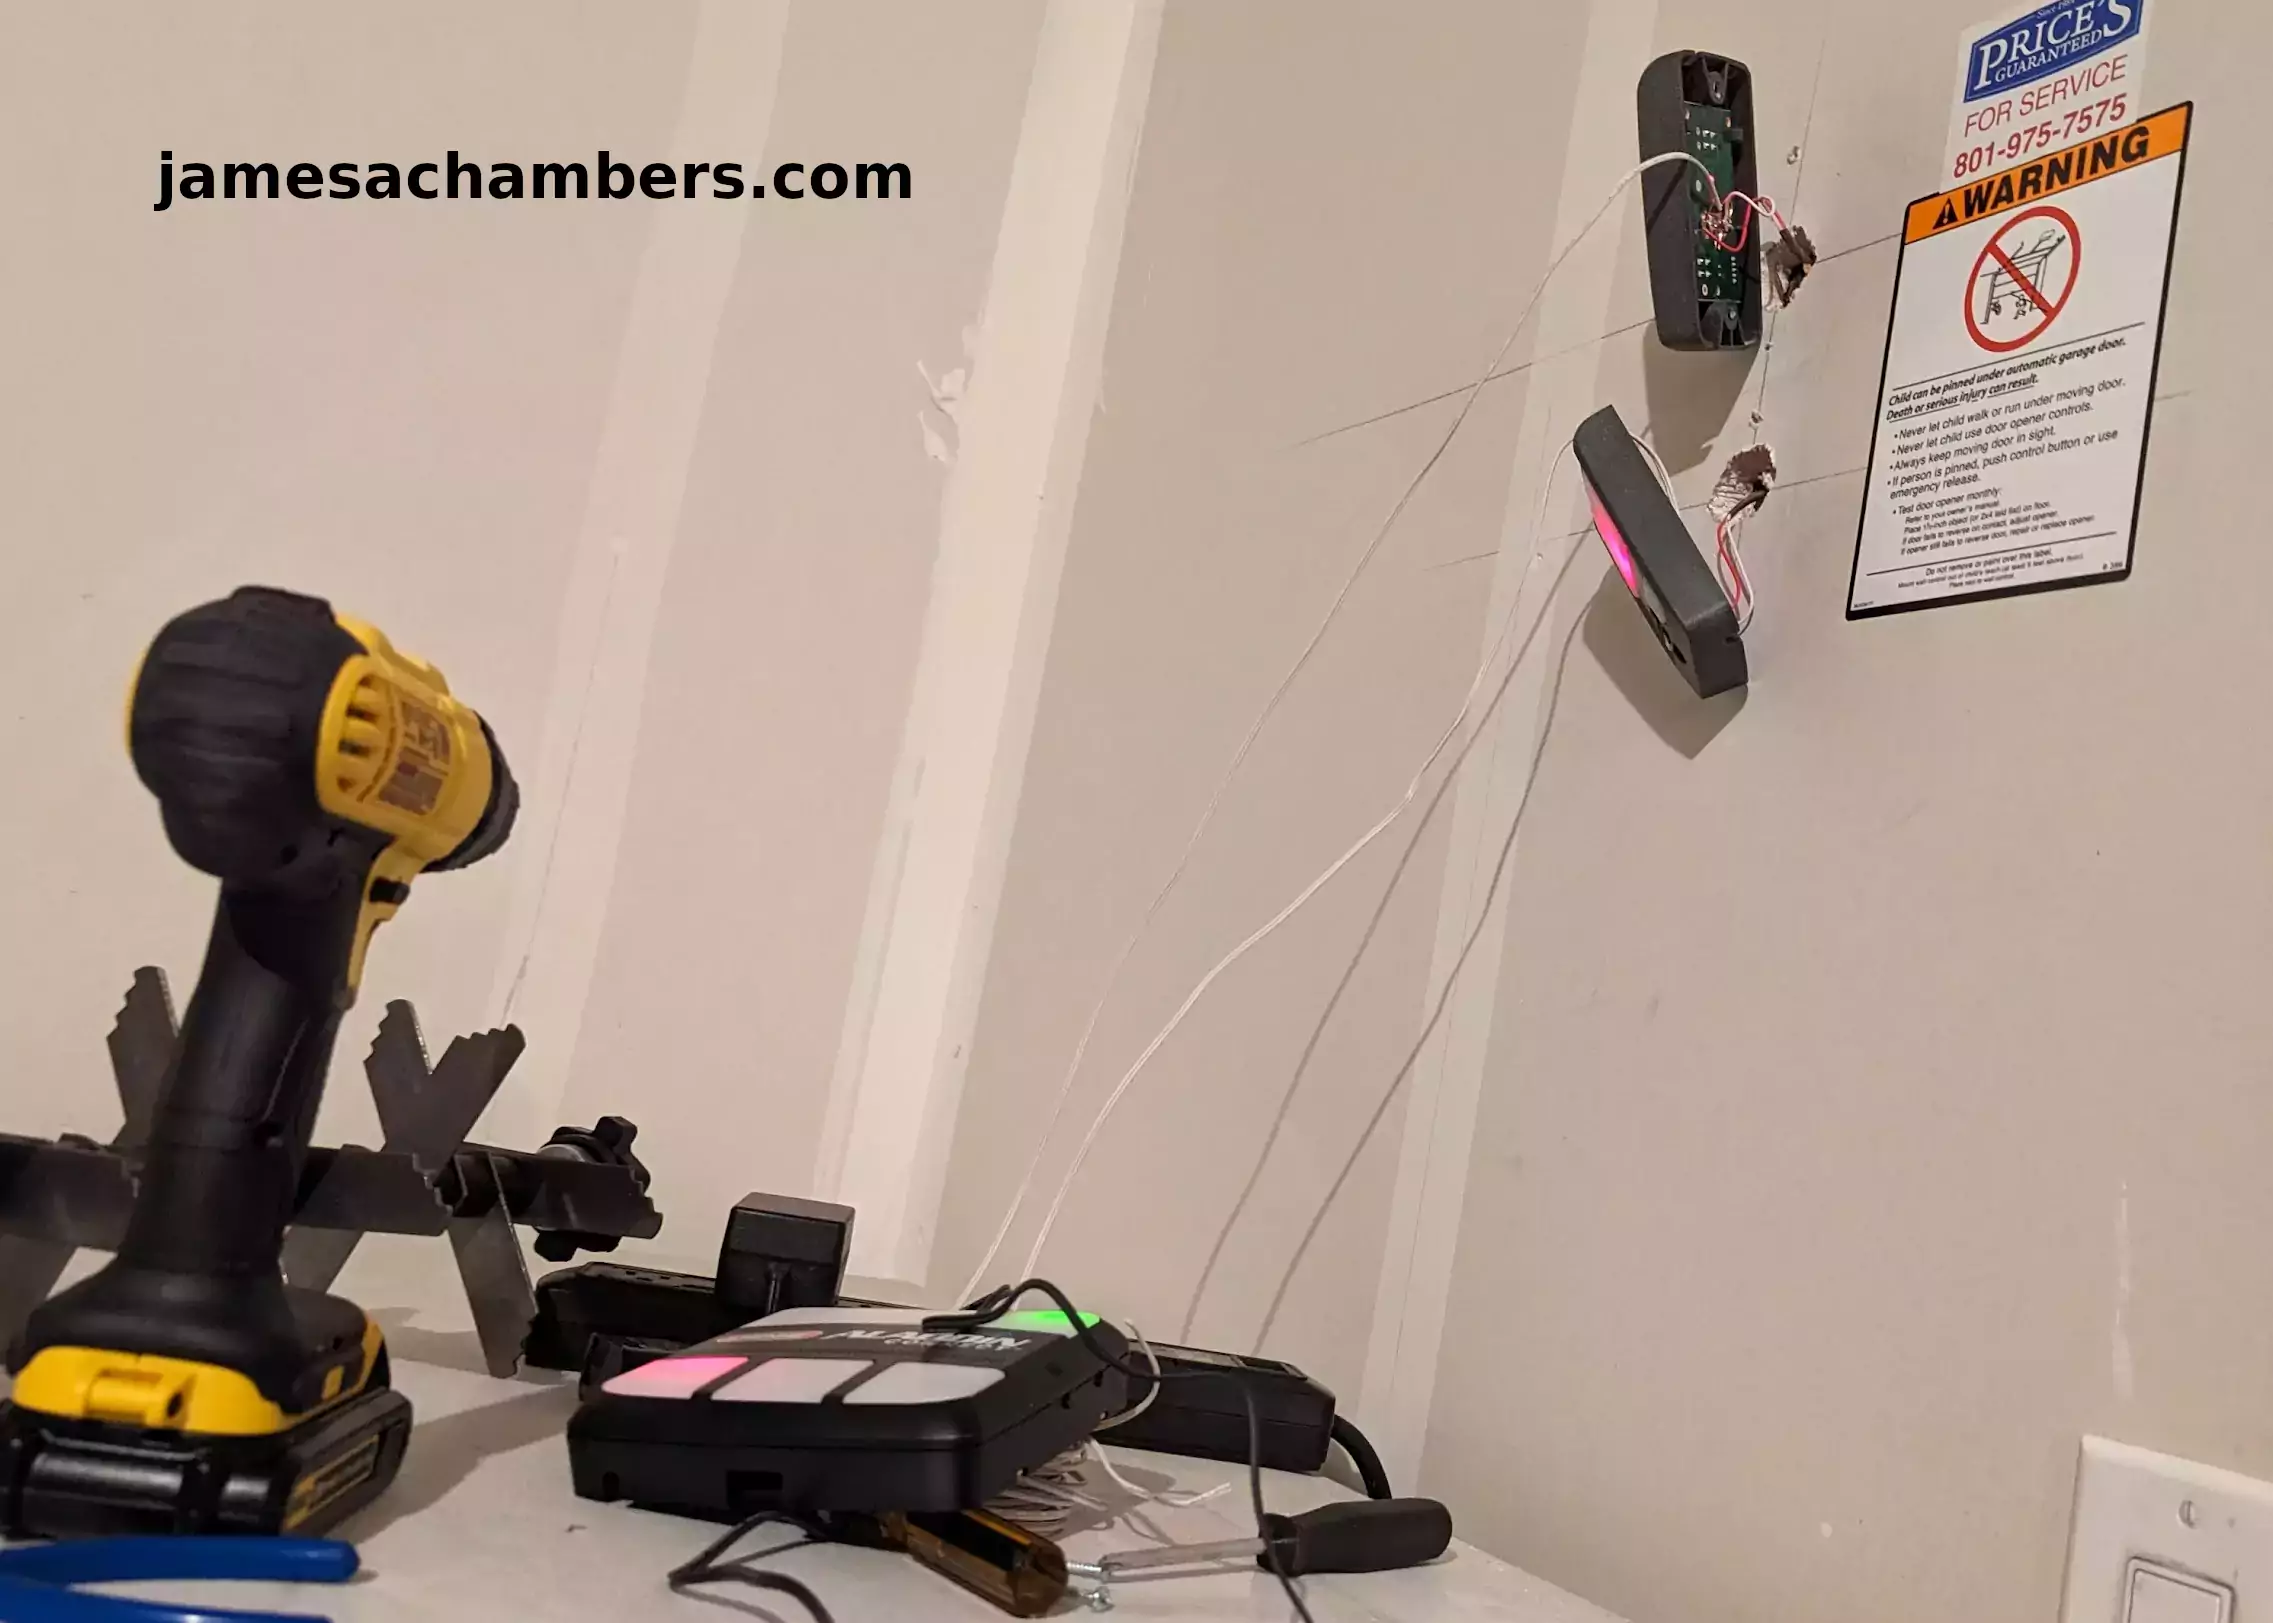
These just plug right into the back of the Aladdin unit in the positions “Door 1” and “Door 2”. After testing to make sure everything worked I moved on to installing the door sensors:
After making sure this worked it was finally time to clean everything up.
Final Installation
I used the provided anchors to clean up the wiring and mounted the unit on the wall. The final result looks like this:
And here’s a wider shot:
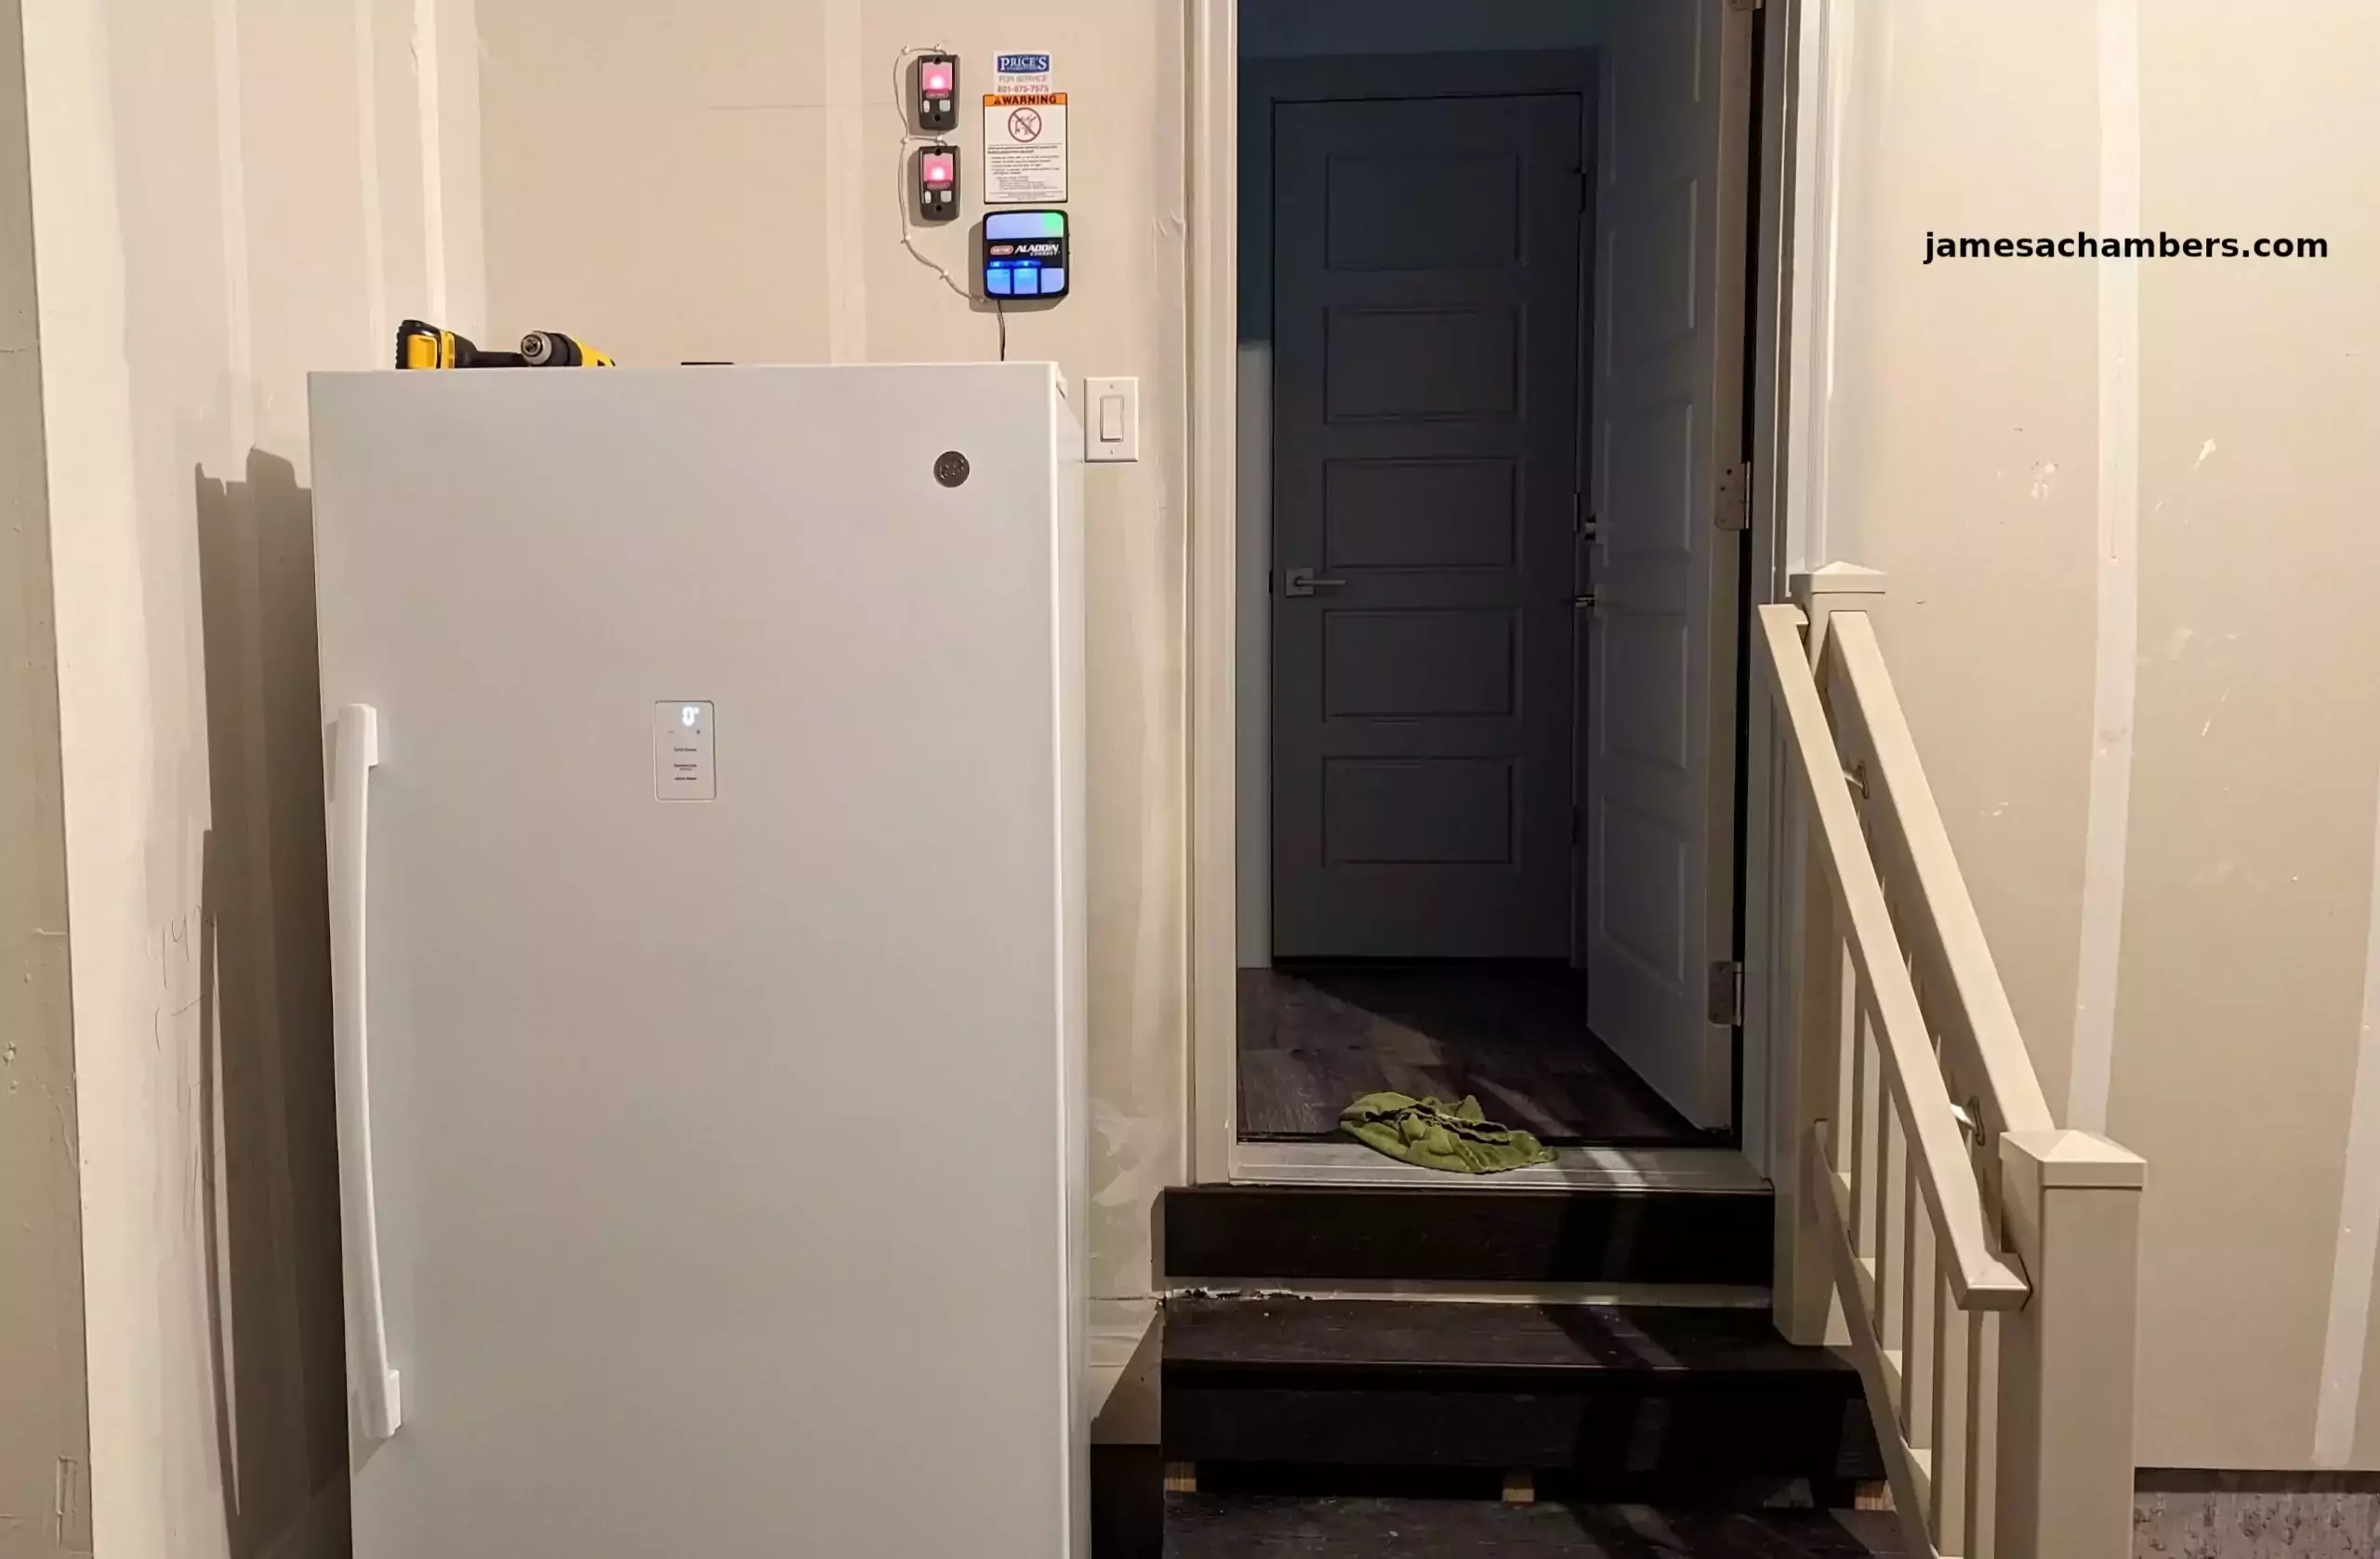
You can see everything is right up above my fridge. This was a convenient installation spot for me since there is a plug already back there to provide AC power for the Aladdin Connect.
Adding to Home Assistant
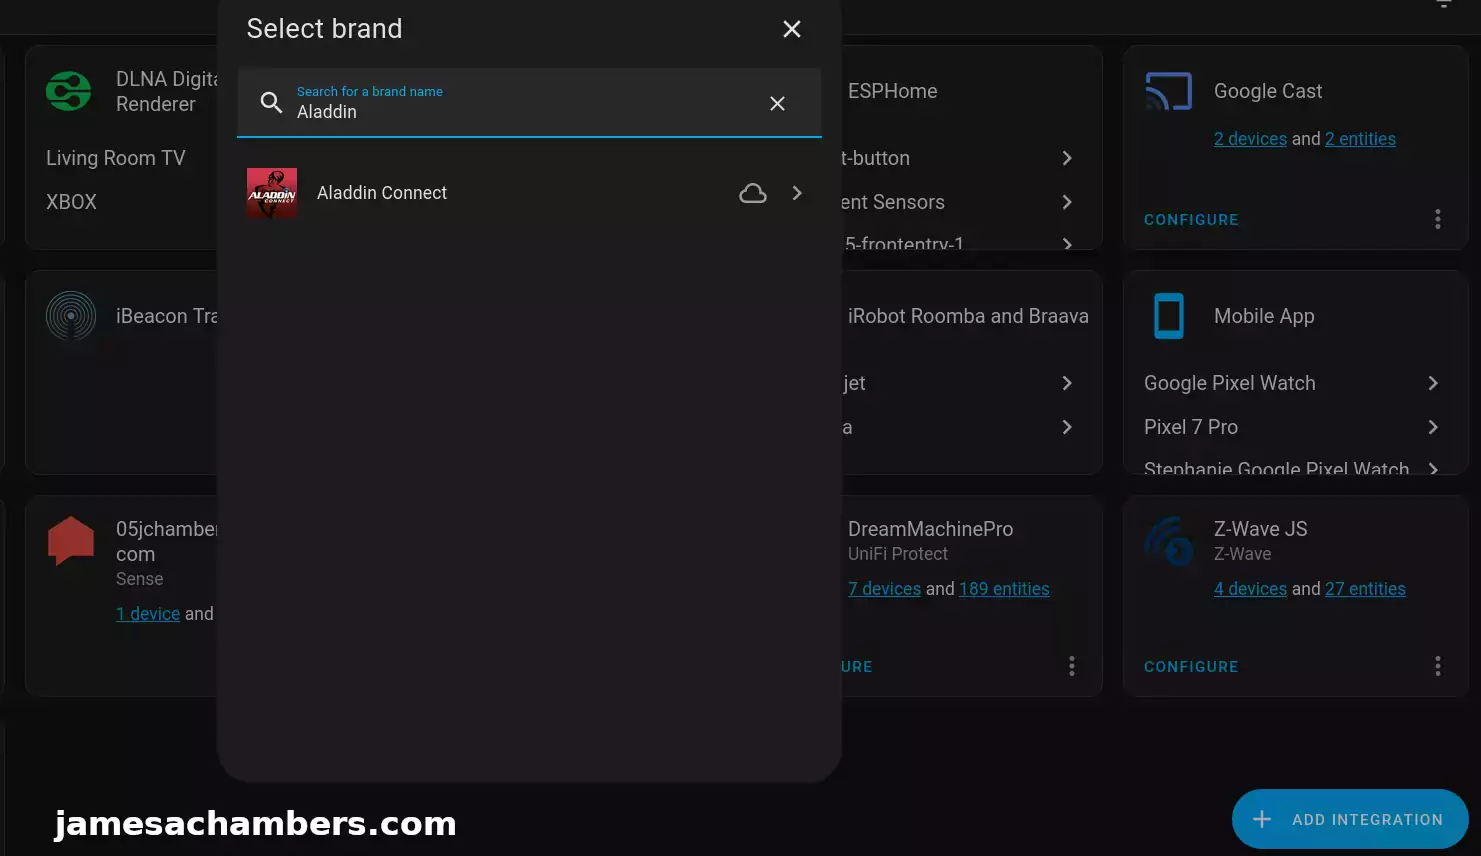
To add your garage doors to Home Assistant go to Settings -> Devices and Services. Click “Add Integration” in the bottom right of the screen and look for “Aladdin”:
Once you’ve added the integration the devices will show up in your Home Assistant instance like this:
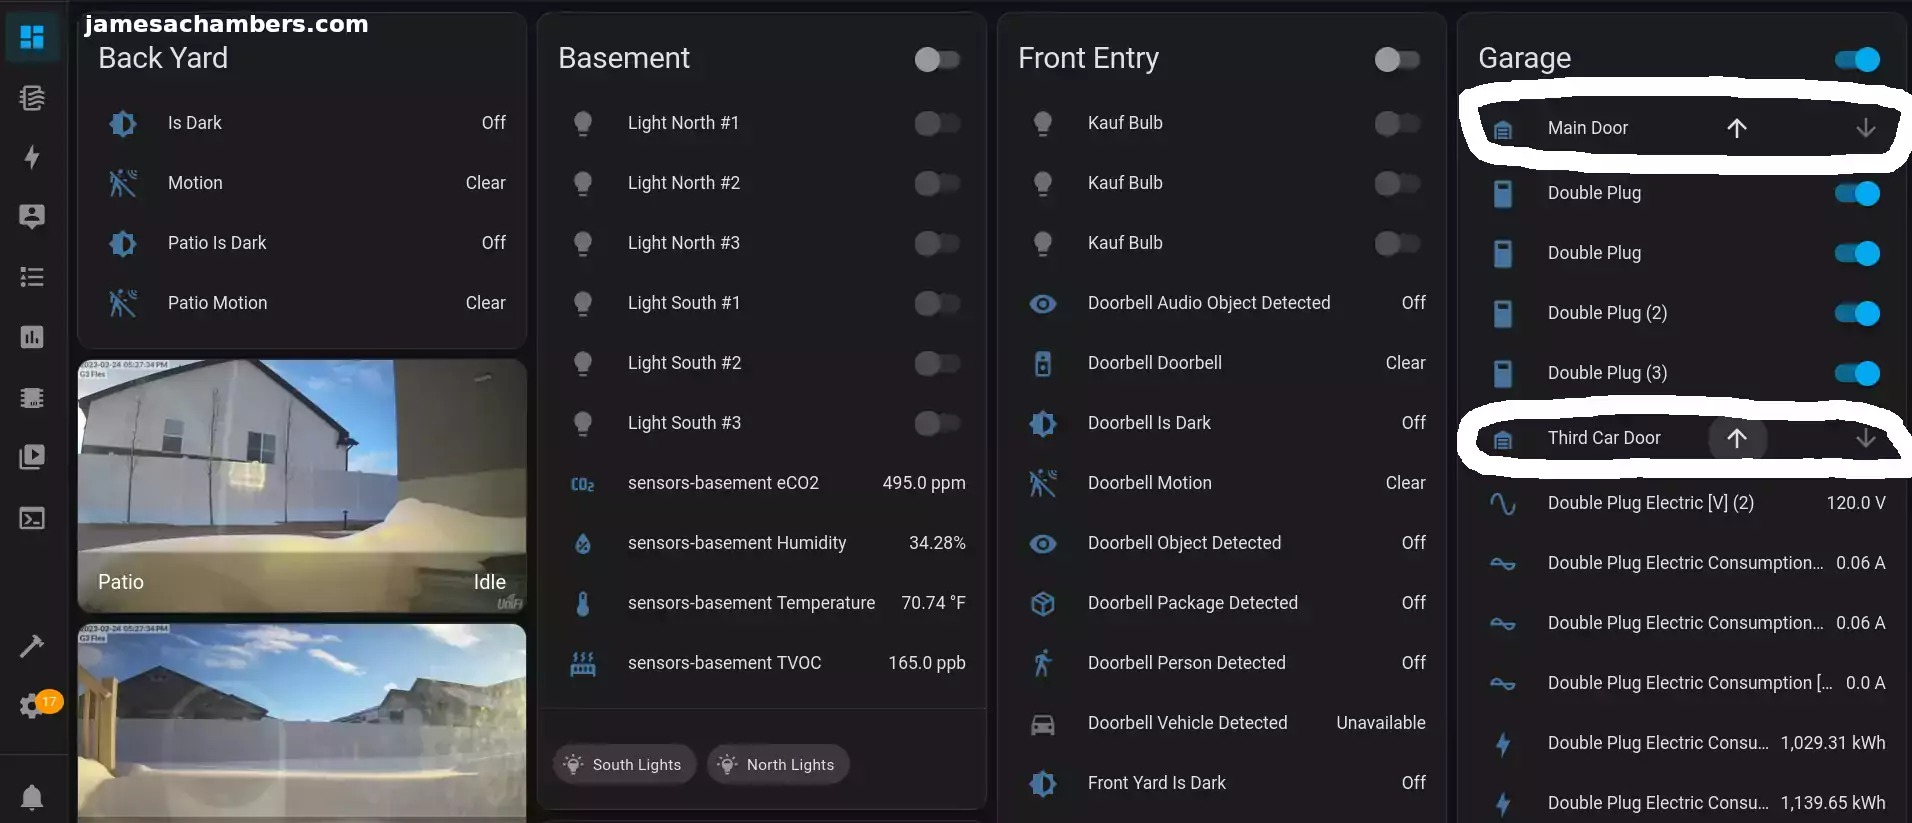
Not only do you get easy one click up and down arrows to open and close the garage. The arrows become dim and bright depending on whether the garage is already closed or not.
In other words you also get sensors. You can also tell the status of the doors within Home Assistant.
You can tell that both garage doors are already shut in the screenshot above because both of the up (or open) arrows are lit up bright white while the other ones are gray.
Conclusion
I’m very happy with how this turned out. I evaluated a lot of options such as using a ESP32 module like I’ve done to automate many other parts of my home. When I investigated this option though I really didn’t like what I was seeing or how it would turn out. I would have had to run a lot more wires, connect directly with both head units and a whole bunch of other things.
Of course if this device wasn’t supported by Home Assistant I wouldn’t have chose it. The smart home integration is actually really nice in this case and I found this to be an acceptable solution for my overall goal (which is having everything in my home be managed and controlled from Home Assistant).
My advice for anyone doing smart home upgrades like this is to evaluate the options and see what makes the most sense for you. I’d imagine that for most people who have an existing Genie system that doesn’t have smart capabilities that this will be the cheapest and best option for them. It will also give you the best final result.
Although this is still a proprietary solution it’s not subscription based which was an acceptable compromise for me for this system. If I have any trouble later on I’d likely replace the system with garage door head units that support the type of WiFi and smart home integration I want out of the box. Since this is only a 3 year old system though buying the upgrade made sense to me in this case!
I have more smart home upgrade articles coming such as my Zooz Z-wave door/window sensors that came today. I will be using these to replace my Ring door and window sensors as I’ve almost completely eliminated my need to keep paying for a Ring subscription. Keep an eye out for that coming soon!
Other Resources
Don’t miss the rest of my Home Assistant related articles here
I’ve also covered my smart lighting solution here using Kauf smart lights
I’ve also added environmental sensing capabilities to my home here


Do the existing garage door opener wireless control buttons still work and the homelike garage door openers in the car still work and / or do not need to be reprogramed.
Hey Jerry,
Yes on both counts. My original openers still work and the original buttons my garage door was installed with still work.
It’s basically just an add-on that gives you the ability to remotely control it if it makes sense. You don’t have to use the new buttons at all if you don’t want to (and I hardly do to be honest).
Hopefully that helps!
Thanks
Outstanding job James as it looks like a smarter idea updating your existing setup as opposed to going the alternative route using say Pico or ESP32 and I love how well it integrates with Home Assistant so well.
I’m not sure about others but I’m really digging these Home Assistant posts as you go into great detail explaining your process and the step by step guides are really informative so thank you and I can’t wait to see the next instalment of the series.
Hey Razor Burn,
Thanks so much, I’m glad you enjoyed it! I mentioned it here and there in the article but this was *not* what I was planning on doing originally. There are definitely ways with ESP32 and completely open-source and homebrew solutions I could have used to do this.
The truth is that there’s no way I could have done anything this clean with a homebrew solution without spending more money than this. All of my wiring is behind the walls and in the ceiling. The only wires in my garage are actually from what I just did on my upgrade and I chose this route to keep it to an absolute minimum. I could have ran it through the nice metal pipes and all of that but to go through behind the walls and through the ceiling is above my skill level to do DIY. It would have made the resulting product feel like a downgrade and introduced a bunch of other wiring/tubes/etc. that wasn’t there before and got rid of my clean look.
One upside is that it does appear to work without having to use the cloud. There’s a way to have it managed by alternative systems. I used the Aladdin Connect one because that was actually a really nice integration with Home Assistant. If that service ever went away though there are other options available with this device and that definitely helped/counted toward my decision to go with something like this instead of complete DIY.
The Z-wave one I have coming soon should be a lot more interesting to my general readers like you who follow the blog and aren’t coming here from searching something like “Genie garage home assistant” or something like that. I already have some existing Zooz Z-wave plugs which I haven’t covered yet on the site but are visible in some of the screenshots here. In the garage the “Double Plug” is actually a Zooz Z-wave plug / power monitor that lets you remotely turn it on and off and see the exact power usage in Home Assistant. I have a USB stick that gives the Home Assistant both Z-wave and Zigbee capabilities so I’ll cover that little stick as well on that one.
Thanks and take care!