
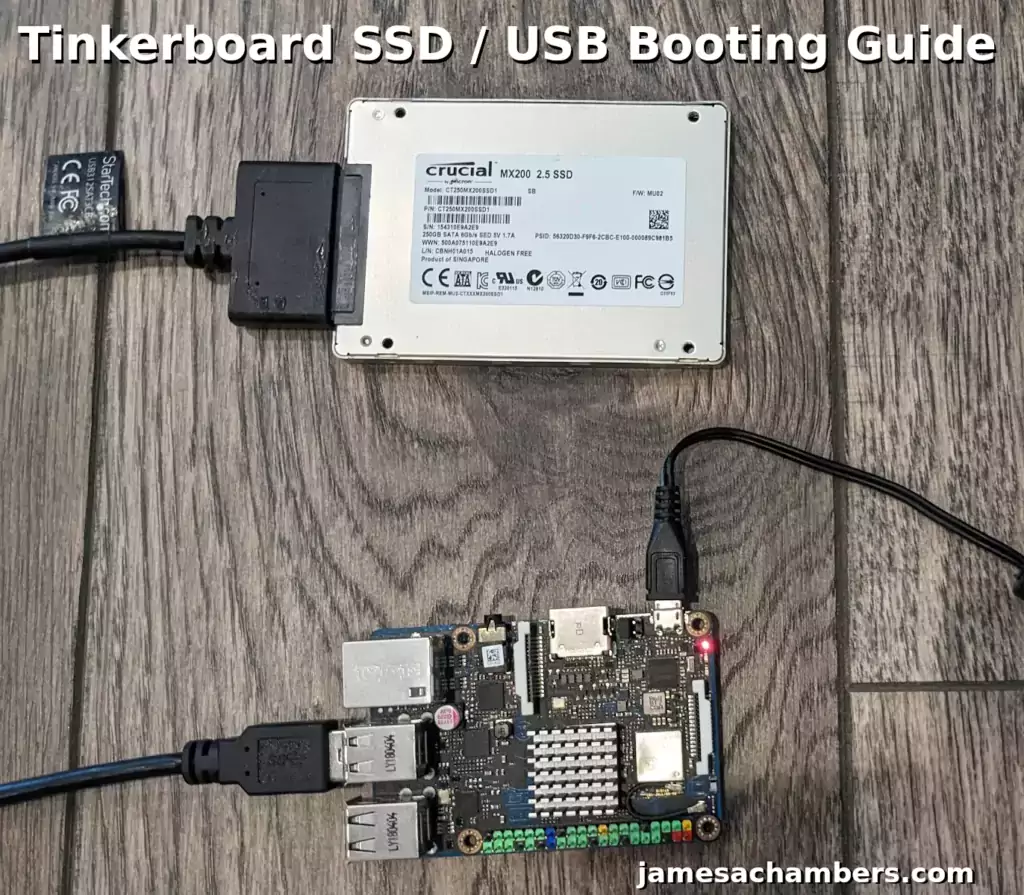
I recently wrote a getting started guide for the Tinker Board as even though the newer models tend to be quite expensive the older models can often be found for a lot cheaper. In this guide we are going to do something more advanced and are going to actually move our root filesystem to a SSD!
I have the original variant (the Tinker Board 1 S) and that is what I will be using for this guide but this should work on all Tinker Boards (including models without the eMMC). The Tinker Board 2 will have faster performance as the USB ports are USB 3.0 vs. USB 2.0 on the original Tinker Board. If you don’t have the S model with the eMMC this method will require a sacrificial SD card to serve as the bootloader.
This is an old method that I first covered for the Raspberry Pi before it supported native USB booting. I’ve also covered it here for the Orange Pi Zero 2. The SD card/eMMC serves as the bootloader but our root filesystem will be on the SSD. This is a fantastic method for any board that doesn’t natively support booting the OS from a USB storage device.
Let’s begin!
Hardware Used
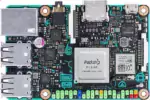
This is the original version of the Tinker Board. It contains a 1.8GHz Quad Core CPU, a 600MHz Mali-T764 GPU and 2GB DDR3 RAM. Less than half the cost of the new version (on Amazon) and still quite capable.
Links: Amazon.com*, AliExpress.com* (S version)
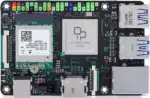
This is the fully loaded and newest version version of the board containing a 16GB eMMC as well as 4 GB of RAM. It’s a 6-Core 2.0 GHz Rockchip RK3399 single board computer. Also has Bluetooth 5.0 capabilities.
Links: Amazon.com*, AliExpress.com*
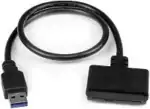
The StarTech USB 3.1 to 2.5″ SATA adapter is one I have recommended for many years for use with all kinds of devices including the Raspberry Pi, Orange Pi and Tinker Board. It’s widely compatible and works with gaming consoles as well.
Links: Amazon.com*, Amazon.ca*, Amazon.com.au*, Amazon.co.jp*, Amazon.co.uk*, Amazon.de*, Amazon.es*, Amazon.fr*, Amazon.it*, Amazon.nl*, Amazon.pl*, Amazon.se*, Amazon.sg*
The Sabrent powered USB hub delivers a whopping 2.5A of dedicated power for your USB attached devices. It will easily power the most thirsty of setups such as NVMe enclosures.
Links: Amazon.com*, Amazon.ca*, Amazon.com.au*, Amazon.co.uk*, Amazon.es*, Amazon.it*, Amazon.nl*, Amazon.pl*, Amazon.se*
Note: Make sure Amazon doesn’t try to take you to the non-powered version and that it’s the one with the AC adapter that plugs in to provide extra power
Preparing OS Image
I highly recommend using Armbian as the default images from ASUS are pretty outdated and using very old kernels.
We will start with a fully working installation on either your eMMC or your SD card. We will then clone this working installation to your SSD. Once we make a couple of configuration changes it will use eMMC/SD as the bootloader but your root filesystem will be on the SSD.
Install your chosen OS and then log into it using the Tinker Board and fully update it with:
sudo apt update && sudo apt full-upgradeReboot to apply updates and then you’re ready to proceed.
Preparing SSD
Now we are going to connect your SSD to the Tinker Board. First we are going to completely remove all partitions from the drive so it’s completely blank. If you only have one drive plugged into the Tinker Board (and nothing else) this should be /dev/sda.
sudo fdisk /dev/sda
Now remove all partitions from the device. If you press “p” it will print out the partitions. Here’s an example on mine:
root@linaro-alip:/dev# sudo fdisk /dev/sda

Welcome to fdisk (util-linux 2.33.1).
Changes will remain in memory only, until you decide to write them.
Be careful before using the write command.


Command (m for help): p
Disk /dev/sda: 232.9 GiB, 250059350016 bytes, 488397168 sectors
Disk model: CT250MX200SSD1
Units: sectors of 1 * 512 = 512 bytes
Sector size (logical/physical): 512 bytes / 4096 bytes
I/O size (minimum/optimal): 4096 bytes / 4096 bytes
Disklabel type: dos
Disk identifier: 0xe8ce0794

Device     Boot Start       End   Sectors   Size Id Type
/dev/sda1        8192 483491839 483483648 230.6G 83 Linux

Command (m for help): d
Selected partition 1
Partition 1 has been deleted.

Command (m for help): w
The partition table has been altered.
Failed to remove partition 1 from system: Device or resource busy

The kernel still uses the old partitions. The new table will be used at the next reboot.
Syncing disks.
Even though I got the device was busy error after unplugging and replugging the SSD the partition table was clear.
Once the drive is all cleared off you’re ready for the next step.
Cloning Installation to SSD
We’re now ready to clone your installation to the SSD. Whether you are using the SD card or eMMC the root filesystem should currently be /dev/mmcblk0.
We can now copy your drive to the SSD with the following command:
cat /dev/mmcblk0 > /dev/sda
Wait for the operation to complete (there won’t be any output but you will have a cursor again and be able to type new commands).
If you are having any trouble with permissions try becoming “root” first with:
sudo su
Now try running the command again and as the superuser you should not encounter any permission errors.
Change SD card’s UUID
Now unplug the SSD and plug it back in. We need to change our eMMC/SD card’s UUID so that it doesn’t try to boot from that partition. We can set it to a random one with the following command:
sudo tune2fs -O metadata_csum_seed -U random /dev/mmcblk0p1
We can verify that it has changed with blkid like this:
root@tinkerboard:/boot# sudo blkid
/dev/mmcblk0p1: LABEL="armbi_root" UUID="5df8ce50-c757-4c6d-9d08-b1fe646ada7f" BLOCK_SIZE="4096" TYPE="ext4" PARTUUID="a48b971e-01"
/dev/zram0: UUID="6f2bb524-e165-4610-a944-9af0ed295bdb" TYPE="swap"
/dev/zram1: LABEL="log2ram" UUID="40c10aef-ce36-4dd2-89cf-43d49a77a104" BLOCK_SIZE="4096" TYPE="ext4"
/dev/sda1: LABEL="armbi_root" UUID="d4f3fb44-5aa5-49f2-83c4-159fd7f2c2aa" BLOCK_SIZE="4096" TYPE="ext4" PARTUUID="a48b971e-01"
Notice that /dev/sda1 and /dev/mmcblk0p1 no longer have matching UUIDs. This is exactly what we want.
Run fsck
Before we reboot run e2fsck on the drive like this:
sudo e2fsck -yf /dev/sda1
This will prevent you from having to run fsck on the CLI the first time you try to boot.
Reboot and Verify
Now reboot the Tinker Board with:
sudo reboot
With any luck you should be booted using your SSD! We can verify this with the mount command like this:
root@tinkerboard:~# mount
/dev/sda1 on / type ext4 (rw,noatime,errors=remount-ro,commit=600)
/dev/sda1 on /var/log.hdd type ext4 (rw,noatime,errors=remount-ro,commit=600)
/dev/zram1 on /var/log type ext4 (rw,relatime,discard)
Here we can see that our root partition (/) is indeed on /dev/sda and not /dev/mmcblk0. Success!
Testing Performance
You can verify the performance of your SSD on Pi Benchmarks using the following command:
sudo curl https://raw.githubusercontent.com/TheRemote/PiBenchmarks/master/Storage.sh | sudo bash
I ran the benchmark with full knowledge that we were using USB 2.0 and were going to be limited in our score. If you have the Tinker Board 2 then you will likely score significantly higher than me:
Here are the results:
     Category                  Test                      Result
HDParm                    Disk Read                 34.14 MB/s
HDParm                    Cached Disk Read          34.33 MB/s
DD                        Disk Write                32.2 MB/s
FIO                       4k random read            2658 IOPS (10633 KB/s)
FIO                       4k random write           2661 IOPS (10647 KB/s)
IOZone                    4k read                   10661 KB/s
IOZone                    4k write                  10659 KB/s
IOZone                    4k random read            10611 KB/s
IOZone                    4k random write           10663 KB/s

                          Score: 2,406
You may view the full benchmark for the Tinker Board on Pi Benchmarks here.
To give some context here the maximum score you can achieve over USB 2.0 is something around 2500-2600 points. This is true on Raspberry Pi Model 3s and older which only have USB 2.0 ports. They also max out around the same score.
This is about twice as fast as even the most expensive/fast application class SD cards. That means it is absolutely worth it to use a SSD with the Tinker Board and even more so with the Tinker Board 2!
Conclusion
This will give your Tinker Board a pretty big I/O speed boost and access to much higher performance/capacity storage than the eMMC or SD cards will allow.
You can use either the eMMC or the SD card as the bootloader for this method and your rootfs will be stored on the SSD!
Other Resources
Don’t miss my Tinker Board Getting Started Guide if you haven’t already seen it
The Orange Pi Zero 2 is a great a relatively inexpensive SBC if you are looking for Raspberry Pi alternatives
If you are after screaming fast I/O speeds the ODROID M1 actually has a real M.2 NVMe slot!


Just want to say thanks for this – helped a lot. I used clonezilla to copy the data.
Thanks dicky!
Good evening James,
just installed an SSD on an old Tinkerboard, everything looks fine up to now.
Thank you very much!
Aldo
Hey Oldo,
That is fantastic, glad to hear it’s working well!
Hi James,
So yes – you were right – it is a boot partition issue…..
The device uses the PARTUUID (see below) – So I assume if I change the PARTUUID of the original root partition it should use my SSD as the PARTUUID of my SSD will be the original one….
Does seem a bit harder to change the PARTUUID – but will give it a go. Will let you know if this works.
fdt_addr=0x43000000image=Image
script=boot.scr
mmc_root="PARTUUID=70672ec3-5eee-49ff-b3b1-eb1fbd406bf5"
sd_root="/dev/mmcblk1p2"
# Check boot device to decide which root partition to use
if test ${bootdev} = 1; then
setenv root ${sd_root}
else
setenv root ${mmc_root}
fi
I used this answer to change the PARTUUID too, but this still didn’t force the use of the SSD root at boot when using ASUS’s standard Debian 10 O/S
Though had no problems – didn’t even need to change UUD – when using Armbian. Just needed to expand the size of the disk as answered already
Hi James,
Thanks for this article – just what I need… although it does not seem to be working for me
I am using a Tinker Board T
I have verified that the files have copied over and followed all instructions as above – without any errors
However – I tested by writing a text file to /media and the file is writing to my eMMC Driver
Below is my outputs from blkid , mount
Any reason why it won’t work?
Thanks!
mendel@undefined-finch:~$ sudo blkid/dev/mmcblk0: PTUUID="85b83f23-51c4-4403-8bac-906ff5800f4e" PTTYPE="gpt"
/dev/mmcblk0p1: UUID="989c59ff-512c-4909-a842-2c44c3f1cd7f" TYPE="ext2" PARTLABEL="boot" PARTUUID="595059e1-7b18-4e71-98f8-86b0ef75fe34"
/dev/mmcblk0p2: PARTLABEL="misc" PARTUUID="b876a2d0-50f1-4fbb-898f-c992e2c91775"
/dev/mmcblk0p3: UUID="d1293316-0447-40a0-a3b0-95d56f9c6c20" TYPE="ext4" PARTLABEL="home" PARTUUID="90461b8e-a5c1-42fd-8766-496c7e8678c9"
/dev/mmcblk0p4: UUID="930cd279-99a0-4f80-a8d0-e9f3d8eb7db3" TYPE="ext4" PARTLABEL="rootfs" PARTUUID="70672ec3-5eee-49ff-b3b1-eb1fbd406bf5"
/dev/sda1: UUID="c98cfd5d-d5f6-4161-8335-7f49e29ad3a4" TYPE="ext2" PARTLABEL="boot" PARTUUID="595059e1-7b18-4e71-98f8-86b0ef75fe34"
/dev/sda2: PARTLABEL="misc" PARTUUID="b876a2d0-50f1-4fbb-898f-c992e2c91775"
/dev/sda3: UUID="d1293316-0447-40a0-a3b0-95d56f9c6c20" TYPE="ext4" PARTLABEL="home" PARTUUID="90461b8e-a5c1-42fd-8766-496c7e8678c9"
/dev/sda4: UUID="930cd279-99a0-4f80-a8d0-e9f3d8eb7db3" TYPE="ext4" PARTLABEL="rootfs" PARTUUID="70672ec3-5eee-49ff-b3b1-eb1fbd406bf5"
mendel@undefined-finch:~$ mount
/dev/mmcblk0p4 on / type ext4 (rw,noatime,data=ordered)
devtmpfs on /dev type devtmpfs (rw,relatime,size=340164k,nr_inodes=85041,mode=755)
sysfs on /sys type sysfs (rw,nosuid,nodev,noexec,relatime)
proc on /proc type proc (rw,nosuid,nodev,noexec,relatime)
tmpfs on /dev/shm type tmpfs (rw,nosuid,nodev)
devpts on /dev/pts type devpts (rw,nosuid,noexec,relatime,gid=5,mode=620,ptmxmode=000)
tmpfs on /run type tmpfs (rw,nosuid,nodev,mode=755)
tmpfs on /run/lock type tmpfs (rw,nosuid,nodev,noexec,relatime,size=5120k)
tmpfs on /sys/fs/cgroup type tmpfs (ro,nosuid,nodev,noexec,mode=755)
cgroup2 on /sys/fs/cgroup/unified type cgroup2 (rw,nosuid,nodev,noexec,relatime,nsdelegate)
cgroup on /sys/fs/cgroup/systemd type cgroup (rw,nosuid,nodev,noexec,relatime,xattr,name=systemd)
pstore on /sys/fs/pstore type pstore (rw,nosuid,nodev,noexec,relatime)
cgroup on /sys/fs/cgroup/blkio type cgroup (rw,nosuid,nodev,noexec,relatime,blkio)
cgroup on /sys/fs/cgroup/cpu,cpuacct type cgroup (rw,nosuid,nodev,noexec,relatime,cpu,cpuacct)
cgroup on /sys/fs/cgroup/perf_event type cgroup (rw,nosuid,nodev,noexec,relatime,perf_event)
cgroup on /sys/fs/cgroup/devices type cgroup (rw,nosuid,nodev,noexec,relatime,devices)
cgroup on /sys/fs/cgroup/cpuset type cgroup (rw,nosuid,nodev,noexec,relatime,cpuset)
cgroup on /sys/fs/cgroup/freezer type cgroup (rw,nosuid,nodev,noexec,relatime,freezer)
cgroup on /sys/fs/cgroup/pids type cgroup (rw,nosuid,nodev,noexec,relatime,pids)
cgroup on /sys/fs/cgroup/memory type cgroup (rw,nosuid,nodev,noexec,relatime,memory)
cgroup on /sys/fs/cgroup/net_prio type cgroup (rw,nosuid,nodev,noexec,relatime,net_prio)
cgroup on /sys/fs/cgroup/hugetlb type cgroup (rw,nosuid,nodev,noexec,relatime,hugetlb)
mqueue on /dev/mqueue type mqueue (rw,relatime)
hugetlbfs on /dev/hugepages type hugetlbfs (rw,relatime,pagesize=2M)
debugfs on /sys/kernel/debug type debugfs (rw,relatime)
configfs on /sys/kernel/config type configfs (rw,relatime)
/dev/mmcblk0p1 on /boot type ext2 (rw,noatime,errors=continue)
/dev/mmcblk0p3 on /home type ext4 (rw,nosuid,nodev,noatime,data=ordered)
tmpfs on /run/user/1000 type tmpfs (rw,nosuid,nodev,relatime,size=100928k,mode=700,uid=1000,gid=1000)
mendel@undefined-finch:~$
Hey Francois,
Welcome! So it looks like your UUIDs are matching still. You can see this in the blkid step:
/dev/mmcblk0p4: UUID="930cd279-99a0-4f80-a8d0-e9f3d8eb7db3" TYPE="ext4" PARTLABEL="rootfs" PARTUUID="70672ec3-5eee-49ff-b3b1-eb1fbd406bf5"/dev/sda4: UUID="930cd279-99a0-4f80-a8d0-e9f3d8eb7db3" TYPE="ext4" PARTLABEL="rootfs" PARTUUID="70672ec3-5eee-49ff-b3b1-eb1fbd406bf5"
These cannot match as that is the whole way this trick works. Oh wait, I see what happened here, you followed the instructions a little bit too literally (which are for Armbian and uses different partitioning) and used /dev/mmcblk0p1 when your operating system has 4 partitions. You basically changed the “boot” partition’s UUID instead of the root partition.
With your operating system the root partition (and the one we will change) is /dev/mmcblk0p4. It isn’t going to be the same for every operating system for sure. It is always going to be your root partition though (shows up in the mount command as ‘/’ or the rootfs label) that you need to change. This is labeled on your mount command:
/dev/mmcblk0p4 on / type ext4 (rw,noatime,data=ordered)Basically the method is exactly the same but look closely at your mount command and make sure that your commands you are typing in actually match the partition layout your operating system is using. There is no guide where you will be able to literally type the same partition IDs such as sda1, sda2 etc. since they are different between the various operating systems.
No matter what operating system it is this method will basically make it mount the root partition of the SSD instead of the SD card (which is why the SD card root partition needs to be changed). Once you change the UUID the OS won’t find it and will only find the SSD’s root partition instead. It’s a trick essentially. It doesn’t know or care which device the partition is on with most boards / operating systems these days and is typically mounted purely by that UUID.
That is why it doesn’t matter that the board doesn’t officially/natively support it as long as you are willing to sacrifice a SD card to kick start the boot process. While most operating systems can easily handle their root partition being on other devices the same cannot be said for the boot loader / boot partition as many / most single board computers *are* hard coded to at least start booting from those places. After that initial step it can be “handed off” to another device. It’s basically the same way we did it before the Pi and other boards that don’t need a sacrificial SD/eMMC had official boot loader support to natively boot from SSDs and other USB mass storage devices. It will require some minor tweaks though as discussed but you should still be able to accomplish what you’re trying to do.
To understand what I mean check out my Rock Pi 4C+ SSD boot guide. That one is *almost* the same as your partitioning layout but on that guide it is actually partition 5 instead of 4. You can see that guide though to understand what I mean by you can use this method of SSD booting between different operating system partitioning layouts (and in fact different boards entirely, this trick works especially well on boards that don’t natively support USB MSD / SSD booting).
Funny enough on that guide in the comments the problems people were having were they were trying to use Armbian (which I actually used in this guide) while for that guide I used an operating system that had a lot more partitions (much more similar to what you are using) so you can see what I mean that there is no perfect way to write these where it will match everyone’s partitioning layout (and in fact there can sometimes even be some subtle differences between operating systems that may require you to change some things on the “boot” partition in some cases as was the case in that guide’s comments for some people).
It kind of just depends which OS I happened to be using when I wrote the guide as to how closely it will match what each person is using unfortunately (which is why I try to teach the method/technique when I can instead of necessarily the exact same line for line instructions that can be repeated for every install which is impossible).
That guide is a lot closer of a match to your operating system’s partitioning layout but it is the exact same method/technique as this guide. You could follow that one for your OS as well if you swapped out the partition 5 for partition 4 if that makes sense. The method/technique is what is more useful to learn as you can typically use it on any device once you understand what the underlying “trick” is doing basically (in a nutshell we clone the original device to the SSD from eMMC/SD and then we change the original device’s root partition UUID so that /etc/fstab won’t find it but will find your SSD which still has the original UUID and will get mounted instead without requiring any special device/bootloader support).
I think that if you try running the UUID command on your root partition that it will be good to go. Hopefully that helps!
Hi James, thanks so much for taking the time with such an good explanation 🙂 Makes sense
I am however getting the below error when trying to change the UID of my root partition….
root@undefined-finch:/home/mendel# sudo tune2fs -U random /dev/mmcblk0p4
tune2fs 1.44.5 (15-Dec-2018)
Setting the UUID on this filesystem could take some time.
Proceed anyway (or wait 5 seconds to proceed) ? (y,N) y
The UUID may only be changed when the filesystem is unmounted.
If you only use kernels newer than v4.4, run ‘tune2fs -O metadata_csum_seed’ and re-run this command.
root@undefined-finch:/home/mendel#
Not sure if its safe to unmount the root partition….?
Hey Francios,
Interesting. You actually have to do what it is telling you to do and run the command that way. I’ve seen this before on other operating systems.
In that case run the command like this:
sudo tune2fs -O metadata_csum_seed -U random /dev/mmcblk0p4I’ll add that flag to this guide’s tutorial (it’s in the Rock Pi 4C+ one). Thanks for letting me know!
Hi James…making progress thanks…but not there yet 🙂
The Id’s are now different – as you can see below – but it is still mounting the wrong root
mendel@undefined-finch:/media$ sudo blkid/dev/mmcblk0: PTUUID="85b83f23-51c4-4403-8bac-906ff5800f4e" PTTYPE="gpt"
/dev/mmcblk0p1: UUID="af901b57-1dc5-43c2-a68b-a0e72ef934ca" TYPE="ext2" PARTLABEL="boot" PARTUUID="595059e1-7b18-4e71-98f8-86b0ef75fe34"
/dev/mmcblk0p2: PARTLABEL="misc" PARTUUID="b876a2d0-50f1-4fbb-898f-c992e2c91775"
/dev/mmcblk0p3: UUID="d1293316-0447-40a0-a3b0-95d56f9c6c20" TYPE="ext4" PARTLABEL="home" PARTUUID="90461b8e-a5c1-42fd-8766-496c7e8678c9"
/dev/mmcblk0p4: UUID="19dc84cc-4a29-45a4-97b3-f0f1bb5ba7cd" TYPE="ext4" PARTLABEL="rootfs" PARTUUID="70672ec3-5eee-49ff-b3b1-eb1fbd406bf5"
/dev/sda1: UUID="af901b57-1dc5-43c2-a68b-a0e72ef934ca" TYPE="ext2" PARTLABEL="boot" PARTUUID="595059e1-7b18-4e71-98f8-86b0ef75fe34"
/dev/sda2: PARTLABEL="misc" PARTUUID="b876a2d0-50f1-4fbb-898f-c992e2c91775"
/dev/sda3: UUID="d1293316-0447-40a0-a3b0-95d56f9c6c20" TYPE="ext4" PARTLABEL="home" PARTUUID="90461b8e-a5c1-42fd-8766-496c7e8678c9"
/dev/sda4: UUID="af40b917-05b7-4892-a792-f3420ba5053e" TYPE="ext4" PARTLABEL="rootfs" PARTUUID="70672ec3-5eee-49ff-b3b1-eb1fbd406bf5"
mendel@undefined-finch:/media$
I had a look and there were some entries in fstab…
/dev/mmcblk0p4 / ext4 noatime,defaults 0 1/dev/mmcblk0p1 /boot ext2 noatime,defaults 0 2
/dev/mmcblk0p3 /home ext4 noatime,nosuid,nodev,defaults 0 3
I updated fstab trying both of the below….but still having the same result of the original rootfs mounting
/dev/sda4 /root ext4 noatime,defaults 0 1/dev/mmcblk0p1 /boot ext2 noatime,defaults 0 2
/dev/mmcblk0p3 /home ext4 noatime,nosuid,nodev,defaults 0 3
UUID=af40b917-05b7-4892-a792-f3420ba5053e /root ext4 defaults 0 1
/dev/mmcblk0p1 /boot ext2 noatime,defaults 0 2
/dev/mmcblk0p3 /home ext4 noatime,nosuid,nodev,defaults 0 3
Hey Francios,
The answer for this one is probably going to be in your boot partition (/boot or /dev/mmcblk0p1). Most likely there are configuration files in the /boot folder also telling it to boot from SSD.
I would say whatever this OS is isn’t a good candidate for this. It looks like it doesn’t work the modern way most operating systems work like I was alluding to in my earlier posts where it mounts by UUID. It looks like it has one UUID in /etc/fstab but I’m guessing there are all kinds of files in your /boot partition that override anything you’re doing most likely.
I’d definitely check the /boot partition on this one as it is overriding everything you are doing with this OS. If it’s the default Linaro I’d definitely not really recommend using that as it was quite outdated from what I could see (although maybe the newer models have better OS versions available). I looked at the default official Linaro downloads for the original Tinker Board and dismissed them out of hand as way too old to the point of being ancient. That’s definitely why I wrote this one for Armbian as the official OS for my board at least is too old to be used.
It only took me about 20 minutes to set this up using Armbian and to be honest if I saw a OS that was configured like that with so many hard-coded paths I would use a different one. I understand that’s not always possible but if it is then it could only benefit you to switch from whatever this is. Debian/Armbian/Ubuntu/any modern Linux flavor does not work this way and hasn’t for nearly a decade and at least 5+ years if we’re being kind for sure.
This one looks like it needs more configuration! Everything is hard coded into this OS which is a nightmare for just about everyone and the exact reason that nobody makes their operating system work this way anymore on any modern OS/flavor. Hopefully that helps!
This is Mendel Linux by Google It is the OS that is recommended and downloadable from the Tinker website
…well at least for the Tinker Edge T
Hey Francios,
It’s using uboot like Armbian does. People have successfully modified their uboot in my ODROID N2+ SSD boot guide similarly to give an example.
I’ve helped someone do this before here. It’s not easy if you have never done anything like it before. Basically you would edit /boot/boot.cmd and find the /dev/mmcblk0p4 entry wherever it is and change it. After that you have to rebuild your boot file with:
mkimage -C none -A arm -T script -d /boot/boot.cmd /boot/boot.scrThis is pretty much what it will take for this one to get working I think. Hopefully that helps!
Thanks – Only saw this comment now – so posted one before I read this…
Hey Francois,
Beautiful, that is exactly it! I think this is the last piece and should take care of it for you for sure.
Hi James – So I got the rootfs mounted on the SSD and all is working – the only issue I’m having now is that the copied partition on the 240 GB SSD is showing up as a 5.3 GB Drive and almost full ( That was obviously the original partition size ). When I look at the drive properties is shows as a 5.3GB Drive – but when I open it under disks it shows a single volume with 240GB…. any idea to resolve this?
Hey Francois du Toit,
Every OS has scripts built in to do this on the first startup. They just aren’t running automatically because it thinks you’ve already had your first startup (because we cloned an existing install). We can still trigger these to run manually though. On Armbian you can probably do it from armbian-config or you can also do:
sudo systemctl enable armbian-resize-filesystemsudo reboot
Your OS can’t be mounted when you are resizing the partition which is why you use the startup scripts to do it at startup if that makes sense. Hopefully that helps!
…thanks..any idea how I would do this on mendel?
Hey Francois,
I’m honestly not sure. The people you should be asking are probably the Mendel Linux people. I didn’t see anything in a quick search on how to do anything like this on there. I bet they would tell you this is completely unsupported.
I’ve written scripts to do this before on things like the ODROID M1 but you need a startup service to do it from within the OS. It almost certainly has one otherwise your SD card installation would be the exact same way but I don’t know what it is nor do I see any documentation on it.
You could always just put it in a different Linux PC and do it manually. You won’t be able to do it on the device itself this way though. If you put it in a different Linux PC and run gparted on it you could just resize the partition that way. That may be the best bet since I’m guessing you’re the only person that has ever tried to do this with that Linux before. Hopefully that helps!
mmm…so I opened fdisk to check the partition… and got this message….
The old ext4 signature will be removed by a write command.
Device does not contain a recognized partition table.
Created a new DOS disklabel with disk identifier 0x92fe07bd.
Now it wont boot… Honeslty – I would just install Armbian – but have not had luck getting it to run on the Tinker Edge T….
Hey Francois,
It gets really complex for sure. If that OS uses GPT partition tables then yes fdisk will kill it and you would want to use gdisk. It looks like it just obliterated the boot partition. You’d probably have to start over and clone again for that one.
I would say if you’re really determined to get this one going what I would do is try cloning again into the working state with the tiny partition like you had before. Now shut down and plug the disk into a different system and run gparted on it (it’s graphical so you can see it and literally size the bars to change it, it’s nice). This should safely resize it even if it is using GPT partitions (it sounds like it is to me).
I think this would work given how far you got before but that the partition size was wrong. Mendel isn’t giving us an easy way to resize this so let’s just use gparted and bypass that completely. Hopefully that gets it for you!
Yeah – will have to start over….again…lol. Ok – so let me get everything working again and will try with gparted as you suggested. Will keep you posted 🙂
Hey Francois,
I admire your spirit and I think you will succeed. It honestly sounds like you already had it but we just have no idea how Mendel would resize the partition for us or how we could manually trigger that process (so let’s try cheating and using a different machine to do it).
Note that after you resize it with gparted and boot up the partition might still be small but it will be for a different reason. That is because we still need to run resize2fs. That would look something like:
sudo resize2fs /dev/sda2Then after a reboot it should be seeing all available space. Note that you may need to adjust the device labels but just change them to whichever partition is tiny that should be large etc.
Best of luck, I look forward to hearing how it turns out!
Success!!! That worked 🙂 All looks good and all partitions sizes are correct. I’ll do some testing to make sure nothing blows up. But so far so good. Thanks allot for all your help – really appreciate it.
PS: I did not have to run resize2fs – below is my output from df -h and lsblk after reboot
Filesystem Size Used Avail Use% Mounted on/dev/root 237G 2.1G 223G 1% /
devtmpfs 349M 0 349M 0% /dev
tmpfs 517M 0 517M 0% /dev/shm
tmpfs 517M 20M 497M 4% /run
tmpfs 5.3M 4.1k 5.3M 1% /run/lock
tmpfs 517M 0 517M 0% /sys/fs/cgroup
/dev/mmcblk0p3 2.1G 6.4M 2.0G 1% /home
/dev/mmcblk0p1 130M 33M 91M 27% /boot
tmpfs 104M 4.9M 99M 5% /run/user/1000
NAME MAJ:MIN RM SIZE RO TYPE MOUNTPOINT
sda 8:0 0 223.6G 0 disk /
mmcblk0 179:0 0 7.3G 0 disk
├─mmcblk0p1 179:1 0 128M 0 part /boot
├─mmcblk0p2 179:2 0 1M 0 part
├─mmcblk0p3 179:3 0 2G 0 part /home
└─mmcblk0p4 179:4 0 5.1G 0 part
mmcblk0boot0 179:32 0 4M 1 disk
mmcblk0boot1 179:64 0 4M 1 disk
mmcblk0rpmb 179:96 0 512K 0 disk
Hey Francios,
Great work! That’s fantastic that it didn’t need the resize2fs and I’m glad that wasn’t necessary. I just wanted to throw it in there in case it was so you didn’t do all of that work and get stuck on that last step. It sounds like gparted handled it well for us.
Mounts look good to go. Congratulations on being the first (that I know of or can find any record of on the internet) person to do this with Mendel, enjoy and take care!