

Official support from Canonical for the Raspberry Pi has come a long way. We can now install officially supported Ubuntu on the Pi! In my previous guide for Ubuntu 18.04 on the Pi the Raspberry Pi was not officially supported yet and to be honest the experience was pretty janky.
The previous LTS “unofficial” release had so many problems I actually rolled my own image with dozens of fixes to common ailments before I quickly realized that maintaining a Linux distro, even in such a limited capacity as patching in and distributing fixed binaries, was a monumental undertaking.
Fortunately the current Ubuntu 20.04 LTS release is officially certified for the Raspberry Pi. This combined with Ubuntu’s full 64 bit userland/system environment allows you to take full advantage of the 8 GB Pi’s memory without per-process 3GB memory limits (very useful if you are doing something like running a Minecraft server and want to allocate almost all of the 8 GB to it) means there has never been a better time to give Ubuntu a try on the Pi.
This guide takes it a step further and shows you how to get Ubuntu 20.04 / 20.10 / 21.04 / etc. working with a SSD. Let’s get started!
Equipment Used

The Kingston A400 has been a great drive to use with the Pi for years. It’s reliable, widely available around the world, has low power requirements and performs very well. It’s also very affordable. This drive has been benchmarked over 1000 times at pibenchmarks.com and is the #1 most popular SSD among the Pi community!
Links: AliExpress*, Amazon.com*, Amazon.ca*, Amazon.com.au*, Amazon.co.jp*, Amazon.co.uk*, Amazon.de*, Amazon.es*, Amazon.fr*, Amazon.it*, Amazon.nl*, Amazon.pl*, Amazon.se*, Amazon.sg*
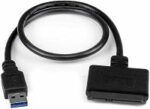
The USB 3.1 variant of the StarTech 2.5″ SATA adapter works well with the Pi 4. The USB 3.0 variant doesn’t have firmware updates available and is not recommended.
Links: Amazon.com*, Amazon.ca*, Amazon.com.au*, Amazon.co.jp*, Amazon.co.uk*, Amazon.de*, Amazon.es*, Amazon.fr*, Amazon.it*, Amazon.nl*, Amazon.pl*, Amazon.se*, Amazon.sg*
NVME Option (powered USB hub required, see “Power Requirements” section in my more generalized Raspberry Pi 4 USB booting guide):
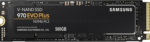
The Samsung 970 EVO Plus is a fantastic drive and has fallen in price substantially. It’s widely available around the world. The smaller capacities (such as the 250GB version) of this drive are perfect for the Pi! This is the top performance option without going into the “Pro” series of the lineup which are much more expensive.
Links: AliExpress*, Amazon.com*, Amazon.ca*, Amazon.com.au*, Amazon.co.jp*, Amazon.co.uk*, Amazon.de*, Amazon.es*, Amazon.fr*, Amazon.it*, Amazon.nl*, Amazon.pl*, Amazon.se*, Amazon.sg*
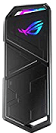
If you really want to take things over the top the ASUS Rog Strix M.2 NVMe enclosure uses the latest USB 3.2 Gen2 specification, is RGB capable and works with the Pi! Unsurprisingly, adding the extra lighting does take extra power! A powered USB hub is also required for this enclosure. More widely available than the ICY BOX but tends to be on the expensive side.
Links: AliExpress*, Amazon.com*, Amazon.ca*, Amazon.com.au*, *Amazon.co.jp*, Amazon.co.uk*, Amazon.de*, Amazon.es*, Amazon.fr*, Amazon.it*, Amazon.nl*, Amazon.pl*, Amazon.se*, Amazon.sg*
Prerequisites
Verify Power Supply Size (3.5A strongly recommended)
Check your Raspberry Pi’s power supply size and make sure it is delivering at least 3.5A. There are a lot of USB C adapters for the Raspberry Pi that are only 3.0A. These will typically work fine, until you plug in something like a SSD which draws power from the Pi and there is nothing left to give.
Most SSDs are quite power efficient but HDDs draw significantly more. Older generations of SSDs used quite a bit more power than newer ones as well. If you are using an older drive or a drive that you know is power hungry you need to pay extra attention to having a quality power source with plenty of capacity.
A good alternative option to relying on the Pi to power the drive is using a powered USB hub* so your drive doesn’t need to draw power from the Pi’s limited power budget. Make sure you get one that is compatible with the Pi as some powered USB hubs won’t work properly with it so check the reviews and do your research to make sure people are using it successfully with the Pi.
Using a 3.5A power supply* or powered USB hub* will ensure your drive is getting enough power without impacting the Pi’s stability.
Recommended Power Solutions
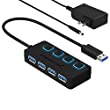
The Sabrent powered USB hub delivers a whopping 2.5A of dedicated power for your USB attached devices. This is almost as much as the Pi adapter itself is rated for (3.0A). It will easily power the most thirsty of setups such as NVMe enclosures.
Links: Amazon.com*, Amazon.ca*, Amazon.com.au*, Amazon.co.uk*, Amazon.es*, Amazon.it*, Amazon.nl*, Amazon.pl*, Amazon.se*
Note: Make sure Amazon doesn’t try to take you to the non-powered version and that it’s the one with the AC adapter that plugs in to provide extra power

The CanaKit 3.5A adapter has an extra half an amp (500 mA) of capacity to give some breathing room to your accessories. This is bigger than the official Pi power supply which provides 3.0A.
Links: Amazon.com*, Amazon.ca*, Amazon.com.au*, Amazon.sg*
Verify Storage Adapter Compatibility
You will need a USB 3.0 storage adapter. See my other article on USB booting not specific to Ubuntu for a lot more details on the storage adapters!
Get Latest Raspbian & Updates
To update your bootloader / firmware you should use Raspbian on a SD card. Right now support in third party operating systems to do anything with the new Raspberry Pi 4’s firmware or bootloader is very limited / nonexistent. You can use a third party operating system later once you set the boot mode, but to actually make these changes we will use official Raspbian.
First make sure that you have the absolute latest updates and firmware for the Pi. To upgrade all your packages and firmware to the latest version use the following command:
sudo apt update && sudo apt full-upgrade -y
Once the update has completed restart your Pi with a sudo reboot command to apply the latest firmware / kernel updates.
Verify EEPROM Bootloader is up to date
We can check if your Pi’s bootloader firmware is up to date with the following command:
sudo rpi-eeprom-updateIf your Raspbian is *very* out of date you may not have this utility and can install it using:
sudo apt install rpi-eepromThe output from rpi-eeprom-update will look like this if you are not up to date:
BCM2711 detected
VL805 firmware in bootloader EEPROM
*** UPDATE AVAILABLE ***
BOOTLOADER: update available
CURRENT: Thu 3 Sep 12:11:43 UTC 2020 (1599135103)
LATEST: Tue 24 Nov 15:08:04 UTC 2020 (1606230484)
FW DIR: /lib/firmware/raspberrypi/bootloader/beta
VL805: up-to-date
CURRENT: 000138a1
LATEST: 000138a1
If it says any updates are available they be installed manually by adding ‘-a’ to the end of our previous command like this:
sudo rpi-eeprom-update -aAfter the updates finish installing restart your Pi as firmware updates will not be applied until after a reboot. Now if you run rpi-eeprom-update to check for updates again it should say you are on the latest and up to date!
Changing rpi-eeprom’s Release Channel
Note: As of February 16th the firmware available in the “critical” branch is new enough to USB boot so I no longer recommend changing this. One reader even let me know in the comments that on the “stable” channel his storage was getting corrupted prompting a full reinstall!
By default you will only receive updates from Raspbian’s “critical” channel. This is a very conservative firmware update channel that will only give you very well tested firmware updates that are considered critical fixes for the device. Another channel that is available is “stable”.
Carlos and other commenters have reported that the current “critical” firmware didn’t work for them and they had to upgrade to the “stable” channel.
To switch to the stable channel we are going to edit the file /etc/default/rpi-eeprom-update:
sudo nano /etc/default/rpi-eeprom-updateChange the line FIRMWARE_RELEASE_STATUS=”critical” to:
FIRMWARE_RELEASE_STATUS="stable"
Now you can run sudo rpi-eeprom-update and you should see a new update available.
Install Ubuntu on USB Storage Device
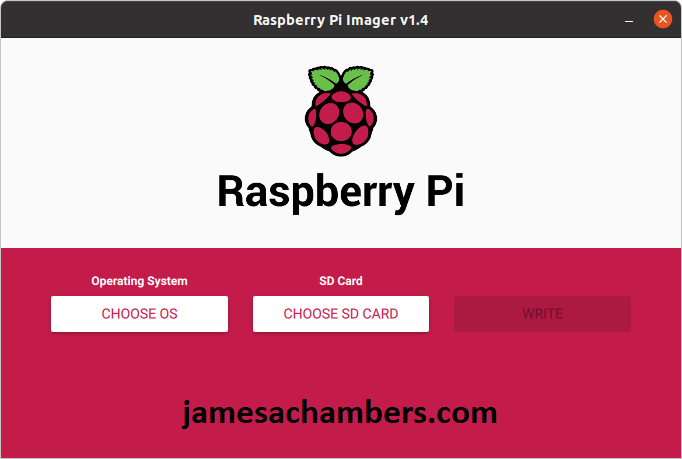
The new official Raspberry Pi imaging tool is really good. It’s available on Windows, Linux and MacOS and is a small and fast download. It also works fine on most USB mass storage devices like SSDs. Since Ubuntu is now officially supported the image itself is also available in this tool which saves you the trouble of having to find and download the right image files.
64 bit images are recommended for the Pi 4 for better performance but the 32 bit images work as well.
If you want to do things the traditional way you can download the image from the main Ubuntu site and write it yourself using Etcher / dd / Win32diskimager / your preferred tool and skip to the next section. It’s recommended to create the media with the Raspberry Pi Imager unless you are having problems with that utility or are using this as a troubleshooting step.
Once you’ve downloaded the tool run it as administrator/sudo to avoid permission errors. To run the utility from the command line is usually sudo rpi-imager. You’ll be greeted with this screen:
Next click the “Choose OS” button:
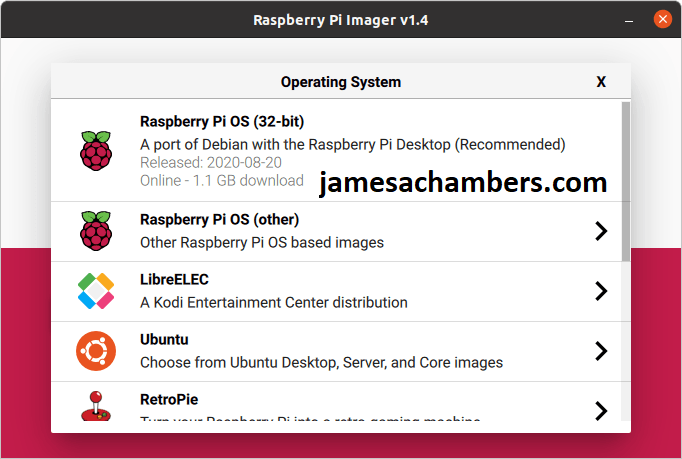
Ahh, the benefits of being officially supported! Ubuntu is right there on the list waiting for us. Select the Ubuntu option and you will get the different choices of flavors/architectures. There’s Ubuntu Desktop, Ubuntu Server, and Ubuntu Core in various forms of 64-bit (arm64) and 32-bit (armhf).
If you want to use the out-of-the-box Ubuntu Desktop edition you need to use the 64 bit Ubuntu 20.10 image as they never made a 20.04 desktop version for some reason. This really isn’t usually a big deal though because you can always choose the “Server” version and install Ubuntu’s desktop environment later with:
sudo apt install ubuntu-desktopOnce you’ve selected the edition you want go ahead and pick the “Choose SD Card” option and write the image. Despite not being a SD card my USB mass storage devices showed up anyway (writing the guide I used a StarTech adapter and a Kingston A400 SSD).
I’m sure some of you will manage to find unusual devices and configurations that may not show up in this tool. It doesn’t appear to show “fixed drives” that are physically installed in your machine. Regardless if it is causing a headache you may need to do it the old fashioned way and download the image from the main Ubuntu site and write the image using your favorite imaging tool instead.
Modifying Ubuntu for USB Booting
We need to make some changes to the Ubuntu drive we just created before we boot from it. Make sure your Pi is powered on and booted into Raspbian then plug in your newly imaged Ubuntu drive. We are going to make the changes using the Pi.
Find and Mount Storage Device
First let’s find your storage device using the command:
lsblk
This will show you all the storage devices attached to your system:
NAME        MAJ:MIN RM   SIZE RO TYPE MOUNTPOINT
sda           8:0    0 119.2G  0 disk
├─sda1        8:1    0   256M  0 part
└─sda2        8:2    0   2.8G  0 part
mmcblk0     179:0    0  59.5G  0 disk
├─mmcblk0p1 179:1    0   256M  0 part /boot
└─mmcblk0p2 179:2    0  59.2G  0 part /
Your SD card will always start with mmcblk so you can rule that one out. That leaves sda as the only other disk device on the system. This will be the same for most of you but depending on what type of drive and storage adapter you use this can vary. You can substitute whatever yours is in place of /dev/sda in these instructions going forward. If yours is sdb use /dev/sdb. If it’s nvme0 use /dev/nvme0, etc.
In my output under the “MOUNTPOINT” column you can see it is blank. This means the drive isn’t mounted on my system. My mmcblk0p1 mountpoint though is not blank and is “/boot” as an example of a non-blank mountpoint. If you are using the full “Desktop” version of Raspbian it may have automatically mounted your drive and created 2 shortcuts on your desktop that will take you to the files. If your mountpoint is not blank and has something like /media/pi/writable go ahead and unmount them now using the following commands substituting the mountpoint listed for your drive:
sudo umount /media/pi/writable
sudo umount /media/pi/system-boot
Now we are going to create two mountpoints and mount the Ubuntu drive. Use these commands substituting your own drive it is not /dev/sda:
sudo mkdir /mnt/boot
sudo mkdir /mnt/writable
sudo mount /dev/sda1 /mnt/boot
sudo mount /dev/sda2 /mnt/writable
Once you have mounted everything correctly your lsblk command’s output should look like this with the mountpoint field now populated:
NAME        MAJ:MIN RM   SIZE RO TYPE MOUNTPOINT
sda           8:0    0 119.2G  0 disk
├─sda1        8:1    0   256M  0 part /mnt/boot
└─sda2        8:2    0   2.8G  0 part /mnt/writable
mmcblk0     179:0    0  59.5G  0 disk
├─mmcblk0p1 179:1    0   256M  0 part /boot
└─mmcblk0p2 179:2    0  59.2G  0 part /
Modify Mounted Partitions – Option A – Automated Script
If you just want to get your Ubuntu partition bootable I have made an automated script to do this. As long as you have mounted the partitions as /mnt/boot and /mnt/writable the script will make the necessary changes for Ubuntu 20.04 / 20.10 to boot! The source code for the script is available at https://github.com/TheRemote/Ubuntu-Server-raspi4-unofficial/blob/master/BootFix.sh
Here is a one liner to run the script:
sudo curl https://raw.githubusercontent.com/TheRemote/Ubuntu-Server-raspi4-unofficial/master/BootFix.sh | sudo bash
You may also download it for inspection (such as nano BootFix.sh or opening it in the Text Editor if you are using Desktop Raspbian) with:
curl https://raw.githubusercontent.com/TheRemote/Ubuntu-Server-raspi4-unofficial/master/BootFix.sh -O BootFix.sh
chmod +x BootFix.sh
nano BootFix.sh
To execute the script use:
sudo ./BootFix.sh
As long as you mounted your partitions correctly it will modify the partition and tell you that it was successful. Now unmount your partitions with the following commands:
sudo umount /mnt/boot
sudo umount /mnt/writable
You may now shut down your Pi and remove the SD card from the Pi leaving just the USB mass storage device plugged in. Reconnect the power.
Modify Mounted Partitions – Option B – Manual Instructions
See bottom of the article for the manual instructions section
First Boot
If all went well the system should boot up into Ubuntu’s logon screen! The default credentials are:
Username: ubuntu
Password: ubuntu
Before logging in for the first time you will be forced to select a new password. Once you have done that you will be fully logged in!
Important Note: Upon logging in for the first time if the Pi is connected to the internet Ubuntu will immediately/soon start a lengthy update process via snapd and apt.  This can be annoying since you'll be ready to start configuring the system and if you do an apt install it will halt and wait for the updates to finish.

It may seem like they're stuck, but if you use the 'top' command you will see all sorts of apt/package/update/extraction related activity happening.  Even on my 8 GB Pi and a gigabit fiber connection these took a good 20 minutes or so before my CPU activity went back to 0 and the apt lock released.

I highly recommend letting these finish and not yanking the power on the Pi / forcing a reboot / trying to kill the processes.  It will often cause a ton of very nasty apt and dpkg problems to the point where it's easier to start over from a fresh image than try to fsck and apt install --fix-broken your way out of it  Try to do other necessary configuration that doesn't involve apt in the mean time and let these finish in the background.
Once the patching is finished your shiny new Ubuntu 20.04 system is fully ready to use!
Manual Instructions
These are the manual instructions to recreate what the automated script does. If you used the automated script you don’t need to do anything further in this section unless you want to understand more about how it works or you want to do the process manually.
Decompress the kernel
We need to decompress the kernel as we will be changing the way the Pi is booting. Ubuntu uses u-boot by default and we will be switching away from that. We can do this with the following command:
zcat -qf "/mnt/boot/vmlinuz" > "/mnt/boot/vmlinux"
Update config.txt with correct parameters
Now let’s update /mnt/boot/config.txt with the parameters we need to load the decompressed kernel. Open up config.txt with nano with:
sudo nano /mnt/boot/config.txt
Change the [pi4] section to the following contents:
[pi4]
max_framebuffers=2
dtoverlay=vc4-fkms-v3d
boot_delay
kernel=vmlinux
initramfs initrd.img followkernel
Create script to automatically decompress kernel
We are going to create a script to automatically decompress the kernel. If we don’t do this we have to decompress it every time Ubuntu updates. This particular part of the script was not written by me and was found at the post on the Raspberry Pi forums by egrechko.
First let’s create the decompression script. Open up a new file with nano using:
sudo nano /mnt/boot/auto_decompress_kernel
Paste the following contents:
#!/bin/bash -e
# auto_decompress_kernel script
BTPATH=/boot/firmware
CKPATH=$BTPATH/vmlinuz
DKPATH=$BTPATH/vmlinux
# Check if compression needs to be done.
if [ -e $BTPATH/check.md5 ]; then
   if md5sum --status --ignore-missing -c $BTPATH/check.md5; then
      echo -e "\e[32mFiles have not changed, Decompression not needed\e[0m"
      exit 0
   else
      echo -e "\e[31mHash failed, kernel will be compressed\e[0m"
   fi
fi
# Backup the old decompressed kernel
mv $DKPATH $DKPATH.bak
if [ ! $? == 0 ]; then
   echo -e "\e[31mDECOMPRESSED KERNEL BACKUP FAILED!\e[0m"
   exit 1
else
   echo -e "\e[32mDecompressed kernel backup was successful\e[0m"
fi
# Decompress the new kernel
echo "Decompressing kernel: "$CKPATH".............."
zcat -qf $CKPATH > $DKPATH
if [ ! $? == 0 ]; then
   echo -e "\e[31mKERNEL FAILED TO DECOMPRESS!\e[0m"
   exit 1
else
   echo -e "\e[32mKernel Decompressed Succesfully\e[0m"
fi
# Hash the new kernel for checking
md5sum $CKPATH $DKPATH > $BTPATH/check.md5
if [ ! $? == 0 ]; then
   echo -e "\e[31mMD5 GENERATION FAILED!\e[0m"
else
   echo -e "\e[32mMD5 generated Succesfully\e[0m"
fi
exit 0
Create apt script to call kernel decompression script automatically
This is a one liner to create a script to call the auto_decompress_kernel script:
echo 'DPkg::Post-Invoke {"/bin/bash /boot/firmware/auto_decompress_kernel"; };' | sudo tee /mnt/writable/etc/apt/apt.conf.d/999_decompress_rpi_kernel
Verify Drive Performance
You can make sure everything is running correctly (and as fast as it should be) by running my quick storage benchmark. You can run the benchmark with the following one-liner:
sudo curl https://raw.githubusercontent.com/TheRemote/PiBenchmarks/master/Storage.sh | sudo bash
This will give you a score you can compare to the other Raspberry Pi Storage Benchmark results and make sure that you are getting an equivalent speed to your peers with the same device!
Fix (some) USB Adapter Problems Using Quirks
Some storage adapters don’t work very well with the Raspberry Pi 4. There is an option that can get a lot of them working using quirks. If your Ubuntu is booting to emergency mode but not in normal mode it’s worth giving quirks a try. This lowers performance, but it’s still much faster than a SD card and your adapter won’t go to waste.
To find out the quirks mode string to use we need to find the device ID string for your adapter and then add an entry to cmdline.txt telling the kernel to apply them on boot.
Find Your Adapter
To apply the quirks we first need to get the adapter id. We will use the sudo lsusb command:
$ sudo lsusb
 Bus 003 Device 001: ID 1d6b:0002 Linux Foundation 2.0 root hub
 Bus 002 Device 002: ID 174c:55aa ASMedia Technology Inc. Name: ASM1051E SATA 6Gb/s bridge, ASM1053E SATA 6Gb/s bridge, ASM1153 SATA 3Gb/s bridge, ASM1153E SATA 6Gb/s bridge
 Bus 002 Device 001: ID 1d6b:0003 Linux Foundation 3.0 root hub
 Bus 001 Device 002: ID 2109:3431 VIA Labs, Inc. Hub
 Bus 001 Device 001: ID 1d6b:0002 Linux Foundation 2.0 root hub
On line 2 we can see my ASM1051E SATA 6Gb/s bridge adapter (it’s the known working StarTech.com 2.5″ SATA to USB 3.1* adapter). You will see something very similar to mine when you run the command and it shouldn’t be too hard to figure out which device it is. If you need more information add a -v switch to make the command sudo lsusb -v. This can sometimes add some additional details to make it easier to figure out which one is your adapter.
If you’re still not sure, we have another command that between the two that can narrow things down. Type / paste the following:
sudo dmesg | grep usb

 [0.828535] usb usb3: New USB device found, idVendor=1d6b, idProduct=0002, bcdDevice= 4.19
 [0.828568] usb usb3: New USB device strings: Mfr=3, Product=2, SerialNumber=1
 [0.828597] usb usb3: Product: DWC OTG Controller
 [0.828620] usb usb3: Manufacturer: Linux 4.19.75-v7l+ dwc_otg_hcd
 [0.828644] usb usb3: SerialNumber: fe980000.usb
 [0.830051] usbcore: registered new interface driver uas
 [0.830182] usbcore: registered new interface driver usb-storage
 [0.836488] usbcore: registered new interface driver usbhid
 [0.836511] usbhid: USB HID core driver
 [0.971598] usb 1-1: new high-speed USB device number 2 using xhci_hcd
 [1.154217] usb 1-1: New USB device found, idVendor=2109, idProduct=3431, bcdDevice= 4.20
 [1.154254] usb 1-1: New USB device strings: Mfr=0, Product=1, SerialNumber=0
 [1.154281] usb 1-1: Product: USB2.0 Hub
 [1.301989] usb 2-1: new SuperSpeed Gen 1 USB device number 2 using xhci_hcd
 [1.332965] usb 2-1: New USB device found, idVendor=174c, idProduct=55aa, bcdDevice= 1.00
 [1.332999] usb 2-1: New USB device strings: Mfr=2, Product=3, SerialNumber=1
 [1.333026] usb 2-1: Product: ASM105x
 [1.333048] usb 2-1: Manufacturer: ASMT
 [1.333071] usb 2-1: SerialNumber: 123456789B79F
This is the dmesg log showing the hardware detection as hardware is activated on the Pi. If your log is really long you can generate fresh entries by just unplugging a device and plugging it back in and running the command again. Here we can clearly see that the ASM105x is what our StarTech adapter is being detected as.
Now we can go back to our first lsusb command and we want the 8 characters from the ID field that comes right after the Device:
Bus 002 Device 002: ID 174c:55aa ASMedia Technology Inc. Name: ASM1051E SATA 6Gb/s bridge
Our adapter’s ID is: 174c:55aa
Applying Quirks
To apply the quirks to our USB adapter we are going to edit /boot/firmware/cmdline.txt. Type:
sudo nano /boot/firmware/cmdline.txt
We are going to add the following entry into the very front of cmdline.txt:
usb-storage.quirks=XXXX:XXXX:u
In place of the X’s above you will put in your adapter’s ID that we got before. With the example commands I gave above mine would look like this: usb-storage.quirks=174c:55aa:u. After this my cmdline.txt looks like this (everything should be one continuous line, no line breaks!):
usb-storage.quirks=174c:55aa:u dwg_otg.lpm_enable=0 console=serial0,115200 console=tty1 root=LABEL=writable rootfstype=ext4 elevator=deadline rootwait fixrtc
Now reboot the Pi. If the Pi fails to boot you can plug the SD card into the computer and go to /boot/cmdline.txt and undo the change we did so you can boot back in with your SD card.
Verifying Quirks
Once you have rebooted after changing cmdline.txt we can verify the quirks have been applied by doing another dmesg | grep usb command:
sudo dmesg | grep usb
 [1.332924] usb 2-1: New USB device found, idVendor=174c, idProduct=55aa, bcdDevice= 1.00
 [1.332957] usb 2-1: New USB device strings: Mfr=2, Product=3, SerialNumber=1
 [1.332983] usb 2-1: Product: ASM105x
 [1.333006] usb 2-1: Manufacturer: ASMT
 [1.333028] usb 2-1: SerialNumber: 123456789B79F
 [1.335967] usb 2-1: UAS is blacklisted for this device, using usb-storage instead
 [1.336071] usb 2-1: UAS is blacklisted for this device, using usb-storage instead
 [1.336103] usb-storage 2-1:1.0: USB Mass Storage device detected
 [1.336479] usb-storage 2-1:1.0: Quirks match for vid 174c pid 55aa: c00000
 [1.336611] scsi host0: usb-storage 2-1:1.0
This time we can see in dmesg that UAS was blacklisted for the device and it has loaded with the usb-storage driver instead. This driver tends to be more compatible with the “problematic adapters” but the performance is usually significantly lower. It’s definitely worth a try though as some adapters do better with the quirks performance-wise. The only way to know for sure is to run a benchmark (see “Verify Drive Performance” section).
Other Resources
I compiled the 2022 Raspberry Pi Storage benchmarks which shows the fastest storage devices for the Pi
For easy headless imaging (does support Ubuntu) check out my Headless Raspberry Pi configuration guide
To find out where to get the 64 bit version of Raspberry Pi OS: where to get the 64 bit Raspberry Pi OS image
To find out how to add a UPS backup battery to your Pi check out my UPS for Raspberry Pi guide


You Sir, deserve an award! I wish I had found your blog post earlier to find the missing piece of puzzle of decompressing the kernel. It took me a whole weekend of troubleshooting to find what I was missing, and the key was here, thank you for that!
James
Several years ago, with your help, I enabled my Raspberry Pi4 to run ubuntu and mate desktop by booting from an ssd.
I now want to upgrade to a V2 of the Raspberry pi4.
I have a full operating system of the of my current ubuntu mate installation on another ssd copied using the dd command.
Can I simply plug and play to a new Raspberry Pi4 V2 without any other changes or do I have to make changes to the new device’s bootloader?
Your advice would be appreciated.
Rob
Hi there, I recently visited keeot.com, a reseller of Enterprise IT Components, Data Storage Systems, NAS, SAS Hard Drives for businesses, data centers, educational institutes, and Government organizations. I have a question about the Western Digital dashboard. I tried it also with both a black and a blue drive, but I couldn’t find the firmware update option. Is the firmware update option only available for Western Digital SSDs?
Hey Mary,
Best I can tell yes. There are old firmware updates out there available from these drives from OEM partners like Dell, HP, etc. but it’s very difficult to find one for any given drive. They do exist though but won’t work through the tool (it does seem to be SSDs only).
Hopefully that helps!
Hello there,do you happen this know how can I successful shutdown the hard disk drive usung usb boot with the raspberry pi 4?? Im using the shutdown -h now command but when the raspberry pi power off i hear a clicking sound from the drive i suppose it does not park the heads,i saw various guides with hdparm i dont really know what one will work correct, thanks
Hey Jim,
Welcome back! That’s a great question and pretty difficult. I had to go way back in the day to find people actively talking about using HDDs with it. It’s really hard on the drives to use them with a Pi.
I know you’re using a powered external enclosure now so the power issue probably doesn’t apply to you at this point but the Pi is excellent at killing HDDs. It always has been and I don’t think that has changed much. I don’t think this will change much in the future either as I’m expecting the next Pi will probably have a M.2 slot like many other devices coming out lately.
I can’t imagine a Pi engineer has used a HDD with one of their devices for at least 5+ years. I can pretty much guarantee it because we know they’re using eMMCs and other technology in their other in-house products such as the CM4. All of the stuff coming into their labs and R&D is all using newer tech very, very far away from anything mechanical or spinning. This has to be one of the furthest technologies from their mind at the Pi Foundation.
Loud mechanical spinning parts is pretty much the antithesis of what Raspberry Pi is trying to do with all of their stuff. Nobody has even put these into a laptop for years let alone a SBC. The only HDD I think in use in my house right now is a 8TB Unifi drive to record all of my video camera events around the house. HDDs are still *fantastic* for this. Much better than SSDs not only because of how much more GB/$ you get but because the constant recording and writing of data will eventually kill a SSD in a way that mechanical drives are more resistant to (especially drives designed for constantly recording video 24/7). Huge video recording drives are still an excellent use of HDDs. HDDs still have their place (including for desktop/workstation large storage/backup drives as well). It just isn’t the Pi.
A 128GB SSSTC NVMe drive is only $8.99 so I can’t think of any reason to use a HDD with a Pi other than if you already own them. Even then I’d think about upgrading at this point. It’s so cheap now that it’s literally not worth the time/frustration to fight with HDDs on a platform not only not designed for it but known to kill them. I’ll be very surprised if next Pi generation you won’t be able to directly pop that module right into the board instead of using an adapter like you would have to this generation. We’re already doing this on the Orange Pi 5. Storage performance score of 17,718 with that $8.99 drive (a score that is impossible to obtain on the Pi 4, only the CM4 using PCIe or the Orange Pi 5/ODROID M1).
One thing that may be worth checking is if your kernel command line has the “rootwait” command on it. This can give some extra time for HDDs to “do their thing” such as spin up/spin down and get ready. A lot of the people in that thread did that. HDParm is definitely another option. It sounds like most people in that thread even 9 years ago just knew that a certain # of them would die and didn’t worry too much about it (as they emphasize all their backup strategies more than they offer solutions to this problem as I don’t think there are many). Hopefully that helps!
Thanks
This is my setup
Using an old usb case that takes both 2.5″ ide/sata hdd and also external sata i have it connected in a jms566 usb sata bridge
It works great with quirks disabled
Hey Jim,
Looking good! Have you had any failures? I’m certain you’re right that it’s not good for it that it’s not properly locking the heads. Presumably you’re comparing this to what it would do if it was installed in a PC (which is how I would compare it as well).
I would definitely just keep on trucking with it. I wish I had some better suggestions on utilities/tricks you could use to control this behavior better but I think the truth is (at least within the Pi ecosystem) that nobody is really working on this problem. I can’t point to any newer utilities/methods that have been added that would let you manually control doing this.
I think “rootwait” is probably the best as that will let the kernel give it some extra time which is definitely helpful! I also think what the people in that old thread were saying is correct. It’s not a big deal if you’re prepared for it. You probably have others of these drives laying around in case it kills it (and they’re certainly available out there for cheaper than ever these days).
One of my theories is that a lot of these HDD drive deaths on the Pi are in fact due to power. You and I have talked about power at length on these before and you have the power situation under control with your powered enclosure. I’d imagine a lot of the people that kill them often though are having the Pi power the drive (which is not good for HDDs or even some SSDs like NVMe especially). Your drive will be able to handle the big power spike when the drive tries to “spin up” much better than someone who is powering it from the Pi’s USB ports. I think in those cases the drive won’t get the power it wants / is asking for a lot of the time and that can’t be good for it as well.
It may be one of those things where if it makes sense to use one of these drives with a Pi you just know you have to accept a little bit of risk and maybe some damage to the drive over the long term but even then it probably still makes sense to do it in some situations (as long as you’re prepared with a good backup system).
No failures yet i check always with hard disk sentinel for raspberry pi the disk,the case takes external power,but when i remove the power the click comes but this only happens with the wd1600bekt hdd with my hitachi HTS541612J9SA00 hdd i do t hear a click sound when i remove the power.
Hey Jim,
Ahh yes, I have a few of those Western Digital Black drives. Those are some of the better ones I would find in old Dells when I was working as a PC tech (which is why I have some of these, they were in surplused PCs being replaced with newer ones).
I think it might be due to some of the technology in the Western Digital drive:
Reliable and rugged - WD's ShockGuard™ technology protects the drive mechanics and platter surfaces from shocks during shipping and handling and in daily operation. WD’s SecurePark parks the recording heads off the disk surface during spin up, spin down, and when the drive is off. This ensures the recording head never touches the disk surface, resulting in improved long-term reliability due to less head wear and improved non-operational shock tolerance.It looks like this drive actually parks them during spin up and spin down. This is probably why you aren’t hearing an additional click. It has already done it during spin-down unlike the other drive so it doesn’t need to do a special park operation when it’s turning off. I think many drives only park the heads when the drive is turned off. It may simply be that the heads were already parked on this drive since it seems to park the heads more aggressively.
The ultimate test would be to use it with a PC and see if it does the click with a PC. It doesn’t sound to me like it will though. It sounds like this drive parks the heads differently than other drives and they seem pretty proud of it from the marketing!
I tested some 2.5 western digital most blue drives they all do the click when safe removal in usb mode in a pc with windows,it looks like to me western digital messed up their idle tech they put in many drives that literally kills them by closing and opening the drives when is not been used,wd1600bekt was the worst when i put it for first time for in a usb case in my pc it literally closed and opened 3 times in 5 secs(suicide for the drive)
When i disabled from hard disk sentinel the advanced power management feature it stopped doing that.
Western Digital harakiri technology save energy by killing the drive 😅
Hey Jim,
I would definitely recommend running their firmware upgrade utility. Hopefully the Western Digital Dashboard will still recognize the HDDs (probably since they still sell a *lot* of HDDs). It’s at least still listed in the “Downloads” section for the drive as the firmware update utility.
What I would try doing is use a Windows PC and run the Western Digital Dashboard against all of the drives you have. Blues, blacks, whatever. See if any of them will take a firmware update. The issues you’re describing sound exactly like the kind of things I would expect the firmware updates to potentially improve. This shouldn’t require touching the drive data at all. You could simply plug them into the Windows PC one at a time, upgrade the firmware using the application without even touching or mounting the data, and then put them back wherever they go.
These definitely exist like for example here is a firmware update for the WD1600YS (not our drive). The best bet to find them is the Western Digital Dashboard utility though I’d say!
Hi there i tried the western digital dashboard with a black and a blue drive but there was nowhere the firmware update option,is the firmware option working only with western digital ssds ??
Hey Jim,
Maybe, that’s definitely what I was afraid of! It’s still listed as the utility to update it but it may not recognize and update the HDDs anymore unfortunately!
I think the issue is that I haven’t worked at the place I pulled those drives from for almost 4-5 years now. Those models are no longer supported and they have several newer generations of replacements out (which would probably show up within the Western Digital Dashboard at least for the fancier ones).
These were also OEM drives. They weren’t meant to be sold directly to consumers and are usually pulls (even when they’re sold on Amazon). I pulled mine out of old Dells. This makes it all the more harder to get those updates. The drives weren’t meant to be sold to you directly. Those are something they would give to Dell or their partners in the case of OEM models. Theoretically Dell would distribute those updates through all the Dell software update tools (although in practice they rarely do unless there was some critical issue it fixed people were complaining about).
My guess is that combined with being way outside of their support period as well as being a technology that isn’t showing up much in new consumer devices anymore has led to them dropping support for these HDDs within the Western Digital Dashboard. I’m sure these updates still exist but you’d probably need to be a company and have some kind of Western Digital enterprise account to get them. Hopefully that helps!
It recognizes the hdds it shows every possible info about them, except the firmware update
Hey Jim,
That’s more promising at least. It’s too bad it’s not recognizing the updates. I’d imagine it’s because there either aren’t any or it doesn’t give them to OEM drives (I think this is what it is). They would expect you to get the update from Dell, Lenovo, or whoever made the system that OEM drive shipped in.
Like take a look at this here. Here’s one distributed through Lenovo.
The issue is:
Some 2.5 inch Western Digital manufactured hard drives may make cyclic noises. In some extremely rare cases, some hard drives may experience a system hang or a blue screen.However if you try to find that update on Western Digital’s site you won’t find it. They seem to only give out the OEM updates to the OEMs. If the tool isn’t giving you the option to download/update them I have no idea where you’d be able to find them for sure! That’s what I mean by these definitely exist but I have no clue how you’d find them if the utility won’t give them to you.
If I were to try to find these updates I would probably look on Dell’s web site on the exact model of system I pulled the drive from. That’s probably where I’d be most likely to find it but it’s still a long shot whether Dell thought the updates were important enough to post/distribute on their web site. In the case of that Lenovo issue I linked above they thought it was (people were even getting blue screens). Most of them though if they think people won’t notice they probably won’t post them. Hopefully that helps!
James, I have everything working a treat with a Micron SATA SSD recycled from a broken laptop. I am using the Startech SATA to USB adapter. My setup worked both before and after I added the quirk to the command line. However with the quirk the performance dropped from >6000 to 4195. Is there a known reason to leave the quirk enabled?
Hey Paul,
Fantastic question! So no, absolutely remove the quirks flag since you have the StarTech.
To explain the quirks flag disables UASP. This fixes some storage adapters that don’t normally work with the Pi but it has a performance penalty. UAS is about 50% faster and your numbers are pretty close to that here.
I’d definitely remove the quirks flag since you don’t need it for this adapter. Hopefully that helps!