
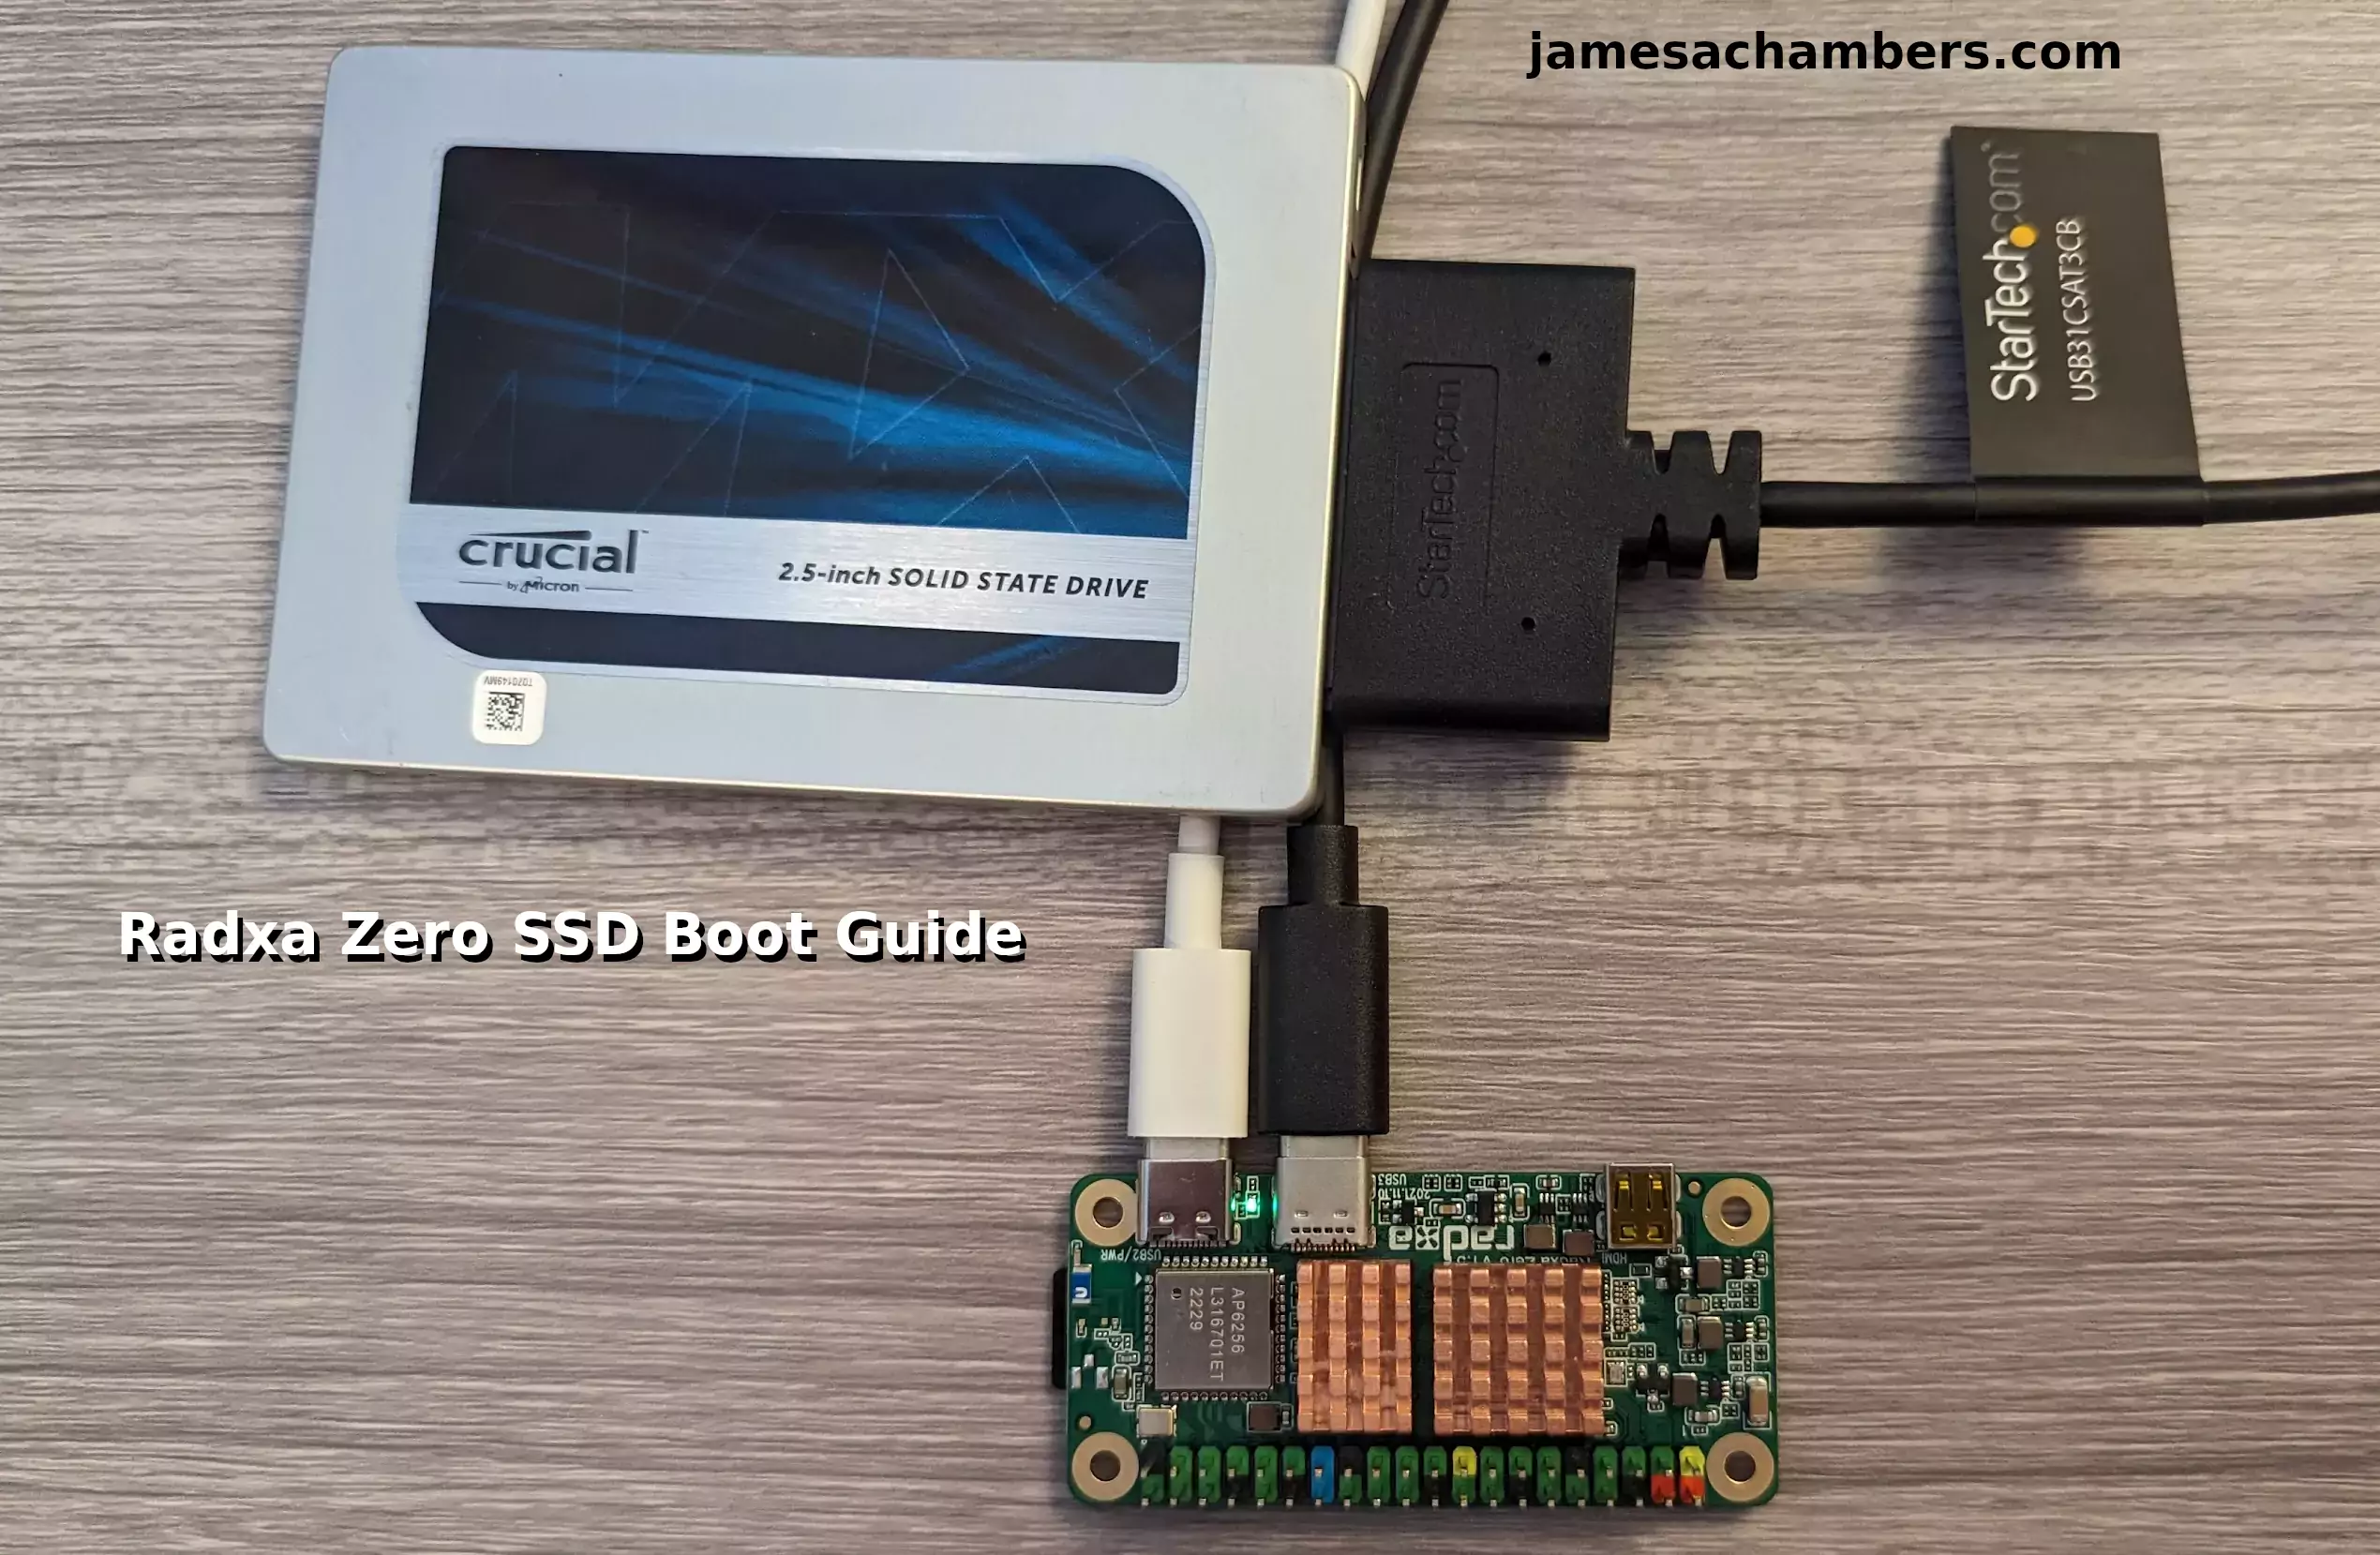
The Radxa Zero can definitely be set up to boot from USB storage / using a SSD. You can do this trick using both the eMMC and an SD card. Given that the board also has a quad-core processor you can actually make a tiny and pretty powerful server setup with something like this achieving pretty impressive I/O speeds for such a small package.
In this guide I’ll show you how to set up SSD booting on the Radxa Zero using their official Debian operating system. Let’s get started!
Hardware Used
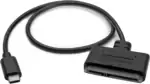
The StarTech USB31CSAT3CB is a USB-C 2.5″ SATA adapter that is perfect for plugging into boards that only have USB-C ports without having to use additional adapters
Links: Amazon.com*, Amazon.ca*, Amazon.com.au*, Amazon.co.jp*, Amazon.co.uk*, Amazon.de*, Amazon.es*, Amazon.fr*, Amazon.it*, Amazon.nl*, Amazon.pl*, Amazon.se*, Amazon.sg*
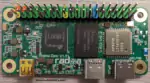
The Radxa Zero comes in the form factor of the Raspberry Pi Zero but is upgraded to USB-C and a quad-core CPU. Available with RAM options of 1/2/4GB and eMMC options of 8/16/32/64/128GB.
Links: AliExpress*, Amazon.co.uk*, Amazon.de*, Amazon.es*, Amazon.fr*, Amazon.it*, Amazon.nl*, Amazon.pl*, Amazon.se*
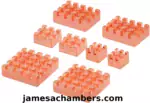
The Geekworm copper heat sink set is designed to fit many different single board computers. It uses thermal conductive adhesive which many “cheap” heat sink kits for SBCs don’t have. Eliminates hot spots and reduces throttling. Can be further enhanced by powered cooling over the heat sinks.
Links: Amazon.com*, Amazon.ca*, Amazon.co.jp*, Amazon.co.uk*, Amazon.de*, Amazon.es*, Amazon.fr*, Amazon.it*
Preparing SD Card / eMMC
First you should have a completely working installation on a SD card of the OS that you would like to use. I used the official Debian desktop image for this guide (recommended) so if your partitions are different it may be your flavor of Linux and need slightly altered instructions.
If you have an already working installation you want to move to your SSD you can use this as well most likely.
You should completely update first with:
sudo apt update && sudo apt full-upgrade
I will be using a SD card for this guide. The method itself will work fine though with the eMMC as well. Just make sure you get the right device paths (/dev/mmcblk1 vs. /dev/mmcblk2, use lsblk to see which ones are actively in use and mounted as /).
Preparing SSD
First we are going to completely remove all partitions from the drive so it’s completely blank. Your drive should typically be /dev/sda:
sudo gdisk /dev/sda
Now remove all partitions from the device. If you press “p” it will print out the partitions. You can then use “d” to delete them.
Here’s an example on mine:
radxa@radxa-zero:~$ sudo gdisk /dev/sda
[sudo] password for radxa:
GPT fdisk (gdisk) version 1.0.6

Partition table scan:
  MBR: protective
  BSD: not present
  APM: not present
  GPT: present

Found valid GPT with protective MBR; using GPT.

Command (? for help): p
Disk /dev/sda: 488397168 sectors, 232.9 GiB
Model: CT250MX200SSD1
Sector size (logical/physical): 512/4096 bytes
Disk identifier (GUID): E983E937-26E4-494E-BCD9-A8CA673A8F52
Partition table holds up to 128 entries
Main partition table begins at sector 2 and ends at sector 33
First usable sector is 2048, last usable sector is 250069646
Partitions will be aligned on 2048-sector boundaries
Total free space is 2566799 sectors (1.2 GiB)

Number  Start (sector)    End (sector)  Size       Code  Name
   1           61440          585727   256.0 MiB   EA00  bootfs
   2          585728       247562239   117.8 GiB   8300

Command (? for help): d
Partition number (1-2): 1

Command (? for help): d
Using 2

Command (? for help): w
Warning! Secondary header is placed too early on the disk! Do you want to
correct this problem? (Y/N): Y

OK; writing new GUID partition table (GPT) to /dev/sda.
The operation has completed successfully.
Keep pressing d until all the partitions are deleted. Once they are gone use the ‘w’ command to write your changes.
Cloning Installation to SSD
We’re now ready to clone your installation to the SSD. We can now copy your drive to the SSD with the following command:
cat /dev/mmcblk1 > /dev/sda
Wait for the operation to complete (there won’t be any output but you will have a cursor again and be able to type new commands). Remember that you are copying an entire drive from one to another basically with that one command.
Mine took about 30-45 minutes (although I was using a 64GB SD card and the larger SD card you use the longer it will take to copy the whole drive).
If you are having any trouble with permissions try becoming “root” first with:
sudo su
Now try running the command again and as the superuser you should not encounter any permission errors.
Change SD card’s rootfs UUID
We need to change our SD card’s UUID so that it doesn’t try to boot from that partition. We can set it to a random one with the following command:
sudo tune2fs -O metadata_csum_seed -U random /dev/mmcblk1p2
We can verify that it has changed with blkid like this:
root@radxa-zero:/home/radxa#  sudo blkid
/dev/mmcblk1p1: LABEL_FATBOOT="config" LABEL="config" UUID="4917-99FE" BLOCK_SIZE="512" TYPE="vfat" PARTUUID="b6724908-01"
/dev/mmcblk1p2: LABEL="rootfs" UUID="d23a0a20-87b7-47e6-ad8f-a89ae736d289" BLOCK_SIZE="4096" TYPE="ext4" PARTUUID="b6724908-02"
/dev/sda1: LABEL_FATBOOT="config" LABEL="config" UUID="4917-99FE" BLOCK_SIZE="512" TYPE="vfat" PARTUUID="b6724908-01"
/dev/sda2: LABEL="rootfs" UUID="215a8efd-1276-4faa-a223-30a89609b9a9" BLOCK_SIZE="4096" TYPE="ext4" PARTUUID="b6724908-02"
Notice that /dev/sda2 and /dev/mmcblk1p2 no longer have matching UUIDs. This is exactly what we want.
Change SSD’s boot UUID
Next we are going to change the boot partition’s UUID on the SSD. This will make it so that the mounted /boot folder inside your operating system actually mounts the SD card (which is your actual boot loader in this configuration).
First make sure you have mtools with:
sudo apt install mtools -y
Now we can change the UUID with:
sudo mlabel -N aaaa1111 -i /dev/sda1 ::
You can verify these are different using the same sudo blkid command as the previous section.
Run fsck
Before we reboot run fsck on the drive like this:
sudo fsck -yf /dev/sda2
This will prevent you from having to run fsck on the CLI the first time you try to boot.
Reboot and Verify
Now reboot the Radxa Zero with:
sudo reboot
With any luck you should be booted using your SSD! We can verify this with the mount command like this:
radxa@radxa-zero:~$ mount
/dev/sda2 on / type ext4 (rw,relatime)
systemd-1 on /config type autofs (rw,relatime,fd=48,pgrp=1,timeout=0,minproto=5,maxproto=5,direct,pipe_ino=1975)
/dev/mmcblk1p1 on /config type vfat (rw,relatime,fmask=0022,dmask=0022,codepage=437,iocharset=iso8859-1,shortname=mixed,utf8,errors=remount-ro,x-systemd.automount)
radxa@radxa-zero:~$
Here we can see that our root partition (/) is indeed on /dev/sda2 and not /dev/mmcblk1p2. We can also see that my /boot folder is properly mounted is /dev/mmcblk1p1 (the SD card or eMMC which is serving as our boot loader). Success!
Testing Performance
You can verify the performance of your SSD on Pi Benchmarks using the following command:
sudo curl https://raw.githubusercontent.com/TheRemote/PiBenchmarks/master/Storage.sh | sudo bash
Here are the results:
     Category                  Test                      Result
HDParm                    Disk Read                 31.72 MB/s
HDParm                    Cached Disk Read          31.42 MB/s
DD                        Disk Write                33.6 MB/s
FIO                       4k random read            6259 IOPS (25036 KB/s)
FIO                       4k random write           6243 IOPS (24975 KB/s)
IOZone                    4k read                   10203 KB/s
IOZone                    4k write                  10552 KB/s
IOZone                    4k random read            9269 KB/s
IOZone                    4k random write           11154 KB/s

                          Score: 2,912
The full Radxa Zero SSD benchmark can be viewed here on Pi Benchmarks.
This is quite the improvement over my SD card score of 1,049 from my Radxa Zero review. I definitely recommend this for anyone who needs to get higher storage performance out of the Radxa Zero!
Note that it’s USB 2.1 performance so it’s definitely not as high as some other boards can hit. It’s still 3x the speed of a SD card though so I’d say it’s still worth it!
The eMMC on the other hand is faster. If you have a big enough eMMC it may not be worth SSD booting at all (at least for performance reasons). It may make more sense to just attach the SSD and mount it.
No matter what your use case is though this should give you the option to SSD boot if it makes the most sense for what you are trying to do!
Other Resources
I’ve also reviewed the Radxa Zero here
Don’t miss my Radxa Rock 5B review here
I’ve written a review about the Rock Pi 4C Plus here


Thanks for this post; interesting points that you make about RPi Foundation. However I’m more interested in your experience with Radxa Rock Pi and other boards. I started with the RockPi 4A and support was definitely very rough even though those boards supported eMMC and NVMe SSD. Getting the hardware supported on the main Armbian/Debian branches and elsewhere was sparse to be sure but I was able to create a pretty mean little cluster with 6 RockPi 4As with eMMC and SSD. Your post about the Radxa Zero is really encouraging as I’ve seen the Radxa crew really start to invest in their boards and push for support on the mainstream builds. As a result I’m able to resurrect the RockPi 4A on Armbian (I still can’t get Radxa builds to work well on that hardware) and use it for other projects. Your post about the Zero is exciting and I think I’ll pull the trigger on one of those to see how it fares as a Minidexed instance. One point about the RPi Hats is that there are several high end audio hats that work really well; USB Audio isn’t something I want to use here as there are other drawbacks (like noise) but it’s an option for sure. There is value in a standardized GPIO layout that supports an ecosystem of “hats” or accessories in my opinion but there’s nothing to keep me from creating custom board designs for any functionality – but I’d rather buy it if I can.
Hey Ron,
Great question! So I actually have reviewed the Radxa Rock Pi 4C here (the version with NVMe). I think it’s a fantastic choice. You could do the same thing with NVMe with the Radxa Rock Pi 4C theoretically!
Thanks for the instruction. We are very happy about it. The Radxa Zero is a great device, and this instruction helps a lot to make it more popular. I first doubted that there is an ongoing developement for it, but now I have changed my mind and found it. Fist the Debian Laptop, and then Debian SSD. Really great, thanks a lot for the instruction.
Hey Peter,
Thank you so much for leaving this comment! To be honest I used to feel the same way you did before you changed your mind. These alternative boards have really only come into their own this generation. Radxa has been around a long time and their older boards definitely did feel that way.
Things have changed quite a bit though. In my opinion the most interesting things / the most aggressive development is now happening on alternative boards.
This has changed for a few reasons but the big one is that of course Raspberry Pi is no longer capable of serving the single board computer community and hasn’t been for several years now (by their own choice — they chose to provide commercial customers instead and hung the consumers out to dry). That means that a lot of people were *forced* to explore alternatives (myself included) and this increased usage has led to increased development.
In other words since now a bunch of us own and are using these boards we are submitting patches/bug reports to Radxa. They also have a lot more money for development in the first place because they are selling boards now (like crazy). In contrast I don’t really think much has changed for Raspberry Pi. I feel it’s Raspberry Pi that has completely stagnated and the wind is really coming out of the sails of a lot of the development meant for that platform. I think that ecosystem is in decline simply due to so many years of persistent poor availability / scalping / all the other problems.
Add on top that these boards perform better and have capabilities that Raspberry Pi doesn’t have an answer to. That has been the case for a couple of years now and the development (both from the community and the manufacturer) has really caught up.
There’s still a few pain points such as the Raspberry Pi hats but those proprietary hats are more the problem than the Radxa Zero or any alternative board. They’re also pretty easily avoided these days which is what people have been doing for the most part I think. It’s getting easier every day to completely avoid hats and use the GPIO directly or just use USB or other alternatives that are more platform independent. The advantage of those types of approaches means you can also use them with a whole bunch of different boards instead of locking yourself into the Pi ecosystem.
Even if Raspberry Pi makes their really old models such as the Pi Zero available again this year as they are promising (since they have apparently realized they are LOSING the market due to their idiotic support of the commercial customers over makers) would you even want to go back? I wouldn’t. The Radxa Zero has way bigger RAM options and eMMC options. The Pi Zero 2 is the only one that can compare on power and that is *not* planned to be available in this upcoming availability dump from Raspberry Pi. The Pi Zero 2 also ships with micro USB still and only 1GB of RAM (in 2023). Yuck. It feels obsolete compared to the Radxa Zero already TODAY and there is a Radxa Zero 2 coming eventually.
We all got burned so badly from Raspberry Pi’s missteps. They created this situation directly through their policies. It was a *choice* to stop selling to consumers and prioritize IoT manufacturers that “had their living on the line” (oh please, the manufacturers would have just bought something else which is probably what Raspberry Pi was afraid of, manufacturers had options consumers didn’t at that time, now we *all* have options though). I wasn’t looking to switch originally. Once I did though it was like, oh, wow, Raspberry Pi is *way* behind actually. I can already buy something better than the Raspberry Pi Zero 2 let alone the Raspberry Pi Zero.
They were only ahead on support/development but that is changing so fast. Why? Because Raspberry Pi was never responsible for the development / support of their boards. We were. The open source community they forgot about to sell to giant manufacturers. They turned their backs on us though for giant pallets of cash from companies such as Helium miner manufacturers. Now they’re going to come running back but we won’t forget and we learned a lot of lessons from how we’ve been treated over the past few years.
Things like proprietary Pi hats and cameras (that won’t work with any other board by design) now literally disgust me after escaping their ecosystem. I’d never willingly put myself in chains like that again and I almost feel sorry for the people who haven’t had the awakening that I have had and you are having / have had! More people see it every day though. I don’t think it was a coincidence the Raspberry Pi 5 was cancelled shortly after the Orange Pi 5 / Radxa Rock 5B were released and they realized how far behind they really are and that releasing what would have undoubtedly been a pathetic product would have only cemented that opinion even more than it has already taken hold.
Except by the time Raspberry Pi has an answer to any of the *current* alternative boards the Radxa Zero 2 I linked to earlier will already be released and we will be looking at what they are going to do with the Orange Pi 6 and the Radxa Rock 6B. I actually think it’s too late for them to recover. They were caught completely off guard after several years of basically not selling their boards to consumers and only selling them to large IoT manufacturers. They seemed to think nobody else would ever be able to make one or that people like us wouldn’t leave.
We did leave though. I don’t owe anything to Raspberry Pi whatsoever and I never did. I don’t know why they thought otherwise. I legitimately think they have not even fully grasped this yet (their self-righteousness runs DEEP, a very large obstacle for anyone to overcome) but I think they’re starting to realize they might be in trouble and that it may have been a mistake to turn your backs on the open source community and the maker community for short term $$$.
Not everybody is where I’m at yet but notice that all of the people who are still sticking with Raspberry Pi and saying stuff like “there’s no support” are people with conflicts of interest (and the fans/followers of those people). YouTubers, IoT manufacturers, and a lot of people with loud voices *do* owe a lot to Raspberry Pi. They know people from the company and take free product / get exclusive first looks on unreleased products / everything else the manufacturers do to control them. They’re compromised basically. I’m completely independent though here so I just look at the boards for what they are. I have no interest in covering for Raspberry Pi or making excuses for them. It is what it is. That’s hardly unique to single board computers either. The people covering technology are usually compromised and the other ones (like me) are poor (but sleep very well).
They didn’t even use that filthy crypto miner manufacturer money they sold us all out for (immediately) to make better boards. They literally have NO answer to the Radxa Zero or Rock 5B and we know their upcoming Pi 5 for 2023 was cancelled so there won’t even be an answer this year. The least they could have done was try to invest that money to make their boards so much better than the alt boards nobody would care about them still. They didn’t do that either. They haven’t done anything in years best I can tell and that is why they’re at best being passed right now and at worst were passed a year or two ago (by multiple alternative boards).
Thanks for sharing and your kind words, take care!
Its great to know that owners of the Radxa Zero can use an SSD to boot from if you need faster speeds…
Great write up James!
Hey Razor Burn,
Thanks so much! It may come in particularly handy for people without the eMMC I’d say for sure. Mine did come with a 8GB eMMC but that’s not a ton of storage to work with for sure.
Take care!