
During my recent coverage of SBCs I’ve been benchmarking them using SSDs. The process for booting from a SSD varies across different boards. I’ve found the documentation for some of these to be lacking / nonexistent and the Orange Pi Zero 2 is one of these.
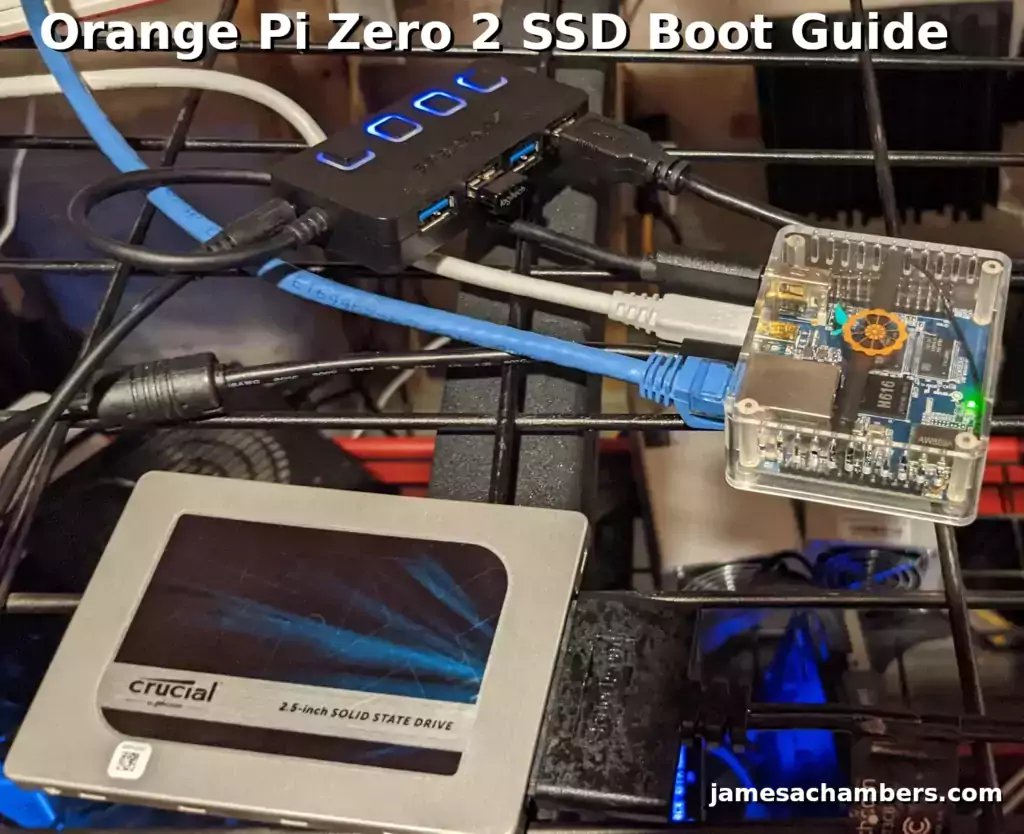
Today I wanted to benchmark the Orange Pi Zero 2 with the SSD and given the lack of documentation I’m going to document my process for setting it up. The Orange Pi Zero 2 will require a sacrificial SD card to bootstrap the process and has USB 2.0 ports. With those limitations in mind let’s set it up and see how it performs!
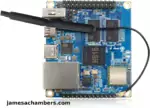
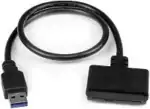
Hardware Used

Choosing a Drive
Some possible drive types include 2.5″ SATA, M.2 SATA, mSATA and M.2 NVMe.
I do not recommend using a NVMe drive with the Orange Pi Zero 2 because it has USB 2.0 ports. That is a total and complete waste as we are definitely going to max out the USB 2.0 bus with even a garbage-tier unbranded 2.5″ SSD.
I typically do not recommend USB flash drives either. No matter how fast you think it is unless it is a REAL solid state drive (SSD) it’s slower than your SD card.
The best choices are definitely something like an older cheap 2.5″ SATA or M.2 SATA SSD. I will be using a 2.5″ SATA drive (Crucial MX200 250GB*) to write this guide.
First Step – Have Working Installation
The first step in this method is to already have a working installation of the OS you want to use for SSD booting installed on your SD card.
Many of you will have this already unless you’re installing something totally new. The next thing you should do is make sure it is fully updated with:
sudo apt update && sudo apt full-upgrade -yHaving a fully updated installation will make everything much simpler as we are going to clone a fully working and up to date installation to our SSD instead of try to do a fresh image on a board that isn’t really intended for SSD booting.
Clone Installation
With the Orange Pi Zero 2 booted up using your working installation it’s time to plug your SSD into the Orange Pi Zero 2 using your USB to X adapter.
You should see devices pop up for /dev/sda in lsblk:
orangepi@orangepizero2:~$ sudo lsblk
NAME        MAJ:MIN RM   SIZE RO TYPE MOUNTPOINT
sda           8:0    0 232.9G  0 disk
├─sda1        8:1    0     1M  0 part
├─sda2        8:2    0    15M  0 part
└─sda3        8:3    0 232.9G  0 part
mmcblk1     179:0    0  59.5G  0 disk
└─mmcblk1p1 179:1    0  58.9G  0 part /
zram0       252:0    0 492.1M  0 disk [SWAP]
zram1       252:1    0    50M  0 disk /var/log
zram2       252:2    0 492.1M  0 disk /tmp
First clean off the SSD by running:
sudo fdisk /dev/sda
Delete all partitions until it is completely blank.
Now we can copy the entire SD card to our SSD with the following command:
sudo cat /dev/mmcblk1 > /dev/sda
Wait for the operation to complete (there won’t be any output but you will have a cursor again and be able to type new commands).
If you are having any trouble with permissions try becoming “root” first with:
sudo su
Now try running the command again and as the superuser you should not encounter any permission errors.
Change SD card’s UUID
Now unplug the SSD and plug it back in. We need to change our SD card’s UUID so that it doesn’t try to boot from that partition. We can set it to a random one with the following command:
sudo tune2fs -U random /dev/mmcblk1p1
We can verify that it has changed with blkid like this:
orangepi@orangepizero2:~$ sudo blkid
/dev/mmcblk1p1: UUID="9c0a441b-5aaf-4cf1-bec7-b457d3966cb6" BLOCK_SIZE="4096" TYPE="ext4" PARTUUID="e8ce0794-01"
/dev/zram0: UUID="66b180ff-2899-431b-b8b7-8347d9af85eb" TYPE="swap"
/dev/zram1: LABEL="log2ram" UUID="d87403e0-1d2f-4356-905d-9dfaba14b6ee" BLOCK_SIZE="4096" TYPE="ext4"
/dev/zram2: LABEL="tmp" UUID="9abe5f8e-49b7-41d6-839b-3d2e0aa3b9cd" BLOCK_SIZE="4096" TYPE="ext4"
/dev/sda1: UUID="5dd5b836-fb32-4678-908e-d23f7a028780" BLOCK_SIZE="4096" TYPE="ext4" PARTUUID="e8ce0794-01"
Notice that /dev/sda1 and /dev/mmcblk1p1 no longer have matching UUIDs. This is exactly what we want.
Run fsck
Before we reboot run e2fsck on the drive like this:
sudo e2fsck -yf /dev/sda1
This will prevent you from having to run fsck on the CLI the first time you try to boot.
Reboot and Verify
Now reboot the Orange Pi with:
sudo reboot
With any luck you should be booted using your SSD! We can verify this with the mount command like this:
orangepi@orangepizero2:~$ mount
sysfs on /sys type sysfs (rw,nosuid,nodev,noexec,relatime)
proc on /proc type proc (rw,nosuid,nodev,noexec,relatime)
udev on /dev type devtmpfs (rw,nosuid,relatime,size=431840k,nr_inodes=107960,mode=755)
devpts on /dev/pts type devpts (rw,nosuid,noexec,relatime,gid=5,mode=620,ptmxmode=000)
tmpfs on /run type tmpfs (rw,nosuid,nodev,noexec,relatime,size=100776k,mode=755)
/dev/sda1 on / type ext4 (ro,noatime,errors=remount-ro,commit=600)
/dev/sda1 on /var/log.hdd type ext4 (ro,noatime,errors=remount-ro,commit=600)
/dev/zram1 on /var/log type ext4 (rw,relatime,discard)
tmpfs on /run/user/1000 type tmpfs (rw,nosuid,nodev,relatime,size=100772k,nr_inodes=25193,mode=700,uid=1000,gid=1000)
Here we can see that our root partition (/) is indeed on /dev/sda and not /dev/mmcblk1. Success!
Resize SSD Partition
Once you’ve rebooted and verified you are booted from the SSD we can resize the SSD’s partition to be the same size.
We can use a built in service on the Orange Pi to do this. Use the following command:
sudo systemctl start orangepi-resize-filesystem.service
This will take a few minutes depending on how large your SSD is. Once it is finished verify you are using the full space on your SSD with:
orangepi@orangepizero2:~$ lsblk
NAME        MAJ:MIN RM   SIZE RO TYPE MOUNTPOINT
sda           8:0    0 232.9G  0 disk
└─sda1        8:1    0 230.5G  0 part /
mmcblk1     179:0    0  59.5G  0 disk
└─mmcblk1p1 179:1    0  58.9G  0 part
zram0       252:0    0 492.1M  0 disk [SWAP]
zram1       252:1    0    50M  0 disk /var/log
Here we can see that my SSD’s partition is now the correct size for a 250GB SSD and is no longer only 58.9G like our original partition from the SD card.
Troubleshooting Note
The first time you try rebooting you may get an initramfs screen that says you need to do a manual fsck. This usually means you didn’t completely clean the partitions off the SSD (don’t be ashamed, I didn’t the first time either which is why I know it can be fixed). That can be fixed by using:
e2fsck /dev/sda1 -y
or:
fsck.ext4 /dev/sda1
It should say the filesystem is clean after this and let you boot normally. Once it boots up it wouldn’t hurt to give it a:
sudo e2fsck /dev/sda1 -y
Fixing these may take a while. I had to do this second fsck because even though my system booted after the first fsck the disk was mounted as read-only due to additional errors (which is why it will let you fsck the root partition while actively booted which is normally a no-go, it’s in a protected read-only mode due to errors).
After this comes out clean reboot one more time and you should be all set with a read-write root partition on your SSD!
Testing Performance
You can verify the performance of your SSD on Pi Benchmarks using the following command:
sudo curl https://raw.githubusercontent.com/TheRemote/PiBenchmarks/master/Storage.sh | sudo bash
I ran the benchmark with full knowledge that we were using USB 2.0 and were going to be limited in our score. Nevertheless I wanted to see what the improvement over using the SD card was.
Here are the results:
     Category                  Test                      Result
HDParm                    Disk Read                 37.08 MB/s
HDParm                    Cached Disk Read          36.94 MB/s
DD                        Disk Write                37.8 MB/s
FIO                       4k random read            4745 IOPS (18980 KB/s)
FIO                       4k random write           4426 IOPS (17704 KB/s)
IOZone                    4k read                   8094 KB/s
IOZone                    4k write                  10667 KB/s
IOZone                    4k random read            8020 KB/s
IOZone                    4k random write           10652 KB/s

                          Score: 2,593
You may view the full benchmark on Pi Benchmarks for the Orange Pi Zero 2 here.
Wow, that is a score of 2,593! That absolutely smashes any other tests for the Orange Pi Zero 2 on the site and is the new world record.
To give some context here the maximum score you can achieve over USB 2.0 is something around 2500-2600 points. This is true on Raspberry Pi Model 3s and older which only have USB 2.0 ports. They also max out around the same score.
This is more than double the fastest SD card score anyone has ever achieved on the board. That means it is absolutely worth it to use a SSD with the Orange Pi Zero 2!
Conclusion
It’s working 100%! We are getting full USB 2.0 speeds and maxing out the bus and substantially outperforming any micro SD card. It’s not too difficult to achieve this setup using this method.
It’s also very cheap. You can find 2.5″ SATA drives for less than $20 as well as M.2 SATA drives and those will more than max out the bus.
I highly recommend trying this for all Orange Pi Zero 2 owners! It was worth it on the Raspberry Pi 3 even over USB 2.0 (and I was doing it back then like in this benchmark with an almost identical score on the Pi 3 due to the USB 2.0 bus just like with this one). It’s worth it on the Orange Pi Zero 2 over USB 2.0 as well. A 2x-2.5x increase in speed is worth it for a relatively easy setup process.
Just make sure to use a cheap drive as anything more is massive overkill / a waste due to USB 2.0 limitations!
Other Resources
I’ve also reviewed the Orange Pi portable monitor here
Make sure you check out my Orange Pi Zero 2 review and tips/tricks guide
If you have the Orange Pi i96 check out my updated image available for it here
Want to see an even insanely cheaper board than the Orange Pi Zero 2? Check out my guide on the Orange Pi i96 headless board which is available for something like $7.
If you like retro gaming you may be interested in my ODROID Go Super Guide!


Hi James,
thank you! Even if I’m not an expert I accomplished to make work my orange pi zero 2w on ssd! Just one more question: my “boot” sd card is a 16 gb card. It is a waste to leave there 16 gb just to perform a boot. I was wondering if I can use an old and useless 1 gb card and transfer the boot stuff from the 16gb card to the 1gb… Is it possibile in your opinion? What should I do to achieve that? Thank you in advance!
Hey, so I was considering doing this, but… How come OPi knows to boot from USB? On chat Technician told me that its not possible. What if I burned the image directly to the SSD or used Clonezilla and removed the micro SD card?
From what I have tested my SD card in OPizero3 only has 1 main partition and all necessary files are there. (Tested with Gparted).
Hello dronostyka,
Basically it doesn’t. The boot files will always be read off the SD card. That’s why I call it a “sacrificial SD card” in the article. The way it works is that those files are read off the SD card for it to boot but then since we change the UUIDs it ends up mounting the SSD as the root partition instead of the SD card.
On this board you can see in the article that I do indeed only have one partition as well. If you follow the guide it will be using your SSD when it boots up. If you take the SD card out though it won’t boot anymore. The sacrificial SD card needs to be left in and that’s why it works. We then just trick it to mount the SSD as the root partition after the boot process.
Hopefully that helps!
I just managed to boot without a microSD, I put it on the armbian forum https://forum.armbian.com/topic/51044-spi-boot-for-usb-or-pxe-without-microsd/
Very nicely done, thanks for reporting back!
Hi James,
Great tutorial,
All seems to work as described on an orangePi zero 3.
I am however wondering if you could help to remove the need for the SD card on this device, AFAIK the zero 3 has got 16MB SPI flash which would be great to make use of if possible.
In orangepi-config I do have the option for SPI boot when the SSD is connected, I’ve tried moving the boot this way but it seems to fail after a few bytes and I have to manually reboot the device.
Is there any way to use the onboard SPI to tell the pi to boot from SSD instead of the SD card? even with an SD card how would you go about moving the boot to SPI, I assume that is why it exists in the first place?
Perhaps I am mistaken about the use of SPI on this device in which case sorry about the silly question but if not for boot what is it for? under lsblk it is listed as mtdblock0 which I see you do not have on the zero 2.
Thanks for any help/ advice on the issue, if you’re unsure that’s fine too no hassle!
Cheers,
M@rk.
After some further research I believe flashrom could be the way to achieve this, I has successfully gotten access to the SPI through this now but will not be able to look more into it for a couple of days, if you think I’m on the wrong track let me know! If I get it working I’ll update.
James, I’m new to SBC & Linux. Will this work on OPi Zero 3 as well?
yes
it will
Hello, I need to convert several robots that use Orange Pi Zero 2 W into video cameras, so I need Android to use hardware encoding (I believe it’s not possible in other OS). Additionally, and I need the HDD (we have some old HDDs) to store at least one month of previous recordings. Do you think this is a good approach? Is it really beneficial for android, or would it be better to just run the OS from the MicroSD and store recordings on the HDD?
The instructions do not work…
Are you sure you tried this youreself?? How did you now encounter the problem of….
sudo cat /dev/mmcblk1 > /dev/sda
sudo tune2fs -U random /dev/mmcblk1p1
mine come back with Error… the operation requires a freshly checked filesystem
Please run e2fsck -f on file system
Hello BillC,
Did you finish reading the instructions or did you get frustrated and write this at the first sign of trouble? Let’s look at the troubleshooting section:
This usually means you didn't completely clean the partitions off the SSD (don't be ashamed, I didn't the first time either which is why I know it can be fixed). That can be fixed by using:e2fsck /dev/sda1 -y
I honestly don’t recommend doing it though in your case. If you don’t actually understand what is happening on some level here you shouldn’t be trying this.
The error message told you exactly how to fix it. It even gave you the command! Then later in the article I also covered how to fix it if you encounter fsck errors. Both of these things got past you completely.
You don’t have the mentality to be successful doing this type of stuff. Your skills aren’t what is going to hold you back. Those can be fixed/improved. It’s the entitled attitude that will stop you.
This industry is not easy or kind to people who want everything handed to them. It’s even less kind when the error message (as well as the article you’re reading) gives you the answer and your response is still to blame everyone else.
My advice would be to slow down a little bit and try to step back and think about what is happening here. You’re basically copying one full disk to another disk. That is the cat command. This operation doesn’t necessarily overwrite the partition table that was on the device before though (depending on what type of partition it had).
If we are encountering disk errors after a fresh copy it means either our source also had a disk error or that not everything was overwritten completely. A simple fsck will correct it or you could completely wipe the disk so there’s no partitions and copy it again.