
When my wife and I were trying to play Cyberpunk 2077 on our last-gen console it was extremely painful and not just because of the bugs. It was painful because every time I died it would take 2-3 minutes to reload the game.
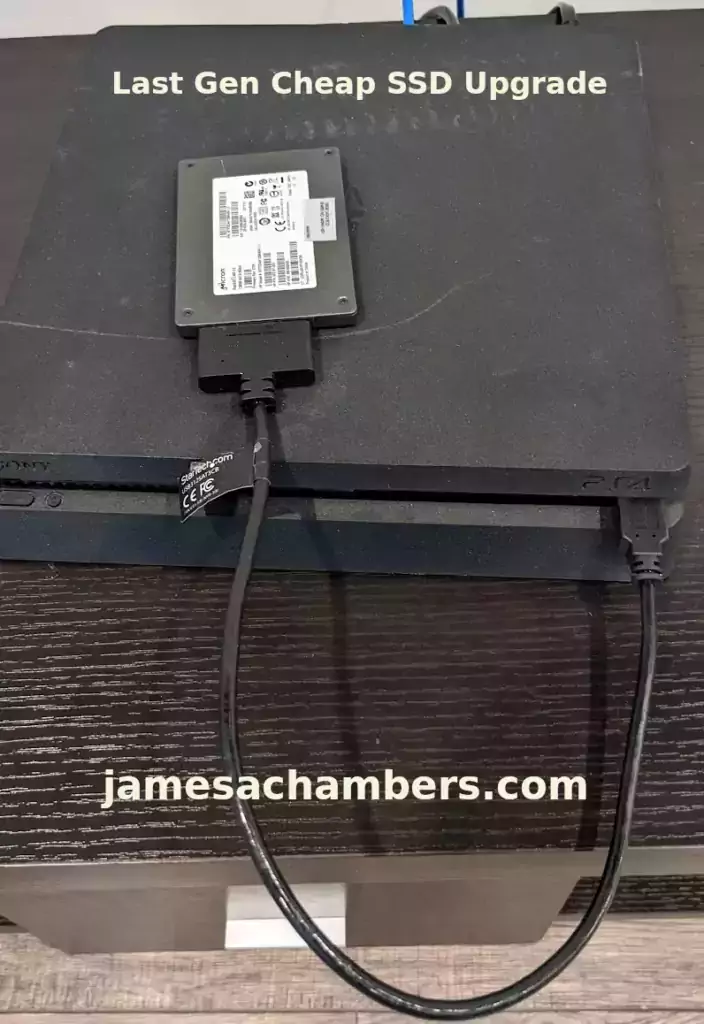
Eventually I decided to grab one of my spare SSDs and use a USB to 2.5″ SATA adapter and hook it up to our last generation consoles and try installing all of the Cyberpunk files to the SSD. It made a gigantic difference getting my load times down to something closer to 20-30 seconds (much better than 3 minutes).
This is also an incredibly cheap thing to do. Even if you buy a new SSD and a 2.5″ SATA adapter you will spend under $30 or so if you get a minimal capacity SSD. If you already have an older spare SSD even better.
Today I’ll cover how to set this up. Let’s get started!
Hardware Used
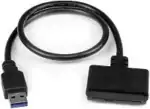
The StarTech USB 3.1 to 2.5″ SATA adapter is one I have recommended for many years for use with all kinds of devices including the Raspberry Pi. It’s widely compatible and works with gaming consoles as well.
Links: Amazon.com*, Amazon.ca*, Amazon.com.au*, Amazon.co.jp*, Amazon.co.uk*, Amazon.de*, Amazon.es*, Amazon.fr*, Amazon.it*, Amazon.nl*, Amazon.pl*, Amazon.se*, Amazon.sg*

The Kingston A400 has been a great drive to use and one of the cheapest for many years. It’s reliable, widely available around the world, has low power requirements and performs very well.
Links: AliExpress*, Amazon.com*, Amazon.ca*, Amazon.com.au*, Amazon.co.jp*, Amazon.co.uk*, Amazon.de*, Amazon.es*, Amazon.fr*, Amazon.it*, Amazon.nl*, Amazon.pl*, Amazon.se*, Amazon.sg*
Formatting the Drive
The drive should generally be formatted as ex-FAT (extended FAT).
Often you can format the drive with the console itself. If it is having trouble reading it simply plug it into a PC and format the drive as ex-FAT. If you are on Windows you can usually just right click on the drive in Windows Explorer and choose “Format”.
Using the Drive
The key part to making use of the SSD takes place when you install the games to the console. Both the PS4 and Xbox have options when you go to install the game to choose where to install it to.
If you’ve formatted and connected your SSD you will see this as an option. Simply install all of the game’s files to the SSD so they are accessed from there instead of the much slower internal storage.
The PS4 has a “Move to External Storage” option that lets you move already installed games onto the SSD when you press the “Options” button and this is a great way to move something you’ve already started over to the device.
The Xbox similarly has a way to move items to external storage:
- Press your controller’s Xbox button.
- Open the “System Guide” and select “System”
- Navigate to the “Settings” menu and select the “Storage” button
- Under the “Manage Storage” box, highlight your internal drive and select “Transfer”
- Check each game you want to transfer over or “Select All” for a full migration
- Click “Copy” or “Move Selected”
- Confirm the external hard drive you want to transfer to
Conclusion
This was super worth it. It reduced my game load times dramatically on last-gen consoles by something like 70%. It’s probably the biggest upgrade within your control you can give yourself on the last gen consoles.
If you already have an older SSD around it’s even cheaper to get a USB to 2.5″ SATA adapter and you won’t need anything else! Playing Cyberpunk 2077 was still a pretty bad experience compared to the next-gen update which was much better but while I was still trying to play it on last gen this upgrade saved my sanity and reduced my frustration enough that I got much further than I would have otherwise.
This should work on any game but will make the most difference on games that rely a lot on the files cached in storage. This is most games though frankly making this worthwhile to do on any game you want to get much faster loading times from!


But changing the internal HD to an SSD should work even better, right? Or as well? Or am I missing something with this? Just asking because changing drives on the PS4 is really easy. (XBox is another story :P)
So, I read the thread afterwards 😛 Sorry. Already answered. 😛
A 1Tb SSD is quite cheap these days so I would recommend you to switch to one internally. 😉
Hey Sketaful,
No worries at all, I couldn’t agree more!
If you have a PS4 and your SSD is over 250GB, you could just replace the Hard Drive with the SSD. It’s very easy to do and I have done that and I found that to be so easy. I HIGHLY recommend doing that as this will most likely decrease the loading times even furthur. Here is a SONY article on how to change the Hard Drive to an SSD.
Once you are done the upgrade, just buy an enclosure for the old Hard Drive and you have external storage. You can use this anywhere (as this is like a “external Hard Drive”), including the PS4.
If you have an Xbox though, it is much harder. It’s possible but it’s not that easy. You should rather use external storage on Xbox.
Thank you for reading my guide. Hopefully this will help.
Hey James,
Thanks for posting this, it makes perfect sense to me. It should absolutely be faster to install internally. Any time you have to go through any adapter or another bus (USB) that is going to lose some speed vs. the direct connection. Thanks for also sharing links to the official Sony documentation to do it! If you have a PS4 this is a great option. The size is 2.5″ SATA as well that the PS4 takes internally so it’s the exact same drive dimensions as the rest of this guide.
You could actually do both as well. Since the price of the SSD goes up with the capacity generally speaking it would not at all be a bad strategy to put something like a 512G or 1TB inside your PS4 using this exact method. You could then use another external drive to easily boost your capacity with another 512G or 1TB (or higher if you have cash or access to high capacity drives).
This will probably end up being cheaper than buying a 2 TB+ as it gets dramatically more expensive with the large sizes (often substantially more than the same size overall in smaller drives put together especially the bigger you go) but always check because deals and market strangeness can present opportunities to break this rule of thumb and get a truly great deal.
I couldn’t have asked for a higher quality first comment on the article, thanks for sharing!