
I just received a very exciting upgrade for my HackRF One. It is called the PortaPack H2. It essentially gives your HackRF a rechargeable battery, a display and many new capabilities that are a part of the Havoc firmware.
This setup will basically take my HackRF’s capabilities completely mobile opening it up to places and locations to explore that aren’t easy/possible without a setup like this.
Today I wanted to build the new PortaPack H2 and show all the steps I took. Let’s begin!
Hardware Used
Upgrade Kit
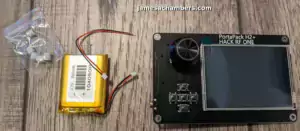
The upgrade kit came with the following:
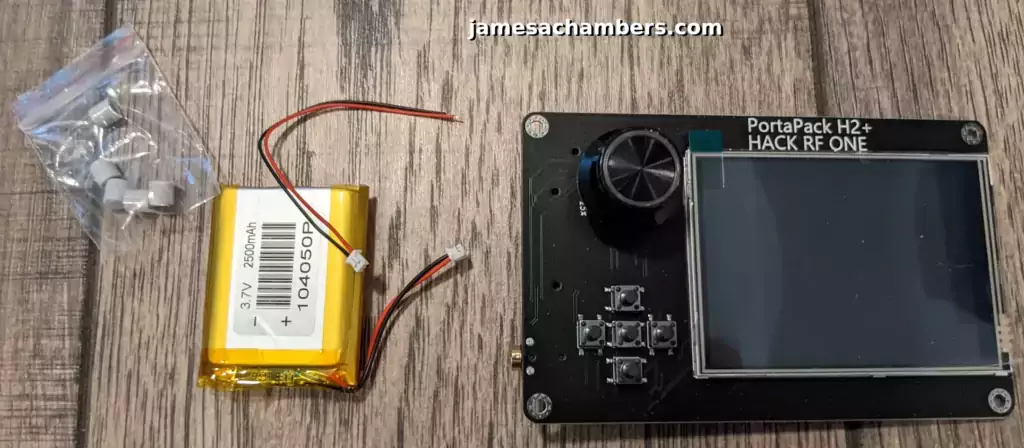
And here is the back of the board:

Well that looks relatively straight forward to put together. Now we just need to open the HackRF One.
Opening HackRF One
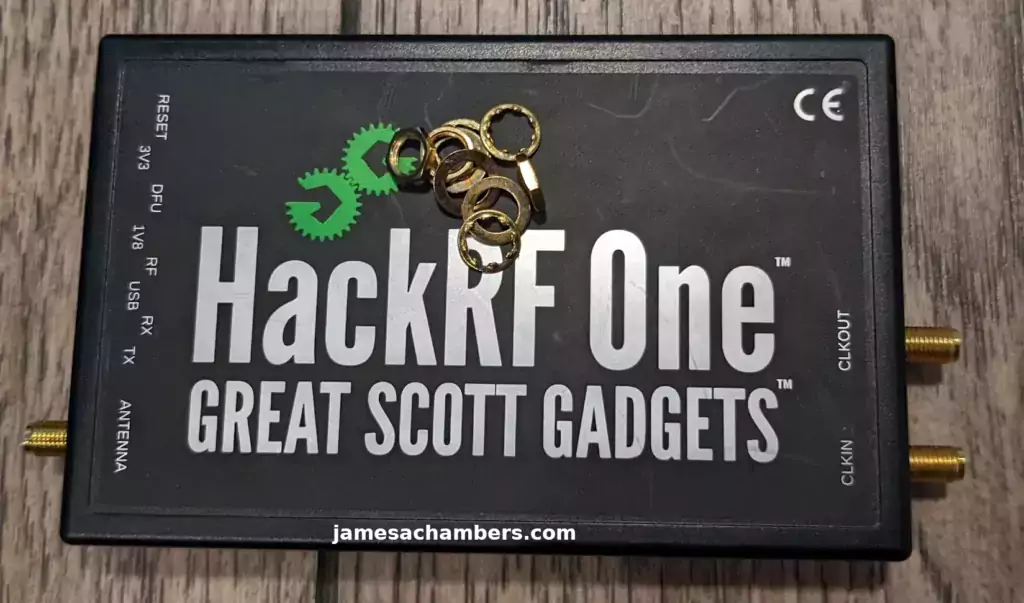
To do this you will actually remove the gold rings around the ANTENNA, CLKIN and CLKOUT ports. You can screw these off with just your fingers.
This should leave you with a nice pile of nuts and washers like this:
Now we can open the case using a simple pry tool. Something like a plastic pick works great:
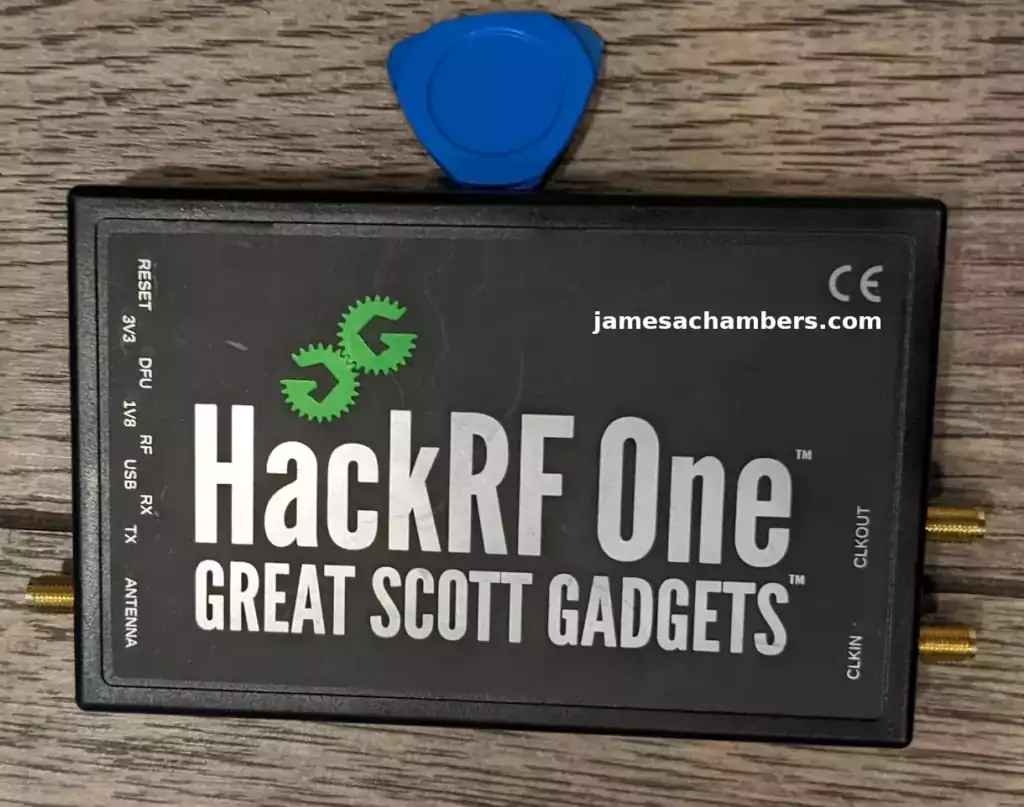
Now wedge the pick in and move toward each corner and they should pop and release:
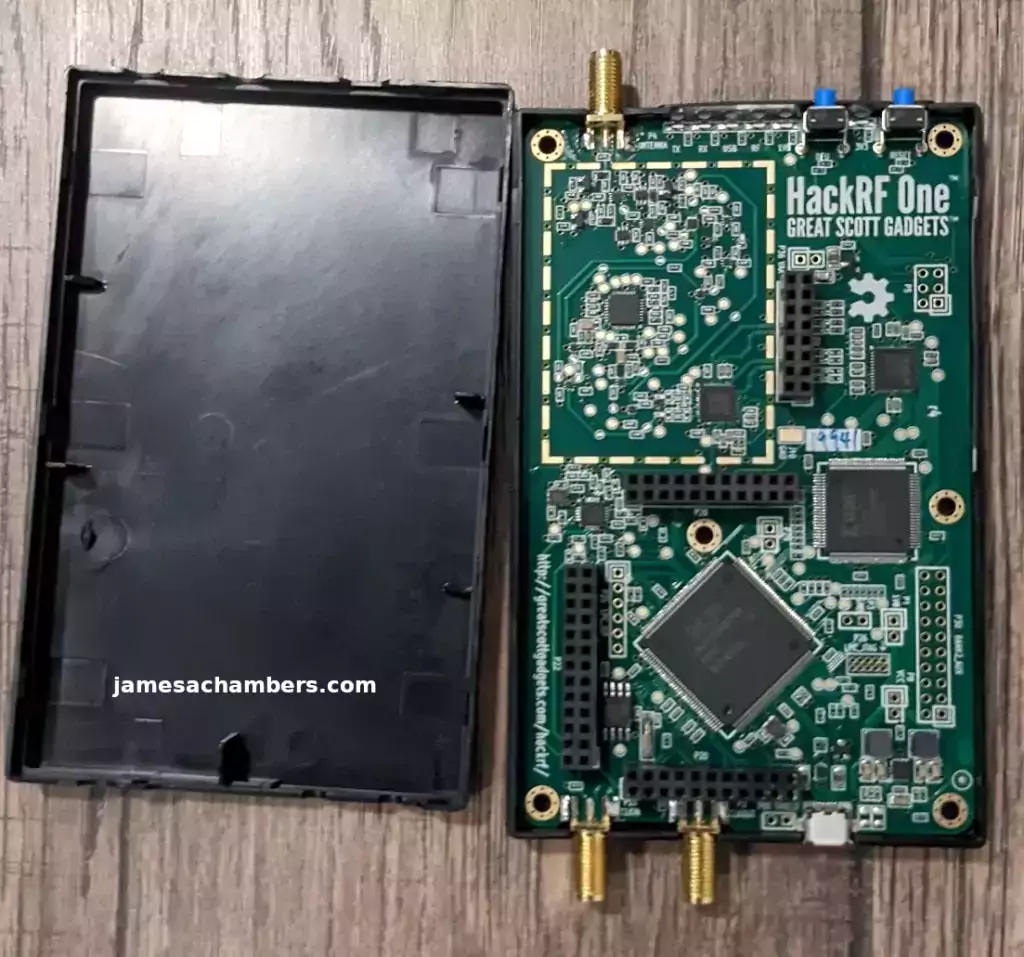
Bingo! You can now lift the board out of the HackRF One’s shell (it’s not screwed in). The black connectors on the board are where the pins from the PortaPack H2 will plug into.
Adding New Components
Now that we’ve got to the loose HackRF board you can literally see how to assemble this kit. The pins from the PortaPack board are going to plug right into the HackRF.
You need to be careful when lining up the pins. It’s easy to end up one row too far over and have a whole row of pins not actually plugged into a socket.
Once you’ve got them lined up you can gently press the boards together. Don’t push too far on one side without the other sides going in or things can get awkward. It’s best to push them in a little bit at a time and then go push on the opposite end of the board to make sure the 3 sections of pins plugging into the board go in relatively evenly.
Here is the result:
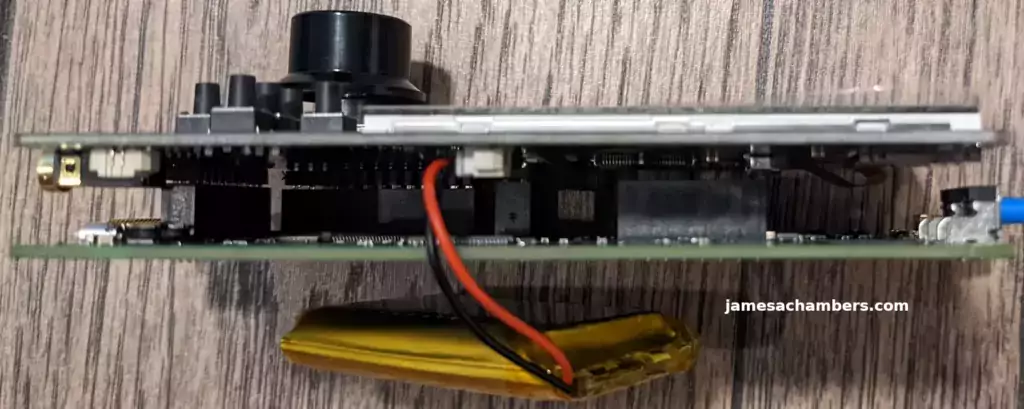
Finally I tucked the battery between the boards like this:
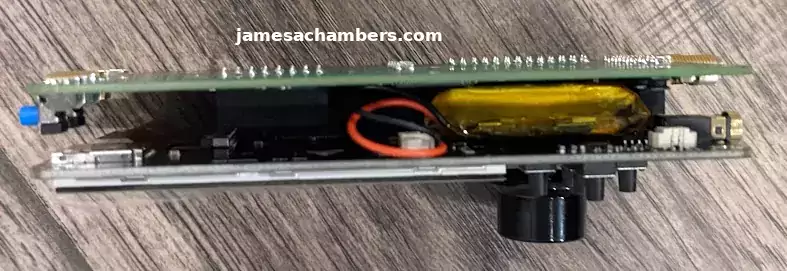
The boards seem to easily hold the battery in place. Now add the knob and buttons to the board.
We have now completed the physical build!
Flashing Havoc Firmware
Go to the official GitHub releases page for the Havoc firmware here.
Grab the latest available release (2.4.0 at time of writing). There are two files (FIRMWARE_mayhem_nightly_n_XXXXXX and COPY_TO_SDCARD_hackrf_mayhem_nightly_n_XXXXXX.zip).
Get both files although for this step we will be using the firmware file. Unzip the archive.
The next step will depend on your platform. There are scripts in there to help on platforms other than Linux. Since you are of course using Linux we will proceed with that assumption (but if you aren’t check the GitHub page which will have the documentation for your platform).
You should already have the HackRF utilities installed on your computer. We are going to use the hackrf_spiflash utility to upload the Havoc firmware to the device like this:
hackrf_spiflash -w firmware_hackrf.bin
A successful flash would look like this:
james@james-TRX40-AORUS-MASTER:~/Downloads/FIRMWARE_mayhem_nightly_n_260424/firmware$ sudo hackrf_spiflash -w firmware_hackrf.bin
File size 1048576 bytes.
Checking target device compatibility
Erasing SPI flash.
Writing 1048576 bytes at 0x000000.
Preparing SD Card
The PortaPack H2 has enhanced features that can be enabled with the use of a SD card including a world map. First insert a micro SD card into your computer and format it to be blank with the format of FAT32.
Now extract the file we got in the previous section COPY_TO_SDCARD_hackrf_mayhem_nightly_n_XXXXXX.zip
You are going to copy the contents of this archive directly into the root of the SD card. Once it is complete you can insert the SD card into the device.
Screen Troubleshooting Note
When I first got everything set up I had no display. It’s because you need to change the display driver your device is using.
This is very easy. The way you change it is by holding down one of the buttons (from the 5 button set) and power on the device. This may take up to 10 seconds to take effect.
For my display I had to hold the left button down and then power on the device. This immediately powered on my display.
If you aren’t getting any display this is almost certainly why and it’s not very likely your display is bad/damaged.
Conclusion
The upgrade is complete! Here is a look:
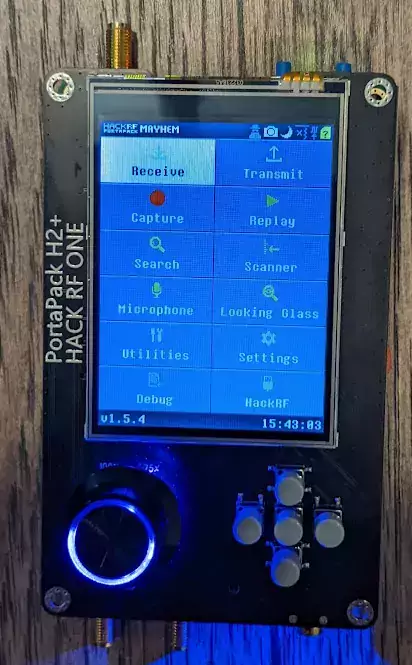
Here you can see the main menus. It’s very simple to navigate. You can easily do replay attacks from the menu here, perform captures, transmit signals and much more.
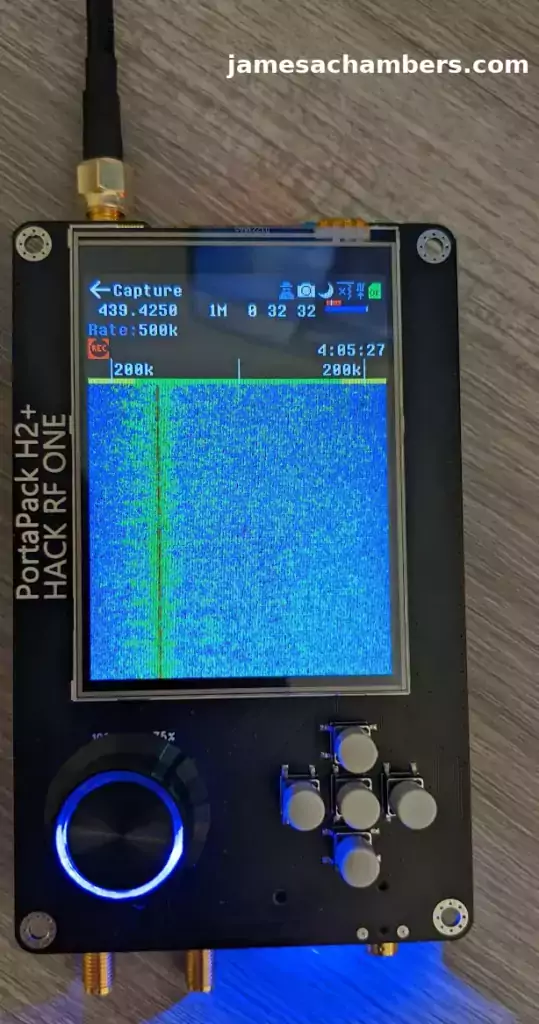
Here’s an active capture going:
It is very cool to see the handheld waterfall. I do need some better handheld antennas so I’ll definitely be getting some of those and covering them here on the site. I also have a metal body kit on the way (you can see it in the AliExpress link) but that will take a few weeks to get here.
Definitely stay tuned for more coverage of the PortaPack H2 features as I have just completed the build and will be diving into those in the near future!
Other Resources
My prerequisite guide HackRF Software Defined Radio Guide for Linux
To see using the HackRF for locking/unlocking a vehicle check out my Use HackRF SDR to Lock / Unlock Car article


My porta pack just showers up and there is no internal battery where can I buy one and which one do I buy?
Hello Mike,
Great question. So you need to be careful buying batteries that don’t come with the kit. The biggest thing you need to watch out for is the polarity. The red and black wires can sometimes be reversed on third party batteries and if it has the wrong polarity you can fry the board (and yes, I’ve done it to other boards, but not a PortaPack).
First let’s go to the PortaPack H2 GitHub and get the right specs. Here you can see the board was designed for a 1500mAh 3.7V battery with a JST connector. It looks like this:
When you buy a third party battery you need to make sure that the red and black wires match what your board should be. The best way to guess that is the above picture. My battery also matches the above picture’s configuration.
The only reason I can’t be 100% confident is that there are a lot of “clone” boards of PortaPack H2s. Is it possible some of them might have a different polarity? It’s probably possible but hopefully they stuck to the original design.
With all of that being said you can now search Amazon for 1500mAh 3.7V lithium ion batteries with a JST connector on Amazon like this.
Hopefully that helps!
My son gave me a HackRF One with a Porta Pack H2+ attached. After much work, finally got it to do anything to prove it actually would work. First, tried to upgrade the firmware which went badly. Removed the PortaPack and installed the HackRF One firmware directly and then placed the PortaPack back on the HackRF to flash the MayHem firmware to get a known playing field to work with. Got it to do all of the functions with parameters I had available. Does not come with a speaker, per se, but has audio out jack for a headset. Tried it with my computer headset and got no audio out. Is there schematic documentation available for troubleshooting? I’m a pretty good hardware tech, worked in the industry in the past. Just need a roadmap to try to find the problem by working backwards from the apparent problem spot, the human Interface audio device. Thanks.
hi. had the same issue. it seems to be related with the sd card. a workaround may be: turn on the device without the sd card inserted. try e.g „receive – Audio“, now you should have audio. in the next step i inserted the sd card again, just in this mode and then i used the arrow back buttons to return to the main menu. then a switched the device off and on again. still hearing something via headphones. but the next day again no sound, so that i had to repeat the procedure.. that‘s pretty annoying.. maybe someone knows a better solution…
Hi..
Does anyone know of a source for replacement momentary switches for the Hack One RF Portapack H2?
I’m referencing the group of 5 on the front alongside the rotary knob..
I snagged the right hand side button on a cable and the button “cap” or whatever the part of the switch that you press during operation.
Now all I have left is the body of the switch itself. It’s still functional IF I can press the center portion of that one switch with a micro sized screwdriver.
Thank you in advance!
Hey Rich,
Great question, it’s a bit tricky to answer though because honestly when I look at various PortaPack H2 listings all of the boards look slightly different. There’s definitely a bunch of different variations of this out there being sold by different people.
From what you’re describing you probably only need the button cover potentially. I’d probably reach out to some of the sellers and see if they can send you either the button cover or a button assembly. Hopefully that helps!
Would you be willing to repair 2 of my Hackrf? I have parts. FAIRCHILD BSS84 MOSFET P-CH 50V 130MA SOT-23 and MGA-81563-TR1 RF DRIVER AMP, 0.1-6GHZ 3V 14dBm, SOT363
Or do you know somewhere I can get them repaired?
Hey Sam,
Welcome! So that’s not an easy repair as I’m sure you’ve found. I don’t have the right equipment for it although there are some guides on how to do it.
Have you tried contacting Great Scott Gadgets? Their contact information is here. These would be the most likely people to repair it for you for a reasonable price (and have all the tools and expertise to do it). Third party repair shops may be able to help but it’s unlikely any of them will know what a HackRF is so I would try them first.
Hopefully that helps!
It probably needs 2 of the mga-81563 replaced, do you have that many?
I did a repair to a hackrf one with portapack. The Rx LNA and the TX amp were bad. Replaced both of them but not the skyworks switch and its sensitivity and power out has been restored. I obtained limiter diodes to put at the input(sma type) that limit at 10dbm. I expect to use a filter in front of it with the limiter and hope the front end will last a long time.
The input did not have a limiter just a large resistor on the antenna terminal. Any voltage excursion would be able to blow the input of the lna through the switch. I have 2 hackrf one’s with portapack, the second one has a bad lna but transmit power is ok so next change the LNA on it.
Hey chris451,
Wow, that’s an awesome repair and modification. Sounds like you’re well on your way to getting the second one fixed as well!
I have both Portapacks running well right now, Ive replaced the LNA/Buffer amp twice on one unit and once on the other. I think an AC ground loop and loose connector got it the second time. Now all is fine except for the rotary encoder. The encoder doesnt output a quadrature pulse the phase looks more like 180 degrees not 90 degrees.
This changes the more you use the tuner knob. I’m trying to track down this part and look at the spec on it. They built it wrong as near as I can tell. Maybe I can open it up and modify it so there is +90 degrees on the second pin.
The RF part is fine now and I always run them with a limiter or filter or DC block and sometimes an attenuator depending on the source its plugged into.
Hey Chris,
Great findings! It wouldn’t surprise me if the knob adjustments are being done in software/firmware as well. It very well may be electrically wrong and they are just adjusting it within firmware.
Great work repairing the RF part of the device!