
The term “software defined radio” simply means that parts of a radio that were traditionally hardware are implemented in software. This means that functions that used to require knobs, dials or some kind of physical mechanism can now be controlled via software. Essentially this makes using computers/ software with radios much easier and more accessible (cheaper) than it had ever been traditionally.
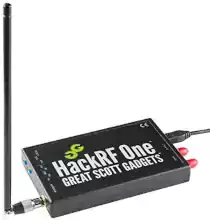
Now with that background I can explain what the HackRF device is. The HackRF is a software defined radio device that is designed to let you access *all* of the radio spectrum all the way from 1 MHz up to 6 GHz! Think of it like a FM radio where the frequency controls don’t stop at 88 MHz or 108 MHz and you could turn it way below or above that. That is exactly what a HackRF is!
You are definitely not limited to listening to radio stations though. You can basically receive all types of signals with the HackRF (depending on your antenna) including video and data signals which can be processed by your computer. In this guide I’m going to cover how to get started with a device like this in Ubuntu Linux and give you an idea of what kind of things you can do with it!
Overview
My setup ended up being very compact and relatively inexpensive. This is all it looks like:
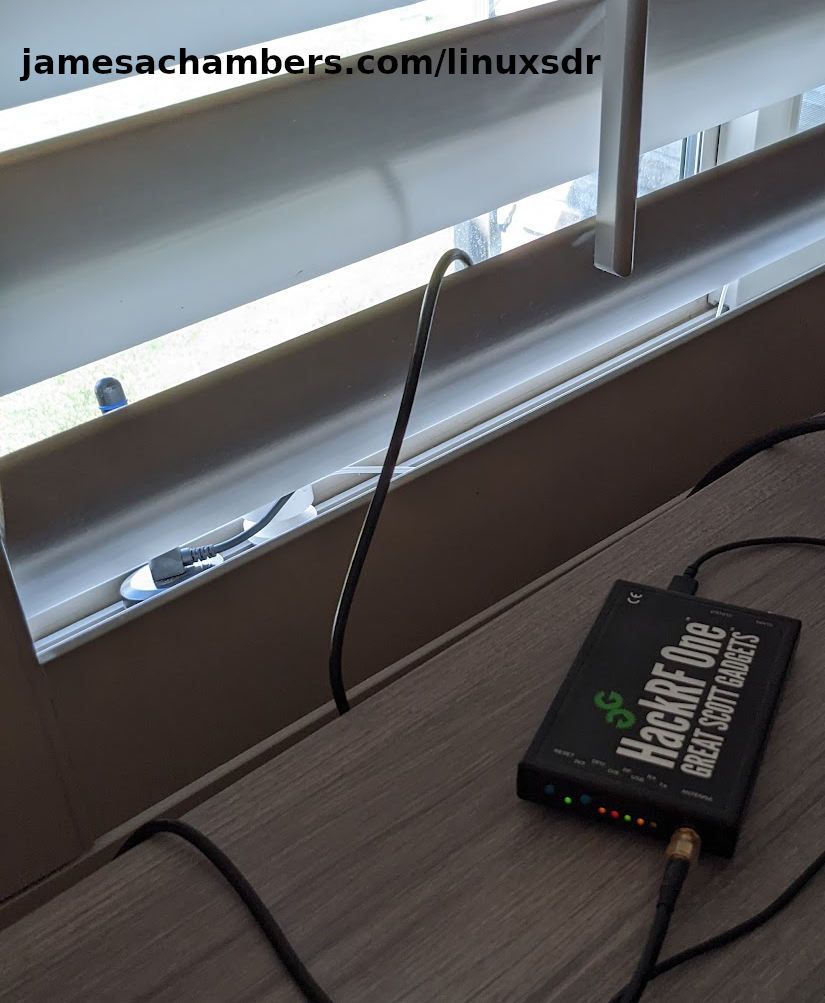
The antenna is there in the window (it has a blue ring on the top). This is plugged into my PC via a micro USB cable.
Hardware Used
HackRF Utilities
Installation
First we need to install the basic hackrf utilities. Many of the larger flavors of Linux such as Ubuntu have the hackrf main package right in their repositories. If you have an apt-based Linux distro then you can typically install the base hackrf package like this:
sudo apt install hackrfIf this is the case then you are done with this part and can skip to the next section!
If this isn’t the case then definitely check out the official HackRF installation documentation. This has instructions for many other flavors and platforms and yours is very likely there.
Now that you have the hackrf package installed there are a few things we should check / do first. If your HackRF device isn’t plugged into your Linux machine go ahead and plug it in now.
All of the utilities are prefixed with “hackrf_” and include the following:
- hackrf_clock – measures the current clock speeds of the device
- hackrf_debug – debug info
- hackrf_operacake – used for an antenna switching add-on for the HackRF
- hackrf_sweep – Performs sweep of the radio spectrum
- hackrf_cpldjtag – Configure on-board CPLD
- hackrf_info – Display information about connected HackRF devices
- hackrf_spiflash – SPI flash utility for firmware updates
- hackrf_transfer – Transfer files over radio
Check status / version
First let’s do a hackrf_info to make sure that everything is connected and being seen properly:
james@jamesgigabyte-linux:~$ sudo hackrf_info
hackrf_info version: unknown
libhackrf version: unknown (0.6)
Found HackRF
Index: 0
Serial number: 000000000000000057b068dc24299a63
Board ID Number: 2 (HackRF One)
Firmware Version: 2021.03.1 (API:1.04)
Part ID Number: 0xa000cb3c 0x00554766
Here we can see my firmware version on my board which is 2021.03.1 (API:1.04).
Updating Firmware
Mine didn’t come with the latest firmware and I’d imagine yours won’t either. It’s very easy and quick to update.
First download the latest release from the official HackRF GitHub releases page. Extract the archive and you will see a “firmware-bin” folder. If you have the HackRF One model like I do then you want the ‘hackrf_one_usb.bin’ file.
It can be flashed to the device with the hackrf_spiflash command:
hackrf_spiflash -w hackrf_one_usb.bin
Once the firmware update successfully completes go ahead and unplug the HackRF device briefly and then plug it back in.
CubicSDR
We’ve now completely configured and updated the HackRF device and are ready to actually do something with it! There are *many* software packages available to control/utilize our device and you will use different ones for different purposes.
This is a fantastic application to start exploring the spectrum. It should be available on most Linux distributions through your package manager like this:
sudo apt install cubicsdr
Usage
Now launch the application and if your HackRF is plugged in it should be detected like this:
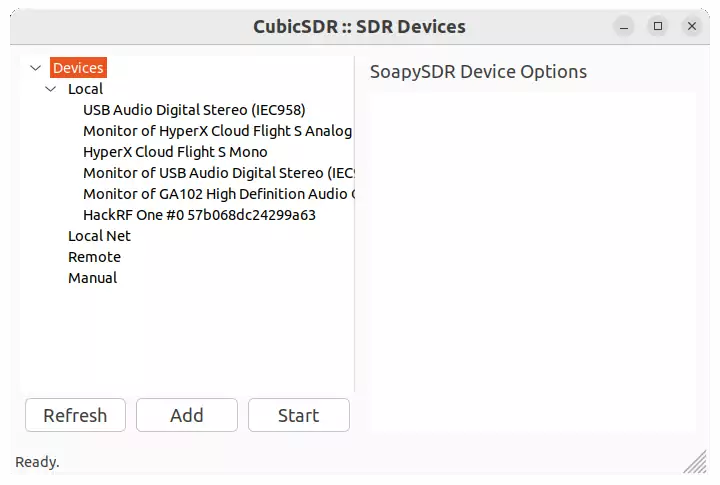
Select your HackRF device and before you press “Start” make sure you have your volume turned down. You are very likely about to hear a bunch of static until we tune into a station / configure the squelch and turning down the volume will prevent you from getting quite a startle. Now press “Start”.
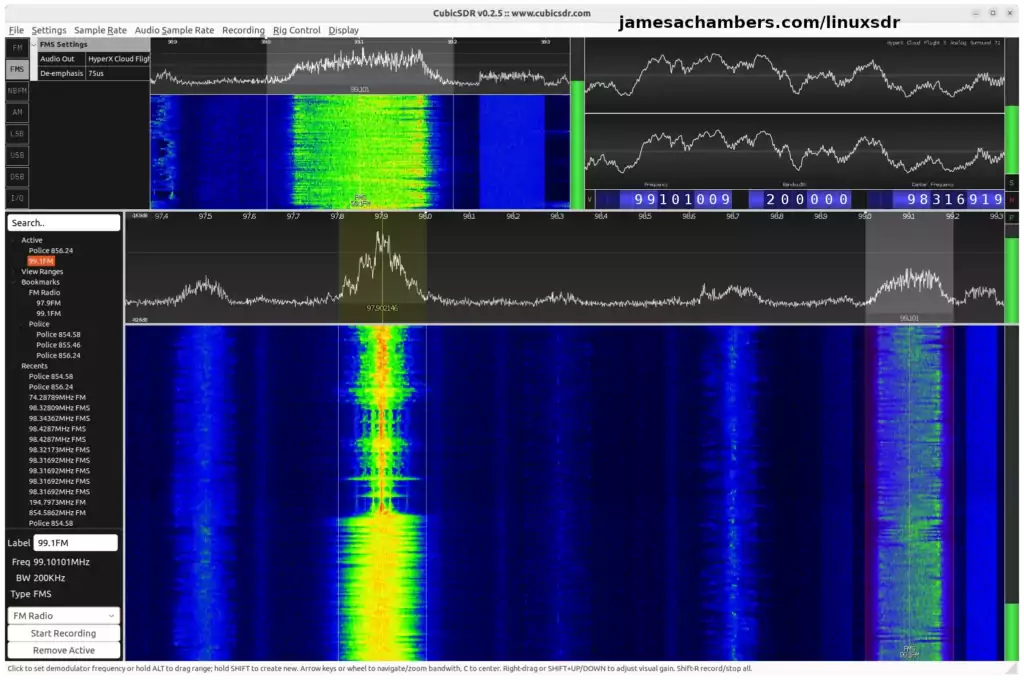
Now at first glance this may seem very overwhelming. It’s actually remarkably simple to use. It just looks scary but there’s only a handful of things you can actually click and most of it is just visualization / noise.
Selecting a frequency
If this is the first time you’ve opened the program and you haven’t ever tuned it to anything you are probably just hearing noise although it may have landed on a FM station. Let’s start with the most basic thing. Tuning the radio to a frequency.
If you look at the bottom half of the screen you see a mostly blue background with some pretty wild colors spread throughout. This is called the “waterfall”. What you are seeing is a section of the radio frequency and the brighter colors indicate activity. When we are looking for signals this is what we want to see and the darker blue spots indicate very low activity.
Now hover your mouse over the waterfall area and move it toward an area where you see some activity. You will see that you are selecting a range with two white lines on the outside. You want the outside two lines to envelop the signal and be as centered as possible like in the above screenshot.
Now simply left click your mouse. Your tuned frequency will change and you will immediately start hearing the signal.
Adjusting bandwidth
Remember the two white lines in the previous section that we tried to center our signal in? The bandwidth is simply how far apart those lines are. It’s how big our “slice” of the spectrum we are tuning to is. If it’s too narrow we won’t hear all of the signal and if it’s too wide we will hear interference (usually static) or potentially even other signals.
A basic rule of thumb is you want this to tightly wrap your signal. The easiest way to adjust this is the buttons in the top left corner of the screen (FM, FMS, AM) will change your bandwidth setting to a reasonable default for your signal type. Try experimenting with the different types and you’ll get a sense of the effects this has on the signal. You’ll learn to be able to tell from sound alone if it’s too narrow or wide from the types of interference/artifacts you’re hearing given time!
Fine tuning
So far we’ve been using a sledgehammer to tune. This is actually the best way to start if you’re just exploring but now it’s time to “zero in” on the signal. For this you will want to use the fine frequency controls which are located in the top right quadrant of the screen below your general sound output:
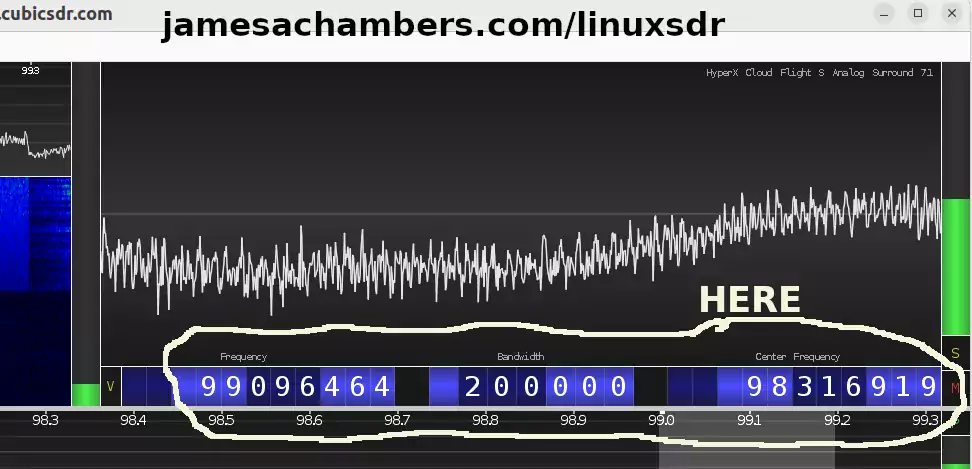
The way these work is if you click on the bottom half of the number it will lower the number by one and if you click on the top half of the number it raises it by one.
You have controls for both the frequency and the bandwidth that we covered here. This lets you zero in with precision on a signal until it sounds perfect.
Bookmarking
Once you’ve tuned the signal and are happy with it it’s time to bookmark it. The controls for bookmarking are all in the bottom left of the screen. Slightly above the “Bookmark” menu you will see a label that is blank. Type in a name now to the “Label” field for what you want to label this frequency and then press “Enter” to make it apply the label.
Now to actually create a bookmark click the “Bookmark..” dropdown and select “(New Group..)” as you will have to create a group first. I created the groups “FM Stations” and “Police” when I was creating this guide but you can organize them however you’d like. Once you have a group now click the “Bookmark..” dropdown again and select your new group.
This should now add the bookmark with the label you typed in the field. Now you can essentially “map” your airwaves by creating bookmarks for activity you find!
The best way to switch bookmarks is to highlight the bookmark and click “Activate Bookmark” at the bottom of the screen. You can add several frequencies to listen to at once and that can become a giant mess so if you have multiple “Active” frequencies you can simply highlight them and click “Remove active”.
Conclusion
We’re only scratching the surface in this guide of what you can do with a software defined radio. There are many other applications we can use such as GNU Radio, gqrx , SDRSharp and others. The YouTube recordings for this article were done in SDRSharp for example. We can decode video, data and many other types of signals using these programs.
I’ll definitely be covering more of these on the site which I’ll add to the “Other Resources” section. This was meant to help you get your HackRF installed and the firmware updated as well as start using the device to tune into frequencies.
It has transmit capabilities but you’re really going to want to check your local laws/regulations first and make sure you know what you’re doing before you attempt to transmit. I’m not even comfortable setting up transmission yet on mine although I plan on learning enough to get there but if you are already experienced with radios and know your local laws/regulations then yes it absolutely can do it.
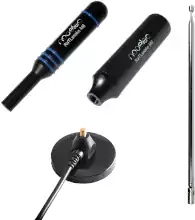
I was able to find many interesting unencrypted signals from a wide variety of sources. I picked up signals from the airport such as their security and general airport channels, police and fire and lots of other types of signals that come through clear as day on the HackRF. This wasn’t with anything more than the RaTLSnake antenna in my window (behind the low-e window coating even which isn’t great for the signal).
This was a relatively inexpensive build. It’s really interesting what kind of signals are out there and I myself still have a lot to learn. I just wanted to share how easy it was to get started and actually just start receiving and tuning in to whatever is out there. These radio waves are all around us no matter where you are (and essentially bombarding us but they’re harmless unless you’re being exposed to something usual you shouldn’t be) so you may as well listen to what they are saying with a device like this!
Other Resources
For the best upgrade you can do with your HackRF see my Upgrading HackRF One to PortaPack H2 guide!
Definitely see my Use HackRF SDR to Lock / Unlock Car for an example of me using the HackRF’s transmitter!
Speaking of knowing what is going on in the airwaves around you check out my Pwnagotchi WiFi Audit Tool guide!
My guide on getting started with the Ubertooth One (by Great Scott Gadgets, the same people behind the HackRF)


Try out HackRF One with SDRAngel. Some guy made DragonOS which has it all installed. This setup lets you use the HackRF transmitter.
I will check it out!