
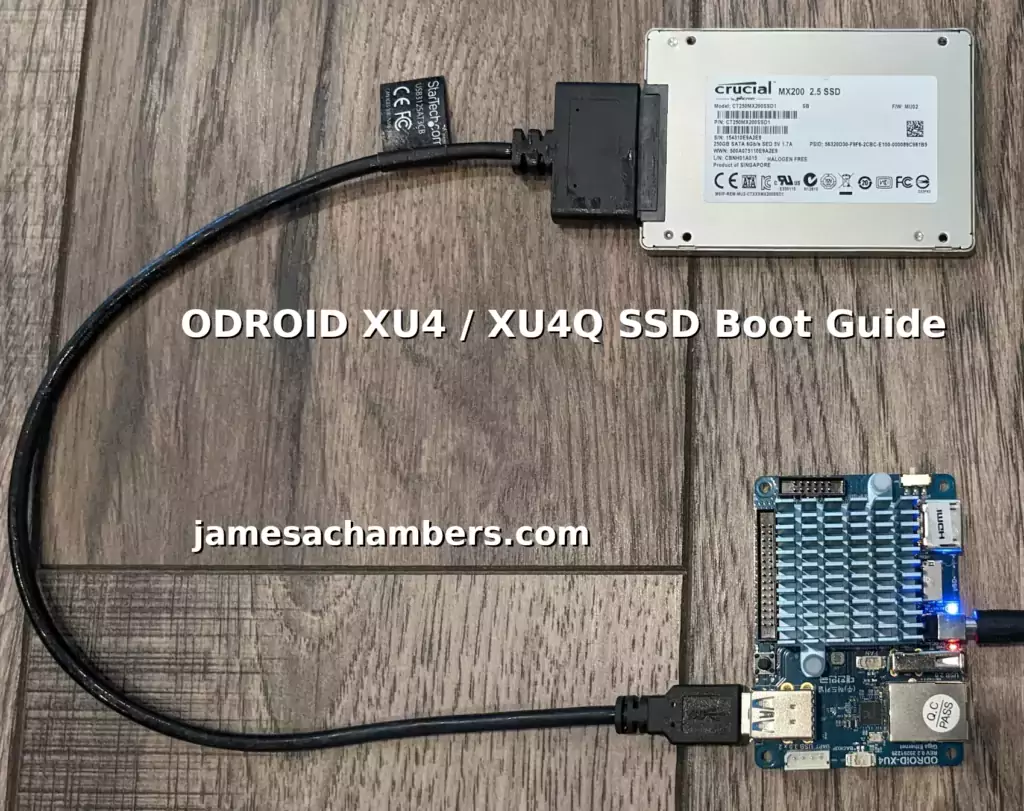
The ODROID XU4 and XU4Q can be a bit more tricky to boot from USB drives such as a SSD due to them not using the fantastic Petitboot bootloader like many of their newer boards have. It is still completely achievable though using an old trick and a sacrificial SD card.
The performance gains as well as access to much higher capacity drives can makes it more than worth it to set up SSD storage (as it is on nearly all single board computers).
Let’s get started!
Hardware Used
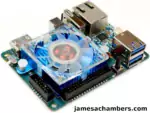
The ODROID XU4 is actively cooled by a powered fan. It has an octocore (8 core) processor.
Links: Amazon.com*, AliExpress.com*, Amazon.ca*, Amazon.com.au*, Amazon.co.jp*, Amazon.co.uk*, Amazon.de*, Amazon.es*, Amazon.fr*, Amazon.it*, Amazon.sg*
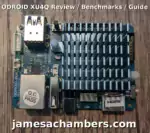
The ODROID XU4Q is a passively cooled version of the popular XU4 model. It has an octocore (8 core) processor.
Links: Amazon.com*, AliExpress.com*, Amazon.ca*, Amazon.com.au*, Amazon.co.jp*, Amazon.co.uk*, Amazon.de*, Amazon.es*, Amazon.fr*, Amazon.it*, Amazon.nl*, Amazon.pl*, Amazon.se*, Amazon.sg*
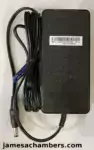
The XU4Q needs a pretty hefty power supply and tends to not boot if it’s not just right. This is a link to the official ODROID power supply.
Links: Amazon.com*, Amazon.ca*, Amazon.com.au*, Amazon.co.jp*, Amazon.co.uk*, Amazon.de,* Amazon.es*, Amazon.fr*, Amazon.it*, Amazon.nl*, Amazon.pl*, Amazon.se*
The StarTech USB to 2.5″ SATA adapter is one I have recommended for many years for use with all kinds of devices including the Raspberry Pi, Orange Pi, ODROID and Tinker Board. It’s widely compatible and works with gaming consoles as well.
Links: Amazon.com*, Amazon.ca*, Amazon.com.au*, Amazon.co.jp*, Amazon.co.uk*, Amazon.de*, Amazon.es*, Amazon.fr*, Amazon.it*, Amazon.nl*, Amazon.pl*, Amazon.se*, Amazon.sg*
Preparing SD Card
First you should have a completely working installation on a SD card of the OS that you would like to use. If you have an already working installation you want to move to your SSD you can use this as well.
You should completely update first with:
sudo apt update && sudo apt full-upgrade
If you are using a different package manager then update the image however you need to for your distribution.
Preparing SSD
Now we are going to connect your SSD to the XU4. Make sure you plug your drive into one of the blue USB 3.0 ports and not the white USB 2.0 port!
First we are going to completely remove all partitions from the drive so it’s completely blank. If you only have one drive plugged into the XU4 (and nothing else) this should be /dev/sda.
sudo fdisk /dev/sda
Now remove all partitions from the device. If you press “p” it will print out the partitions. Here’s an example on mine:
odroid@odroid:~$ sudo fdisk /dev/sda
[sudo] password for odroid:

Welcome to fdisk (util-linux 2.37.2).
Changes will remain in memory only, until you decide to write them.
Be careful before using the write command.

This disk is currently in use - repartitioning is probably a bad idea.
It's recommended to umount all file systems, and swapoff all swap
partitions on this disk.


Command (m for help): p

Disk /dev/sda: 232.89 GiB, 250059350016 bytes, 488397168 sectors
Disk model: CT250MX200SSD1
Units: sectors of 1 * 512 = 512 bytes
Sector size (logical/physical): 512 bytes / 4096 bytes
I/O size (minimum/optimal): 4096 bytes / 4096 bytes
Disklabel type: dos
Disk identifier: 0xa48b971e

Device     Boot Start      End  Sectors  Size Id Type
/dev/sda1        8192 30441472 30433281 14.5G 83 Linux

Command (m for help): d
Selected partition 1
Partition 1 has been deleted.

Command (m for help): w
The partition table has been altered.
Failed to remove partition 1 from system: Device or resource busy

The kernel still uses the old partitions. The new table will be used at the next reboot.
Syncing disks.
Even though I got the device was busy error after unplugging and replugging the SSD the partition table was clear.
Once the drive is all cleared off you’re ready for the next step.
Cloning Installation to SSD
We’re now ready to clone your installation to the SSD. If you don’t have the eMMC attached your current root filesystem should be /dev/mmcblk1p2.
We can now copy your drive to the SSD with the following command:
cat /dev/mmcblk1 > /dev/sda
Wait for the operation to complete (there won’t be any output but you will have a cursor again and be able to type new commands). It may take several minutes or longer. You are copying an entire drive from one to another basically with that one command.
If you are having any trouble with permissions try becoming “root” first with:
sudo su
Now try running the command again and as the superuser you should not encounter any permission errors.
Change SD card’s UUID
Now unplug the SSD and plug it back in. We need to change our SD card’s UUID so that it doesn’t try to boot from that partition. We can set it to a random one with the following command:
sudo tune2fs -U random /dev/mmcblk1p2
We can verify that it has changed with blkid like this:
odroid@odroid:~$ sudo blkid
/dev/mmcblk1p2: LABEL="rootfs" UUID="31077d7d-1be2-4d93-b833-c2ce6de7a8ce" BLOCK_SIZE="4096" TYPE="ext4" PARTUUID="3cedfd53-02"
/dev/mmcblk1p1: SEC_TYPE="msdos" LABEL_FATBOOT="boot" LABEL="boot" UUID="52AA-6867" BLOCK_SIZE="512" TYPE="vfat" PARTUUID="3cedfd53-01"
/dev/sda2: LABEL="rootfs" UUID="e139ce78-9841-40fe-8823-96a304a09859" BLOCK_SIZE="4096" TYPE="ext4" PARTUUID="3cedfd53-02"
/dev/sda1: SEC_TYPE="msdos" LABEL_FATBOOT="boot" LABEL="boot" UUID="52AA-6867" BLOCK_SIZE="512" TYPE="vfat" PARTUUID="3cedfd53-01"
Notice that /dev/sda2 and /dev/mmcblk1p2 no longer have matching UUIDs. This is exactly what we want.
Run fsck
Before we reboot run e2fsck on the drive like this:
sudo e2fsck -yf /dev/sda2
This will prevent you from having to run fsck on the CLI the first time you try to boot.
Reboot and Verify
Now reboot the XU4 with:
sudo reboot
With any luck you should be booted using your SSD! We can verify this with the mount command like this:
odroid@odroid:~$ mount
sysfs on /sys type sysfs (rw,nosuid,nodev,noexec,relatime)
proc on /proc type proc (rw,nosuid,nodev,noexec,relatime)
udev on /dev type devtmpfs (rw,nosuid,relatime,size=947684k,nr_inodes=184562,mode=755)
devpts on /dev/pts type devpts (rw,nosuid,noexec,relatime,gid=5,mode=620,ptmxmode=000)
tmpfs on /run type tmpfs (rw,nosuid,nodev,noexec,relatime,size=203920k,mode=755)
/dev/sda2 on / type ext4 (rw,noatime,errors=remount-ro,stripe=32753)
/dev/sda1 on /media/boot type vfat (rw,relatime,fmask=0022,dmask=0022,codepage=437,iocharset=iso8859-1,shortname=mixed,utf8,errors=remount-ro)
Here we can see that our root partition (/) is indeed on /dev/sda2 and not /dev/mmcblk1p2. Success!
Testing Performance
You can verify the performance of your SSD on Pi Benchmarks using the following command:
sudo curl https://raw.githubusercontent.com/TheRemote/PiBenchmarks/master/Storage.sh | sudo bashSD Card Test
To show the improvement between having a SD card rootfs and having a SSD rootfs I did a before test here with the SD card:
     Category                  Test                      Result
HDParm                    Disk Read                 72.04 MB/s
HDParm                    Cached Disk Read          74.11 MB/s
DD                        Disk Write                8.6 MB/s
FIO                       4k random read            2442 IOPS (9769 KB/s)
FIO                       4k random write           90 IOPS (362 KB/s)
IOZone                    4k read                   7823 KB/s
IOZone                    4k write                  1860 KB/s
IOZone                    4k random read            7591 KB/s
IOZone                    4k random write           1571 KB/s

                          Score: 752
SSD Test
     Category                  Test                      Result
HDParm                    Disk Read                 286.44 MB/s
HDParm                    Cached Disk Read          279.66 MB/s
DD                        Disk Write                193 MB/s
FIO                       4k random read            18927 IOPS (75711 KB/s)
FIO                       4k random write           15170 IOPS (60681 KB/s)
IOZone                    4k read                   22714 KB/s
IOZone                    4k write                  27447 KB/s
IOZone                    4k random read            18418 KB/s
IOZone                    4k random write           28851 KB/s

                          Score: 8,373
You may view the full benchmark for the XU4Q on Pi Benchmarks here.
Wow, that’s quite a dramatic improvement. We went from 752 to 8,373. That’s more than a 10x! You can also look at the raw IOPS and MB/s numbers on HDParm and the various test categories if you are more familiar with those to see the improvement.
Conclusion
The XU4 and XU4Q actually benefit a lot more from this than a lot of the other boards that I have SSD boot guides for due to them having the USB 3.0 ports. We get a very nice performance increase and access to much higher capacity storage devices. You can get roughly 10 times the performance with even a 2.5″ SATA SSD like I am using here.
There isn’t a lot of benefit to using NVMe over USB 3.0. The USB 3.0 bus will limit your speed to around the score I got even with a 2.5″ SATA. It needs a faster bus or a real NVMe port to go much faster than that so don’t use any drives that are too expensive for this.
This does require sacrificing a SD card to serve as the bootloader so make sure you use one of your slow and low capacity SD cards for this as it won’t be doing much other than switching the root filesystem over to the SSD during boot time.
I definitely recommend any XU4 owners give this a try as it’s extra worth it due to the USB 3.0 on the board!
Other Resources
Make sure to check out my original ODROID XU4Q review which includes eMMC tests and benchmarking
My ODROID eMMC guide is available here which covers which compatible modules are compatible with each ODROID
For an awesome retro gaming handheld console check out the ODROID Go Super
Also see my Libre Computers “Le Potato” Review for an available $~45 SBC


Hi James, wonderful guide and it really a life saver.
Just one question about the OS, I have noticed that the instructions are for Linux OS, have you tried Android?I found that performance on booting Android from SD on XU4 is not acceptable at all so SSD from USB3 is the only hope.
Pls kindly share the instructions if you have done it with official Odriod Android OS.
Thanks
William
Hey William,
Android is pretty complicated to try and do this with. I’ve never heard of anyone doing it successfully. The partition layout is completely different and typically needs to be “flashed” instead of just writing an image.
Hopefully that helps!
Hi James, thank you for your confirmation, I have observed the same. Since the price of EMMC has dropped significantly, may be I it’s time to get one for test.
Hey William,
No problem, let me know how it goes if you try it!
This Guide worked for me. The system is now on an 64GB USB3-Stick and works fine.
I have several applications with high IO on it like influx, NodeRed, Grafana, Sqlite, Domoticz and so on which are mutch faster now.
Thanx a lot for this Guide
Hey Deali,
Excellent, this should be perfect for those applications. Thanks for sharing and take care!
after all this we created new /dev/sda2 on ssd … now how can i access this folder .. couse i assume its not mounted .. sorry if i confused you with this but .. i dont know where is the new /media/boot folder to make a change in usb-storage.quirks=
Hey ersen,
You can pretty much mount it wherever you would like. If you wanted to mount it to the /mnt folder you could do:
sudo mount /dev/sda2 /mntNow you could cd to /mnt and see all of the folders on that partition. Hopefully that helps!
oops … the question before was not that logical …but i know my terrible uas keep haressing my hdd .i gues i solved that issue either adding boot.ini file the q. or adding the file /etc/modprobe.d/disable-uas.conf with the same …now what…
yes .. its indeed .thank you for your time ..
Hey ersen,
No problem at all, enjoy and take care!
Great James! Thanks. A huge boost! So, James, not clear for sudo tune2fs -U random /dev/mmcblk1p2. I succeeded with that command, but with the SD card unmounted. Anyway thanks a lot. great article. And great tool to obtain benchmark!
Hey Michele,
Thanks so much, I’m glad you got it going and enjoyed the benchmark as well, take care!
Hi great bench, Does the xu4 has sdr104 mem card controller?? Coz i see speeds over 70mb/sec
Hey Jim,
Great question! It does indeed have sdr104 support for sure. The benchmarks were great for both SD / eMMC due to this as both options fully support sdr104. Hopefully that helps!
Strange for such an old sbc, i got 90mb/sec in my odroid C4 with a transcend 500s card,stupid raspberry foundation is it so difficult to upgrade their sdr50 to 104 in a later revision.
Hey Jim,
Wow, that is an absolutely crazy number! Yes, I don’t know why the SD card stack is so limited in the Pi. You can’t even overclock the SD card port anymore on newer Pi models (you still can on your Zero W though with dtparam=sd_overclock=100).
I also would add to my wish list that they add support for Application Class A2 cards. The way application class works is that all SD card ports can support A1 as that is really just a memory speed classification on the card. There are A2 cards as well though but the host has to support A2 to take advantage of that part of the application class specification and it still doesn’t on the Pi (and I don’t know of many things that do yet to be honest, probably newer phones?).
There is a lot of confusion out there about the A1 vs A2 standards even among some of the biggest Pi content creators. They think A2 is a scam because they have tested the cards and they aren’t any faster. That is because the Pi doesn’t support the A2 standard. It’s not because it’s a trick or a scam. It’s actually the exact same as sdr50 vs sdr104 (they just don’t know about those because those terms aren’t marketed like A1 vs A2). It’s because the host needs to support it and you can add that to the list of things it doesn’t support for sure:
This is why it’s valuable to benchmark these for sure. We can start to spot and understand these differences. We’ll score that point for ODROID for having a better SD card stack/capabilities than the Pi for sure. Thanks for sharing this!
Maybe is the card i used it has MLC NAND flash
Its quite expensive thought
I remember the Toshiba exceria a few years ago with 90 read and 30 write when all other cards didn’t go over 20/10
Still have a couple
If the Raspi had sdr104 i wouldn’t talk about hdd boot now
Yes, I have a bunch of older cards that are from “Golden Generations” I guess you could call them. The old orange Samsung Evo (NOT the red Evo+) cards from around 2015 are still some of the fastest cards I have (even without application class). The newer ones are not as good though. It’s really spotty for sure. It’s during certain periods when they happened to be using really high grade memory / controllers inside their SD cards (memory was probably ultra cheap at the time, they had a huge surplus, who knows).
Imagine if we had A2 support and you were hitting speeds like 160MB/s. That standard has been out for years across multiple Pi generations and there’s nowhere it would make a bigger difference than there. In fact everything I’m reading seems to suggest it would be implemented into the host driver meaning it wouldn’t need a brand new SD card slot to support this. They would just need to update the driver potentially but maybe there’s more to it than that. Either way, it would be a total game changer if we could hit speeds like that over SD.
Still have for 7 years my transcend rdf5 card reader quality hardware,there are 300mb/sec cards i think from kingston,but still the price is higher than ssd and slower not worth it
When the pi gets this speeds we will be 80 years old :p
Look at this guy the leader of scams,he broke any copyright law there is
amigapple
Hey Jim,
There’s only two places in the world you could do this and get away with it (that have any kind of infrastructure where you could capitalize on it): Russia and China. It looks like this one is in Russia.
If you go to their shipping section: “we may ship items from Turkey, Kazakhstan or Russia”. What this really means is that they will ship it from whichever country doesn’t have sanctions against it preventing them from shipping it which is probably not Russia right now but it would be a vassal state / close friend for sure.
This in itself doesn’t bother me normally if it’s an otherwise reputable / legitimate operation. I’ve had conversations with visitors on the site from all those countries and have had great experiences. If they aren’t high ranking government officials then they aren’t to blame for current geopolitics and probably shouldn’t be held responsible for their government’s actions anymore than I would want to be held personally responsible for my government’s actions that are completely outside my control. I’ve found regular people to be regular people everywhere.
In this case though when you’re dealing with software and licenses you will have no recourse if anything is wrong / it’s outright a scam (as in if you actually receive anything it will be pirated licenses/everything). When that is the case you have to look at their choice of countries they are operating from and put two and two together that things are shipping from there because they can’t be touched there by lawsuits from the companies they are infringing on (and they know it).
Some of these product offerings are really strange. There is a Windows 3.1 SD card available for purchase. What?!
None of these products make sense to order anyway. If you are going to pirate it you definitely don’t need a SD card from Russia to do this. I would also hope the people smart enough to actually have any use for a Windows 3.1 SD card installation would realize that you are not getting a legitimate license from Microsoft for the product so there is no point in paying anyone for it vs. using a torrent or widely available keys for it (there’s no activation in those older ones).
Interesting stuff!
Windows 3.1 didn’t really had an activation i think it was just a key you put in the setup, he has account’s also in ebay and other sites as i see in the news page,a lot of raspberry “pirated” things name it and its there I don’t understand why someone can trust this people and buy from them anyway.
I start from win95 and now im on seven,i will put soon win10 in a amd-e450 netbook of course i will put the light version :p
Win 11 is too heavy for me plus i prefer 32bit
They have Better compartibility
Hey Jim,
This is still on my to-do list to try and review! Let me know how your experience goes!
I have tested before win10 lite on that 10 years old netbook,it goes pretty fast 700mb ram used on idle out of 3.5gb
From the many tests with hdds a 3.5″ drive at 5400 goes faster than a 2.5″ drive at 7200
Its a myth that drives with the same rpms go the same if one is 3.5″ and the other in 2.5″
Probably its the 12v versus the 5v more volts more power.
Hey Jim,
Great observations! Yes, I can explain the HDD part a little bit at least. There are a few reasons and this article covers them pretty well.
The biggest reasons are that 3.5″ drives tend to have larger and higher quantities and quality of cache / memory on board. The storage controller used also tends to be a higher grade in the 3.5″ ones.
They also tend to have less power restrictions as they were typically meant for desktop/server use where power wasn’t as limited / battery power wasn’t really coming into play. This isn’t necessary how people use the drives (especially in 2022) but it’s the design methodology that has dominated the industry for decades and will generally be true for everything but specialty parts (that were usually specially designed to overcome these shortcomings which usually means more $$).
Some of the reasons are less obvious but pretty important. For example 3.5″ HDDs hold more sectors per track on the disk platter. Others have to do with the physics of how the larger platter spins vs. the smaller platters in 2.5″ drives. That article is definitely worth a read but your observations are definitely right / correct!