
The Orange Pi 5 has a nice M.2 NVMe slot but unfortunately most of the official images will not boot if you try to directly image a NVMe drive. Fortunately there is an easy way to get this working that people who frequent the blog will almost certainly have seen before.
We are going to bootstrap the boot process using a SD card and then clone that SD card to our SSD to be used as the root partition. This essentially will let us have our system’s root partition on the SSD (much faster).
Let’s get started!
Hardware Used
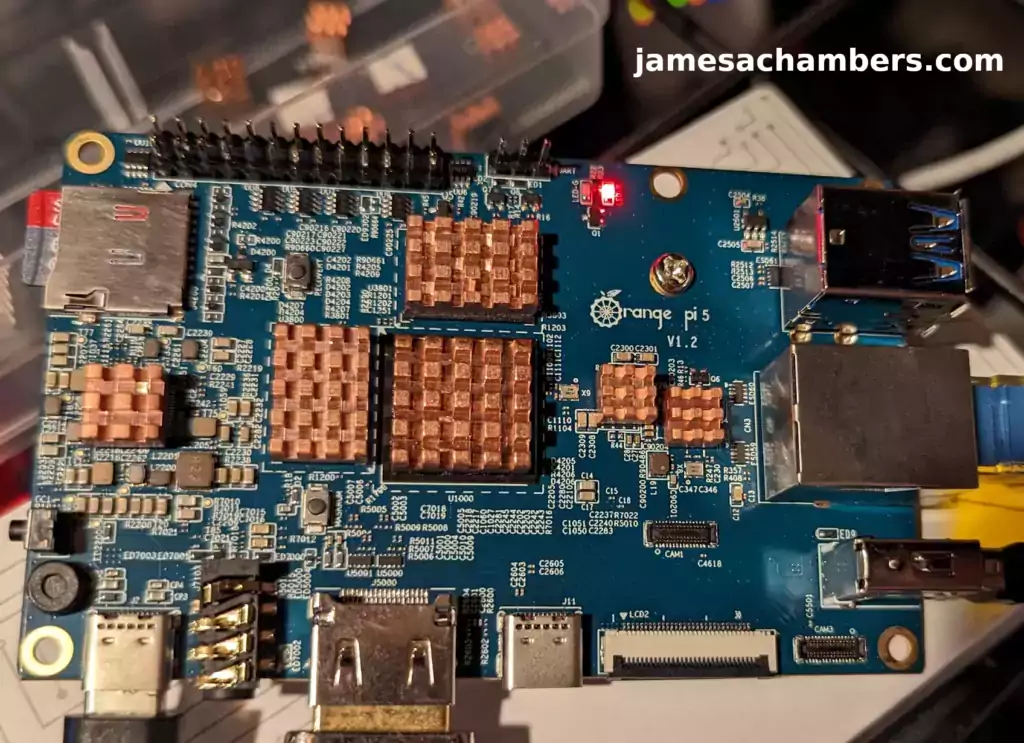
The Orange Pi 5 the latest release from Orange Pi and is the most powerful model yet. It has a 6 core CPU and options from 4GB of RAM all the way up to 32GB of RAM!
Links: Amazon.com*, AliExpress*, Amazon.ca*, Amazon.co.uk*, Amazon.de*, Amazon.es*, Amazon.fr*, Amazon.it*, Amazon.nl*, Amazon.pl*
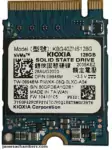
The Kioxia (Toshiba) 128GB M.2 2230 PCIe NVMe drive is much shorter than most NVMe drives (full size is 2280). It fits great with single board computers / tablets / other smaller form factors.
Links: Amazon.com*, Amazon.ca*, Amazon.co.uk*, Amazon.co.jp*, Amazon.com.au*, Amazon.de*, Amazon.es*, Amazon.fr*, Amazon.it*, Amazon.nl*, Amazon.pl*, Amazon.se*, Amazon.sg*

The Geekworm copper heat sink set is designed to fit many different single board computers. It uses thermal conductive adhesive which many “cheap” heat sink kits for SBCs don’t have. Eliminates hot spots and reduces throttling. Can be further enhanced by powered cooling over the heat sinks.
Links: Amazon.com*, Amazon.ca*, Amazon.co.jp*, Amazon.co.uk*, Amazon.de*, Amazon.es*, Amazon.fr*, Amazon.it*
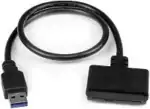
The StarTech USB 3.1 to 2.5″ SATA adapter is one I have recommended for many years for use with all kinds of devices including the Raspberry Pi, Orange Pi, ODROID, Libre “Renegade” and Tinker Board. It’s widely compatible and works with gaming consoles as well.
Links: Amazon.com*, Amazon.ca*, Amazon.com.au*, Amazon.co.jp*, Amazon.co.uk*, Amazon.de*, Amazon.es*, Amazon.fr*, Amazon.it*, Amazon.nl*, Amazon.pl*, Amazon.se*, Amazon.sg*

The Orange Pi official mouse uses 2.4GHz wireless to give you a wireless mouse experience with the Orange Pi
Links: Amazon.com*, AliExpress*

The Orange Pi monitor is meant to be a portable monitor you can take anywhere. It has a resolution of 1080P and features a hinge in the back that folds out to support the monitor.
Links: Amazon.com*, AliExpress*
Note for USB Booting
Important: Only the top blue port of the Orange Pi 5 is fast for using USB storage. You can use a USB-connected SSD.
The bottom port, despite being blue, is USB 2.1.
Keep in mind that if you are using a USB SSD then in the instructions anywhere it says /dev/nvme0n1 you will need to use /dev/sda or whatever drive was assigned when you plug in your drive via USB.
Note for Official Debian / Ubuntu Images (Updated 1/10/2023)
Orange Pi has updated their official images to support directly booting from NVMe. This means that if you are using the official Ubuntu or Debian from orangepi.org then you can actually write the image directly to the SSD. This is the easiest way to get it going.
You first need to write the image to a SD card and then run:
sudo orangepi-config
Then choose System->Install->Boot from SPI and install the new updated boot loader to the SPI flash.
This did not work at launch but is working now. It is now possible to simply write the official images directly to NVMe and boot with it after updating the boot loader! The following instructions will still be useful for other operating systems or operating systems that do not support booting directly from NVMe.
Note for Armbian (Added 1/20/2023)
Armbian has a similar install utility as orangepi-config. For Armbian you will use:
sudo armbian-config
Then choose System->Install->Boot from eMMC and install the new updated boot loader to the SPI flash.
You should also install the system to Armbian using this method. The instructions in the rest of the article are meant for operating systems that will not boot natively from NVMe. It uses a SD card as the boot loader to essentially let you boot anything (even ones not designed to boot directly from NVMe).
Supported SSD Sizes (Updated 1/26/2023)
Important: There is also a type of M.2 drive called a M.2 SATA drive. This is an older type of drive that most of you won’t have but some of you will. This type of drive is supported by the Orange Pi 5 but you have to add a special overlay (overlays=ssd-sata). If your NVMe drive shows up as /dev/sda instead of /dev/nvme0n1 then you have a M.2 SATA SSD. If you have a M.2 SATA drive follow this excellent guide by u/jng98908 on reddit.
You can use either a 2230 or a 2242 size NVMe drive.
There are actually holes for mounting hardware at both places.
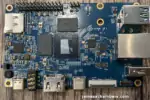
Using a 2230 size NVMe drive looks like this:
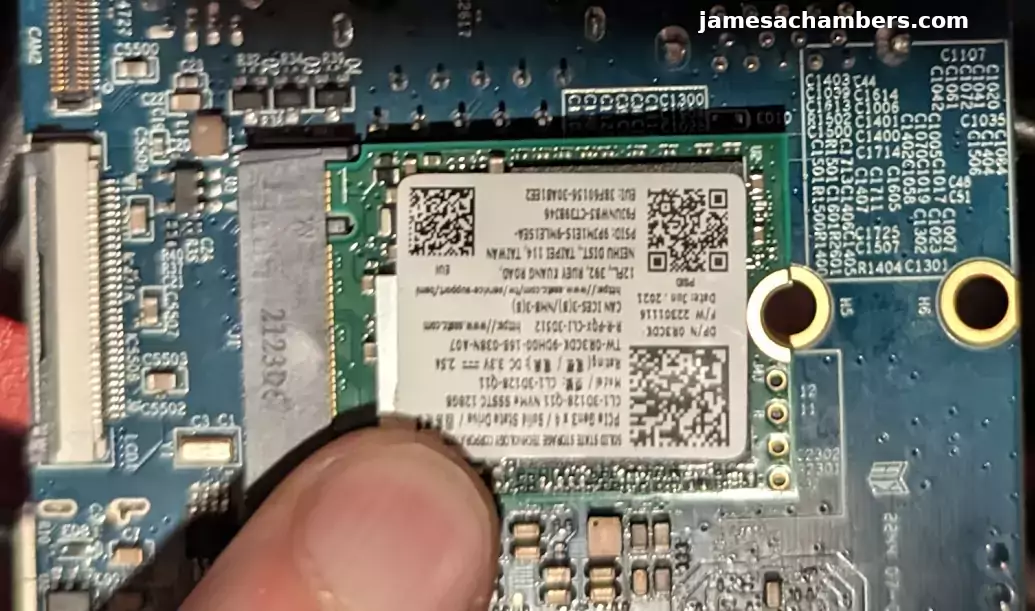
It’s totally fine to use a larger one but they will be hanging off the edge of the board. As you can see I do not have the mounts installed on my board. I just leave the 2230 drive in the port like this but it is on my to-do list to find some mounts for the M.2 drive for this board.
SD card boot loader – Preparing SD Card
First you should have a completely working installation on a SD card of the OS that you would like to use. I used the official Debian desktop image for this guide (recommended) so if your partitions are different it may be your flavor of Linux and need slightly altered instructions.
If you have an already working installation you want to move to your SSD you can use this as well most likely.
Note that some operating systems like Armbian will require you to manually go in and modify files on the “boot” partition. If you stick with the official images you should be able to follow the guide as-is but note that some operating systems may have text files (or even files that need to be recompiled with mkimage like for Armbian) for this method to work.
You should completely update first with:
sudo apt update && sudo apt full-upgrade
Preparing SSD
First we are going to completely remove all partitions from the drive so it’s completely blank. Your drive should typically be /dev/nvme0n1:
sudo gdisk /dev/nvme0n1
Now remove all partitions from the device. If you press “p” it will print out the partitions. You can then use “d” to delete them.
Here’s an example on mine:
root@orangepi5:~# sudo gdisk
GPT fdisk (gdisk) version 1.0.6

Partition table scan:
  MBR: protective
  BSD: not present
  APM: not present
  GPT: present

Found valid GPT with protective MBR; using GPT.

Command (? for help): p
Disk /dev/nvme0n1: 250069680 sectors, 119.2 GiB
Sector size (logical/physical): 512/512 bytes
Disk identifier (GUID): E3017ECA-4571-4F62-A39F-4BA2A4323BD8
Partition table holds up to 128 entries
Main partition table begins at sector 2 and ends at sector 33
First usable sector is 34, last usable sector is 250069646
Partitions will be aligned on 64-sector boundaries
Total free space is 8350 sectors (4.1 MiB)

Number  Start (sector)    End (sector)  Size       Code  Name
   1              64            8063   3.9 MiB     0700  loader1
   2           16384           24575   4.0 MiB     0700  loader2
   3           24576           32767   4.0 MiB     0700  trust
   4           32768         1081343   512.0 MiB   EF00  boot
   5         1081344       250069646   118.7 GiB   8300  rootfs

Command (? for help): d
Keep pressing d until all the partitions are deleted. Once they are gone use the ‘w’ command to write your changes.
Cloning Installation to SSD
We’re now ready to clone your installation to the SSD. We can now copy your drive to the SSD with the following command:
cat /dev/mmcblk1 > /dev/nvme0n1Wait for the operation to complete (there won’t be any output but you will have a cursor again and be able to type new commands). Remember that you are copying an entire drive from one to another basically with that one command.
Mine took about 30-45 minutes (although I was using a 64GB SD card and the larger SD card you use the longer it will take to copy the whole drive).
If you are having any trouble with permissions try becoming “root” first with:
sudo suNow try running the command again and as the superuser you should not encounter any permission errors.
Change SD card’s rootfs UUID
We need to change our SD card’s UUID so that it doesn’t try to boot from that partition. We can set it to a random one with the following command:
sudo tune2fs -U random /dev/mmcblk1p2
If you get an error with the previous command regarding csums try the following command instead:
sudo tune2fs -O metadata_csum_seed -U random /dev/mmcblk1p2
We can verify that it has changed with blkid like this:
root@orangepi5:~# sudo blkid
/dev/nvme0n1p1: SEC_TYPE="msdos" LABEL_FATBOOT="opi_boot" LABEL="opi_boot" UUID="0257-2A31" BLOCK_SIZE="512" TYPE="vfat" PARTLABEL="bootfs" PARTUUID="0a65713b-d4b4-0642-a3a4-ebc357e507a1"
/dev/nvme0n1p2: LABEL="opi_root" UUID="ae948e48-3646-4f5c-be01-73168e079bc8" BLOCK_SIZE="4096" TYPE="ext4" PARTUUID="7490e84a-f585-944e-9ce6-f275f067a023"
/dev/mmcblk1p1: SEC_TYPE="msdos" LABEL_FATBOOT="opi_boot" LABEL="opi_boot" UUID="0257-2A31" BLOCK_SIZE="512" TYPE="vfat" PARTLABEL="bootfs" PARTUUID="0a65713b-d4b4-0642-a3a4-ebc357e507a1"
/dev/mmcblk1p2: LABEL="opi_root" UUID="37a6ee0a-e61d-470a-9e53-eaf51726942c" BLOCK_SIZE="4096" TYPE="ext4" PARTUUID="4f32d51c-0523-1248-9bc3-092d1f11c594"
Notice that /dev/nvme0n1p2 and /dev/mmcblk1p2 no longer have matching UUIDs. This is exactly what we want.
Change SSD’s boot UUID
Next we are going to change the boot partition’s UUID on the SSD. This will make it so that the mounted /boot folder inside your operating system actually mounts the SD card (which is your actual boot loader in this configuration).
First make sure you have mtools with:
sudo apt install mtools -y
Now we can change the UUID with:
sudo mlabel -N aaaa1111 -i /dev/nvme0n1p1 ::
You can verify these are different using the same sudo blkid command as the previous section.
Run fsck
Before we reboot run fsck on the drive like this:
sudo fsck -yf /dev/nvme0n1p2
This will prevent you from having to run fsck on the CLI the first time you try to boot.
Reboot and Verify
Now reboot the Orange Pi 5 with:
sudo reboot
With any luck you should be booted using your SSD! We can verify this with the mount command like this:
root@orangepi5:~# mount
/dev/nvme0n1p2 on / type ext4 (rw,noatime,errors=remount-ro,commit=600)
/dev/mmcblk1p1 on /boot type vfat (rw,relatime,fmask=0022,dmask=0022,codepage=936,iocharset=utf8,shortname=mixed,errors=remount-ro)
/dev/nvme0n1p2 on /var/log.hdd type ext4 (rw,noatime,errors=remount-ro,commit=600)
Here we can see that our root partition (/) is indeed on /dev/nvme0n1p2 and not /dev/mmcblk0p2. We can also see that my /boot folder is properly mounted is /dev/mmcblk0p1 (the SD card which is serving as our boot loader). Success!
Resize NVMe Partition (Added 1/24/2023)
You can use Orange Pi’s built in resize application if you are using one of the official operating systems:
sudo /usr/lib/orangepi/orangepi-resize-filesystem start
Testing Performance
For the guide I used a SSSTC 128GB 2230 M.2 NVMe drive. These are available on Amazon for around $10-12 (also see Kioxia 128GB M.2 2230 module*).
You can verify the performance of your drive on Pi Benchmarks using the following command:
sudo curl https://raw.githubusercontent.com/TheRemote/PiBenchmarks/master/Storage.sh | sudo bash
Here are the results:
     Category                  Test                      Result
HDParm                    Disk Read                 375.32 MB/s
HDParm                    Cached Disk Read          381.15 MB/s
DD                        Disk Write                234 MB/s
FIO                       4k random read            47080 IOPS (188321 KB/s)
FIO                       4k random write           35128 IOPS (140514 KB/s)
IOZone                    4k read                   75628 KB/s
IOZone                    4k write                  67285 KB/s
IOZone                    4k random read            35874 KB/s
IOZone                    4k random write           70620 KB/s

                          Score: 17,718
The full Orange Pi 5 benchmark can be viewed here on Pi Benchmarks.
That is an outstanding score. We are getting NVMe performance. This score actually even beats my ODROID M1 benchmark.
The Orange Pi 5 is without a doubt a very powerful board and is performing exactly where it should be.
Other Resources
I’ve also covered how to install Steam on the Orange Pi 5 here
I’ve also reviewed the Orange Pi portable monitor here (with the Orange Pi 5 connected)
If you are looking for alternative WiFi adapters for the Orange Pi 5 see my using E-keyed WiFi adapters with the Orange Pi 5 guide here!


Is it possible to install Android to eMMC, and install Ubuntu to NVMe for Pi5 Max/Ultra? And have a selective boot with booth OS?
Booting the NVME without a SD card would require an additional tool: ‘GParted Live’ on another SD card. In this case the SD card where you’d etch the Linux image might as well be a USB memory stick, otherwise you’ll need a microSD card to USB adapter.
The process is easy:
1. Download and etch OPI Linux on a SD card or USB memory stick. You can boot it for testing, or if the SPI flash update step is mandatory for your board (“sudo nand-sata-install” or via orangepi-config).
2. Download and etch GParted Live iso on another SD card.
3. Boot the OPI using the GParted SD card, with the etched Linux SD+adapter (or USB stick) plugged into an USB port on the OPI.
4. Using GParted copy both the FAT32 boot and ext4 partitions from the Linux SD/ USB to the clean NVME and resize the ext4 accordingly. The partition table should be GPT. Leave the pointed UUID unchanged, it should match that of the rootfs ext4 on the NVME.
5. Run partition checks in GParted on both partitions on the NVME.
6. Manage the boot partition flags on the NVME, in GParted GUI. Toggle ON (check) the “boot” and “esp” flags only; the rest should be unchecked (OFF). The ext4 partition should have no flags checked.
7. Remove the GParted and the Linux SD/USB cards and reboot.
Hello James.
Long time no talk.
Mate. The Joshua Riek ubuntu for rockchip distribution has a very easy way to install the Os in the SSD.
You can see it and maybe add it to this page here:
https://github.com/Joshua-Riek/ubuntu-rockchip/issues/813
Hey munecito,
Welcome back! That looks like a great method. I’m glad to see the methods are evolving/improving over time so much!
Thanks for your kind assistance.
When entering the sudo mlabel -N aaaa1111 -i /dev/nvme0n1p1 :: command, I got an error:
aaaallll not a valid serial number
So, I’m stuck.
Can you advise how to continue?
advTHANKSance
Bob
Hello Bob,
In the original command you posted you had aaaa1111 (with the number one). This is valid hexadecimal.
However in the output you posted it says:
aaaallllThat is the letter L which is *not* valid hexadecimal. You can only use letters A-F. Just use the number 1 instead of the letter L. Hopefully that helps!
sudo tune2fs -U random /dev/mmcblk1p2
sudo tune2fs -O metadata_csum_seed -U random /dev/mmcblk1p2
For me, both of those commands fail with:
tune2fs: Bad magic number in super-block while trying to open /dev/mmcblk1p2
Hey Eric,
It means you’re trying to run this procedure on a OS that doesn’t use the same partitioning as this guide. Do a:
blkidand it will tell you the type of partition the OS you are trying has. It’s not going to be ext or you wouldn’t get this error.
Hopefully that helps!
To James chambers
thank you for comment.
My instructions were only possible because of your work.
I have had a OPi for about a month and still learning how it works.
Your article taught me about
1) boot from spi
2) how a lot of distributions boot based on UUID
3) UUID conflict
so that made it possible for me to put my instructions together
so thank you for education.
I have done a few builds on my orange pi. Here is how I got armbian/nvme working without spi activated
it is a little easier than Mr Chambers install instruction – but my main box is linux not windows.
things are a little out of order from what I did ( for spi stuff ), but this should work.
1) I had used armbian-config to write the boot to spi.
could not get to boot from spi ( as I had to figure out how to active spi – and all instructions that I read
did not have the correct name forf spi 🙂
2) on LInux. I wrote Armbian to a micro-SD card
3) on same card, I used gparted remove the root partition – will make remove the UUID conflict
Mention in above article.
4) on LInux – I wrote Armbian to a nvme
5) on same card, I used gparted to
Note – If you do not fully understand partitioning, skip this and just do the normal install
for me
A) created a data partiotion at end of nvme space – yes you can do this.
B) expanded the root for Armbian to fill rest ( this is part of the normal install – so you can stop after
step A and just boot. I like this way.
6) Put microSD card in and Nvme in
7) boot.
this was my stop gap since I could not boot directly from nvme.
my boot stuff was in spi, but spi is not active by default.
after I was able to figure out how to enable spi, I remove the microSD card and it booted just fine.
Hey wab,
Great instructions, thanks for sharing!