
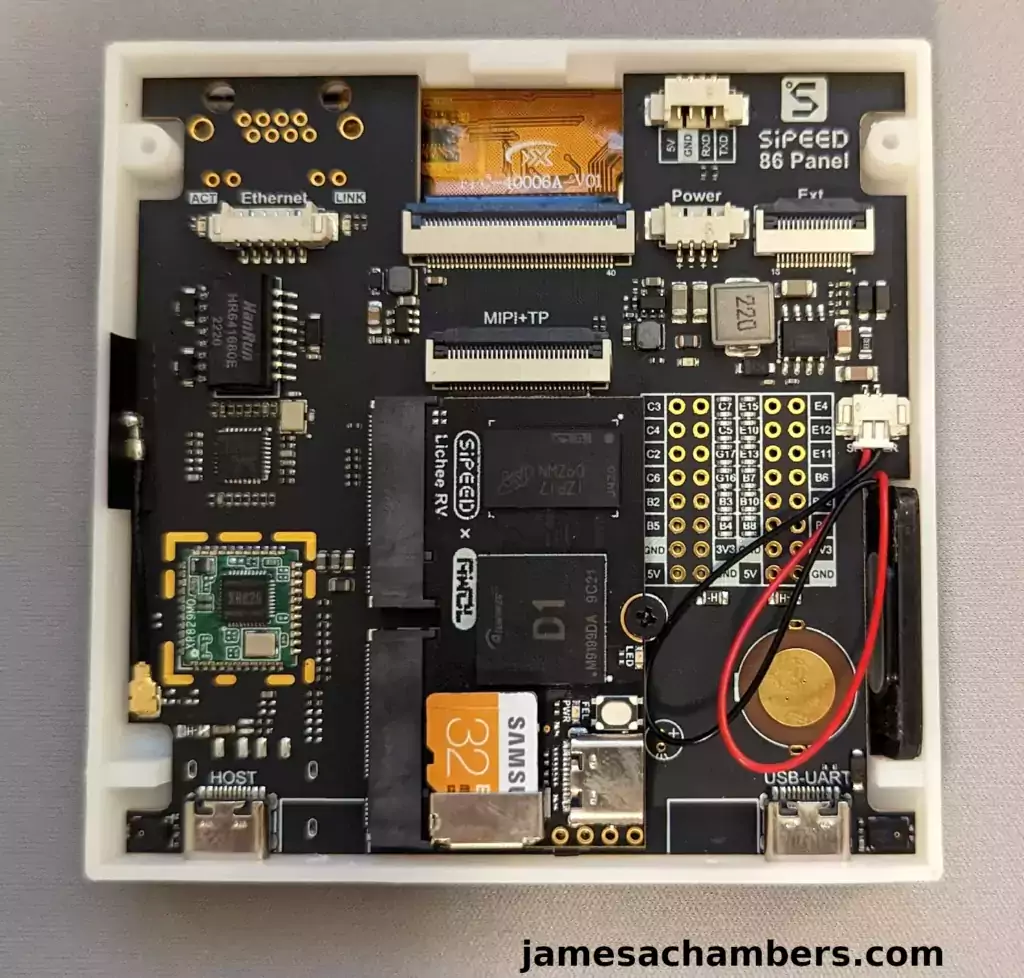
The Lichee RV 86 Panel is a RISC-V powered Linux computer complete with screen! It comes as a low cost kit with everything you need including the Lichee RV module.
In this guide I’ll show you how to get going with the Lichee RV 86 panel including getting Linux on there and getting it connected to WiFi. Let’s get started!
Hardware Used
The Lichee RV Dock runs the RISC-V architecture with a Allwinner D1 1.0 GHz CPU. It uses 2 M.2 connectors side by side as the connection between the dock and the LicheeRV.
Links: Amazon.com*, AliExpress*, Amazon.ca*, Amazon.com.au*, Amazon.co.uk*, Amazon.de*, Amazon.es*, Amazon.fr*, Amazon.it*, Amazon.nl*, Amazon.pl*, Amazon.sg*
Getting System Image
You can choose between Debian and Tina Linux for the Lichee RV 86 Panel.
The official images are located here.
If you want to use Debian then download the LicheeRV_Debian_86_480p.7z file (even if you have the 720p screen). We will fix your screen to match the correct resolution in a later step.
You may also choose the “Tina” Linux distribution for a more lightweight distribution.
Important: If you want to have the touch driver you should choose Tina Linux as Debian does not contain the touch driver for the screen
Writing Image
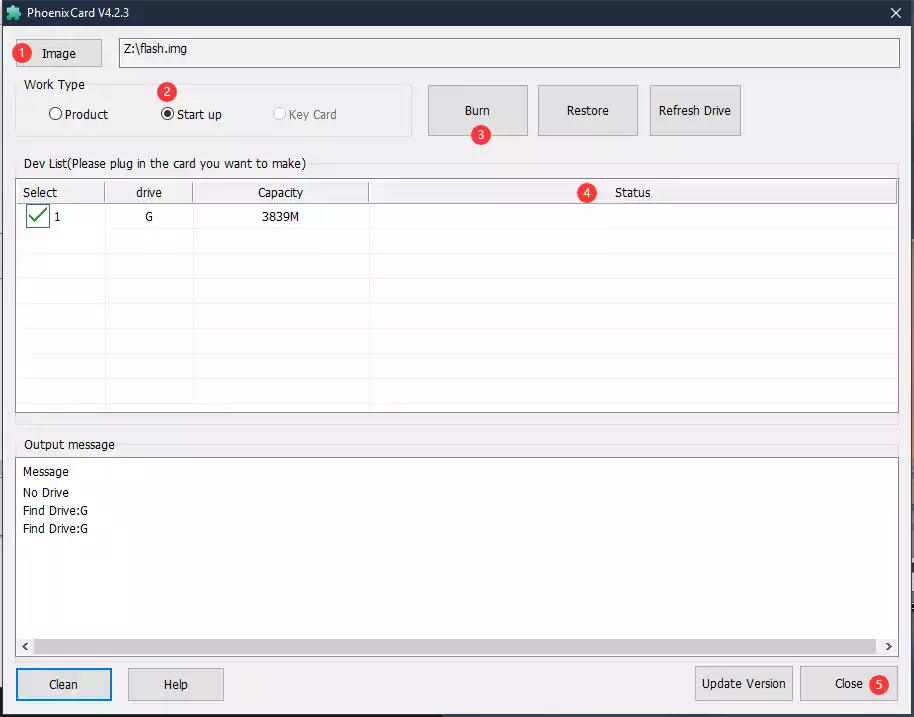
Unfortunately to write the image we need to use the PhoenixFlash application which is for Windows only. If you do not have Windows I actually did this using a virtual machine with USB passthrough and ran PhoenixFlash that way.
First you should get the SD card association’s formatting tool from here (free).
Install the SD card association’s formatting tool application and then open it and completely clean the SD card off since if we don’t PhoenixFlash often will not see the SD card.
Next we need to get PhoenixFlash. You can get PhoenixFlash from here (official Sipeed site).
Once you open PhoenixFlash choose the downloaded image from the previous step and configure the application like this (choosing “Start Up”):
The flash took a long time for me. Wait for it to complete all of the way. Once it’s done we’re ready to set the correct resolution for the display.
Set Display Resolution
For the display to use the correct resolution we need to update the SD card with the proper boot image for your screen size.
Head to the official Sipeed downloads page for the different boot packages.
- boot_package_86_480p.fex
- boot_package_86_720p.fex
I got the 720p screen so I downloaded the boot_package_86_720p file. Download the correct one for your screen size.
Now plug your SD card into your computer. If you are using an adapter the partitions will typically show up as /dev/sda but it will depend on your system. If you aren’t using NVMe or another drive is using /dev/sda already then it may show up as /dev/sdb. This could be /dev/mmcblk0 if you have a SD card slot in something like a laptop.
Make sure you’ve determined the right device before running this command. If you are unsure try unplugging the SD card and doing ls /dev and then plug it in and see what devices have changed.
Once you’ve determined this navigate to the folder where you downloaded the boot package file. Now in the Linux terminal we can use:
sudo dd if=boot_package_86_720p.fex of=/dev/sdX bs=1K seek=16400
Change sdX to match your correct SD card device. Once that is complete you are ready to boot!
First Boot / Configuration
Insert your SD card into the Lichee RV. If necessary remove the outer 2 screws so you can open the inside panel.
You can see where to insert the SD card below:
Now connect the USB-C either to your computer or another power source to power on the Lichee RV 86 panel.
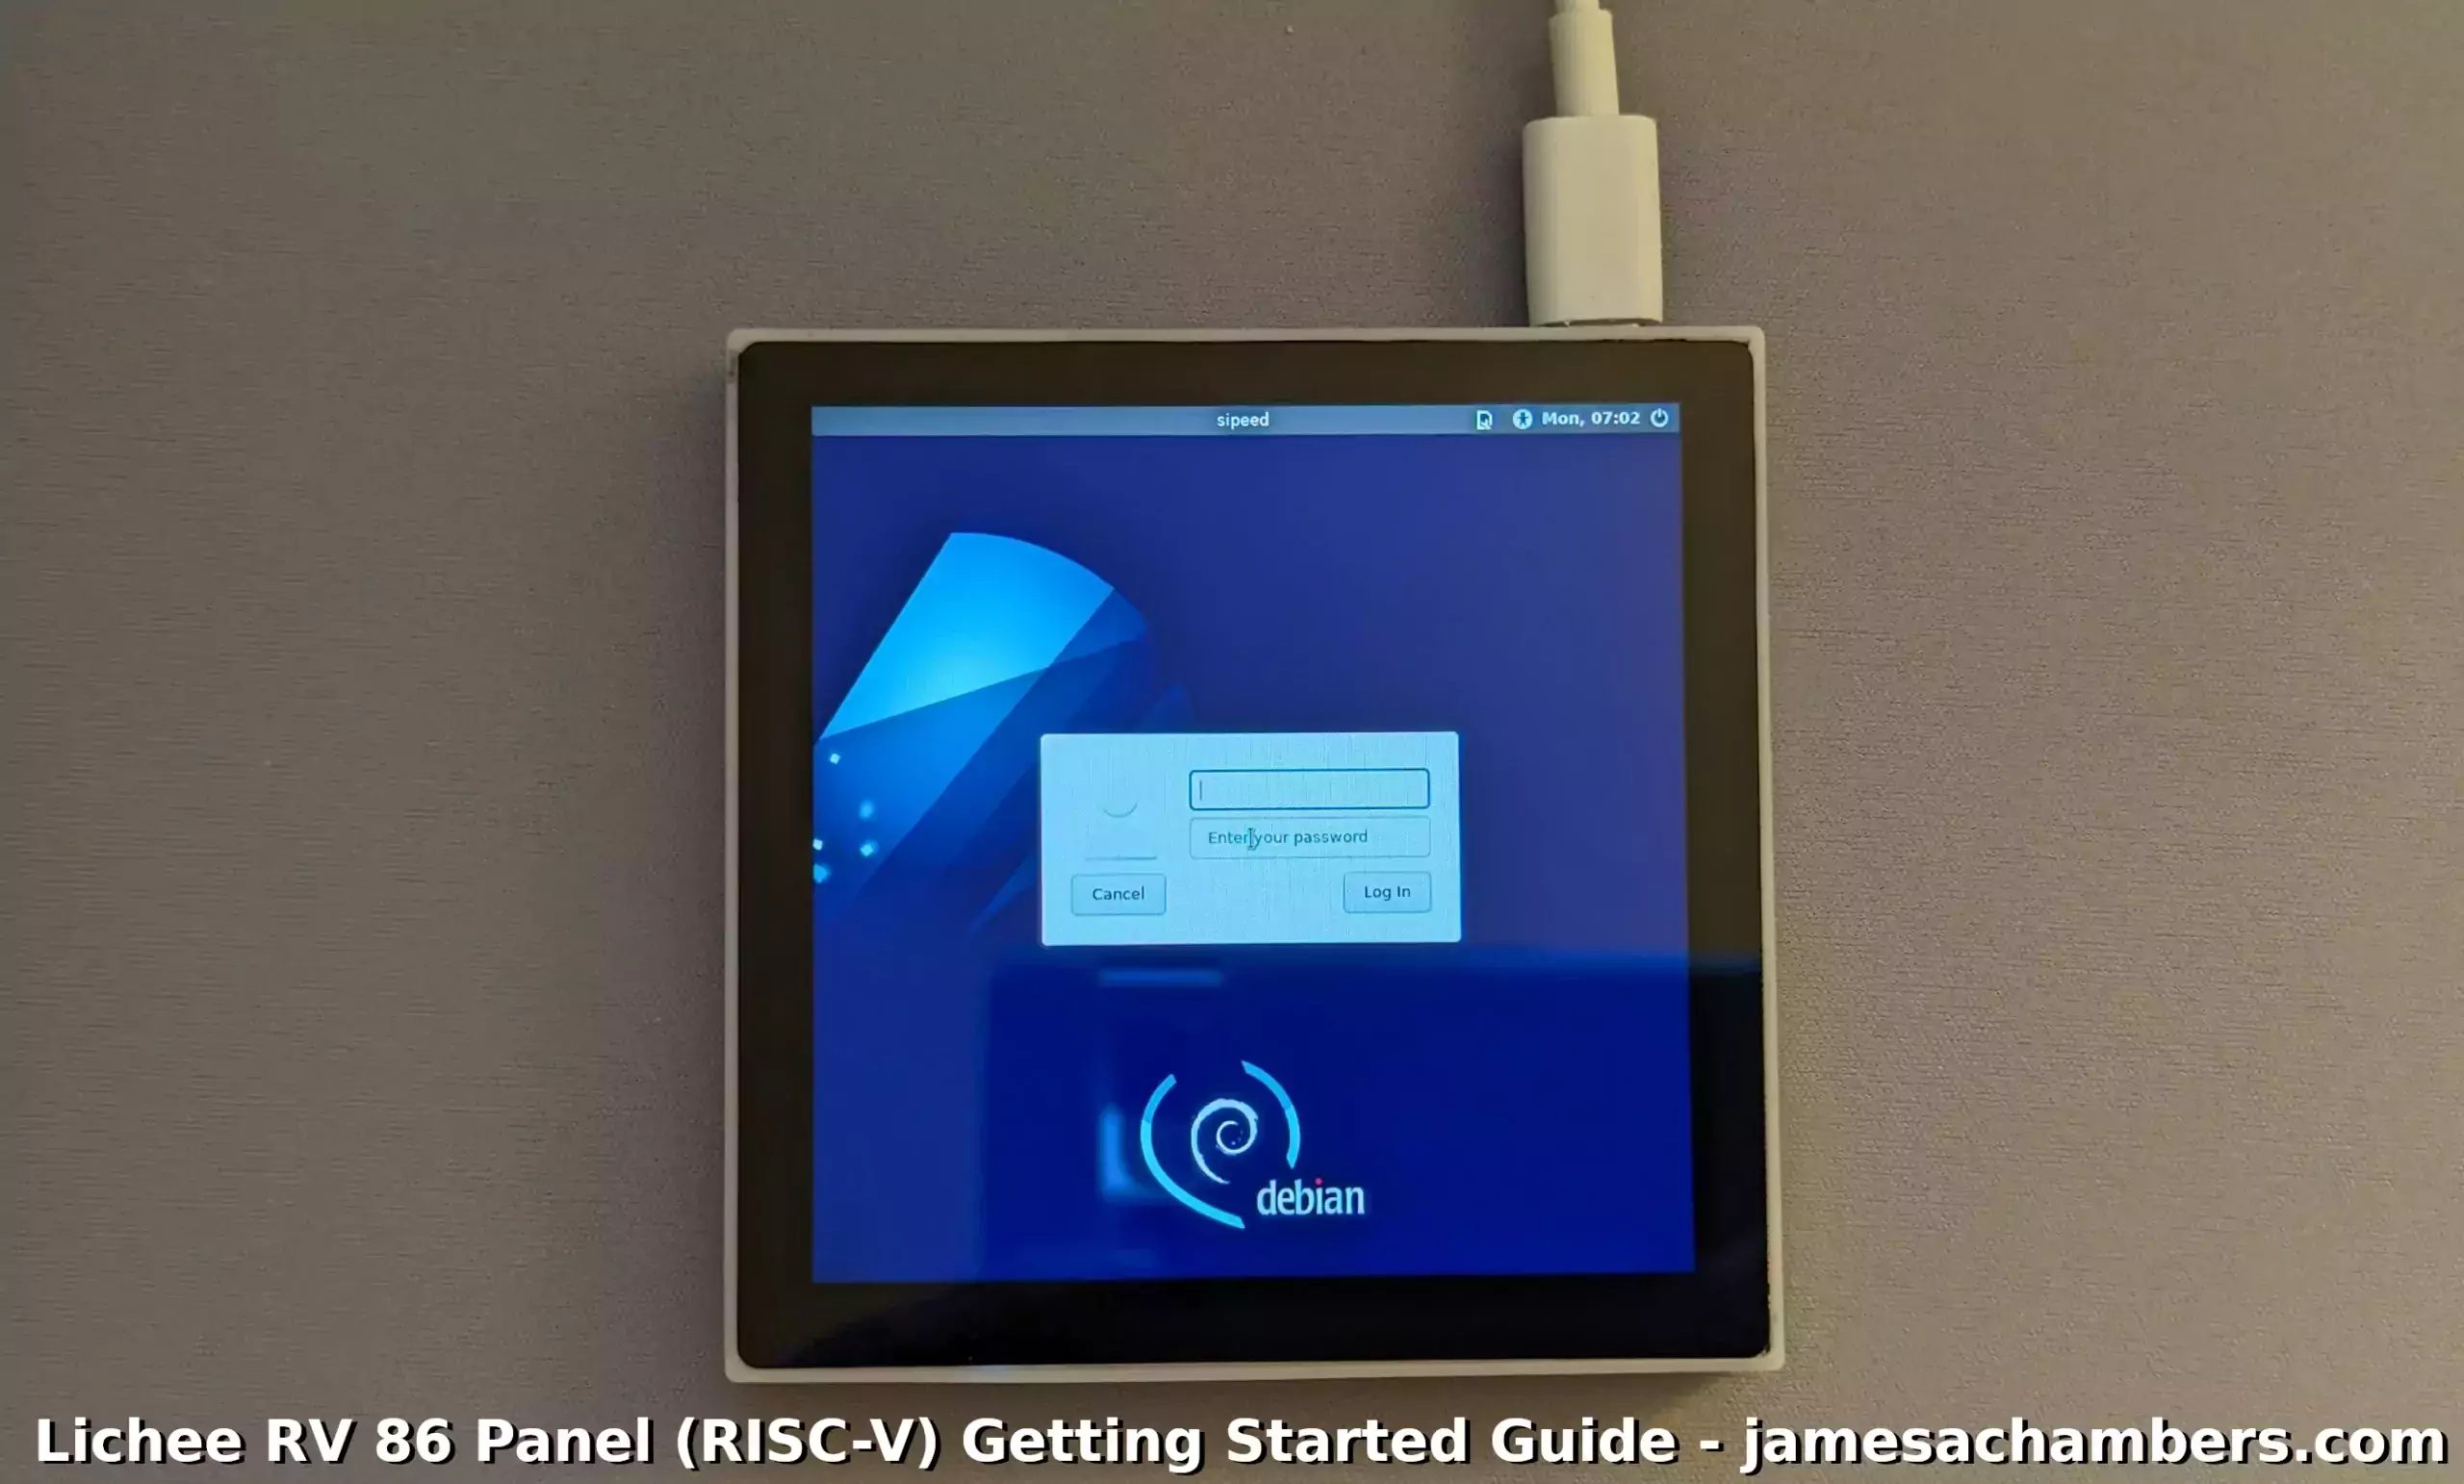
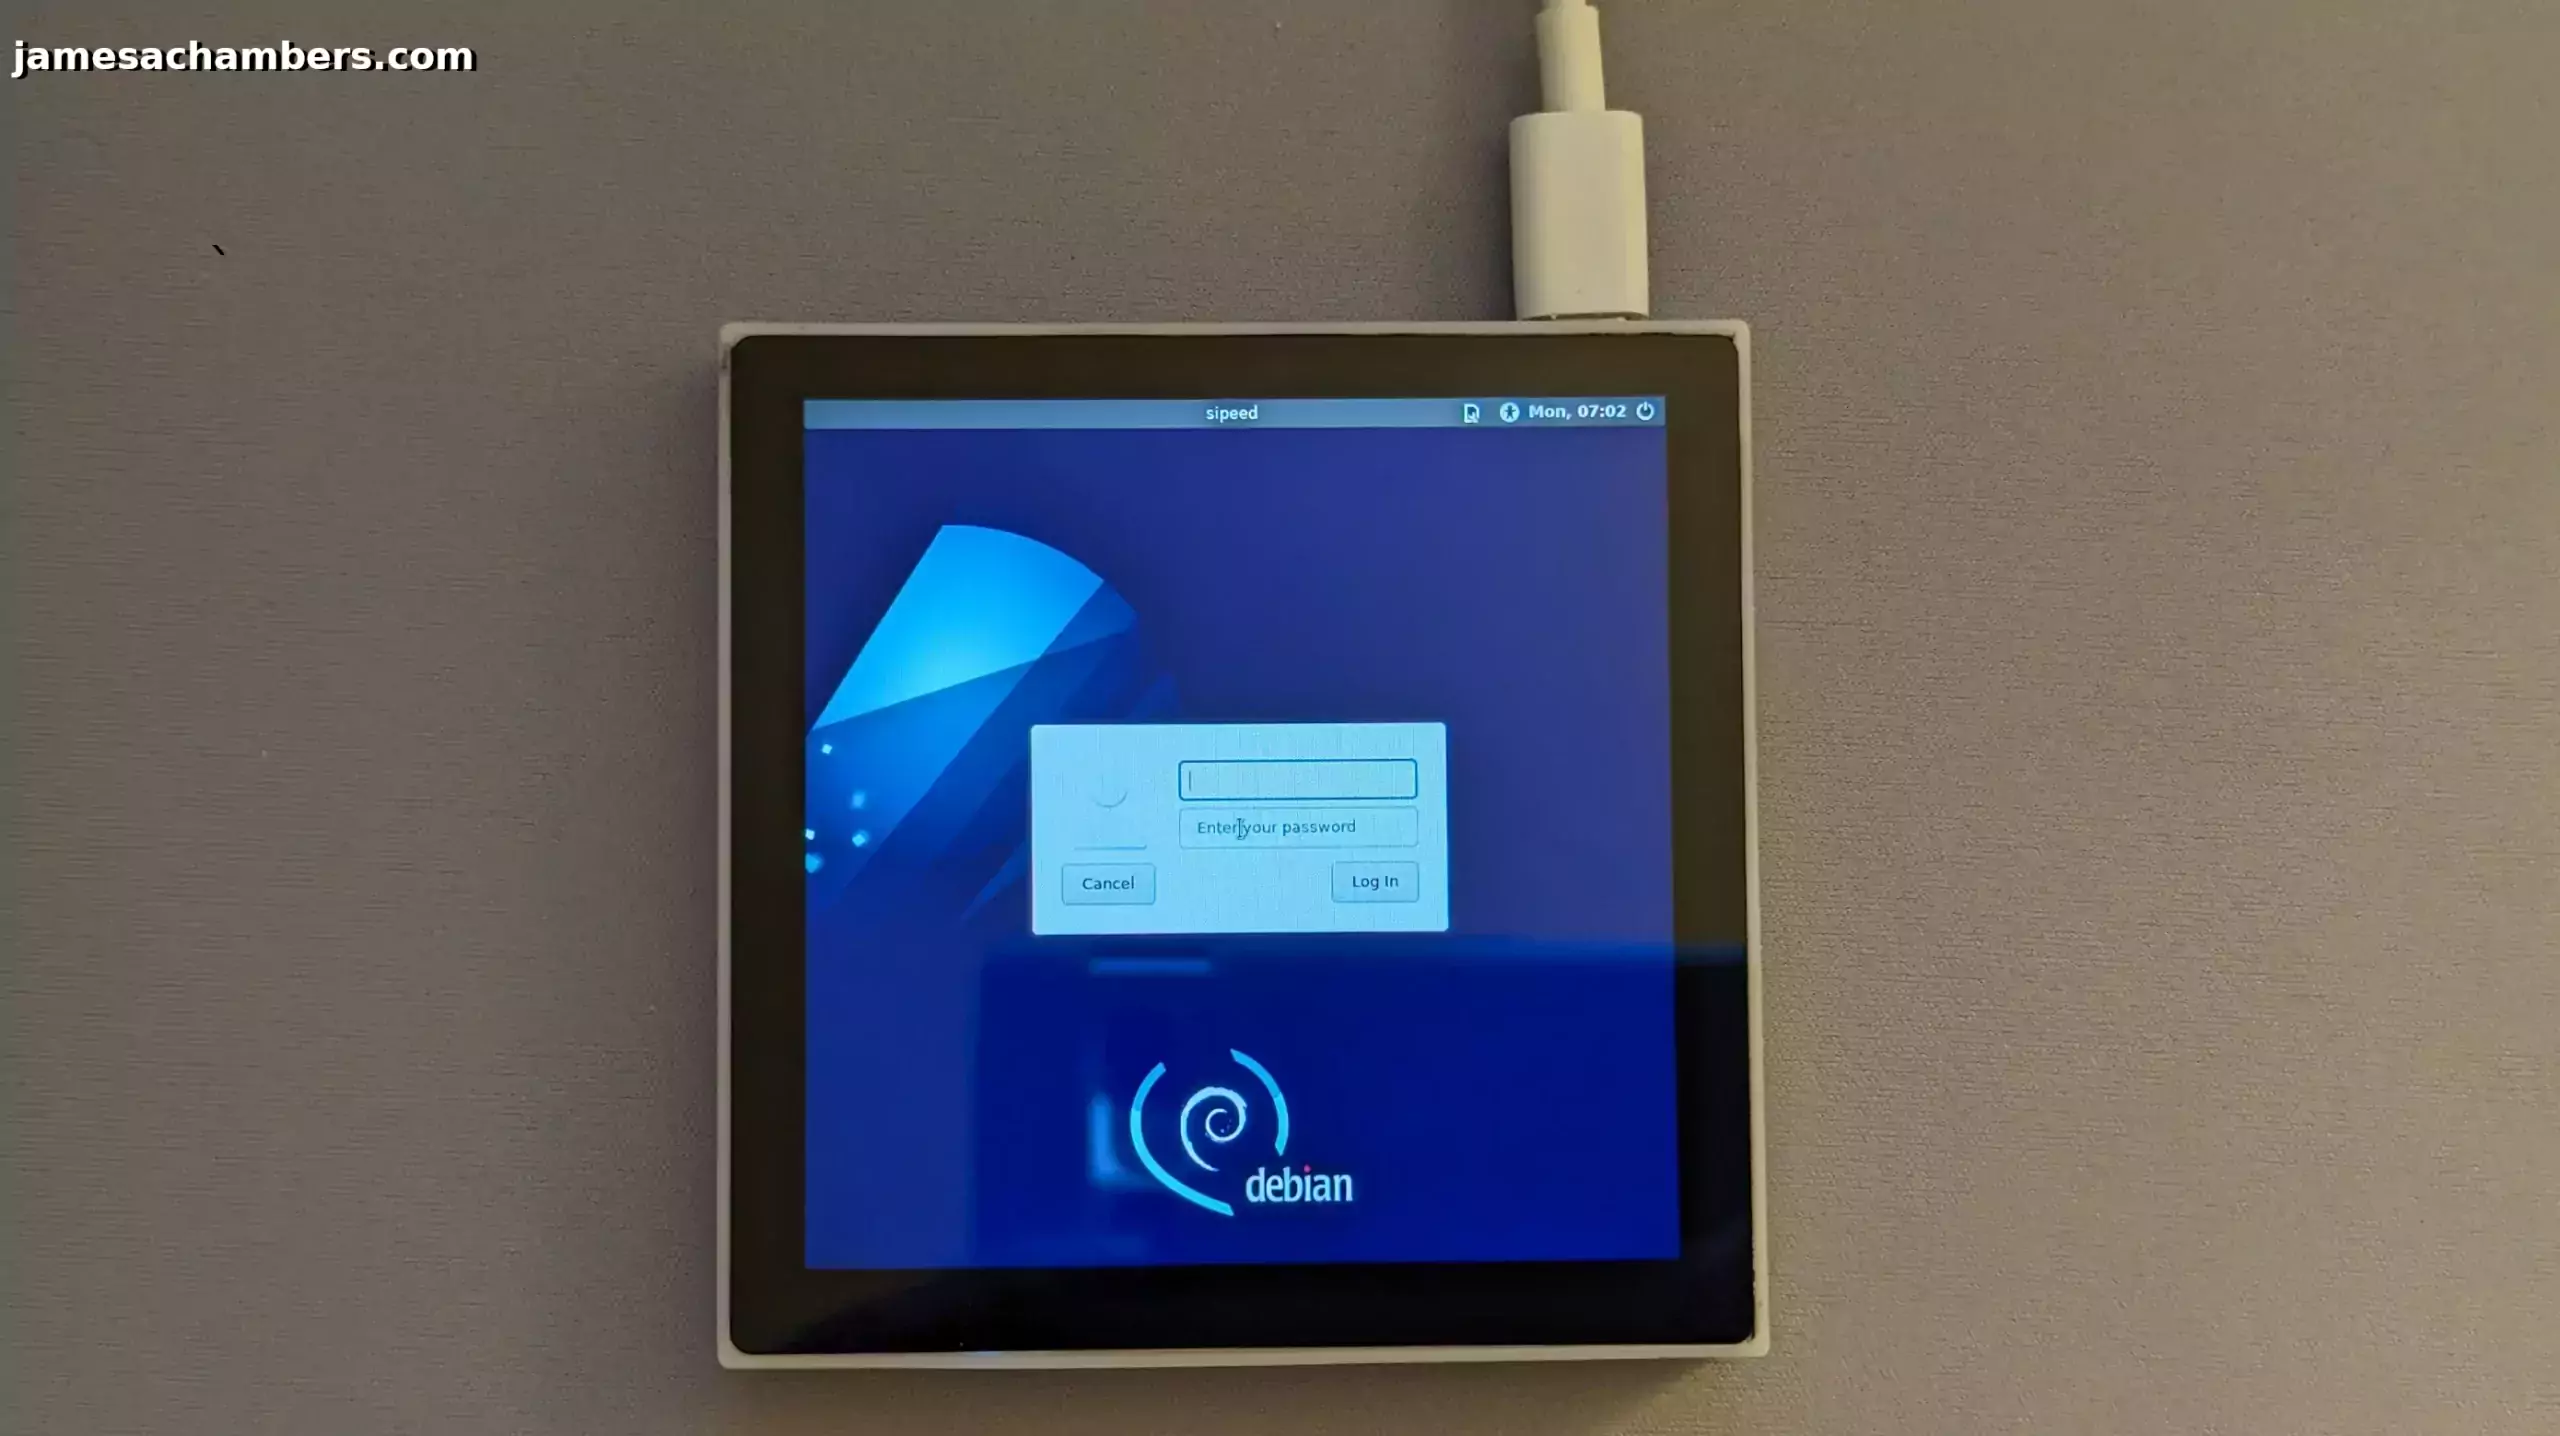
If the PhoenixCard flash as well as the boot package dd operation went well then you should see this:
If you are seeing a bunch of flickering then you likely need to flash a different boot package to your device as per the previous step (try 480p instead of 720p or vice versa).
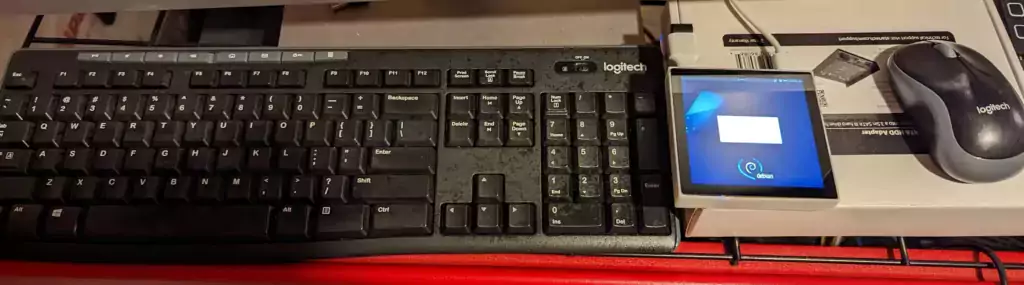
The easiest way to proceed for initial configuration is to plug in a mouse/keyboard at this point. This will let us connect to the WiFi at which point we will be able to SSH into the device and configure it that way. If you have something like a mouse/keyboard combo that uses a USB adapter such as a Logitech set that is even better as you can use a single USB-C to USB-A adapter to connect both. You can also use a USB-C hub to extend the ports.
You may also use a TTY serial to USB adapter and use the serial connection to do some initial configuration.
If all of that sounds incredibly painful / difficult then I would actually suggest getting the Lichee RV dock (linked in the “Hardware Used” section). If you have the dock you can simply connect it to the dock to do most of this configuration. At that point you could install VNC, RDP, enable SSH and all of the other ways to remotely manage / control the device. This should make things easier for sure if you don’t have all of these adapters laying around.
My setup for initial configuration ended up looking like this:
Initial Login
The username is root and the password is:
licheepi
Wireless Configuration (Debian)
According to Sipeed the wireless on Debian can only be configured with the GUI.
We are going to use the Settings -> Connman Settings application like this:
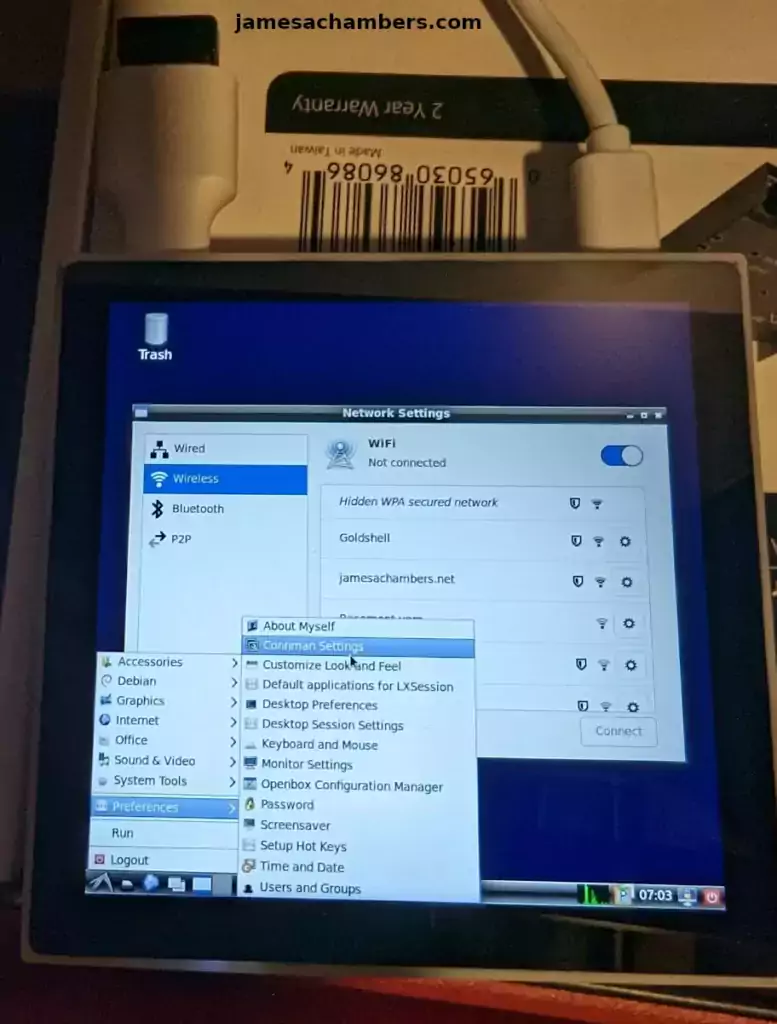
Select your network and enter your password and then it will immediately connect!
Wireless Configuration (Tina)
On Tina you set the wireless network by editing:
/etc/wifi/wpa-supplicant.conf
Add the following contents to the file and reboot:
network={
    ssid="WiFi_name"
    psk="WiFi_password"
}
Conclusion
The Lichee RV 86 Panel is available (including the Lichee RV module) for as low as $60-70 or so. It’s pretty easy to get an up and running Debian or Tina Linux computer with a screen extremely quickly. This is all using completely open RISC-V hardware!
This type of setup is perfect for things like a control panel and monitoring system. My intention was to use this more as a panel running light applications and displaying information and so Debian suited my purposes but if you use Tina Linux you can use the touch screen driver and have it actually control applications/settings/etc. It’s basically a monitoring panel with a Linux computer inside it that is easy to deploy and uses very little power.
There are 512MB and 1GB modules available. For this guide I used the 720p version of the screen with the 1GB module. Now that it’s all booted into Debian there are many things I can potentially do with it and I’ll be sure to share some more of those on the site in the future!
Other Resources
Make sure to check out my Lichee RV with Dock review. I highly recommend the official Lichee dock to make it easier to work with Lichee RV modules!
You can see the rest of my RISC-V related articles here


Hello, I found your blog and was excited to get my Lichee RV 86 working with your instructions. However, I am having issues with a couple of things that maybe you can help me with.
1. I can’t seem to get the browser working. I am building a web-based Nameplate application and wanted to use these little computers to browse our web server and display the information as a web page. I have the web server working now on using a Pi as a nameplate, but they are rather large and difficult to source.
2. I can’t seem to get it to automatically login.
Hey Bill,
I saw people mentioning to try using Chromium instead at what I assume is your other post here. Did you try this? Did it work on Chromium?