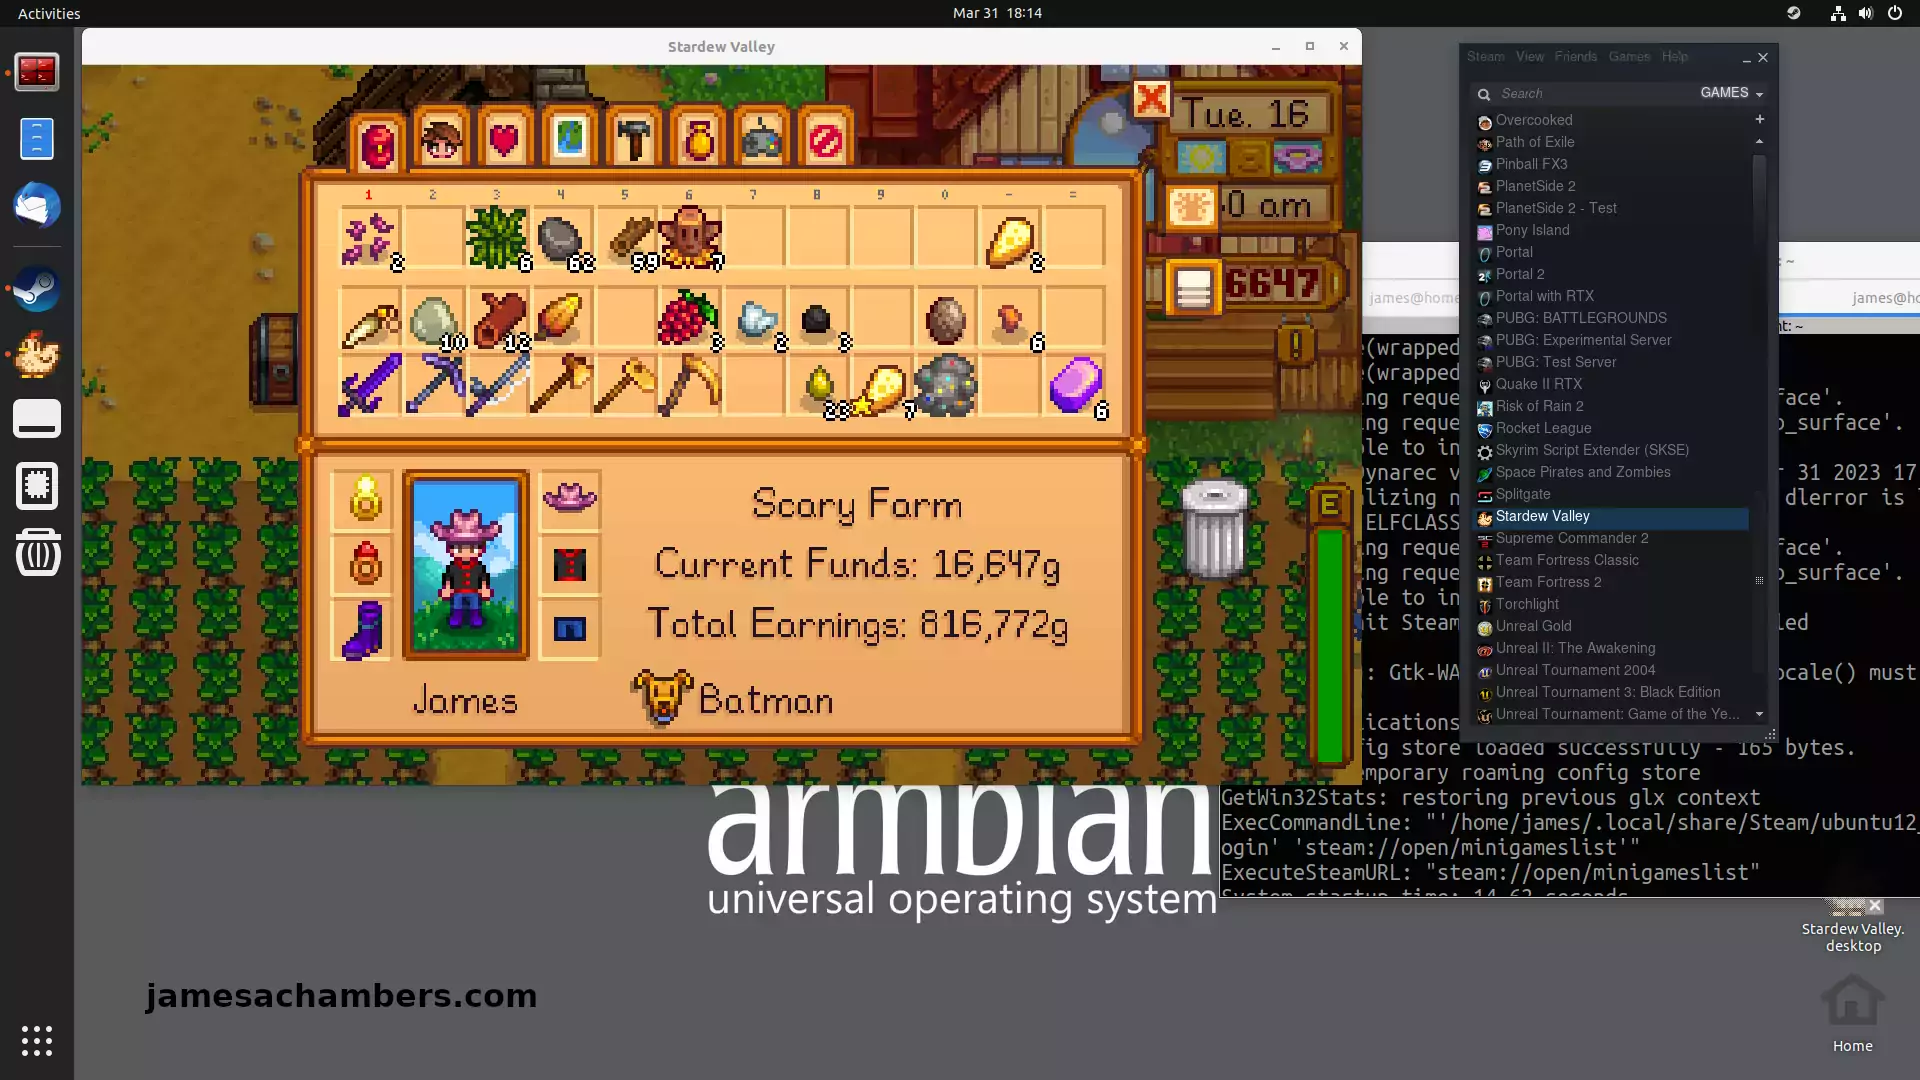
The new RK3588/RK3588S boards have much more power than we’ve typically had available to us in the past on ARM boards. With a whopping 8 CPU cores and a Mali 610 GPU the Orange Pi 5 is capable of running Steam using Box64/Box86. It’s even able to play basic games pretty well (with some tinkering usually).
In this guide I’ll show you how to set up Steam on the Orange Pi 5 and run Stardew Valley on it. You should keep your expectations in line though because there is no native ARM client for Steam. We are using emulation and instruction translation. You will also likely be missing libraries for most games you try which will require some fiddling.
This guide is only for Armbian running the Ubuntu Jammy variant with the Gnome desktop installed only (platinum support status). The Orange Pi official distributions will not have 3D support and I don’t care about whatever other flavor of Linux you are running either. I’m not going to install your preferred flavor of Linux and try to figure out how to do this on there nor am I interested in troubleshooting it. Please don’t ask.
With all of that being said let’s get started!
Hardware Used
The Orange Pi 5 the latest release from Orange Pi and is the most powerful model yet. It has a 6 core CPU and options from 4GB of RAM all the way up to 32GB of RAM!
Links: Amazon.com*, AliExpress*, Amazon.ca*, Amazon.co.uk*, Amazon.de*, Amazon.es*, Amazon.fr*, Amazon.it*, Amazon.nl*, Amazon.pl*

The Kioxia (Toshiba) 128GB M.2 2230 PCIe NVMe drive is much shorter than most NVMe drives (full size is 2280). It fits great with single board computers / tablets / other smaller form factors.
Links: Amazon.com*, Amazon.ca*, Amazon.co.uk*, Amazon.co.jp*, Amazon.com.au*, Amazon.de*, Amazon.es*, Amazon.fr*, Amazon.it*, Amazon.nl*, Amazon.pl*, Amazon.se*, Amazon.sg*

The Geekworm copper heat sink set is designed to fit many different single board computers. It uses thermal conductive adhesive which many “cheap” heat sink kits for SBCs don’t have. Eliminates hot spots and reduces throttling. Can be further enhanced by powered cooling over the heat sinks.
Links: Amazon.com*, Amazon.ca*, Amazon.co.jp*, Amazon.co.uk*, Amazon.de*, Amazon.es*, Amazon.fr*, Amazon.it*

The Orange Pi official mouse uses 2.4GHz wireless to give you a wireless mouse experience with the Orange Pi
Links: Amazon.com*, AliExpress*

The Orange Pi monitor is meant to be a portable monitor you can take anywhere. It has a resolution of 1080P and features a hinge in the back that folds out to support the monitor.
Links: Amazon.com*, AliExpress*
Installing Dependencies
First we need to install some dependencies that are required by Steam. Use the following lines:
sudo dpkg --add-architecture armhf
sudo apt update && sudo apt install build-essential git cmake gcc-arm-linux-gnueabihf libc6-dev-armhf-cross libappindicator1 libnm0 libtcmalloc-minimal4 binfmt-support liblttng-ust-dev libcairo2:armhf libgmp10:armhf libvulkan1:armhf libudev-dev:armhf -y
Next we’re going to install Box64. Paste the following lines in your terminal:
git clone https://github.com/ptitSeb/box64
cd box64
mkdir build; cd build; cmake .. -DRK3588=1 -DCMAKE_BUILD_TYPE=RelWithDebInfo
make -j4
sudo make install
We also need Box86:
cd ~
git clone https://github.com/ptitSeb/box86
cd box86
mkdir build; cd build; cmake .. -DRK3588=1 -DCMAKE_BUILD_TYPE=RelWithDebInfo
make -j4
sudo make install
We also need to install the 3D support drivers with the following:
sudo add-apt-repository ppa:liujianfeng1994/panfork-mesa
sudo add-apt-repository ppa:liujianfeng1994/rockchip-multimedia
sudo apt update
sudo apt dist-upgrade -y
sudo apt install mali-g610-firmware rockchip-multimedia-config -y
That’s it for the dependencies! Before you continue you should reboot the device with:
sudo reboot
Installing Steam
First we need to configure the environment for Steam. Use the following lines to add two environment variables to your Linux environment:
echo 'export STEAMOS=1
export STEAM_RUNTIME=1
export DOTNET_SYSTEM_GLOBALIZATION_INVARIANT=1
export PAN_MESA_DEBUG=gofaster,gl3' | sudo tee /etc/profile.d/steam.sh
source /etc/profile.d/steam.sh
Next we’re going to use Box86’s install_steam.sh script like this:
cd ~/box86
./install_steam.sh
Installation is now finished!
Launching Steam
I highly recommend running Steam from a terminal/console like this so you can see the error messages (especially when launching new games):
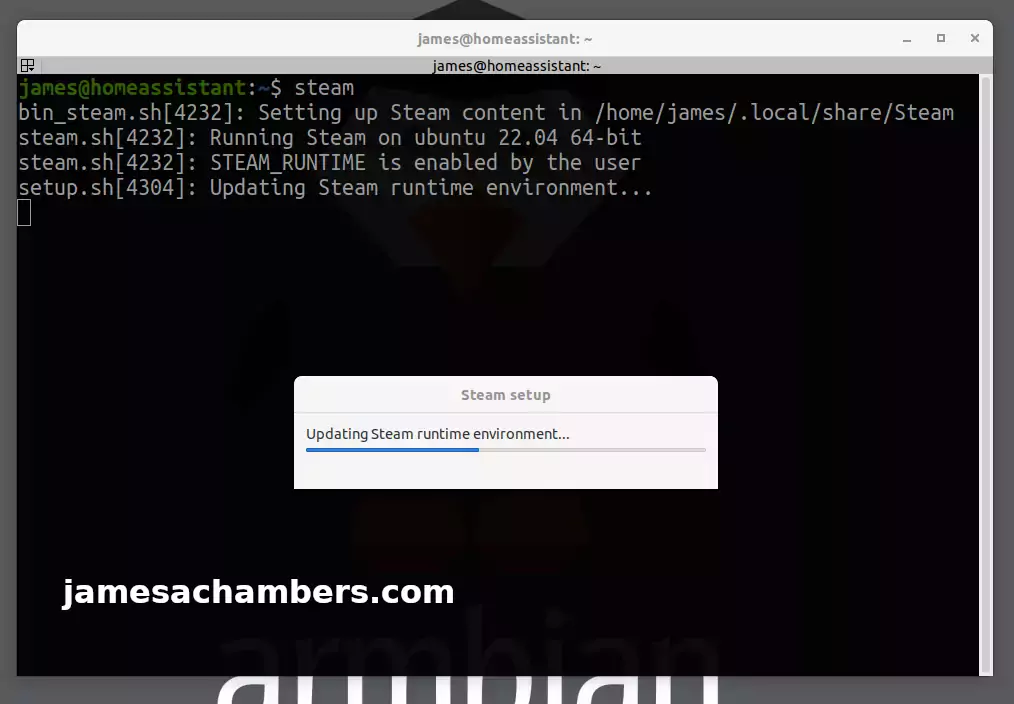
It’s not unexpected for it to crash right after you log in for the first time. Mine crashed after I entered my one-time e-mail code from Steam. Simply launch it again. I had to log in again but it remembered the PC and stuck the second time.
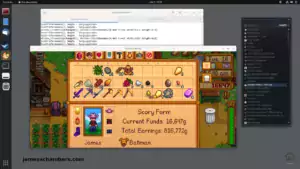
It also crashed once when I installed Stardew Valley. I then just launched Steam again and it downloaded the game and launched perfectly afterward:

Conclusion
This is only the beginning of your journey. I can get you this far. You should expect most games you try to launch to crash with missing libraries. You then typically will install those libraries through apt (or other means) to fix it. In fact Stardew Valley wouldn’t have worked if I hadn’t added several dependencies to the dependency section. It did crash at first when I tried this and it took several hours for me to figure out the right dependencies to install for it.
If you are encountering really strange errors launching other titles you will want to use the trick I shared earlier of launching Steam within your console. You can then report such issues to the developers here on the GitHub issues page for Box64. There is a *ton* of helpful information there (and people) that can help with getting stubborn titles to launch. The developer ptitSeb is an absolute legend as well.
My performance was very, very good on Stardew Valley. It takes a while to load the game for some reason but it runs perfectly smoothly on the Orange Pi 5. Obviously this is not an incredibly demanding game on your GPU and I would recommend sticking to those.
I would absolutely also recommend active cooling on your Orange Pi 5. You at a bare minimum need my recommended heat sinks but even with my heat sinks I managed to overheat my Orange Pi 5 (forcing a power cycle) several times writing this article. If I was going to be gaming a lot more regularly on this device I would put a powered fan on it. The few times my system locked up I touched my heat sink and they were *very hot*. If you are getting lock-ups touch your heat sink (carefully) and see if it’s absolutely burning up. That means you need a powered fan.
Overall I’m pretty impressed. You’re going to have technical problems with various titles but this absolutely works. You can run games that aren’t super demanding at full speed and enjoy them on a 64-bit ARM board / distribution. Great work to all of the projects involved that have led to this being a reality!
Other Resources
Make sure to check out my Orange Pi 5 review here
I’ve also covered setting up a SSD on the Orange Pi 5 here
The Orange Pi 5 also makes a great host environment for Home Assistant which I’ve covered here


Hello. james A. Chamber.
The ubuntu jammy is not available anymore. at least i cannot find it.
and your link just gives me an 404 error. so i used the ubuntu jammy kde neon variant. and i tried many other versions. all did not work. here i get following meesage after typing steam.
steam.sh[11899]: Running Steam on ubuntu 22.04 64-bit

steam.sh[11899]: STEAM_RUNTIME is enabled by the user

setup.sh[11966]: Steam runtime environment up-to-date!

/home/user/.local/share/Steam/ubuntu12_32/steam-runtime/run.sh: line 85: steam-runtime-identify-library-abi: command not found

run.sh[11978]: steam-runtime-identify-library-abi --ldconfig-paths failed, falling back to ldconfig

steam.sh[11899]: Couldn't find /home/user/.local/share/Steam/ubuntu12_32/steam-runtime/amd64/usr/bin/srt-logger, logging to console-linux.txt

steam.sh[11899]: Can't find 'steam-runtime-check-requirements', continuing anyway

Box86 with Dynarec v0.3.7 1e749beb built on Nov 13 2024 13:22:41

[2024-11-13 13:36:50] Startup - updater built Jul 16 2024 23:21:18

[2024-11-13 13:36:50] Startup - Steam Client launched with: '/home/user/.local/share/Steam/ubuntu12_32/steam'

ILocalize::AddFile() failed to load file "public/steambootstrapper_english.txt".

src/steamexe/updateui_xwin.cpp (1466) : BFileExists( m_FontFileRegular )

src/steamexe/updateui_xwin.cpp (1466) : BFileExists( m_FontFileRegular )

11/13 13:36:50 minidumps folder is set to /tmp/dumps

11/13 13:36:50 Init: Installing breakpad exception handler for appid(steam)/version(1.0)/tid(11998)

user@orangepi5:~$ Box86 with Dynarec v0.3.7 1e749beb built on Nov 13 2024 13:22:41

al/share/Steam/linux32/steamerrorreporter[12010]: Uploading dump (out-of-process)

/tmp/dumps/assert_20241113133650_3.dmp

Error initializing native libcurl.so.4 (last dlerror is libcurl-gnutls.so.4: wrong ELF class: ELFCLASS64)

Error initializing native libcurl-gnutls.so.4 (last dlerror is libcurl-gnutls.so.4: wrong ELF class: ELFCLASS64)

Error initializing native libcurl.so.3 (last dlerror is libcurl-gnutls.so.4: wrong ELF class: ELFCLASS64)

al/share/Steam/linux32/steamerrorreporter[12010]: Finished uploading minidump (out-of-process): success = no

al/share/Steam/linux32/steamerrorreporter[12010]: error: Cannot dlopen("libcurl.so"/0x30017013, 2)

al/share/Steam/linux32/steamerrorreporter[12010]: file ''/tmp/dumps/assert_20241113133650_3.dmp'', upload no: ''Cannot dlopen("libcurl.so"/0x30017013, 2)''
can you update the guide, or help me fix it?
Hello James. I recently tried installing it on the orange pi 5 plus. It works, till the login screen comes. after that, i get following error, message, or idk.
steam.sh[18600]: Running Steam on ubuntu 22.04 64-bitsteam.sh[18600]: STEAM_RUNTIME is enabled by the user
setup.sh[18663]: Steam runtime environment up-to-date!
/home/korebho/.local/share/Steam/ubuntu12_32/steam-runtime/run.sh: line 85: /home/korebho/.local/share/Steam/ubuntu12_32/steam-runtime/amd64/usr/bin/steam-runtime-identify-library-abi: cannot execute binary file: Exec format error
run.sh[18675]: steam-runtime-identify-library-abi --ldconfig-paths failed, falling back to ldconfig
/home/korebho/.local/share/Steam/ubuntu12_32/steam-runtime/usr/libexec/steam-runtime-tools-0/logger-0.bash: line 25: /home/korebho/.local/share/Steam/ubuntu12_32/steam-runtime/usr/libexec/steam-runtime-tools-0/srt-logger: cannot execute binary file: Exec format error
steam.sh[18600]: Couldn't set up srt-logger, not logging to console-linux.txt
/home/korebho/.local/share/Steam/steam.sh: line 480: /home/korebho/.local/share/Steam/ubuntu12_32/steam-runtime/amd64/usr/bin/steam-runtime-check-requirements: cannot execute binary file: Exec format error
steam.sh[18600]: steam-runtime-check-requirements failed with an unexpected nonzero exit status. Trying to continue
Box86 with Dynarec v0.3.7 54c806c5 built on Sep 19 2024 18:00:32
[2024-09-19 18:34:05] Startup - updater built Sep 17 2024 20:02:19
[2024-09-19 18:34:05] Startup - Steam Client launched with: '/home/korebho/.local/share/Steam/ubuntu12_32/steam'
Error initializing native libGL.so.1 (last dlerror is libGL.so.1: wrong ELF class: ELFCLASS64)
Looks like steam didn't shutdown cleanly, scheduling immediate update check
[2024-09-19 18:34:05] Loading cached metrics from disk (/home/korebho/.local/share/Steam/package/steam_client_metrics.bin)
[2024-09-19 18:34:05] Failed to load cached hosts file (File 'update_hosts_cached.vdf' not found), using defaults
[2024-09-19 18:34:05] Using the following download hosts for Public, Realm steamglobal
[2024-09-19 18:34:05] 1. https://client-update.steamstatic.com, /, Realm 'steamglobal', weight was 1, source = 'baked in'
[2024-09-19 18:34:05] Checking for update on startup
[2024-09-19 18:34:05] Checking for available updates...
[2024-09-19 18:34:05] Downloading manifest: https://client-update.steamstatic.com/steam_client_ubuntu12
[2024-09-19 18:34:05] Manifest download: send request
[2024-09-19 18:34:05] Manifest download: waiting for download to finish
[2024-09-19 18:34:06] Manifest download: finished
[2024-09-19 18:34:06] Download skipped: /steam_client_ubuntu12 version 1726604483, installed version 1726604483, existing pending version 0
[2024-09-19 18:34:06] Nothing to do
[2024-09-19 18:34:06] Verifying installation...
[2024-09-19 18:34:06] Performing checksum verification of executable files
[2024-09-19 18:34:07] Verification complete
UpdateUI: skip show logoError initializing native libXfixes.so.3 (last dlerror is libXfixes.so.3: wrong ELF class: ELFCLASS64)
Error initializing native libXinerama.so.1 (last dlerror is libXinerama.so.1: wrong ELF class: ELFCLASS64)
Error initializing native libXi.so.6 (last dlerror is libXi.so.6: wrong ELF class: ELFCLASS64)
Error initializing native libXrandr.so.2 (last dlerror is libXrandr.so.2: wrong ELF class: ELFCLASS64)
Error initializing native libXcursor.so.1 (last dlerror is libXcursor.so.1: wrong ELF class: ELFCLASS64)
Error initializing native libXcomposite.so.1 (last dlerror is libXcomposite.so.1: wrong ELF class: ELFCLASS64)
Error initializing native libXdamage.so.1 (last dlerror is libXdamage.so.1: wrong ELF class: ELFCLASS64)
Error initializing native libpng12.so.0 (last dlerror is libpng12.so.0: wrong ELF class: ELFCLASS64)
Error initializing native libjpeg.so.8 (last dlerror is libjpeg.so.62: wrong ELF class: ELFCLASS64)
Error: Symbol XESetCopyEventCookie not found, cannot apply R_386_JMP_SLOT 0x6375700c (0x1736) in /home/korebho/.local/share/Steam/ubuntu12_32/steam-runtime/usr/lib/i386-linux-gnu/libXi.so.6
Error: Symbol _XUnknownNativeEvent not found, cannot apply R_386_JMP_SLOT 0x63757014 (0x1756) in /home/korebho/.local/share/Steam/ubuntu12_32/steam-runtime/usr/lib/i386-linux-gnu/libXi.so.6
Error: Symbol XESetWireToEventCookie not found, cannot apply R_386_JMP_SLOT 0x63757030 (0x17c6) in /home/korebho/.local/share/Steam/ubuntu12_32/steam-runtime/usr/lib/i386-linux-gnu/libXi.so.6
Error: relocating Plt symbols in elf libXi.so.6
Error: PltResolver: Symbol dlmopen(ver 27: dlmopen@GLIBC_2.3.4) not found, cannot apply R_386_JMP_SLOT 0x306c6bb8 (0x300294d6) in /home/korebho/.local/share/Steam/ubuntu12_32/steam
Error: PltResolver: Symbol dlclose(ver 21: dlclose@GLIBC_2.0) not found, cannot apply R_386_JMP_SLOT 0x306c6ac0 (0x300290f6) in /home/korebho/.local/share/Steam/ubuntu12_32/steam
src/common/framefunction.cpp (238) : Assertion Failed: CFrameFunctionMgr::~CFrameFunctionMgr: non static FrameFunction[CHTTPClient::BFrameFuncHandleCompletedWorkItems] still registered
src/common/framefunction.cpp (238) : Assertion Failed: CFrameFunctionMgr::~CFrameFunctionMgr: non static FrameFunction[CHTTPClient::BFrameFuncHandleCompletedWorkItems] still registered
maybe, it’s cause i use an other version. Like the same version, but ubuntu jammy. Would be coll, if you can help.
Hi James! Thank you so much for providing this tutorial. I’m having an issue and I’m hoping you can point me in the right direction. For context, I am using an OPi 5b, with the latest Armbian image from the OrangePi website (Armbian 23.11.1, Jammy Legacy 5.10.160)
I’ve gotten through most of the tutorial so far: installed dependencies, installed box64, and have made the directories and used cmake to create the box86 directories. The problem comes when I try to run the
make -j4command. thearm-linux-gnueabihf-gccthrows a bunch of errors.[ 0%] Building C object CMakeFiles/dynarec_arm.dir/src/dynarec/dynablock.c.o
[ 0%] Generating ../src/wrapped/generated/functions_list.txt
[ 0%] Building C object CMakeFiles/test_interpreter.dir/src/emu/x86run.c.o
[ 0%] Building C object CMakeFiles/interpreter.dir/src/emu/x86run.c.o
arm-linux-gnueabihf-gcc: error: unrecognized command-line option ‘-mfpu=neon-fp-armv8’
arm-linux-gnueabihf-gcc: error: unrecognized command-line option ‘-mfloat-abi=hard’
arm-linux-gnueabihf-gcc: error: unrecognized command-line option ‘-marm’
make[2]: *** [CMakeFiles/dynarec_arm.dir/build.make:76: CMakeFiles/dynarec_arm.dir/src/dynarec/dynablock.c.o] Error 1
make[1]: *** [CMakeFiles/Makefile2:154: CMakeFiles/dynarec_arm.dir/all] Error 2
make[1]: *** Waiting for unfinished jobs....
arm-linux-gnueabihf-gcc: error: unrecognized command-line option ‘-mfpu=neon-fp-armv8’
arm-linux-gnueabihf-gcc: error: unrecognized command-line option ‘-mfpu=neon-fp-armv8’
[ 0%] Building C object CMakeFiles/interpreter.dir/src/emu/x86run0f.c.o
arm-linux-gnueabihf-gcc: error: unrecognized command-line option ‘-mfloat-abi=hard’
arm-linux-gnueabihf-gcc: error: unrecognized command-line option ‘-marm’
arm-linux-gnueabihf-gcc: error: unrecognized command-line option ‘-mfloat-abi=hard’
arm-linux-gnueabihf-gcc: error: unrecognized command-line option ‘-marm’
make[2]: *** [CMakeFiles/test_interpreter.dir/build.make:76: CMakeFiles/test_interpreter.dir/src/emu/x86run.c.o] Error 1
make[2]: *** [CMakeFiles/interpreter.dir/build.make:76: CMakeFiles/interpreter.dir/src/emu/x86run.c.o] Error 1
make[2]: *** Waiting for unfinished jobs....
make[1]: *** [CMakeFiles/Makefile2:284: CMakeFiles/test_interpreter.dir/all] Error 2
arm-linux-gnueabihf-gcc: error: unrecognized command-line option ‘-mfpu=neon-fp-armv8’
arm-linux-gnueabihf-gcc: error: unrecognized command-line option ‘-mfloat-abi=hard’
arm-linux-gnueabihf-gcc: error: unrecognized command-line option ‘-marm’
make[2]: *** [CMakeFiles/interpreter.dir/build.make:90: CMakeFiles/interpreter.dir/src/emu/x86run0f.c.o] Error 1
make[1]: *** [CMakeFiles/Makefile2:341: CMakeFiles/interpreter.dir/all] Error 2
Detected same build as last run, skipping
[ 0%] Built target WRAPPERS
make: *** [Makefile:166: all] Error 2
My only thought is that maybe I’m getting the errors because I am on a different version of Armbian than you were when you wrote this?
Hey Cody,
I assume this post is from you as well.
This is an error we’d expect to get if you are trying to compile 32 bit code in a 64 bit compiler. In other words it doesn’t sound like your arm-linux-gnueabihf-gcc is working properly.
One strange thing about yours is that in this reddit post (which you also posted in) people are actually compiling it using *my* instructions successfully and then switching back to other guides to do what they’re trying to do (such as run Palworld in that linked example).
It may be worth asking the Box86 developer. I tried to see if this issue had come up before on Box86 here. I found 4 results and in all cases they were broken toolchains.
My guess is that you got a subtle error at some point during your configuration steps. The output here only tells us that your compiler is broken for some reason. Did you have any trouble installing dependencies or get any other output during the previous steps? Did you try to build this before having all of the dependencies and you need to clear the CMake cache? (or just delete the source folder completely and pull again through GitHub).
I tried downloading the latest image from the Armbian web site and it’s going at 100kb/s so it still has several hours to go (low bandwidth available I suppose this morning). You’re the only person I’ve ever seen have this error when following this though. I was able to easily find every post on the internet you made about this because frankly you’re the only that has got it just like this. I will give it a try when it finally finishes here.
Alright. I’ve completed verifying the instructions. I used this image:
Armbian 24.2.1 Jammy Gnome Desktopwith 3D/VPU Accel
Kernel: 5.10.160, Size: 1.3GB, Release date: Feb 13, 2024
https://dl.armbian.com/orangepi5/archive/Armbian_24.2.1_Orangepi5_jammy_legacy_5.10.160_gnome-amazingfated_desktop.img.xz
This is the latest desktop version available on Armbian’s main site here at time of writing.
If you are not using the Armbian Jammy Gnome desktop (and anyone who is having trouble with this isn’t, as I will demonstrate momentarily) then I suggest redownloading the latest desktop Gnome version or using the link I posted above if you want to be absolutely sure you’re doing the same thing as me.
I fired up a fresh image, set my root password and username and then launched the built in Chromium browser and headed to jamesachambers.com. I opened the article (without doing *anything* else) and pasted the steps into the console/terminal:
And everything just worked. I’m already done. It took an hour of waiting for Armbian’s slow throttled download to complete and then 10 minutes to run the steps (mostly just waiting for things to compile). I copied and pasted the steps from my browser one section at a time and in about 10 minutes Steam was already updating itself.
I’m kind of disappointed. With multiple morons on reddit saying my guide wasn’t working I figured *something* would need to be updated. There was *nothing*. It worked 100% the first try literally with a brand new SD card image of the latest version of Armbian Gnome desktop.
So what can we infer from this? I think we can infer the geniuses on reddit are *not* following the guide the way it’s intended. They aren’t starting with a fresh image of the Gnome desktop version. What they are doing is once they try installing Steam and they get stuck they google it and find my guide and try to adapt the instructions to whatever the hell flavor of Armbian (or non-Armbian) they are running (usually without even getting my dependencies installed either which is literally step #1).
If they had any clue what was happening under the hood from these commands it would not surprise them that using a different OS flavor (even another Armbian flavor) would break things. Badly. We are cross-compiling both a 32 bit and 64 bit emulator (for x86_64 and x86) on an ARM system and running Windows binaries. Tons of packages need to be in place to successfully do that. Even just using the CLI version means that a whole bunch of packages this guide is expecting to already be on your system won’t be. That’s why I was so specific in the article about *exactly* what you need to be running for this to work.
In fact I’ll go further and say that if you tried to follow someone else’s guide before using mine you should reimage the entire device and start over from scratch. It’s going to be broken and it will be broken in ways that are so advanced to fix that anyone who actually has the skills to do it will tell you to start over with a clean environment (because it’s not an efficient or smart use of time to fix when a fresh start is an option). These are very serious dependencies and picking the wrong ones / old ones is going to be so difficult to fix it’s easier to start over. And much faster as well.
If you follow this guide as intended and start with a fresh desktop image you will have no trouble. Maybe you just had a bad image Cody. I would try writing the same image again if you’ve verified it’s the same one I’m using in this verification. For the rest of the users on reddit I’m not going to give them the benefit of the doubt. That’s just straight up user error on their parts. They would have a working install if they followed the guide properly.
When I tried to research your issue Cody I easily found every post you’ve made on the internet about it (and linked most of them). I did see a few forum ones I didn’t link. That’s how rare your issue is. I think you legitimately probably just had a bad image (whether it’s the download or the write). It happens. The other possibility is you tried following someone else’s guide first not realizing that not only did it not work, it actually broke your system so badly that even working instructions won’t help you anymore.
It’s so broken though that I would definitely reimage that one again and try one more time. I just personally confirmed that with a working fresh download and image none of the instructions have changed at all.
Hopefully that helps!
Thanks James! I hadn’t seen your reply until after I fixed it but I don’t know if it’s based on your assessment that it was a bad image or if it was something else. I also updated (most of) my posts on reddit, but what I ended up doing was a couple things:
First, I flashed the image to the eMMC of the OPi instead of running it from the SD card. To be fair, I also re-imaged the card before doing it, so I don’t actually know if running from the eMMC was the winner or if it was the image. The other thing I did that I have no idea if it made any difference was editing the armbianEnv.txt to add the “b” after the “5” in the line
fdtfile=rockchip/rk3588s-orangepi-5b.dts
.
Being that I am not as knowledgeable about this stuff as you are, I am going to go with your assessment and say it was a bad image, and I was probably in so deep before that I didn’t want to start over haha. At any rate, keep doing what you are doing, and I know I appreciate not only your posts but your comments supporting those posts.
Hey Cody,
Thanks a ton for the follow-up, that’s great news that you got it going! Thanks for the kind words as well, I’m sure that your posts will help a lot of others!
Getting this at step 3:
E: Unable to locate package mali-g610-firmwareE: Unable to locate package rockchip-multimedia-config
Steam will still install but it will crash every time
It probably means you’re using the wrong operating system. From the Armbian download page for Orange Pi 5:
Enable 3D Acceleration (Ubuntu Gnome variant only):sudo add-apt-repository ppa:liujianfeng1994/panfork-mesa
sudo add-apt-repository ppa:liujianfeng1994/rockchip-multimedia
sudo apt update
sudo apt dist-upgrade
sudo apt install mali-g610-firmware rockchip-multimedia-config
This notice is still there unchanged. Notice that it says “Ubuntu Gnome variant only”. Are you running the Ubuntu Gnome variant? I did specify in the article that you need to use *exactly* what I am if you expecting to just type the commands in and have it work.
Hopefully that helps!
Hello James,
Trying to install Steam on an Orange PI 5 Plus running Ubuntu 22.04 using your guide. In the steps around installing box 64 and box 86 you reference the cmake command. mkdir build; cd build; cmake .. -DRK3588=1 -DCMAKE_BUILD_TYPE=RelWithDebInfo
make -j4
sudo make install If I attempt to run that command under sudo it errors out. bash: cmake: command not found
make: *** No targets specified and no makefile found. Stop.
make: *** No rule to make target ‘install’. Stop.
Please advise what I’m missing. Thank you for this guide.
Hey Michael,
It looks like cmake isn’t making it on there still. Try:
sudo apt install build-essentialor:
sudo apt install build-essentialWe’ll definitely need that to build it. Hopefully that helps!
Hello. I have a problem launching steam. After installation, Steam hangs at the stage of logging into the account and the line “Nothing to do” appears in the terminal and nothing happens. How to fix it? armbian_23.5.1 with gnome
Hey Andrew,
The best way is to launch Steam with the console and then google the error messages you’re getting before it closes. Usually it will be some small dependency you can install through apt or there will be a flag you can use. Everyone’s situation will be slightly different depending on how the system is configured but that’s generally the best way.
Feel free to share what you find here in the comments as well as I try to add more and more fixes to the article as people share them to help others getting started.
Hopefully that helps!
this is what it says to me in the terminal
Error initializing native libgnutls.so.30 (last dlerror is libgnutls.so.30: wrong ELF class: ELFCLASS64)Error: Symbol __gmpz_scan1 not found, cannot apply R_386_JMP_SLOT 0xe7d8e010 (0x48b6) in /home/andrew/.local/share/Steam/ubuntu12_32/steam-runtime/usr/lib/i386-linux-gnu/libhogweed.so.4
Error: Symbol __gmpz_init_set not found, cannot apply R_386_JMP_SLOT 0xe7d8e01c (0x48e6) in /home/andrew/.local/share/Steam/ubuntu12_32/steam-runtime/usr/lib/i386-linux-gnu/libhogweed.so.4
Error: Symbol __gmpz_tdiv_qr not found, cannot apply R_386_JMP_SLOT 0xe7d8e024 (0x4906) in /home/andrew/.local/share/Steam/ubuntu12_32/steam-runtime/usr/lib/i386-linux-gnu/libhogweed.so.4
Error: Symbol __gmpn_copyd not found, cannot apply R_386_JMP_SLOT 0xe7d8e028 (0x4916) in /home/andrew/.local/share/Steam/ubuntu12_32/steam-runtime/usr/lib/i386-linux-gnu/libhogweed.so.4
and
[2023-08-04 10:13:44] Background update loop checking for update. . .[2023-08-04 10:13:44] Checking for available updates...
[2023-08-04 10:13:44] Downloading manifest: https://client-update.akamai.steamstatic.com/steam_client_ubuntu12?t=3270175543
[2023-08-04 10:13:44] Manifest download: send request
[2023-08-04 10:13:44] Manifest download: waiting for download to finish
[2023-08-04 10:13:45] Manifest download: finished
[2023-08-04 10:13:45] Download skipped by HTTP 304 Not Modified
[2023-08-04 10:13:45] Nothing to do
This is where it all ends
Hey Andrew,
So as per my previous post I googled your error. I found a Box86 post here:
You may need to use sudo apt install libnm0 libappindicator1 to run steam.Followed by:
Thanks, that worked!!This is what you are going to have to do. I cannot help you. My system doesn’t do this. You need to look up your errors and figure out which libraries you are missing and install them. If you are not comfortable with that process then you should not attempt this and that goes the same for anyone else reading this. It’s hard to do this and you have to be willing to do some research and some googling. If that’s off the table then so is running this on ARM.
Hopefully that helps!
Hey James!
Thank you kindly for such a great guide! I am a total newbie, have zero experience in everything related to ARM (..and Linux). I stumbled across this article after a week of trying to fix errors by myself.
Also, tried Steam’s Proton, successfully launched and played Fallout: New Vegas (ran way better than I expected). Maybe that kind of info could be useful for newbies like me: games that natively use DirectX 9 could be launched by adding “PROTON_USE_WINED3D=1 %command%” as launch arguments via game’s properties.
Take care,
Nick
Hey Nick,
Thanks so much for the kind words and sharing this flag, I’m sure that will help others get some titles going. Enjoy and take care!