
This guide is meant to help get an environment configured to work with the Raspberry Pi Pico. It’s intended for Linux as even if you don’t use Linux as your main OS you presumably have a Pi that does run Linux and the Pi is a perfectly fine development environment for the Pico!
If you aren’t familiar with the Pico make sure you check out my Raspberry Pi Pico W Explained article as this guide is intended for people who already have the board (but if you want to see how using it works go ahead and peak ahead!).
Hardware Used
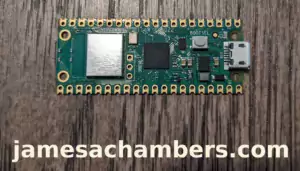
The Raspberry Pi Pico W is a very different type of Raspberry Pi that is meant to run an individual application rather than an entire operating system. It’s still quite powerful having a dual-core Arm Cortex-M0+ processor with 264kB of internal RAM!
Links: Amazon.com*

The GeekPi Pico starter kit includes a Pico (non-wireless) and a whole bunch of accessories to use with the Pico including a breadboard, a micro-servo motor, a I2C 1602 LCD Display Module and more. Good option for people looking for a kit that comes with everything they need to actually use the Pico.
Links: Amazon.com*
Getting Pico Utilities / SDK
If you are using a Raspberry Pi for development you can use the quick setup script like this:
wget https://raw.githubusercontent.com/raspberrypi/pico-setup/master/pico_setup.sh
chmod +x pico_setup.sh
./pico_setup.sh
Otherwise let’s start by building the main utilities to control and query the Pico. First we need some dependencies:
sudo apt install build-essential pkg-config libusb-1.0-0-dev git cmake gcc-arm-none-eabi libnewlib-arm-none-eabi
First we need the official Pico SDK. We can clone and build it from the official repository like this:
git clone https://github.com/raspberrypi/pico-sdk.git
cd pico-sdk
git submodule update --init
Now let’s clone the official Picotool repository and build the tool:
cd ..
git clone https://github.com/raspberrypi/picotool.git
cd picotool
mkdir build
cd build
cmake -DPICO_SDK_PATH=../../pico-sdk ..
make
If the build succeeded we’re ready to test the tool! If you do a ls command you should see these files:
james@jamesgigabyte-linux:~/picotool/build$ ls
boot_picoboot_headers CMakeFiles pico_binary_info picotool
boot_uf2_headers cmake_install.cmake picoboot_connection pico_usb_reset_interface
CMakeCache.txt Makefile pico_platform
We can now run our picotool build with:
./picotool
The options at time of writing looked like this:
james@jamesgigabyte-linux:~/picotool/build$ ./picotool
PICOTOOL:
    Tool for interacting with a RP2040 device in BOOTSEL mode, or with a RP2040 binary

SYNOPSYS:
    picotool info [-b] [-p] [-d] [-l] [-a] [--bus <bus>] [--address <addr>] [-f] [-F]
    picotool info [-b] [-p] [-d] [-l] [-a] <filename> [-t <type>]
    picotool load [-n] [-N] [-v] [-x] <filename> [-t <type>] [-o <offset>] [--bus <bus>] [--address <addr>]
                [-f] [-F]
    picotool save [-p] [--bus <bus>] [--address <addr>] [-f] [-F] <filename> [-t <type>]
    picotool save -a [--bus <bus>] [--address <addr>] [-f] [-F] <filename> [-t <type>]
    picotool save -r <from> <to> [--bus <bus>] [--address <addr>] [-f] [-F] <filename> [-t <type>]
    picotool verify [--bus <bus>] [--address <addr>] [-f] [-F] <filename> [-t <type>] [-r <from> <to>] [-o
                <offset>]
    picotool reboot [-a] [-u] [--bus <bus>] [--address <addr>] [-f] [-F]
    picotool version [-s]
    picotool help [<cmd>]

COMMANDS:
    info      Display information from the target device(s) or file.
              Without any arguments, this will display basic information for all connected RP2040 devices in
              BOOTSEL mode
    load      Load the program / memory range stored in a file onto the device.
    save      Save the program / memory stored in flash on the device to a file.
    verify    Check that the device contents match those in the file.
    reboot    Reboot the device
    version   Display picotool version
    help      Show general help or help for a specific command

Use "picotool help <cmd>" for more info
You may permanently install this tool system-wide with:
sudo make install
and at that point you can use the tool as you would any other utility by just typing “picotool” on the command line.
For a final test let’s query the Pico board and make sure we can communicate with it using the command “picotool info”:
james@jamesgigabyte-linux:~/picotool/build$ picotool info
No accessible RP2040 devices in BOOTSEL mode were found.

but:

Device at bus 7, address 124 appears to be a RP2040 MicroPython device not in BOOTSEL mode.
This message is telling us that I did not plug in the Pico with the “BOOTSEL” button pressed but that it sees it and it’s currently running MicroPython. It will give you the status of your device at any time when you use this command!
Software Development Kits
I’ll split this into two sections that target Python and C++ respectively. If you know you don’t want to work with one of these languages on the Pico then you can skip that section!
MicroPython (Python 3)
This is the fastest way to get started with the Pico and it’s using Python! To get started first download the latest release for your specific Pico (W vs non-W) from the following pages:
MicroPython – Pico – Latest Build
MicroPython – Pico W – Latest Build
Now it’s time to connect the Pico. Press and hold the white “BOOTSEL” button on the board and connect the microUSB cable from the Pico to your computer / device. Shortly after connecting the Pico you will see a new drive pop up on your computer called “RPI-RP2”. Mine looked like this:
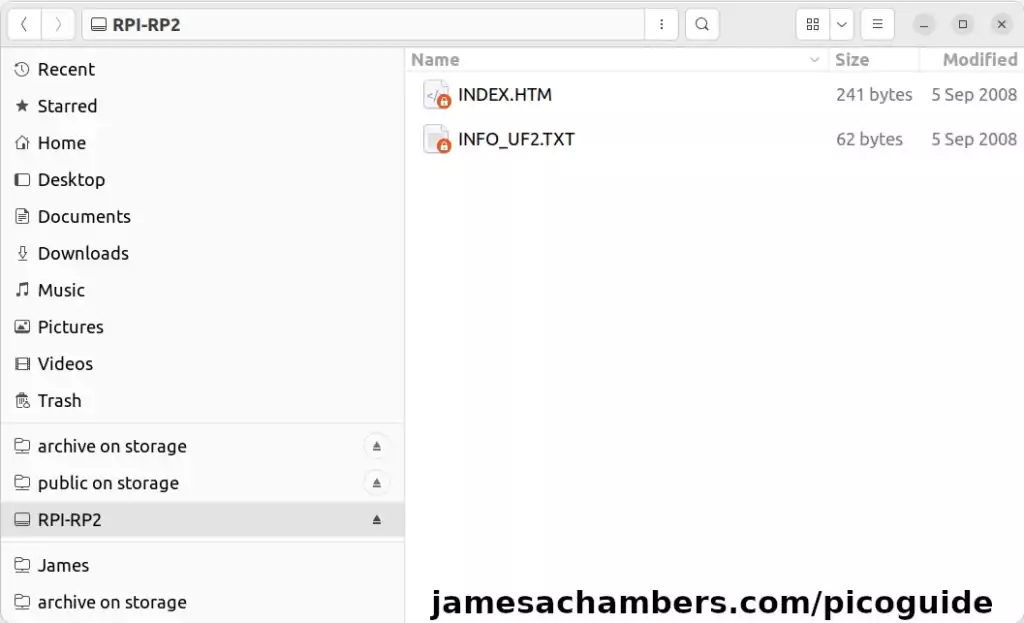
You can see a couple of files here already. Now go ahead and drag/copy the MicroPython file we downloaded into right into the base of the folder.
My file explorer window paused for a good 10 seconds or so while this file flashed onto the device. It will then unmount itself automatically.
Believe it or not you are already running MicroPython on the Pico now! All we need to do is connect with a serial console to interact with it. First make sure you have minicom installed with:
sudo apt install minicom
Before we continue you need to find your USB device name. The easiest way to find this is using ls like this:
ls /dev/ttyACM*

james@jamesgigabyte-linux:~$ ls /dev/ttyACM*
/dev/ttyACM0  /dev/ttyACM1  /dev/ttyACM2
It’s most likely to be the highest number as that is the most recently connected. On my system it’s /dev/ttyACM2.
Now we can connect to the Pi (change the 2 at the end to match the device id # on your system) with:
sudo minicom -o -D /dev/ttyACM2
Assuming it was the right device id # (not a big deal if it wasn’t, just try again) it will look like this:
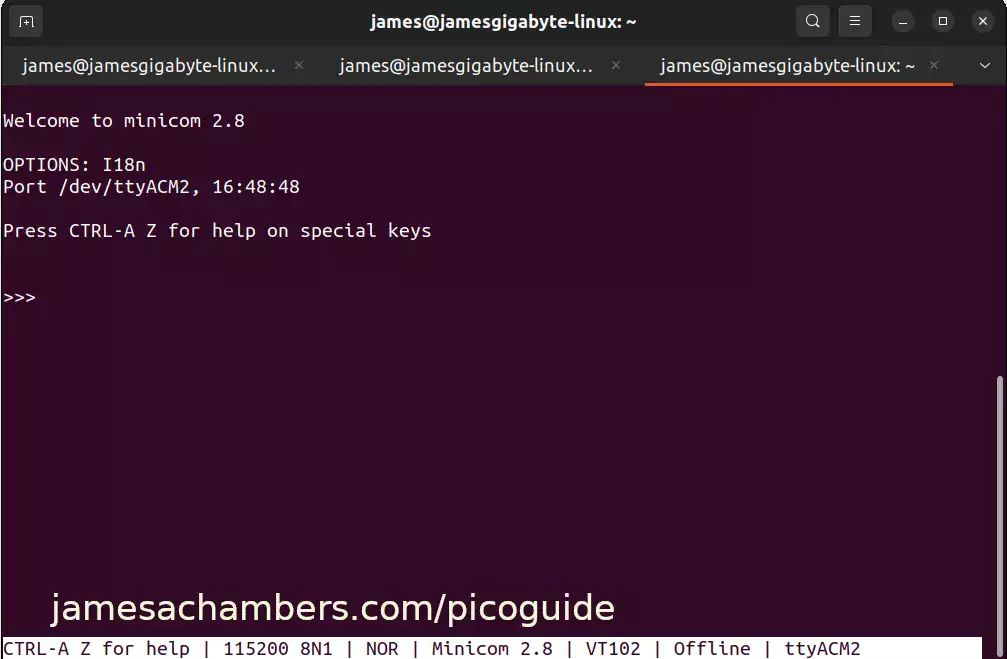
Press the “Enter” key and you should see the three >>> on your screen. That is actually the Python command line! You can type help() and press enter to verify it’s working:
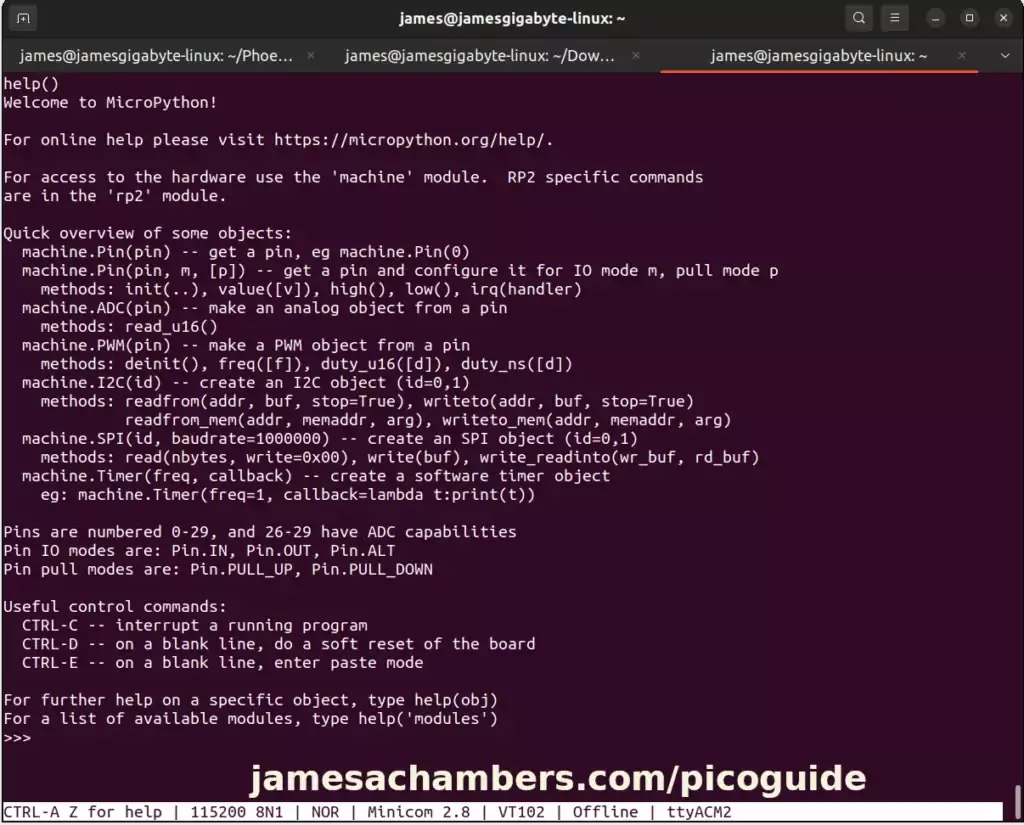
Now for one last trick. At any time you can press the keys Ctrl+D. This will initiate a soft reboot of the Pico. You’ll see the following on your screen:
MPY: soft reboot
MicroPython v1.19.1 on 2022-07-26; Raspberry Pi Pico W with RP2040
Type "help()" for more information.
You’ve now just performed a soft reboot of the Pico!
Official Pico SDK (C++)
The best way to get started and make sure your environment is configured correctly is to test using the pico-examples repository. Not only does this have our obligatory “Hello World” program but it has a whole bunch of much more useful examples in there that will let you see and experiment with some more practical examples.
We are going to build the serial output version of “Hello World”. If you did not try the Python section first then let’s install minicom now so we can connect over serial:
sudo apt install minicom
Let’s clone the pico-examples repository now:
git clone https://github.com/raspberrypi/pico-examples
cd pico-examples
mkdir build
cd build
cmake -DPICO_SDK_PATH=../../pico-sdk -DPICO_BOARD=pico_w ..
make -j$(nproc)
This will build all of the examples at once! Notice that I specified the pico_w board as the PICO_BOARD variable so if you are using a regular Pico you can drop the _w from the end.
Let’s head into our build directory and see what files were produced:
cd hello_world/serial
ls
Mine looked like this:
james@jamesgigabyte-linux:~/pico-examples/build/hello_world/serial$ ls
CMakeFiles           hello_serial.bin  hello_serial.elf      hello_serial.hex  Makefile
cmake_install.cmake  hello_serial.dis  hello_serial.elf.map  hello_serial.uf2
The file we are interested in is the hello_serial.uf2. This is the file we are going to put on the Pico!
Now it’s time to connect the Pico. Press and hold the white “BOOTSEL” button on the board and connect the microUSB cable from the Pico to your computer / device. Shortly after connecting the Pico you will see a new drive pop up on your computer called “RPI-RP2”. Mine looked like this:
You can see a couple of files here already. Now go ahead and drag/copy the hello_serial2.uf2 file we downloaded into right into the base of the folder.
My file explorer window paused for a second or two while this file flashed onto the device. It will then unmount itself automatically.
Believe it or not (you will believe it if you did the previous MicroPython section) the application is now already running! We just need to connect with it using the minicom application we installed earlier.
Before we continue you need to find your USB device name. The easiest way to find this is using ls like this:
ls /dev/ttyACM*

james@jamesgigabyte-linux:~$ ls /dev/ttyACM*
/dev/ttyACM0  /dev/ttyACM1  /dev/ttyACM2
It’s most likely to be the highest number as that is the most recently connected. On my system it’s /dev/ttyACM2.
Now we can connect to the Pi (change the 2 at the end to match the device id # on your system) with:
sudo minicom -o -D /dev/ttyACM2
Once the minicom screens is up you should start immediately seeing:
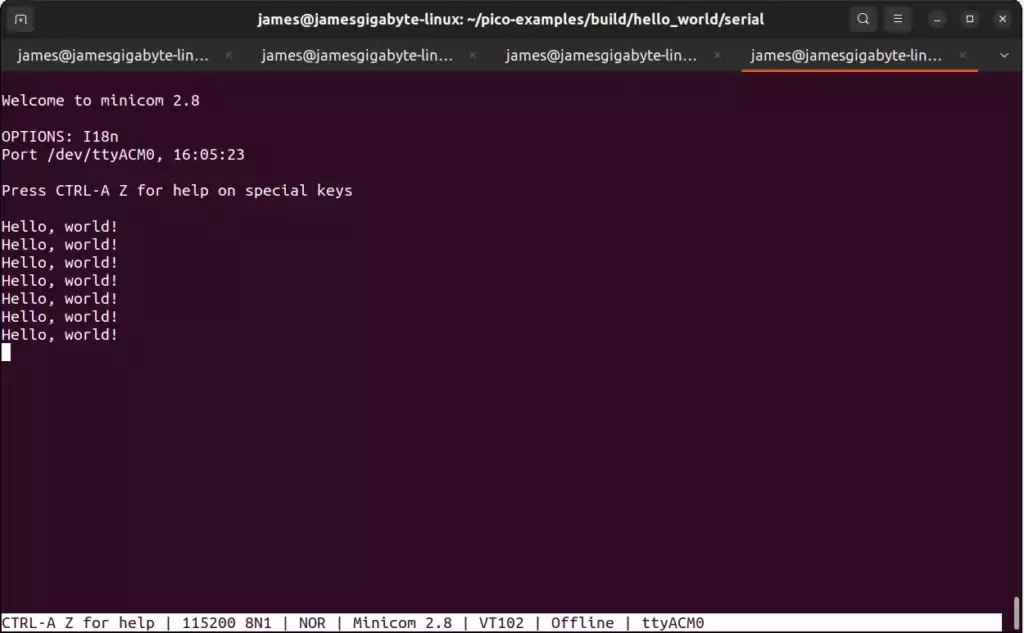
Provided you picked the right ACM port then you’ve done it! Running the other examples is just as easy and you’ve already built them. It’s time to start diving into code!
Conclusion
It’s surprisingly easy and fun to work with these boards. I’m really enjoying it yet and I haven’t even started playing with the wireless yet (stay tuned for articles on that).
It’s literally the push of a button to put it into mass storage mode and then you simply copy or drag and drop your application. That’s it! With the Python support it’s even great for beginners / people learning. I can’t imagine a better microcontroller board to learn on than this one.
Other Resources
If you are working with the Compute Module 4 you can see my full setup guide here or if you are interested in NVMe storage on the CM4 see my NVMe CM4 guide here
The official Raspberry Pi documentation to get started with MicroPython is here
The official Raspberry Pi documentation to get started with the C++ Pico SDK is here


I agree with Damian. This was a very good tutorial, with nothing left out. Thank You for the work You put into this.
With this superlative resource, I was finally able to get picotool up and running after weeks of wasted attempts using info from other places. Particularly helpful was learning to use ./ before picotool to get it to run and sudo make install to “solidify” the program. Maybe stuff like that is linux 101, but I have to tell you that including it in the instructions made the headache I was having from pounding it into a wall just up and vanish. Thank you so much.
Hey Damian,
Thanks so much for leaving this comment! I haven’t had as many comments on this one so it’s great to know it was worth writing and putting out there.
Enjoy and take care!