
I highly recommend using the Docker version over the standalone version (this). Another great option is to use my Minecraft Java + Bedrock Together Geyser container which allows both Bedrock and Java players to connect!
It’s now possible to convert your worlds between Bedrock and Java versions. Check out my guide on Chunker here for more information.
One of the most requested features in my Raspberry Pi Minecraft server guide is support for the Bedrock edition of Minecraft. This is the edition that powers Minecraft on iOS / Android / Xbox / Nintendo Switch as well as the free Windows 10 edition.
There’s one big problem though. The official Minecraft Bedrock dedicated server is only compiled for Windows and Ubuntu X86_64. Without ARM support it seems impossible to run the Bedrock dedicated server on a Raspberry Pi. I couldn’t find a documented instance of anyone doing it anywhere.
So naturally today in this guide we are going to do the impossible. But right off the bat let me point out that there is an asterisk in my article title. Why you ask? That is because unlike my other guides this one will not yield you a well performing server. That is because we will be emulating a x86_64 processor on ARM. This is slow. VERY slow.
What’s the point?
So if the server doesn’t perform well and it’s too slow why did I even bother to write this article?
Basically “too slow” is only in the context of today’s hardware and software we currently have available to us. Both hardware and software for ARM have been evolving at a furious pace. ARM powers smartphones which means it is not going anywhere and will continue to have tons of R&D money put into it and it may not be long before the hardware is powerful enough.
There’s also the possibility that by sharing this work that someone who reads this may know or discover ways to speed things up and build on what I present here. If you’re one of those people drop me a comment or send me an email and I will gladly credit and share your work!
And last but not least, the techniques I use here can be used to run other x86_64 binaries on Raspberry Pi. Many applications will perform just fine even on current generation gear.
Current Status
I highly recommend using the Docker version over the standalone version (this). Another great option is to use my Minecraft Java + Bedrock Together Geyser container which allows both Bedrock and Java players to connect!
The script is working on Raspberry Pi but if you use the Raspberry Pi OS’s Debian repositories the QEMU version in there will give a bus error. If you compile a newer QEMU from source or use a different operating system it works (very slowly)!
You may need to build the dependencies yourself if you are getting segfaults from my prepackaged depends.zip. This is because I generated a static dump of dependencies at a snapshot in time and they’ve likely been updated to a point they are no longer compatible. See the “Satisfying Dependencies” section for how to build the dependencies!
Hardware
This is the hardware I used for the server. I always recommend using solid state storage for the best performance. To see why check out the Raspberry Pi storage benchmarks section. This contains benchmarks submitted by others who ran the benchmark so you can see what other people are using and provides the best performance.
Here’s the recommendations:
Recommended Gear

The Raspberry Pi 4 is available in different memory configurations all the way up to 8 GB. It’s about the size of a credit card and uses an extremely low amount of power making it ideal for all sorts of projects and ideas!
Links: AliExpress*, Amazon.com*, Amazon.ca*, Amazon.com.au*, Amazon*.co.jp*, Amazon.co.uk*, Amazon.de*, Amazon.es*, Amazon.fr*, Amazon.it*, Amazon.nl*, Amazon.pl*, Amazon.se*, Amazon.sg*

The Raspberry Pi 400 kit includes everything you need for a full Pi 400 desktop build. The Pi 400 is the fastest Raspberry Pi ever released and comes in the form factor of a keyboard!
Links: AliExpress*, Amazon.com*, Amazon.ca*, Amazon.com.au*, Amazon.co.jp*, Amazon.co.uk*, Amazon.de*, Amazon.es*, Amazon.fr*, Amazon.it*, Amazon.nl*, Amazon.pl*, Amazon.se*, Amazon.sg*

The Kingston A400 has been a great drive to use with the Pi for years. It’s reliable, widely available around the world, has low power requirements and performs very well. It’s also very affordable. This drive has been benchmarked over 1000 times at pibenchmarks.com and is the #1 most popular SSD among the Pi community!
Links: AliExpress*, Amazon.com*, Amazon.ca*, Amazon.com.au*, Amazon.co.jp*, Amazon.co.uk*, Amazon.de*, Amazon.es*, Amazon.fr*, Amazon.it*, Amazon.nl*, Amazon.pl*, Amazon.se*, Amazon.sg*

The USB 3.1 variant of the StarTech 2.5″ SATA adapter works well with the Pi 4. The USB 3.0 variant doesn’t have firmware updates available and is not recommended.
Links: Amazon.com*, Amazon.ca*, Amazon.com.au*, Amazon.co.jp*, Amazon.co.uk*, Amazon.de*, Amazon.es*, Amazon.fr*, Amazon.it*, Amazon.nl*, Amazon.pl*, Amazon.se*, Amazon.sg*
Or for a compact setup:

The SanDisk Extreme Pro USB SSD is a true solid state drive. This is different than a typical “flash drive” which uses extremely cheap memory and has very low random I/O performance/throughput compared to a real solid state drive. I’ve used both the USB 3.1 and USB 3.2 variants with the Pi successfully and they benchmark very well!
Links: AliExpress*, Amazon.com*, Amazon.ca*, Amazon.com.au*, Amazon.co.jp*, Amazon.co.uk*, Amazon.de*, Amazon.es*, Amazon.fr*, Amazon.it*, Amazon.nl*, Amazon.pl*, Amazon.se*, Amazon.sg*
SD Card Setup:

The SanDisk Extreme A1-A2 SD card has the best scoring SD card on Pi Benchmarks for years and is second in popularity only to the SanDisk Ultra (often included in combo kits). The application class (A1) means random I/O speeds (very important when running an OS) have to meet a higher standard. There’s no benefit on the Pi for A2 right now so get whichever is cheaper/available.
Links: AliExpress*, Amazon.com*, Amazon.ca*, Amazon.com.au*, Amazon.co.jp*, Amazon.co.uk*, Amazon.de*, Amazon.es*, Amazon.fr*, Amazon.it*, Amazon.nl*, Amazon.pl*, Amazon.se*, Amazon.sg*
All of these versions support cross-platform play with each other (but not with the Java edition).

This is the PC Minecraft for Windows 10 (Bedrock) edition of Minecraft. It is able to play cross-platform with other players on Android / iOS / Playstation / Xbox / Switch. Available as a code that is instantly activated to give you permanent access to the game!
Links: Amazon.com*, Amazon.co.jp*, Amazon.co.uk*, Amazon.de*, Amazon.es*, Amazon.fr*, Amazon.it*

The Sony PlayStation version of Minecraft: Bedrock edition.
Links: Amazon.com*, Amazon.ca*, Amazon.com.au*, Amazon.co.jp*, Amazon.co.uk*, Amazon.de*, Amazon.es*, Amazon.fr*, Amazon.it*, Amazon.nl*, Amazon.se*, Amazon.sg*

This is the Nintendo Switch version of Minecraft: Bedrock edition.
Links: Amazon.com*, Amazon.ca*, Amazon.com.au*, Amazon.co.jp*, Amazon.co.uk*, Amazon.de*, Amazon.es*, Amazon.fr*, Amazon.it*, Amazon.nl*, Amazon.pl*, Amazon.se*, Amazon.sg*

This is the Microsoft Xbox version of Minecraft: Bedrock edition.
Links: Amazon.com*, Amazon.ca*, Amazon.com.au*, Amazon.co.uk*, Amazon.de*, Amazon.es*, Amazon.fr*, Amazon.it*, Amazon.nl*, Amazon.sg*
Linux Distribution
For this to work it is required that we use a 64 bit aarch64/arm64 distribution. This is because when we try to emulate 32 bit ARM we will get a “bus error” as soon as the server tries to start. This is likely because QEMU 32 bit is missing some support we need to emulate the x86_64 architecture.
Distributions that will work:
- Ubuntu Server 20.04 / 18.04 ARM64 (choose the one under ARM64 section, ARMHF will not work!)
- Debian “Buster” Preview for Raspberry Pi
- Raspbian 64 bit Beta Version
Since the server is natively compiled for Ubuntu it is best to use a Debian based distribution. For the Raspberry Pi I recommend Ubuntu Server 20.04 or 20.10. Check out my article on how to install Ubuntu Server on Raspberry Pi.
You can also use the Debian “Buster” preview which has the advantage of having QEMU 3.1 available in the apt repository right now which will save you several steps later of having to acquire a newer static binary of QEMU the “evil” way.
Raspbian will not work with this method unless you use the 64 bit beta because it is only 32 bit. You will get a segmentation fault when you run it on a 32 bit ARM system instead of a 64 bit one.
Automatic Setup Script
If you just want to get your hands on the finished working server my Minecraft Bedrock Dedicated Server guide already supports ARM and will setup the dependencies and download the server for you. It also supports the following:
- Sets up fully operational Minecraft Bedrock edition server in a couple of minutes
- Ubuntu / Debian distributions supported
- Sets up Minecraft as a system service with option to autostart at boot
- Automatic backups when server restarts
- Updates automatically to the latest version when server is started
- Easy control of server with start.sh, stop.sh and restart.sh scripts
- Optional scheduled daily restart of server using cron
Run the automatic setup script by pasting / typing the following on the command line:
curl https://raw.githubusercontent.com/TheRemote/MinecraftBedrockServer/master/SetupMinecraft.sh | bashFirst Join
Before you join the server for the first time make sure the server has started by typing:
screen -r
You should be inside the Minecraft server console. What you want to look for before you try to join is that the server has completely finished starting. This can take a while on ARM. The line we want to see to know it’s ready is this:
[INFO] Server started.
The first time it joins will be very very slow. You may have to try several times as the server generates the starting area. Eventually you’ll get in and be able to move around. You’re able to break blocks but there’s definitely a delay when you break blocks and things are pretty laggy.
Manual Instructions
You only need to follow the manual instructions if you want to recreate my process step by step. Here are the steps:
Getting the Dedicated Server
The latest official dedicated Minecraft Bedrock server binary is available at: Official Minecraft Bedrock Server Download Page. We will download the Ubuntu Server version.
mkdir bedrock
cd bedrock
wget https://minecraft.azureedge.net/bin-linux/bedrock-server-1.16.0.200.zip
unzip -o bedrock-server-1.16.0.200.zip
We now have the Bedrock dedicated server unzipped into a folder called “bedrock”. However, if we try to run it by typing ./bedrock_server we get:
bash: ./bedrock_server: cannot execute binary file: Exec format error
This is because we are on the ARM architecture and this file type is compiled for x86_64. In Linux we can get the file type format of any executable by using the file command:
# file bedrock_server
bedrock_server: ELF 64-bit LSB shared object, x86-64, version 1 (SYSV), dynamically linked, interpreter /lib64/ld-linux-x86-64.so.2, for GNU/Linux 3.2.0, stripped
Now that we know what target architecture we need to run we need to get QEMU.
Installing QEMU Host Mode Emulator
You may have used QEMU before in the past to create virtual machines. But QEMU has another less known operating mode called user mode emulation. User mode emulation is faster than a virtual machine because it takes advantage of the host operating system to do a lot of functions rather than emulate an entire operating system.
On top of being much faster, this will allow us to run a x86_64 binary on the ARM platform without having to install a full blown x86_64 operating system inside a QEMU container.
At the time of writing the binaries provided in Ubuntu Server and Raspbian are too old and don’t have the x86_64 support we need. The binaries available in apt are QEMU 2.8 and we need 3.0 or higher.
Check what the latest version of QEMU available for your distribution is by typing:
sudo apt search qemu-user-static
On my system this yielded the result:
qemu-user/stable 1:2.8+dfsg-6+deb9u4 armhf
   QEMU user mode emulation binaries
qemu-user-static/stable 1:2.8+dfsg-6+deb9u4 armhf
   QEMU user mode emulation binaries (static version)
Notice the version is 2.8 and not 3.0 or higher. If your version is 3.0 or higher you can (and should) install qemu-user-static from apt.
Mine aren’t, so we are going to cheat. But before we cheat, I am going to explain why we are violating the Holy Sacred Linux Bylaws by doing what I’m about to show you and explain why it should basically never be used. If you are using the Debian Buster distribution you can skip the next section since QEMU 3.1 is already available in apt for Debian.
Evil way to get latest QEMU
The proper thing to do in this situation is to download QEMU from source and build the newer version yourself. The problem is QEMU takes forever and a day to compile. Even just trying to compile the user mode binaries I came back to my Pi a full 24 hours later and it still wasn’t even close to done.
Okay so building this binary in the Pi is too slow. So what is the proper thing to do then? The proper thing to do would be to set up a development machine for cross compiling on your main more powerful system and compile it that way. The downside? Unless you already have a system set up with a cross compiling chain this is going to also take a lot of research and effort to get set up.
So where could we possibly get precompiled binaries for our system? Well, since we are using a Debian based Linux distribution we are downstream from Debian proper. So let’s take a look at Debian’s repository and see what is available: https://packages.debian.org/buster/qemu-user-static
Well look at that. The upcoming Debian Buster repository contains QEMU 3.1! We can just grab it from there. But wait… RED ALERT!

This is very bad practice. The reason we can get away with it in this case is because qemu-user-static is statically compiled and only has one dependency (binfmt-support). All of the current stock Raspberry Pi distributions don’t have anything that depends on either of these packages. This makes qemu-user-static and binfmt-support relatively self contained. Nothing else in our system depends on them and they aren’t a part of any dependency chains.
Have you ever tried to install a package and been stopped by some little dependency? It may be tempting to use this technique in situations like that. However, when you introduce foreign packages into your package tree you will very likely break your entire system. If anything depends on those packages apt will go haywire since it won’t be able to resolve the dependency chains and you will lose the ability to update or install new packages. Many packages have dozens of dependencies and a single wrong one in the chain will break everything. Therefore this technique should almost never be used.
Okay, with all that out of the way, let’s proceed. First we are going to grab a prebuilt QEMU package for our ARM architecture. We can get these from the Debian repository. These links change often so you will need to navigate to the repository yourself and see what the latest available QEMU repository is. First we need to find qemu-user-static. Here’s where that will be in the Debian repository:
http://ftp.us.debian.org/debian/pool/main/q/qemu/
Make a note of the exact name of the package. You will need it in the next step. Now we need to find one more package which is binfmt-support from here:
http://ftp.us.debian.org/debian/pool/main/b/binfmt-support/
Once you’ve found these and made a note of the package names download them to your Pi like this:
wget http://ftp.us.debian.org/debian/pool/main/q/qemu/qemu-user-static_4.1-1+b3_arm64.deb
wget http://ftp.us.debian.org/debian/pool/main/b/binfmt-support/binfmt-support_2.2.0-2_arm64.deb
sudo dpkg --install binfmt*.deb
sudo dpkg --install qemu-user*.deb
You should now have QEMU installed. You can verify this with the following:
# qemu-x86_64-static --version

qemu-x86_64 version 3.1.0 (Debian 1:3.1+dfsg-7)
 Copyright (c) 2003-2018 Fabrice Bellard and the QEMU Project developers
Your version should be a lot newer than mine since this output is from the date of publication but if you didn’t get an error you should be all set to move on to the next step.
Satisfying Dependencies
Now that we have QEMU installed if we try to run bedrock_server we get the following:
# ./bedrock_server
 /lib64/ld-linux-x86-64.so.2: No such file or directory
This is progress. We’re no longer getting an error that the system can’t read the binary format of the file. We are now met with a dependency error.
This is to be expected because we are running on a ARM system and don’t have any x86_64 dependencies installed. The Minecraft server executable is dynamically linked as we learned earlier with the file info tool. This means that we will need to provide some libraries for the executable to work.
The easiest and fastest way to get them is to install Ubuntu x86_64 on a virtual machine using something like VirtualBox or on a spare machine. If you want to download my copy of the dependencies and skip this step I have them zipped up at Minecraft Bedrock Server Dependencies – depends.zip
One alternative would be to set up a chroot environment containing a x86_64 environment but I have had nothing but problems trying to create such an environment on ARM. Usually the chroot will crash out QEMU and when you google the crash codes you will come across bug posts where the QEMU authors state that ARM to x86_64 isn’t used all that often and some things are unimplemented. This is also why we need to use QEMU 3.0 or higher to get the support we need to run the server as the support was improved in that version.
Once you have set up a x86_64 environment download the server like we did earlier and we will use the ldd tool to look up the dependencies. On your x86_64 installation type ldd bedrock_server:
# ldd bedrock_server
         linux-vdso.so.1 (0x00007fff04bb0000)
         libcurl.so.4 => /usr/lib/x86_64-linux-gnu/libcurl.so.4 (0x00007fb77c01b000)
         libCrypto.so => /home/james/minecraftbe/./libCrypto.so (0x00007fb77bdf0000)
         libpthread.so.0 => /lib/x86_64-linux-gnu/libpthread.so.0 (0x00007fb77bbd1000)
         libdl.so.2 => /lib/x86_64-linux-gnu/libdl.so.2 (0x00007fb77b9cd000)
         libssl.so.1.1 => /usr/lib/x86_64-linux-gnu/libssl.so.1.1 (0x00007fb77b763000)
         libcrypto.so.1.1 => /usr/lib/x86_64-linux-gnu/libcrypto.so.1.1 (0x00007fb77b2eb000)
         libz.so.1 => /lib/x86_64-linux-gnu/libz.so.1 (0x00007fb77b0ce000)
         libstdc++.so.6 => /usr/lib/x86_64-linux-gnu/libstdc++.so.6 (0x00007fb77ad45000)
         libm.so.6 => /lib/x86_64-linux-gnu/libm.so.6 (0x00007fb77a9a7000)
         libgcc_s.so.1 => /lib/x86_64-linux-gnu/libgcc_s.so.1 (0x00007fb77a78f000)
         libc.so.6 => /lib/x86_64-linux-gnu/libc.so.6 (0x00007fb77a39e000)
         /lib64/ld-linux-x86-64.so.2 (0x00007fb780d6b000)
         libnghttp2.so.14 => /usr/lib/x86_64-linux-gnu/libnghttp2.so.14 (0x00007fb77a179000)
         libidn2.so.0 => /usr/lib/x86_64-linux-gnu/libidn2.so.0 (0x00007fb779f5c000)
         librtmp.so.1 => /usr/lib/x86_64-linux-gnu/librtmp.so.1 (0x00007fb779d40000)
         libpsl.so.5 => /usr/lib/x86_64-linux-gnu/libpsl.so.5 (0x00007fb779b32000)
         libgssapi_krb5.so.2 => /usr/lib/x86_64-linux-gnu/libgssapi_krb5.so.2 (0x00007fb7798e7000)
         libldap_r-2.4.so.2 => /usr/lib/x86_64-linux-gnu/libldap_r-2.4.so.2 (0x00007fb779695000)
         liblber-2.4.so.2 => /usr/lib/x86_64-linux-gnu/liblber-2.4.so.2 (0x00007fb779487000)
         libunistring.so.2 => /usr/lib/x86_64-linux-gnu/libunistring.so.2 (0x00007fb779109000)
         libgnutls.so.30 => /usr/lib/x86_64-linux-gnu/libgnutls.so.30 (0x00007fb778da4000)
         libhogweed.so.4 => /usr/lib/x86_64-linux-gnu/libhogweed.so.4 (0x00007fb778b70000)
         libnettle.so.6 => /usr/lib/x86_64-linux-gnu/libnettle.so.6 (0x00007fb77893a000)
         libgmp.so.10 => /usr/lib/x86_64-linux-gnu/libgmp.so.10 (0x00007fb7786b9000)
         libkrb5.so.3 => /usr/lib/x86_64-linux-gnu/libkrb5.so.3 (0x00007fb7783e3000)
         libk5crypto.so.3 => /usr/lib/x86_64-linux-gnu/libk5crypto.so.3 (0x00007fb7781b1000)
         libcom_err.so.2 => /lib/x86_64-linux-gnu/libcom_err.so.2 (0x00007fb777fad000)
         libkrb5support.so.0 => /usr/lib/x86_64-linux-gnu/libkrb5support.so.0 (0x00007fb777da2000)
         libresolv.so.2 => /lib/x86_64-linux-gnu/libresolv.so.2 (0x00007fb777b87000)
         libsasl2.so.2 => /usr/lib/x86_64-linux-gnu/libsasl2.so.2 (0x00007fb77796c000)
         libgssapi.so.3 => /usr/lib/x86_64-linux-gnu/libgssapi.so.3 (0x00007fb77772b000)
         libp11-kit.so.0 => /usr/lib/x86_64-linux-gnu/libp11-kit.so.0 (0x00007fb7773fc000)
         libtasn1.so.6 => /usr/lib/x86_64-linux-gnu/libtasn1.so.6 (0x00007fb7771e9000)
         libkeyutils.so.1 => /lib/x86_64-linux-gnu/libkeyutils.so.1 (0x00007fb776fe5000)
         libheimntlm.so.0 => /usr/lib/x86_64-linux-gnu/libheimntlm.so.0 (0x00007fb776ddc000)
         libkrb5.so.26 => /usr/lib/x86_64-linux-gnu/libkrb5.so.26 (0x00007fb776b4f000)
         libasn1.so.8 => /usr/lib/x86_64-linux-gnu/libasn1.so.8 (0x00007fb7768ad000)
         libhcrypto.so.4 => /usr/lib/x86_64-linux-gnu/libhcrypto.so.4 (0x00007fb776677000)
         libroken.so.18 => /usr/lib/x86_64-linux-gnu/libroken.so.18 (0x00007fb776461000)
         libffi.so.6 => /usr/lib/x86_64-linux-gnu/libffi.so.6 (0x00007fb776259000)
         libwind.so.0 => /usr/lib/x86_64-linux-gnu/libwind.so.0 (0x00007fb776030000)
         libheimbase.so.1 => /usr/lib/x86_64-linux-gnu/libheimbase.so.1 (0x00007fb775e21000)
         libhx509.so.5 => /usr/lib/x86_64-linux-gnu/libhx509.so.5 (0x00007fb775bd7000)
         libsqlite3.so.0 => /usr/lib/x86_64-linux-gnu/libsqlite3.so.0 (0x00007fb7758ce000)
         libcrypt.so.1 => /lib/x86_64-linux-gnu/libcrypt.so.1 (0x00007fb775696000)
Yikes. This thing has a ton of dependencies! This is because it is dynamically linked executable so none of the source code is compiled into the binary for any of these dependencies.
Fortunately I have a bash one liner that will gather a copy of all these dependencies and put it into a folder:
mkdir depends
ldd bedrock_server | grep "=> /" | awk '{print $3}' | xargs -I '{}' cp -Lv '{}' depends
Now zip or tar this folder and move it to your Raspberry Pi. We are going to put the dependencies right in the root of the bedrock folder that we created earlier. Your file structure on the Pi should now look something like this:
 bedrock_server               libgnutls.so.30      libresolv.so.2
 bedrock-server-1.10.0.7.zip  libgpg-error.so.0    librtmp.so.1
 bedrock_server_how_to.html   libgssapi_krb5.so.2  libsasl2.so.2
 behavior_packs               libhogweed.so.4      libssh2.so.1
 definitions                  libidn2.so.0         libssl.so.1.1
 depends.zip                  libk5crypto.so.3     libstdc++.so.6
 ld-2.28.so                   libkeyutils.so.1     libtasn1.so.6
 libcom_err.so.2              libkrb5.so.3         libunistring.so.2
 libCrypto.so                 libkrb5support.so.0  libz.so.1
 libcrypto.so.1.1             liblber-2.4.so.2     permissions.json
 libc.so.6                    libldap_r-2.4.so.2   README.txt
 libcurl.so.4                 libm.so.6            release-notes.txt
 libdl.so.2                   libnettle.so.6       resource_packs
 libffi.so.6                  libnghttp2.so.14     server.properties
 libgcc_s.so.1                libp11-kit.so.0      structures
 libgcrypt.so.20              libpsl.so.5          whitelist.json
 libgmp.so.10                 libpthread.so.0
Now for the last step there is one more dependency we need to resolve that won’t be included in the command we executed. This dependency is the linker dependency ld-2.28.so (your version may be different/newer) and the trick we just used to get the other dependencies won’t work on it. On the x86_64 machine copy ld-linux-x86-64.so.2 like this:
cd depends
cp /lib64/ld-linux-x86-64.so.2 ld-2.28.so
cp /lib64/ld-linux-x86-64.so.2 ld-2.31.so
If you have a different version of the linker you can find it with:
ldd --version
The version of the linker your system is using will be at the end of the very first line of the output from that command.
On the Pi use these commands to set up the linker:
sudo mkdir /lib64
sudo ln -s /home/pi/bedrock/ld-2.28.so /lib64/ld-linux-x86-64.so.2
sudo ln -s /home/pi/bedrock/ld-2.31.so /lib64/ld-linux-x86-64.so.2
This will install the linker binary where it needs to be for us to run the application by creating a symbolic link. The rest of the dependencies will be able to be in the folder that the server is running.
Running the Server
Now we have all our dependencies in place and are ready to run the server. I can’t wait to issue a ./bedrock_server! Let’s try it:
# ./bedrock_server

/lib64/ld-linux-x86-64.so.2: No such file or directory
Ugh. It’s looking for the dependencies in the wrong place! So how do we fix that? The trick is actually on the Minecraft Bedrock server dedicated server download page. We need to change the library load path to our local directory. So the proper way to run the server will be like this:
LD_LIBRARY_PATH=. ./bedrock_serverNow that we run the server this way we see the following output:
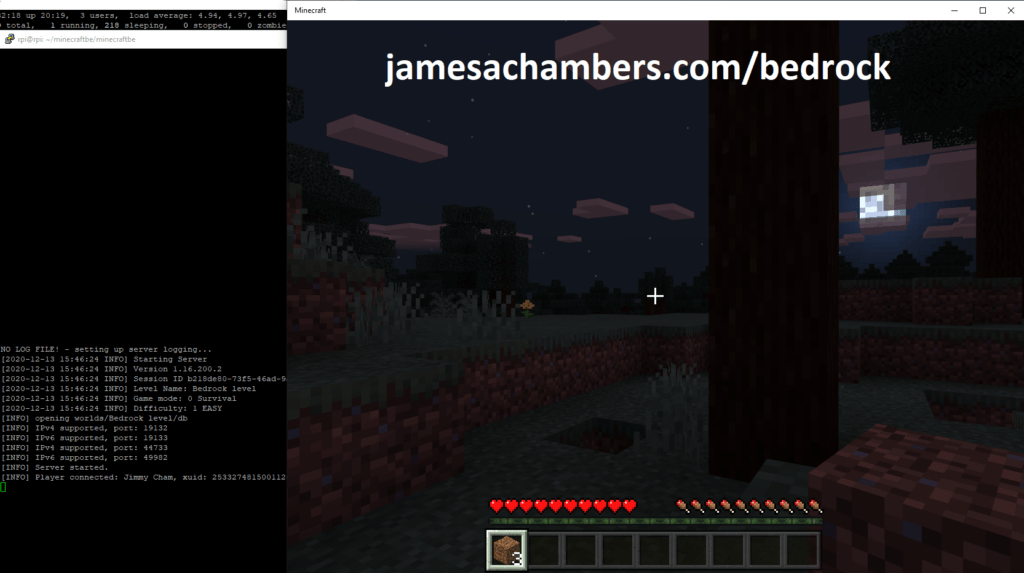
 NO LOG FILE! - setting up server logging…
 [2019-04-27 00:47:16 INFO] Starting Server
 [2019-04-27 00:47:16 INFO] Version 1.11.1.2
 [2019-04-27 00:47:16 INFO] Level Name: Bedrock level
 [2019-04-27 00:47:16 INFO] Game mode: 0 Survival
 [2019-04-27 00:47:16 INFO] Difficulty: 1 EASY
 Unknown host QEMU_IFLA type: 50
 Unknown host QEMU_IFLA type: 51
 Unknown host QEMU_IFLA type: 50
 Unknown host QEMU_IFLA type: 51
 Unknown host QEMU_IFLA type: 50
 Unknown host QEMU_IFLA type: 51
 Unknown host QEMU_IFLA type: 50
 Unknown host QEMU_IFLA type: 51
 Unknown host QEMU_IFLA type: 50
 Unknown host QEMU_IFLA type: 51
 Unknown host QEMU_IFLA type: 50
 Unknown host QEMU_IFLA type: 51
 Unsupported setsockopt level=41 optname=20
 Unsupported setsockopt level=41 optname=20
 Unsupported setsockopt level=41 optname=34
 [2019-04-27 00:51:14 INFO] IPv4 supported, port: 19132
 [2019-04-27 00:51:15 INFO] IPv6 supported, port: 19133
 [2019-04-27 00:53:48 INFO] Server started.
As we can see QEMU does complain about several missing QEMU_IFLA types. These messages relate to certain functionality not being implemented in QEMU yet. These can be safely ignored for now but hopefully if QEMU implements these later it will provide a speed boost to the server.
Another thing to note is the timestamps. The server takes some time to load when using emulation. The total time to reach the “Server started.” line was about 5 minutes. I told you it was slow!
You may now connect to the server but expect it to time out many of your connection attempts. When you do get in monsters will be very slow and glitchy. Breaking blocks will have a significant delay.
Benchmarking / Testing Storage
If you want to verify your drive’s performance you may want to run my storage benchmark with:
sudo curl https://raw.githubusercontent.com/TheRemote/PiBenchmarks/master/Storage.sh | sudo bash
If you search for the model of your drive on Pi Benchmarks you can compare your score with others and make sure the drive is performing correctly!
Conclusion
With the tools and hardware that are available to us today we are able to run the Minecraft Bedrock dedicated server on Pi but it is too slow.
Improvements in hardware and software such as more updates and better implemented of x86_64 emulation on the ARM platform will likely change this in the near future.
Another game changer would be if Mojang chooses to distribute a native ARM binary that we can run on the Pi. This would be *much* faster and would be the ideal scenario. Definitely send them an email or leave a comment on their feedback form if you want to see this!
I will update this article as things change going forward. If you are experimenting with this and find a way to speed things up definitely leave a comment here so I can credit you and publish your findings!
If your goal with this project was to have a small self contained Minecraft server that doesn’t use a lot of power I do have some alternative recommendations below to use in the mean time for getting a well performing Bedrock server!


I am looking to start my server on a raspberry pi 4, that I already have. I do not have an ssd card but I am willing to purchase one in the near future. If I follow this set up, and add port forwarding option to my router, to allow two friends and I to play on this server, would it be too slow to play or is it too slow for a larger group? I have seen a few videos on YouTube where it looks like it worked. I do not think it was bedrock but the slowness was not observed.
What about this error? I’m new to this Linux and Raspberry pi thingy so I still have not enough knowledege regarding this. I’m running the Basig Rasp pi OS from the imager BTW.
LD_LIBRARY_PATH=. ./bedrock_server
x86_64-binfmt-P: ./include/qemu/rcu.h:102: rcu_read_unlock: Assertion `p_rcu_reader->depth != 0′ failed.
Trace/breakpoint trap
Hey Jerome,
I am also having this same issue. Have you found a solution yet?
Nope, I installed the Ubuntu OS and follow the instructions. No head ache XD
Dear James, I came across the problem that when I try to run ‘SetupMinecraft.sh’ in the terminal it says the following “./SetupMinecraft.sh: Permission denied” what do I do?
Hey Guppy,
That should just need a:
chmod +x SetupMinecraft.shand then try running again. Hopefully that helps!