Kali Linux Raspberry Pi 4 Setup
I have tested Kali Linux on the new Raspberry Pi 4 8 GB model and everything works really well. The bootloader for Kali works despite the changes made in the Pi 4’s boot process.
Performance feels really great. The full 8 GB is addressable in Kali Linux and the storage upgrades in the Pi 4 make usage feel really smooth.
Hardware

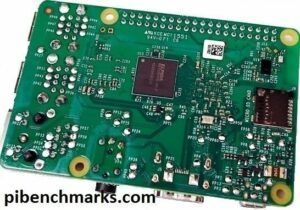
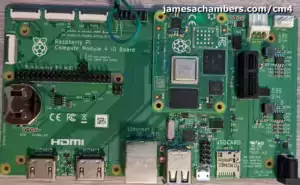
The Raspberry Pi 4 is available in different memory configurations all the way up to 8 GB. It’s about the size of a credit card and uses an extremely low amount of power making it ideal for all sorts of projects and ideas!
Links: AliExpress*, Amazon.com*, Amazon.ca*, Amazon.com.au*, Amazon*.co.jp*, Amazon.co.uk*, Amazon.de*, Amazon.es*, Amazon.fr*, Amazon.it*, Amazon.nl*, Amazon.pl*, Amazon.se*, Amazon.sg*

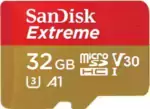
The SanDisk Extreme A1-A2 SD card has the best scoring SD card on Pi Benchmarks for years and is second in popularity only to the SanDisk Ultra (often included in combo kits). The application class (A1) means random I/O speeds (very important when running an OS) have to meet a higher standard. There’s no benefit on the Pi for A2 right now so get whichever is cheaper/available.
Links: AliExpress*, Amazon.com*, Amazon.ca*, Amazon.com.au*, Amazon.co.jp*, Amazon.co.uk*, Amazon.de*, Amazon.es*, Amazon.fr*, Amazon.it*, Amazon.nl*, Amazon.pl*, Amazon.se*, Amazon.sg*
For SSD usage see my Best SSDs and Storage Adapters for use with the Raspberry Pi 4 guide
Instructions
Download Image
Head to Kali’s official ARM images page at the official Kali Linux ARM Images Download Page. Make sure you download one that specifically states that it supports Raspberry Pi 4. At time of writing that is “Kali Linux Raspberry Pi 2, 3 and 4 32 bit”.
I recommend using the official Raspberry Pi Imaging tool to write the image to your Pi’s SD card. It’s available for Windows, Mac and Linux! Once you’ve downloaded the image you can write it to the Pi’s SD card with this utility and it will take care of a lot of problems that can come up when you try to image it with dd or Etcher or other utilities.
Prepare Hardware
Write the image to a SD card as you normally would. When finished connect the Pi’s ethernet port and insert the SD card into the Raspberry Pi 4.
Now power everything up.
Connect to Pi using SSH
Since this is a headless setup we will connect to the Pi using SSH to avoid having to connect a keyboard/monitor.
Once your Pi boots up and gets an IP address open PuTTY or any other SSH program and SSH into your Pi’s IP address. The default credentials are login “root” and password “toor”.
Update Kali
The first thing we should do is update our Kali distribution. Type
sudo apt update && sudo apt dist-upgrade -y
Once everything has finished reboot your Raspberry Pi to fully apply all of the latest updates.
(Optional) Fix Kali Repositories
You may get an error when you update such as the following:
kali@kali:~$ sudo apt update
Get:1 http://kali.download/kali kali-rolling InRelease [30.5 kB]
Get:3 http://http.re4son-kernel.com/re4son kali-pi InRelease [10.4 kB]
Get:2 http://kali.download/kali kali-experimental InRelease [23.0 kB]
Reading package lists... Done
E: Release file for http://http.kali.org/kali/dists/kali-rolling/InRelease is not valid yet (invalid for another 115d 17h 30min 15s). Updates for this repository will not be applied.
This is because the Raspberry Pi’s system time is incorrect. You can fix it with:
sudo date --set "8/7/2021 10:20pm"
substituting the current date and time. This will be close enough for your apt repositories to start working!
(Optional) Install Kali Linux Full
By default the image only comes with a subset of everything available in the Kali distribution. Installing all of these can take some bandwidth/time so make sure you have a decent size/quality SD card and a good internet connection before upgrading to the full version.
If you want to install all tools and achieve a “Kali Linux Full” installation type now type:
sudo apt-get install kali-linux-full
Benchmarking / Testing Storage
If you want to verify your drive’s performance you may want to run my storage benchmark with:
sudo curl https://raw.githubusercontent.com/TheRemote/PiBenchmarks/master/Storage.sh | sudo bash
If you search for the model of your drive on Pi Benchmarks you can compare your score with others and make sure the drive is performing correctly!
(Optional) USB Mass Storage Device Booting (with a SSD for example)
Check out my Pi 4 USB booting guide and follow the same instructions
Other Resources
If you have the 7″ official Raspberry Pi Touch Screen TFT display then check out my 7″ TFT for Kali guide
If you have a Raspberry Pi Zero you may want to check out my Kali P4wnP1 Linux guide here


I am trying to run it headless….I installed it Correctly but it is not showing the IP address….I have no external monitor so please help me out…
Shreyash, Since it wont pick up the available wifi by default, you need to connect Pi via Cat5 / ethernet cable with your wifi router Lan port. Once it boots up, run a angry ip scanner on your internal network and see what ip has been allotted to PI and then connect through putty.
Just tried the 64-bit version. Disappointed I couldn’t get a 64-bit mongo version working 🙁 Will wait around for ubuntu-server.
Hey Magnus,
While you’re waiting check out my unofficial Ubuntu Server image here: Raspberry Pi 4 Ubuntu Server / Desktop 18.04.3 Image (unofficial)
It also has my build script on the GitHub page which might help you get Mongo working if you want to go real deep on it!
when I update/upgrade the wifi stops working