
UPDATE 12/5/20 – New instructions are available for Ubuntu 20.04 or Ubuntu 20.10 installation and USB booting on Raspberry Pi 4 in my new article here
Ubuntu Server has been my favorite Linux distribution for years. On everything but the Raspberry Pi I run Ubuntu Server but felt stuck with Raspbian on the Pi. Until now! Ubuntu Server 18.04.2 has been released and major improvements have been made to the official Pi branch.
The Raspberry Pi 4 is not officially supported out of the box yet on the current Ubuntu Server Raspberry Pi images but you can get it working by manually updating the firmware. Solid state storage is also working but with the catch of having to use a micro SD card as a bootloader since the Pi 4 does not have official boot support yet. I describe how to do both in this article.
The Raspberry Pi’s peripherals such as WiFi / Bluetooth are now fully supported. Previous Ubuntu Server versions for Raspberry Pi (like many other distros) had broken or completely missing drivers for core components such as WiFi / Bluetooth. In the 18.04.2 update the firmware for the WiFi and other components is now included out of the box making it a fully functional distribution!
This is the first distribution besides Raspbian that feels like you can just image it and everything works. I’ll guide you through the process in this guide. It only takes a few minutes to set up.
Recommended Gear
I highly recommend upgrading to a solid state setup. The performance gains are gigantic. It’s now less than 30 bucks to take your Pi solid state. This is the best performance upgrade you can possibly get for a Pi.
With the new Raspberry Pi 4 it’s even more beneficial to use USB storage since a USB 3.0 bus was finally added in the Pi 4 letting it take full advantage of solid state drives. This is the setup I am currently using:
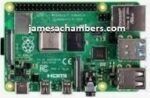
The Raspberry Pi 4 is available in different memory configurations all the way up to 8 GB. It’s about the size of a credit card and uses an extremely low amount of power making it ideal for all sorts of projects and ideas!
Links: AliExpress*, Amazon.com*, Amazon.ca*, Amazon.com.au*, Amazon*.co.jp*, Amazon.co.uk*, Amazon.de*, Amazon.es*, Amazon.fr*, Amazon.it*, Amazon.nl*, Amazon.pl*, Amazon.se*, Amazon.sg*

The Raspberry Pi 400 kit includes everything you need for a full Pi 400 desktop build. The Pi 400 is the fastest Raspberry Pi ever released and comes in the form factor of a keyboard!
Links: AliExpress*, Amazon.com*, Amazon.ca*, Amazon.com.au*, Amazon.co.jp*, Amazon.co.uk*, Amazon.de*, Amazon.es*, Amazon.fr*, Amazon.it*, Amazon.nl*, Amazon.pl*, Amazon.se*, Amazon.sg*

The Kingston A400 has been a great drive to use with the Pi for years. It’s reliable, widely available around the world, has low power requirements and performs very well. It’s also very affordable. This drive has been benchmarked over 1000 times at Pi Benchmarks and is the #1 most popular SSD among the Pi community!
Links: AliExpress*, Amazon.com*, Amazon.ca*, Amazon.com.au*, Amazon.co.jp*, Amazon.co.uk*, Amazon.de*, Amazon.es*, Amazon.fr*, Amazon.it*, Amazon.nl*, Amazon.pl*, Amazon.se*, Amazon.sg*
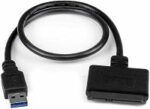
The USB 3.1 variant of the StarTech 2.5″ SATA adapter works well with the Pi 4. The USB 3.0 variant doesn’t have firmware updates available and is not recommended.
Links: Amazon.com*, Amazon.ca*, Amazon.com.au*, Amazon.co.jp*, Amazon.co.uk*, Amazon.de*, Amazon.es*, Amazon.fr*, Amazon.it*, Amazon.nl*, Amazon.pl*, Amazon.se*, Amazon.sg*
Or for a compact setup:

The SanDisk Extreme Pro USB SSD is a true solid state drive. This is different than a typical “flash drive” which uses extremely cheap memory and has very low random I/O performance/throughput compared to a real solid state drive. I’ve used both the USB 3.1 and USB 3.2 variants with the Pi successfully and they benchmark very well!
Links: AliExpress*, Amazon.com*, Amazon.ca*, Amazon.com.au*, Amazon.co.jp*, Amazon.co.uk*, Amazon.de*, Amazon.es*, Amazon.fr*, Amazon.it*, Amazon.nl*, Amazon.pl*, Amazon.se*, Amazon.sg*
SD Card Setup:

The SanDisk Extreme A1-A2 SD card has the best scoring SD card on Pi Benchmarks for years and is second in popularity only to the SanDisk Ultra (often included in combo kits). The application class (A1) means random I/O speeds (very important when running an OS) have to meet a higher standard. There’s no benefit on the Pi for A2 right now so get whichever is cheaper/available.
Links: AliExpress*, Amazon.com*, Amazon.ca*, Amazon.com.au*, Amazon.co.jp*, Amazon.co.uk*, Amazon.de*, Amazon.es*, Amazon.fr*, Amazon.it*, Amazon.nl*, Amazon.pl*, Amazon.se*, Amazon.sg*
These storage choices are ones that all scored highly on the end-user submitted Raspberry Pi Storage Benchmarks and will give you outstanding I/O performance on the Raspberry Pi. I also personally own all of them and recommend them knowing they are compatible and perform well on the Pi.
Getting Ubuntu Server
64 bit (aarch64)
I have a custom compiled prebuilt 64 bit image available for testing. This version supports addressing all 4 GB of RAM if available. The WiFi fix for bootflags3 is also already implemented into the precompiled version. Get my custom built kernel from the Ubuntu-Server-raspi4-unofficial GitHub page.
32 bit (armhf)
To get the 32 bit version head to the official Ubuntu Raspberry Pi page at https://wiki.ubuntu.com/ARM/RaspberryPi and scroll to the “Official Images” section. Until the official Raspberry Pi 4 image is released choose the Raspberry Pi 3B+ armhf release and follow the directions in the next sections to update the firmware for a Pi 4 boot.
Writing the Base Image
This part is easy. Extract the image from xz format to img format (7zip is great and free and can extract these). Now write the img to your media (Micro SD card, solid state drive, USB storage, etc). the same way you would for any other distribution!
Updating Firmware for Raspberry Pi 4
If you are using the CloudKernel 64 bit image you can skip to the “Boot Ubuntu Server” section as it already implements the updated firmware. If you are using the 32 bit image or the official Ubuntu Server preinstalled server image from Ubuntu’s web site you will need to update the firmware using these instructions.
Remove Existing Firmware
The firmware in the current release was not built with Raspberry Pi 4 support so we need to update the firmware on the /boot/ partition for the Pi 4 to be able to boot correctly.
Insert/mount the micro SD card in your computer and navigate to the “boot” partition. Delete everything in the existing folder so it is completely empty.
Download Latest Firmware
32 bit Firmware Instructions
If you are trying to run the 64 bit version of Ubuntu skip to the 64 bit instruction section next. For 32 bit versions of Ubuntu download the firmware from the official GitHib repository here: Raspberry Pi GitHub Official – master.zip
The latest firmware is everything inside master.zip “boot” folder (including subfolders). We want to extract everything from “boot” (including subfolders) to our micro SD’s “boot” partition that we just emptied in the previous step. Don’t forget to get the “overlays” folder as that contains overlays necessary to boot correctly.
The end result will look something like this on the “boot” drive:
$ ls
  COPYING.linux                bcm2711-rpi-4-b.dtb   kernel.img
  LICENCE.broadcom             bootcode.bin          kernel7.img
 'System Volume Information'   cmdline.txt           kernel7l.img
  bcm2708-rpi-b-plus.dtb       config.txt            overlays
  bcm2708-rpi-b.dtb            fixup.dat             start.elf
  bcm2708-rpi-cm.dtb           fixup4.dat            start4.elf
  bcm2708-rpi-zero-w.dtb       fixup4cd.dat          start4cd.elf
  bcm2708-rpi-zero.dtb         fixup4db.dat          start4db.elf
  bcm2709-rpi-2-b.dtb          fixup4x.dat           start4x.elf
  bcm2710-rpi-3-b-plus.dtb     fixup_cd.dat          start_cd.elf
  bcm2710-rpi-3-b.dtb          fixup_db.dat          start_db.elf
  bcm2710-rpi-cm3.dtb          fixup_x.dat           start_x.elf
64 bit Firmware Instructions
To boot Ubuntu Server in 64 bit mode we need to download the 64 bit version of the firmware. The .dtb files are different between 32 bit and 64 bit operating systems. Raspbian does not come with a 64 bit bootloader and one isn’t provided in the official GitHub repo either.
I have these 64 bit versions available in my Ubuntu Server precompiled image.
Create/Update config.txt and cmdline.txt
Navigate to the micro SD /boot/ partition. Create a blank cmdline.txt file with the following line:
dwc_otg.fiq_fix_enable=2 console=ttyAMA0,115200 kgdboc=ttyAMA0,115200 console=tty1 root=/dev/mmcblk0p2 rootfstype=ext4 rootwait rootflags=noload net.ifnames=0
Next we are going to create config.txt with the following content:
# Enable audio (loads snd_bcm2835)
dtparam=audio=on

[pi4]

[all]
64 bit config.txt Configuration
To boot the Pi in 64 bit mode we need to add the following lines to the config.txt:
arm_64bit=1
enable_gic=1
armstub=armstub8-gic.bin
The final configuration for 64 bit will look like this:
# Enable audio (loads snd_bcm2835)
dtparam=audio=on

[pi4]

arm_64bit=1
enable_gic=1
armstub=armstub8-gic.bin

[all]
These enable all the different 64 bit related options you need to perform a 64 bit boot on the Pi.
Boot Ubuntu Server
We are now ready to boot the device. Insert the micro SD card and power on the device.
Note: The very first startup can be very slow. Be patient. It can take up to a couple minutes with no activity lights then all the sudden everything will start blinking and SSH will open up.
Fix apt-get update / Prevent Further Updates
If you try to apt-get update now it will try to update your firmware with older firmware from the Ubuntu repository. The workaround for now is to remove that package so it keeps your existing firmware. Make a note to remember you did this step as later on we will want to reenable updates from the repository once support has been added.
sudo apt-mark hold flash-kernel
You may now run sudo apt-get update && sudo apt-get upgrade. I would avoid using dist-upgrade yet because the kernels in the repository it will update you to don’t support the Pi 4 yet. But this should get you all up to date on the packages!
Once the firmware in the apt repositories has been updated for the Pi 4 it will be safe to reinstall initramfs-tools and let it update through the normal process again.
Solid State Drive (SSD) Configuration (Optional)
USB booting has not been added into the Raspberry Pi 4 firmware yet but is being worked on right now. In the mean time you can use your micro SD card as a bootloader and still boot the whole operating system (rootfs) from the solid state drive giving you the full USB 3.0 speed increases system wide. Once the Pi USB booting is officially released you should be able to boot directly from the device without any makeshift bootloader SD card necessary.
First create a fully imaged and booting micro SD card following the earlier steps in the tutorial. After you have created the micro SD installation you should now image your SSD / USB drive with the same Ubuntu image you used to create the SD card.
Now navigate to the “boot” partition on the newly created SSD / USB drive and remove everything in there just like we did with the SD card earlier. Now copy the “boot” folder from the micro SD card to the solid state drive. This is necessary because even though the files in “boot” are read off our micro SD card initially some firmware files in the later load stages are read off the mounted drive and if the necessary firmware files are missing the system won’t boot.
Now that you’ve created the SSD / USB drive partitions and copied the “boot” partition from the SD card to your new drive we need to update your SD card’s cmdline.txt to point to the SSD / USB drive’s partition.
dwc_otg.fiq_fix_enable=2 console=ttyAMA0,115200 kgdboc=ttyAMA0,115200 console=tty1 root=/dev/mmcblk0p2 rootfstype=ext4 rootwait rootflags=noload net.ifnames=0
The key part we need to change here is the “root=/dev/mmcblk0p2” section. mmcblk0p2 is a hardware identifier for micro SD storage. We need to change this to the device your storage is detected as.
If you are using a USB to solid state drive adapter it’s very likely your drive will be addressed as /dev/sda2. Therefore we will change the root=/dev/mmcblk0p2 to root=/dev/sda2
root=/dev/sda2
The final line will be:
dwc_otg.fiq_fix_enable=2 console=ttyAMA0,115200 kgdboc=ttyAMA0,115200 console=tty1 root=/dev/sda2 rootfstype=ext4 rootwait rootflags=noload net.ifnames=0
Plug both the micro SD and the solid state drive into the Pi and boot it up.
Remember: the first boot can take 2-3 minutes for first startup so give it some time before assuming it didn’t work.
Wireless Fix
The current non-free Raspberry Pi firmware had the wrong bootflags3 for quite a while for the Raspberry Pi 4 and these firmware files are definitely out there. Here is a one liner I wrote to replace the Raspberry Pi 3 boot flags in this driver with the Raspberry Pi 4 one:
sudo sed -i "s:0x48200100:0x44200100:g" /lib/firmware/brcm/brcmfmac43455-sdio.txt
Restart the system afterward.
Configuration
Default User / Password
The username and password for your initial login to Ubuntu Server will be:
user: ubuntu
password: ubuntu
You will be required to change your password after logging in for the first time. Make sure on the prompt you enter the current “ubuntu” password before typing in your new password or the device will kick you out completely and you’ll have to log in again.
Set Time Zone
To configure the correct time zone for Ubuntu Server use the following command:
sudo dpkg-reconfigure tzdata
This will take you to a very easy to follow menu to select your correct time zone and applies it to the system.
Update System
For best stability, security and performance you should immediately update your system and packages to the latest version. This will also grab all of the latest fixes/improvements making your Raspberry Pi Ubuntu experience much better.
This part is easy. Type:
sudo apt-get update && sudo apt-get upgrade
Change Default GPU Memory Split
The default amount of memory allocated to the GPU on the Raspberry Pi is around 76 MB of our 1 GB. In 2 GB and 4 GB models the amount gained from this is negligible but is still worth it for the 1 GB model.
If you type the command “free” you will see that your Raspberry Pi is missing this memory under the “total” column. We can reclaim most of this memory back by setting the GPU memory split to 16 MB. If you are planning on installing a GUI in the future you should not make this change.
This option is set in the config.txt file. It’s exactly the same file as Raspbian uses but it is located at /boot/firmware/config.txt instead of /boot/config.txt. Open config.txt with the following command:
sudo nano /boot/firmware/config.txt
We will add the following line at the bottom of config.txt:
gpu_mem=16
Press Ctrl + X and type yes to save the file. Now restart the Pi by typing
sudo reboot
After the reboot finishes type “free” again and you will see that your total available memory has increased and can now be used by the system and your applications!
Benchmarking / Testing Storage
If you want to verify your drive’s performance you may want to run my storage benchmark with:
sudo curl https://raw.githubusercontent.com/TheRemote/PiBenchmarks/master/Storage.sh | sudo bash
If you search for the model of your drive on Pi Benchmarks you can compare your score with others and make sure the drive is performing correctly!
Conclusion
I’m very excited to see my favorite Linux distributions continue to evolve to the point where they are comparable in performance and stability to Raspbian. I’ve been testing extensively on Ubuntu Server 32 bit and 64 bit for my Raspberry Pi Minecraft Server project and not only is it on par with Raspbian but starting to do things so well it sometimes makes Raspbian feel a little dated.
If you have any questions or suggestions don’t hesitate to leave me a comment on the post or use my contact form to message me privately! I’m good about responding quickly and my articles are constantly revised to address questions or do something a better way that a reader pointed out.
Have fun!


sudo apt-mark hold flash-kernel command solved the issue
I managed to install Ubuntu Server to an SSD on Pi 4 with Argon One M2 case. Logging in is fine and I can set the time zone. But when I try to install anything it fails. This seems to be because it has no network configuration and does not know how to resolve names etc. How do I fix this? Is there an equivalent of the timezone setup for networking? I expected that when Ubuntu first booted it would take me through a list of questions as it did when I installed it in a Virtual machine.
Also, every time I tried to install the LTS version of Ubuntu server onto the SSD it failed. I could only get the developer version to install.
Thank you for your great work.
Hey Leo,
I’m guessing that this is Ubuntu Server 20.04 (and probably not 18.04 or 20.10). If that is the case, I do have a script that may be of assistance in one of my other articles that will fix your networking. It’s available here.
That article will have the BootFix.sh script that should take care of your networking issue in Ubuntu Server 20.04. 20.10 shouldn’t need the fixes anymore but people are reporting Ubuntu Server 20.04 still does!
Hello James,
I just downloaded and flashed the latest 64-bit Ubuntu server image from the Raspberry Pi download page. would like to use it for a tezos baker – but it doesn’t get going – what do i have to change?
Hey Roni,
Sorry I missed this and didn’t reply sooner. I actually made a guide here to get the Ubuntu images going!
If you’re just using a SD card it should just work but if you’re trying to use a faster drive like a SSD then that guide will get you going! If you are using a SD card you may want to try imaging it with the new Raspberry Pi Imager tool as well!
I do accept as true with all of the concepts you’ve offered on your post. They’re really convincing and can definitely work. Still, the posts are very brief for newbies. May just you please extend them a bit from subsequent time? Thank you for the post.
You can also use yamlonline.com for the yaml validator as well as yaml converter to json,csv,xml,base64 also for beautify and minify YAML.
How much faster is an SSD exactly, compared to a pretty not that cheap SD card ?
hi
Login password ?
error “changing password for ubuntu”