Raspberry Pi 4 USB Boot Config Guide for SSD / Flash Drives

Raspberry Pi 4 with Samsung 950 Pro NVME SSD

**The new Raspberry Pi bootloader is out which makes these instructions only necessary if you want to continue to use the SD card as a bootloader. View the Raspberry Pi Bootloader Configuration Guide here!**

The Raspberry Pi 4* is finally here and has a lot of exciting changes. One very major downside is that it doesn’t support true USB booting yet out of the box (like the 3 series did). The Raspberry Pi foundation states that it is being worked on and will be added back with a future update. No timeline has been given yet for that to happen but they state it’s one of their top priorities.

Most of my projects heavily depend on having good performing storage so sitting and waiting was not an acceptable solution. In this guide I’ll show you a workaround to use USB devices as your rootfs device and use a Micro SD card as bootloader only which gives us full SSD performance after boot! To see exactly how much of a performance difference this makes (spoiler: it’s gigantic) check out the Raspberry Pi Storage Benchmarks.

I highly recommend doing this on a completely new install. If you try to upgrade your old ones and something goes wrong there’s a good chance you might lose data. We will be modifying the boot partition, resizing partitions, etc. so don’t use a drive with any data on it unless you are positive you have all of the steps down!

Compatible USB Adapters

The Raspberry Pi 4 is proving to be picky about what SATA, M.2, etc. adapters will work in the USB 3.0 port. The USB 3.0 ports are the ones in the middle that are blue inside. The black ones are USB 2.0 and won’t give you the faster speeds the new Pi offers.

It’s very likely that some of these will be fixed via software and firmware updates and the Raspberry Pi Foundation has several open known issues related to USB 3. Until that happens though I will maintain a list here of known working ones and known problematic ones. It’s still very early in the release of the Pi 4 so we still have a lot to learn about which adapters work / don’t work. If you have working and nonworking adapters leave a comment and I’ll add it in this list.

If the adapters worked before on older Pis then one thing you can try is putting them in the black USB 2.0 ports. Obviously this is stupid because we all want the Pi 4 performance gains but if you end up needing to buy a new adapter this will give you a workaround until a replacement arrives!

Find USB adapter chipset

There are certain chipsets used in adapters that are known to be working/not working.

pi@raspberrypi:~ $ lsusb
Bus 003 Device 001: ID 1d6b:0002 Linux Foundation 2.0 root hub
Bus 002 Device 002: ID 174c:55aa ASMedia Technology Inc. Name: ASM1051E SATA 6Gb/s bridge, ASM1053E SATA 6Gb/s bridge, ASM1153 SATA 3Gb/s bridge, ASM1153E SATA 6Gb/s bridge
Bus 002 Device 001: ID 1d6b:0003 Linux Foundation 3.0 root hub
Bus 001 Device 002: ID 2109:3431 VIA Labs, Inc. Hub
Bus 001 Device 001: ID 1d6b:0002 Linux Foundation 2.0 root hub

This is a lsusb dump of all my connected USB devices. I have bolded the line with the USB bridge device. We can see that the chipset is ASM1153E. This is a really common one that works well with the Pi.

Known Working Adapters

This is a compiled list of known working adapters built by myself from adapters I’ve purchased and commenters from ones they have purchased in this article and my newer guide that utilizes the new Raspberry Pi 4’s native bootloader for USB booting.

StarTech 2.5″ SATA to USB 3.1 Adapter*2.5″ SATA to USB 3.1Verified working in comments (thanks Fredrick)
Inateck FE2004 2.5″ SATA to USB 3.0 Hard Drive Enclosure*2.5″ SATA to USB 3.0Mirco reports that this enclosure is working but trim is not supported
Samsung 2.5″ SATA to USB 850 EVO Kit /w Adapter* (Alternate amazon.de link*)2.5″ SATA to USB 3.0 KitThis is a kit that comes with a drive and adapter. Rene confirms the adapter works including with non-Samsung drives.
CSL 2.5″ SATA to USB 3.0 Adapter*2.5″ SATA to USB 3.0The CSL SL adapter is confirmed to be working by Krikitt in the comments. Available in Europe. Not available in US.
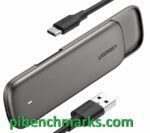
UGREEN 2.5″ SATA to USB-C 3.1 Enclosure Drive Caddy*2.5″ SATA to USB-C 3.1Confirmed to be working by CAProjects in the comments. Available in both Europe and US
UGREEN 2.5″ SATA to USB-C 3.1 “Protect What You Love” Case* (AliExpress Listing* – Make sure to select USB-C 3.1)2.5″ SATA to USB-C 3.1Reported working by Michal in the comments, thanks!
UGREEN 2.5″ to USB 3.0 “SATA USB Converter” Adapter* (AliExpress Listing*)2.5″ SATA to USB 3.0Also reported by Michal as working in the comments, thanks again!
UGREEN 2.5″ SATA to USB 3.0 Adapter Cable with UASP Converter*2.5″ SATA to USB 3.0This adapter is reported to be working by Mirco in the comments
SABRENT 2.5″ SATA to USB-C 3.1 Type A Adapter*2.5″ SATA to USB-C 3.1 Type AThe new USB-C 3.1 Type A version of the Sabrent adapter is reported as working in the comments by UEF. DO NOT get the USB 3.0 version as that one is below on the naughty list and won’t work!
SABRENT 2.5″ SATA to USB 3.0 Dual Bay Docking Station*2.5″ SATA to USB 3.0One of very few Sabrent adapters/enclosures to work. Reported working well by William Grey in the comments. Has two bays!
AliExpress Generic 2.5″ SATA to USB 3.0 3 colors Hard Disk Case*2.5″ SATA to USB 3.0Reported as working with UASP support by pierro78 in the comments
Orico 2.5″ 2139C3-G2 2.5 inch USB 3.1 Gen 2 10Gbps Transparent Enclosure*2.5″ SATA to USB 3.1 Gen 2 10GbpsMake absolutely sure it’s the 10Gbps USB 3.1 Gen 2 version. There is another one that looks identical that is a USB 3.1 Gen 2 6Gbps that will not work. Confirmed working by RRT in the comments.
ASUS ROG STRIX Arion Aluminum Alloy M.2 NVMe SSD External Portable Enclosure Case Adapter* – (AliExpress Listing*)M.2 NVMe (B+M Key) to USB/USB-C 3.2 Gen 2It’s bold. It’s beautiful. It’s also confirmed working by TADRACKET and Steve B.
However, be warned, it takes a *lot* of power!
Steve B. reports that even with the oversized 3.5A CanaKit adapter* it does not work. If you have the standard 3.0 adapter you can be practically certain it won’t power this enclosure.
Does work with a powered USB hub*.
ICY BOX M.2 NVMe (M Key) to USB-C 3.1 Gen 2 Enclosure* (Alternate amazon.de listing*)M.2 NVMe (B+M Key) to USB-C 3.1 Gen 2Returning legendary commentary Frank Meyer reports:
Does not work with a 3.0A power adapter (also reported by TTE). It’s not enough power for this enclosure.
Does work with a powered USB hub*.
TDBT M.2 NVMe (B+M Key) to USB-C 3.1 Gen 2 Enclosure*M.2 NVMe (B+M Key) to USB-C 3.1 Gen 2Confirmed to be working well by WorkHard in the comments
AliExpress Generic M.2 NVMe (B+M Key) to USB 3.1 “M2 SSD Case NVME Enclosure”*M.2 NVMe (B+M Key) to USB 3.1 Type AConfirmed working by Jens Haase, thanks Jen!
SSK Aluminum M.2 NVMe (M Key) to USB 3.1 Gen 2 SSD Enclosure*M.2 NVMe (M Key) to USB 3.1 Gen 2Brian L reports this is working well with beta firmware upgrades, but that it did not work at all without them!
ORICO M.2 NVMe SSD Enclosure, USB 3.1 Gen 2 (10 Gbps)* (AliExpress Listing*)M.2 NVME to USB 3.1 Gen 2M.Yusuf has given the first ever report of a working Orico adapter! Make sure it’s the USB 3.1 Gen 2 version that says “Support UASP for NVMe SSD”. This is the way.
DELOCK 42570 M.2 SATA (B Key) to USB Micro-B 3.1 Gen 2 SSD Enclosure*M.2 SATA (B Key) to USB Micro-B 3.1 Gen 2Andreas Franek reports that the enclosure works with a 3.0A power adapter (gets a little warm)
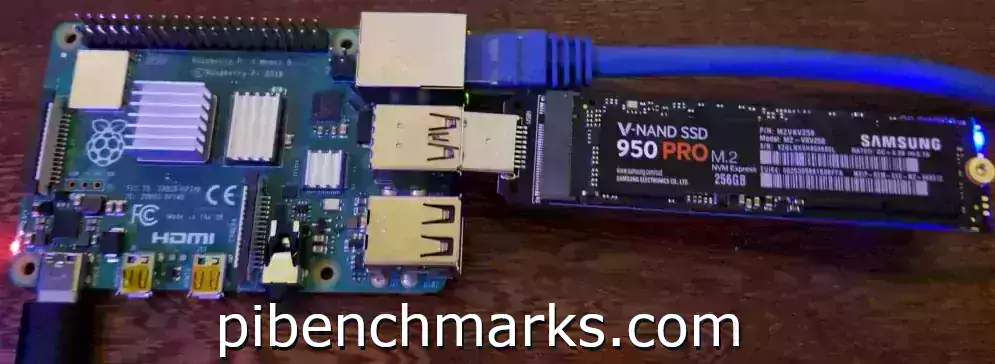
Shinestar M.2 NVMe (M Key) to USB 3.0 Adapter*M.2 NVMe (M Key) to USB 3.0This is the adapter I’m using in the picture at the top of the article. It is for NVMe M.2 drives only and is getting hard to find
UGREEN M.2 NVMe (B+M Key to USB-C 3.1 Gen 2 SSD Enclosure*M.2 NVMe (B+M Key) to USB-C 3.1 Gen 2Confirmed working in comments by Chad D
UGREEN M.2 SATA (B+M Key) to USB 3.1 Enclosure*M.2 SATA (B+M Key) to USB 3.1 EnclosureReported as working well in the comments by John H. Reinhardt with a ASM1051E chipset
QNINE M.2 SATA (B Key) to USB 3.0 Enclosure*M.2 SATA (B Key) to USB 3.0I used this enclosure to benchmark M.2 SATA Lite-On and SanDisk drives — working great in 3.0 ports
Argon One M.2 SATA (B+M Key) Pi 4 Case*M.2 SATA (B+M Key) Pi 4 CaseThis case gives you a M.2 SATA port for your Raspberry Pi and is also a case! Confirmed working by Frank.
Tanbin mSATA to USB Adapter*mSATA to USB 3.0I used this mSATA to USB adapter for my Crucial M550 benchmark — working in 3.0 ports
Generic mSATA to USB 3.0 Adapter (fe2008)*mSATA to USB 3.1Confirmed working in comments by Nico
Canakit Raspberry Pi 4 Power Supply (USB-C)*3.5A USB-C Power SupplyCanakit has been making very reliable power supplies for several Pi generations now. Using a 3.5A power supply will give enough extra power for your Pi to power the drive without causing instability
Simplecom SE502 M.2 SSD Adapter*M.2 SATA (B Key) to USB 3.0Quirks required, reported working by alan but only with quirks
Delock #61883 SATA to USB 3.0 Converter*2.5″ SATA to USB 3.0Reported working well by Joerg_H
Vantec SATA/IDE TO USB 3.0 Adapter*2.5″ SATA to USB 3.0Reported as working by JeffG but with an ugly messy appearance
Known Working Adapters

Known Problematic Adapters (Naughty List)

Here is a list of common USB adapters that are known to have problems with the Raspberry Pi 4. You can get some of these adapters working by using quirks mode (see the “Fix (some) USB Adapter Problems Using Quirks” section below).

FIDECO M207CPS USB3.2 to M2 NVME/SATA SSD Enclosure*M.2 NVME to USB 3.2 Gen 2Lee Myring reports that the FIDECO M207CPS has issues working with the Pi
UGREEN 30848 2.5″ SATA to USB 3.0 Hard Drive Enclosure*2.5″ SATA to USB 3.0Reporting as not working properly and disconnecting often by Mirco, thanks!
Sabrent USB 3.0 to 2.5″ SATA adapter*2.5″ SATA to USB 3.0Only works in the USB 2.0 ports. Will not boot in a USB 3.0 port. I have two of these and can confirm they don’t work. RIP to Sabrent, our previous king of the Pi 3 era of adapters.
Sabrent USB 3.0 to 2.5″ SATA Tool-Free External Hard Drive Enclosure*2.5″ SATA to USB 3.0Another nonworking Sabrent adapter reported by Alex, thanks Alex!
ELUTENG 2.5″ SATA to USB 3.0 Adapter*2.5″ SATA to USB 3.0Despite earlier reports as working Ryan and one other have reported this adapter does not work unless you enable quirks mode! Don’t make Ryan’s sacrifice in vain and avoid this one.
USB 3.0 to 2.5″ SATA III Hard Drive Adapter UASP Support-20cm, Black*2.5″ SATA to USB 3.0reported by dzm in the comments as having very poor I/O performance
ORICO 2.5″ SATA to USB C 3.0 Enclosure (Transparent)*2.5″ SATA to USB 3.0Several commenters have stated the transparent ORICO is not working. Avoid!
ORICO 2.5″ SATA to USB 3.0 Enclosure (Black) 2588US3-BKT*2.5″ SATA to USB 3.0Commenters report that the USB-C variant of the transparent ORICO enclosure also does not work
ORICO 2.5″ SATA to USB 3.0 Enclosure (Black/White) 2520U3*2.5″ SATA to USB 3.0Reported as not working by by Richon in the comments
ORICO 2.5″ SATA to USB-C 3.1 Gen 1 Enclosure (Transparent)*2.5″ SATA to USB-C 3.1 Gen 1Confirmed as not working by Andrea De Lunardi in the comments (thanks!)
Vantec 2.5″ SATA to USB 3.0 USB Adapter with Case*2.5″ SATA to USB 3.0Does not work after hours of testing and frustration by Moshe Katz in the comments!
AliExpress Generic 2.5″ SATA to USB 3.0 “New USB 3.0 To 2.5in SATA 7+15Pin Hard Drive Adapter”*2.5″ SATA to USB 3.0Extremely cheap adapter from AliExpress — MADATALIEXPRESS bought 5 of them and none worked, PPCM had one working, very unreliable and slow when it does work, not recommended even if you get lucky!
EWENT USB 3.0 to SATA EW70172.5″ SATA to USB 3.0Does not work – reported by Wouter in the comments, thanks!
CableCreation USB 3.0 to SATA Adapter Compatible 2.5″ SATA III HDD Hard Disk Driver, 0.5FT, Black*2.5″ SATA to USB 3.0Morgon reports not working in the comments — I also recognize this adapter as the “fake” StarTech adapter that is sold on AliExpress, thanks Morgon!
JSAUX USB 3.0 to SATA Adapter, USB 3.0 to 2.5 Inch SATA III Hard Drives/SSD/HDD Adapter*2.5″ SATA to USB 3.0 Reported as not working by Bennie in the comments, thanks!
EZCast M.2 NVME SSD Enclosure Adapter*M.2 NVMe to USB 3.1 Gen2Reported as problematic due to duplicate USB ids — best to avoid — thanks MikeC
Sabrent 2.5″ Aluminum Enclosure*2.5″ SATA to USB 3.0Reported as not working by JeffG
Known Problematic Adapters

Equipment Used

Samsung 980 Pro 2TB NVMe SSD
Samsung 980 Pro NVMe SSD

The Samsung 980 Pro (NVMe) is a professional grade SSD and one of the fastest in the world. The Samsung NVMe drives have been at the top of this category for a long time and are well trusted for both their performance and reliability / long life.

Links: AliExpress*, Amazon.com*, Amazon.ca*, Amazon.com.au*, Amazon.co.jp*, Amazon.co.uk*, Amazon.de*, Amazon.es*, Amazon.fr*, Amazon.it*, Amazon.nl*, Amazon.pl*, Amazon.se*, Amazon.sg*

ICY BOX NVMe Enclosure
ICY BOX M.2 NVMe Enclosure

The ICY BOX is basically a giant heatsink that you mount a high performance M.2 NVMe drive inside of. This enclosure is really fast but requires a powered USB hub. Not even the 3.5A adapter can reliably power it! The enclosure works well and will physically feel warm to the touch as it is pulling the heat off your NVMe drive!

Links: Amazon.com*, Amazon.ca*, Amazon.com.au*, Amazon.co.uk*, Amazon.de*, Amazon.es*, Amazon.fr*, Amazon.it*, Amazon.nl*, Amazon.pl*, Amazon.se*, Amazon.sg*

2.5″ SATA Option:

Kingston A400 SSD
Kingston A400 2.5″ SATA SSD

The Kingston A400 has been a great drive to use with the Pi for years. It’s reliable, widely available around the world, has low power requirements and performs very well. It’s also very affordable. This drive has been benchmarked over 1000 times at pibenchmarks.com and is the #1 most popular SSD among the Pi community!

Links: AliExpress*, Amazon.com*, Amazon.ca*, Amazon.com.au*, Amazon.co.jp*, Amazon.co.uk*, Amazon.de*, Amazon.es*, Amazon.fr*, Amazon.it*, Amazon.nl*, Amazon.pl*, Amazon.se*, Amazon.sg*

Compact Option:

SanDisk Extreme Pro USB SSD
SanDisk Extreme Pro SSD

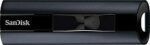
The SanDisk Extreme Pro USB SSD is a true solid state drive. This is different than a typical “flash drive” which uses extremely cheap memory and has very low random I/O performance/throughput compared to a real solid state drive. I’ve used both the USB 3.1 and USB 3.2 variants with the Pi successfully and they benchmark very well!

Links: AliExpress*, Amazon.com*, Amazon.ca*, Amazon.com.au*, Amazon.co.jp*, Amazon.co.uk*, Amazon.de*, Amazon.es*, Amazon.fr*, Amazon.it*, Amazon.nl*, Amazon.pl*, Amazon.se*, Amazon.sg*

You may use other types of drives with the Pi such as M.2 SATA to USB 3.0 and m-SATA to USB 3.0. Here’s some adapters I’ve used for those types of drives:

m-SATA Enclosure
VL716 mSATA Enclosure

The VL716 mSATA enclosure lets you connect micro SATA drives to the Pi. These drives are an older type of SSD (usually seen in laptops) predating the M.2 slot but are still widely available and perform extremely well!

Links: AliExpress*, Amazon.com*, Amazon.ca*, Amazon.com.au*, Amazon.co.jp*, Amazon.co.uk*, Amazon.de*, Amazon.es*, Amazon.fr*, Amazon.it*, Amazon.nl*, Amazon.se*, Amazon.sg*

UGREEN M+B M.2 SATA Enclosure
UGREEN M+B Key M.2 Enclosure

The UGREEN M+B enclosure is a great enclosure for the Pi for M.2 SATA 2280 NGFF drives. It supports both B-key and M-key drives. Does not support newer NVMe drives. As with other types of enclosures it requires more power than other options!

Links: AliExpress*, Amazon.com*, Amazon.ca*, Amazon.com.au*, Amazon.co.jp*, Amazon.co.uk*, Amazon.de*, Amazon.es*, Amazon.fr*, Amazon.it*, Amazon.nl*, Amazon.pl*, Amazon.se*, Amazon.sg*

Argon ONE Pi 4 Case
Argon ONE Pi 4 M.2 Case

The Argon ONE M.2 is a M.2 SATA Pi 4 case / storage solution. With the case and M.2 SATA expansion board you can completely enclosure your Pi 4 and have a built in M.2 slot! The M.2 SATA board is sometimes sold separately from the case itself and can be used as well. Does not support NVMe, this is for SATA M.2 drives only!

Links: AliExpress*, Amazon.com*, Amazon.ca*, Amazon.com.au*, Amazon.co.jp*, Amazon.co.uk*, Amazon.de*, Amazon.es*, Amazon.fr*, Amazon.it*, Amazon.nl*, Amazon.pl*, Amazon.se*, Amazon.sg*

Power Requirements

Power can be a serious problem with these drives. We are learning from the comments that you are especially likely to run into power issues with NVMe enclosures. A powered USB hub or a power adapter that puts out 3.5A comes not only just strongly recommended, it may actually be required that you choose one option or the other for your drive to function.

The specific requirements of how much power you’ll need depend on the adapter/enclosure and the model of your drive itself. As a very rough guideline, older models of drives tend to use more power than newer models of drives. 3.5″ form factor drives also use more power than 2.5″ drives. The earliest SSD models like first and second generation models are also well understood to use significantly more power than newer models. This is due to changes and improvements in technology over the years and even using different more efficient memory like 3D NAND. Some super high end performance drives will consume more power as well.

Here’s the current recommendations based on everyone’s comments combined with stuff I’ve personally used with the Pi:

CanaKit 3.5A Power Adapter

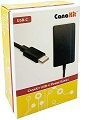
The CanaKit 3.5A adapter has an extra half an amp (500 mA) of capacity to give some breathing room to your accessories. This is bigger than the official Pi power supply which provides 3.0A.

Links: Amazon.com*, Amazon.ca*, Amazon.com.au*, Amazon.sg*

Sabrent Powered USB Hub
Sabrent Powered USB 3.0 Hub

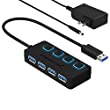
The Sabrent powered USB hub delivers a whopping 2.5A of dedicated power for your USB attached devices. This is almost as much as the Pi adapter itself is rated for (3.0A). It will easily power the most thirsty of setups such as NVMe enclosures.

Links: Amazon.com*, Amazon.ca*, Amazon.com.au*, Amazon.co.uk*, Amazon.es*, Amazon.it*, Amazon.nl*, Amazon.pl*, Amazon.se*

Note: Make sure Amazon doesn’t try to take you to the non-powered version and that it’s the one with the AC adapter that plugs in to provide extra power

Fixing (some) USB Adapter Problems Using Quirks

Some of the very common adapters on the naughty list above (such as the Sabrent) can be made to work by using USB quirks to disable UAS mode on the drive. This lowers performance, but it’s still much faster than a SD card and your adapter won’t go to waste.

To find out the quirks we need to find the device ID string for your adapter and then add an entry to cmdline.txt telling the kernel to apply them on boot.

Find Your Adapter

To apply the quirks we first need to get the adapter id. We will use the sudo lsusb command:

$ sudo lsusb
 Bus 003 Device 001: ID 1d6b:0002 Linux Foundation 2.0 root hub
 Bus 002 Device 002: ID 174c:55aa ASMedia Technology Inc. Name: ASM1051E SATA 6Gb/s bridge, ASM1053E SATA 6Gb/s bridge, ASM1153 SATA 3Gb/s bridge, ASM1153E SATA 6Gb/s bridge
 Bus 002 Device 001: ID 1d6b:0003 Linux Foundation 3.0 root hub
 Bus 001 Device 002: ID 2109:3431 VIA Labs, Inc. Hub
 Bus 001 Device 001: ID 1d6b:0002 Linux Foundation 2.0 root hub

On line 2 we can see my ASM1051E SATA 6Gb/s bridge adapter (it’s the known working StarTech.com 2.5″ SATA to USB adapter*). You will see something very similar to mine when you run the command and it shouldn’t be too hard to figure out which device it is. If you need more information add a -v switch to make the command sudo lsusb -v. This can sometimes add some additional details to make it easier to figure out which one is your adapter.

If you’re still not sure, we have another command that between the two that can narrow things down. Type / paste the following:

sudo dmesg | grep usb

 [    0.828535] usb usb3: New USB device found, idVendor=1d6b, idProduct=0002, bcdDevice= 4.19
 [    0.828568] usb usb3: New USB device strings: Mfr=3, Product=2, SerialNumber=1
 [    0.828597] usb usb3: Product: DWC OTG Controller
 [    0.828620] usb usb3: Manufacturer: Linux 4.19.75-v7l+ dwc_otg_hcd
 [    0.828644] usb usb3: SerialNumber: fe980000.usb
 [    0.830051] usbcore: registered new interface driver uas
 [    0.830182] usbcore: registered new interface driver usb-storage
 [    0.836488] usbcore: registered new interface driver usbhid
 [    0.836511] usbhid: USB HID core driver
 [    0.971598] usb 1-1: new high-speed USB device number 2 using xhci_hcd
 [    1.154217] usb 1-1: New USB device found, idVendor=2109, idProduct=3431, bcdDevice= 4.20
 [    1.154254] usb 1-1: New USB device strings: Mfr=0, Product=1, SerialNumber=0
 [    1.154281] usb 1-1: Product: USB2.0 Hub
 [    1.301989] usb 2-1: new SuperSpeed Gen 1 USB device number 2 using xhci_hcd
 [    1.332965] usb 2-1: New USB device found, idVendor=174c, idProduct=55aa, bcdDevice= 1.00
 [    1.332999] usb 2-1: New USB device strings: Mfr=2, Product=3, SerialNumber=1
 [    1.333026] usb 2-1: Product: ASM105x
 [    1.333048] usb 2-1: Manufacturer: ASMT
 [    1.333071] usb 2-1: SerialNumber: 123456789B79F

This is the dmesg log showing the hardware detection as hardware is activated on the Pi. If your log is really long you can generate fresh entries by just unplugging a device and plugging it back in and running the command again. Here we can clearly see that the ASM105x is what our StarTech adapter is being detected as.

Now we can go back to our first lsusb command and we want the 8 characters from the ID field that comes right after the Device:

Bus 002 Device 002: ID 174c:55aa ASMedia Technology Inc. Name: ASM1051E SATA 6Gb/s bridge

Our adapter’s ID is: 174c:55aa

Applying Quirks

To apply the quirks to our USB adapter we are going to edit /boot/cmdline.txt. Type:

sudo nano /boot/cmdline.txt

We are going to add the following entry into the very front of cmdline.txt:

usb-storage.quirks=XXXX:XXXX:u

In place of the X’s above you will put in your adapter’s ID that we got before. With the example commands I gave above mine would look like this: usb-storage.quirks=174c:55aa:u. After this my cmdline.txt looks like this (everything should be one continuous line, no line breaks!):

usb-storage.quirks=174c:55aa:u console=serial0,115200 console=tty1 root=PARTUUID=d34db33f-02 rootfstype=ext4 elevator=deadline fsck.repair=yes rootwait

Now reboot the Pi. If the Pi fails to boot you can plug the SD card into the computer and go to /boot/cmdline.txt and undo the change we did so you can boot back in with your SD card.

Verifying Quirks

Once you have rebooted after changing cmdline.txt we can verify the quirks have been applied by doing another dmesg | grep usb command:

sudo dmesg | grep usb
 [    1.332924] usb 2-1: New USB device found, idVendor=174c, idProduct=55aa, bcdDevice= 1.00
 [    1.332957] usb 2-1: New USB device strings: Mfr=2, Product=3, SerialNumber=1
 [    1.332983] usb 2-1: Product: ASM105x
 [    1.333006] usb 2-1: Manufacturer: ASMT
 [    1.333028] usb 2-1: SerialNumber: 123456789B79F
 [    1.335967] usb 2-1: UAS is blacklisted for this device, using usb-storage instead
 [    1.336071] usb 2-1: UAS is blacklisted for this device, using usb-storage instead
 [    1.336103] usb-storage 2-1:1.0: USB Mass Storage device detected
 [    1.336479] usb-storage 2-1:1.0: Quirks match for vid 174c pid 55aa: c00000
 [    1.336611] scsi host0: usb-storage 2-1:1.0

This time we can see in dmesg that UAS was blacklisted for the device and it has loaded with the usb-storage driver instead. This driver tends to be more compatible with the “problematic adapters” but the performance is usually significantly lower. It’s definitely worth a try though as some adapters do better with the quirks performance-wise. The only way to know for sure is to run a benchmark (see storage benchmark section near the end).

USB Boot Instructions

There are a lot of steps to follow to set everything up properly. If you make a mistake the first time don’t spend too much time trying to correct it or figure out what you did wrong. It’s usually faster to burn the images again and reconfigure again rather than try to figure out which step you might have made a typo on. It’s much easier the second time!

Prepare SD Card

Download the latest Raspberry Pi OS release from the Official Raspberry Pi download page. Both Lite or Desktop versions will work. Win32DiskImager (Windows) or balenaEtcher (Linux, Mac OS X, Windows) are highly recommended to burn the images.

Note: Don’t attempt to use raw dd commands to write the images. Too many silly things can go wrong that are checked for/fixed by the recommended programs. Do yourself a big favor and use one of the recommends to avoid spending a ton of time troubleshooting basic imaging problems!

Preparing SSD

We are going to burn a second identical copy of Raspbian to the SSD. This ensures everything the Pi needs to boot is there so we can use the SD card as a bootloader but our actual system will be on our nice fast SSD drive.

Note: Make sure you create the empty file named “ssh” on the boot partition of both drives if you are headless or don’t have a mouse/keyboard attached so you can ssh in on the first boot.

First Boot (SD card only, SSD unplugged)

Insert your freshly imaged SD card into the Pi and connect the power. Sign into the Pi for the first time.

Don’t do an apt-get upgrade/dist-upgrade or any additional configuration yet. Just stick with the instructions until we have finished configuration (especially since if something goes wrong you may have to start over and any other setup you did will be lost).

Once the Pi has finished booting and you have signed in for the first time plug in your SSD to your Pi’s USB 3.0 ports. The USB 3.0 ports are the ones that have the blue plastic inside instead of the black plastic (the black ones are USB 2.0 ports).

Change PARTUUID

We need to change the PARTUUID of our SSD’s partitions so the Pi doesn’t get confused about what device to boot from. Right now the partitions on both the SD card and the SSD are an exact match and we need them to be different so we can tell the Pi to boot specifically from our SSD’s partition.

We are going to use fdisk to change the SSD’s PARTUUID to the hexadecimal d34db33f to make our SSD easy to identify. Use the following:

$ sudo fdisk /dev/sda

 Welcome to fdisk (util-linux 2.33.1).
 Changes will remain in memory only, until you decide to write them.
 Be careful before using the write command.
 Command (m for help): p
 Disk /dev/sda: 238.5 GiB, 256060514304 bytes, 500118192 sectors
 Disk model: ASM105x
 Units: sectors of 1 * 512 = 512 bytes
 Sector size (logical/physical): 512 bytes / 512 bytes
 I/O size (minimum/optimal): 512 bytes / 512 bytes
 Disklabel type: dos
 Disk identifier: 0x6c586e13
 Device     Boot  Start       End   Sectors   Size Id Type
 /dev/sda1         8192    532479    524288   256M  c W95 FAT32 (LBA)
 /dev/sda2       532480 500118191 499585712 238.2G 83 Linux
 Command (m for help): x
 Expert command (m for help): i
 Enter the new disk identifier: 0xd34db33f
 Disk identifier changed from 0x6c586e13 to 0xd34db33f.
 Expert command (m for help): r
 Command (m for help): w
 The partition table has been altered.
 Syncing disks.

That’s it. Let’s verify our change using blkid:

$ sudo blkid

/dev/mmcblk0p1: LABEL_FATBOOT="boot" LABEL="boot" UUID="5203-DB74" TYPE="vfat" PARTUUID="6c586e13-01"
/dev/mmcblk0p2: LABEL="rootfs" UUID="2ab3f8e1-7dc6-43f5-b0db-dd5759d51d4e" TYPE="ext4" PARTUUID="6c586e13-02"
/dev/sda1: LABEL_FATBOOT="boot" LABEL="boot" UUID="5203-DB74" TYPE="vfat" PARTUUID="d34db33f-01"
/dev/sda2: LABEL="rootfs" UUID="2ab3f8e1-7dc6-43f5-b0db-dd5759d51d4e" TYPE="ext4" PARTUUID="d34db33f-02"

Your /dev/mmcblk0 and /dev/sda devices should now be different from each other. The SD card’s ID is 6c586e13 and the SSD’s PARTUUID is now

Update /boot/cmdline.txt

We are going to change cmdline.txt to point to the SSD for booting instead of the SD card. First make a backup of your existing cmdline.txt file with the following command:

sudo cp /boot/cmdline.txt /boot/cmdline.txt.bak

We’ve now created a backup you can restore if something goes wrong. If you need to restore your backup plug the SD card into a computer/device and replace cmdline.txt with cmdline.txt.bak that we made above. Now your Pi should boot normally again.

Open up /boot/cmdline.txt using nano or your favorite text editor:

sudo nano /boot/cmdline.txt

The existing file will look like this:

console=serial0,115200 console=tty1 root=PARTUUID=6c586e13-02 rootfstype=ext4 elevator=deadline fsck.repair=yes rootwait quiet init=/usr/lib/raspi-config/init_resize.sh

We are going to change the root=PARTUUID section to point to our new d34db33f PARTUUID like the following:

console=serial0,115200 console=tty1 root=PARTUUID=d34db33f-02 rootfstype=ext4 elevator=deadline fsck.repair=yes rootwait quiet init=/usr/lib/raspi-config/init_resize.sh

Make the change and double check the line is what it should be,then press Ctrl+X to save our changes.

Note: cmdline.txt should be one long solid line with no breaks — don’t add any line breaks or the system won’t boot and you’ll need to restore the backup we made earlier!

Test SSD

We are now ready to test booting from the SSD. Restart your Pi by issuing a

sudo reboot

The first boot with your SSD can be slow due to running fsck on the drive. If you have a really large SSD it can take surprisingly long to check all that space. Once the check completes it will mark the drive clean and skip the disk check from now on. It can take over a minute or two sometimes for really big drives so give it at least that much time before assuming it didn’t work.

After signing in we can verify that the SSD is being used like this:

$ findmnt -n -o SOURCE /

 /dev/sda2

Verify that partition has switched over as shown below to /dev/sda2 (SSD) instead of /dev/mmcblk0p2 (SD card).

Update /etc/fstab

We are now ready to edit the /etc/fstab file to point to our updated drive. To edit the file type:

sudo nano /etc/fstab

Your current file will look like this:

$ cat /etc/fstab
proc            /proc           proc    defaults          0       0
PARTUUID=6c586e13-01  /boot           vfat    defaults          0       2
PARTUUID=6c586e13-02  /               ext4    defaults,noatime  0       1
sudo nano /etc/fstab

Your current file will look similar to this (PARTUUID varies based on your Raspbian image version):

cat /etc/fstab
proc            /proc           proc    defaults          0       0
PARTUUID=6c586e13-01  /boot           vfat    defaults          0       2
PARTUUID=6c586e13-02  /               ext4    defaults,noatime  0       1

We want to change the root ( / ) partition (PARTUUID ending with -02) to load our SSD’s PARTUUID instead of the SD card. Replace the 2nd partition’s PARTUUID field on the last line in the file with the d34db33f label we applied earlier with fdisk. After making the change my /etc/fstab file looks like this:

proc            /proc           proc    defaults          0       0
PARTUUID=6c586e13-01  /boot           vfat    defaults          0       2
PARTUUID=d34db33f-02  /               ext4    defaults,noatime  0       1

Press Ctrl+X to tell nano to save our changes. Now type sudo reboot to restart the Pi.

Note: We want to leave the first partition (/boot) on the SD card. If you change this to the SSD then apt will update your SSD instead of the SD card so they won’t be used during boot! Remember that we are using the SD card as a bootloader and that is why the firmware updates (such as start.elf, etc) should go there instead of the SSD’s boot partition (which is never used).

Resizing Filesystem

By default the partition on the SSD / Flash drive will only be 1.8G. The Pi expands this automatically on micro SD drives but we will need to do it ourselves for a SSD / Flash drive. To do this we need to expand the partition and then resize the file system.

First let’s open fdisk and print the partitions:

pi@raspberrypi:~ $ sudo fdisk /dev/sda
 Welcome to fdisk (util-linux 2.33.1).
 Changes will remain in memory only, until you decide to write them.
 Be careful before using the write command.
 Command (m for help): p
 Disk /dev/sda: 238.5 GiB, 256060514304 bytes, 500118192 sectors
 Disk model: ASM105x
 Units: sectors of 1 * 512 = 512 bytes
 Sector size (logical/physical): 512 bytes / 512 bytes
 I/O size (minimum/optimal): 512 bytes / 512 bytes
 Disklabel type: dos
 Disk identifier: 0xd34db33f
 Device     Boot  Start     End Sectors  Size Id Type
 /dev/sda1         8192  532479  524288  256M  c W95 FAT32 (LBA)
 /dev/sda2       532480 4390911 3858432  1.9G 83 Linux

There is the line we need. Our start value for /dev/sda2 (rootfs) is 532480. Next we need to remove and recreate the partition as a larger size.

If you make any mistakes during this command just close fdisk by pressing q. The changes won’t be written to disk. If you mess up any of the commands the drive will no longer boot and you’ll have to start over again so be careful!

Command (m for help): d
 Partition number (1,2, default 2): 2
 Partition 2 has been deleted.
 Command (m for help): n
 Partition type
    p   primary (1 primary, 0 extended, 3 free)
    e   extended (container for logical partitions)
 Select (default p): p
 Partition number (2-4, default 2): 2
 First sector (2048-500118191, default 2048): 532480
 Last sector, +/-sectors or +/-size{K,M,G,T,P} (532480-500118191, default 500118191): 500118191 
 Created a new partition 2 of type 'Linux' and of size 238.2 GiB.
 Partition #2 contains a ext4 signature.
 Do you want to remove the signature? [Y]es/[N]o: N
 Command (m for help): w
 The partition table has been altered.
 Syncing disks.

If everything went well then type “w” and press enter. Otherwise press “q” to quit and try again. Once you enter “w” the changes will be permanently written to disk!

Now reboot the system. Type “df -h” to view the current disk:

pi@raspberrypi:~ $ df -h
 Filesystem      Size  Used Avail Use% Mounted on
 /dev/root       1.8G  1.3G  415M  76% /
 devtmpfs        1.8G     0  1.8G   0% /dev
 tmpfs           2.0G     0  2.0G   0% /dev/shm
 tmpfs           2.0G  8.5M  1.9G   1% /run
 tmpfs           5.0M  4.0K  5.0M   1% /run/lock
 tmpfs           2.0G     0  2.0G   0% /sys/fs/cgroup
 /dev/mmcblk0p1  253M   52M  201M  21% /boot
 tmpfs           391M     0  391M   0% /run/user/1000

We can see our disk is still 1.8G even after resizing the partition. That’s because we still have one more step! We need to resize the filesystem to fill our new partition space. For this we will use “sudo resize2fs /dev/sda2”:

sudo resize2fs /dev/sda2
 resize2fs 1.44.5 (15-Dec-2018)
 Filesystem at /dev/sda2 is mounted on /; on-line resizing required
 old_desc_blocks = 1, new_desc_blocks = 15
 The filesystem on /dev/sda2 is now 62448214 (4k) blocks long.

Now let’s check df -h again:

pi@raspberrypi:~ $ df -h
 Filesystem      Size  Used Avail Use% Mounted on
 /dev/root       235G  1.3G  224G   1% /
 devtmpfs        1.8G     0  1.8G   0% /dev
 tmpfs           2.0G     0  2.0G   0% /dev/shm
 tmpfs           2.0G  8.5M  1.9G   1% /run
 tmpfs           5.0M  4.0K  5.0M   1% /run/lock
 tmpfs           2.0G     0  2.0G   0% /sys/fs/cgroup
 /dev/mmcblk0p1  253M   52M  201M  21% /boot
 tmpfs           391M     0  391M   0% /run/user/1000

And that’s it! You will now be using all of your space on your drive.

Verify SSD Functionality / Performance

You can make sure everything is running correctly (and as fast as it should be) by running my quick storage benchmark. You can run the benchmark with the following one-liner:

sudo curl https://raw.githubusercontent.com/TheRemote/PiBenchmarks/master/Storage.sh | sudo bash

This will give you a score you can compare to the other Raspberry Pi Storage Benchmark results and make sure that you are getting an equivalent speed to your peers with the same device!

Update Pi using apt

Now that we’ve updated fstab it is safe (and highly recommended) to update your Pi’s software. Type “sudo apt-get update && sudo apt-get dist-upgrade” to update the system and firmware.

Your system will now be running completely from your USB drive! To verify this, run the command “findmnt -n -o SOURCE” / to ensure your root partition has switched over as shown below to /dev/sda2 instead of /dev/mmcblk0p2.

Conclusion

The Samsung 950 Pro NVMe drive in the featured picture scored a 9189 on the Raspberry Pi Storage Benchmark. The previous all-time record score on a Pi 3B+ was 3561. The performance gains are very real and very dramatic.

For me getting this performance is well worth having to waste a micro SD card just to be a bootloader. I am largely after the USB 3.0 bus and gigabit ethernet performance improvements and using this method I am able to achieve the performance I was after without waiting an indeterminate amount of time for the feature to be added back in!

Although there are ongoing compatibility issues and we lack the super easy native USB booting support we had before I’m more than willing to go through the growing pains to finally get rid that ancient USB 2.0 bus! Just make sure if you are planning to build a system you plan your adapters and parts accordingly.

Other Resources

If you want to see which Pi storage performs the fastest and get an idea of what kind of drives to look for check out my 2020’s Fastest Raspberry Pi 4 Storage Benchmarks

If you have one of the new Raspberry Pi 400 kits *then don’t miss my Pi 400 Overclocking and SSD Setup Guide

1,024 thoughts on “Raspberry Pi 4 USB Boot Config Guide for SSD / Flash Drives”

  1. Avatar for Greg

    Hey,
    great article. I think i used it a few years ago to use my ssd with my pi4.
    Now that there is a ssd boot option provided by raspian, is it possible to switch the sd card bootloader method to the native usb boot method that is provided in newer versions. To my understanding the bootloader also exists on the ssd, since we did a identical install on both the sd card and the ssd at the start.

    Is it as easy as switching the boot device to the ssd and removing the sd card? I’d love to keep my current system without having to set it up again.
    Any directions that you could give me about that? Im sure im not the only one wondering.

    Wishing you the best
    Greg

    1. Avatar for James A. Chambers

      Hey Greg,

      Welcome! So you are absolutely right. As long as you have the latest Raspberry Pi firmware installed you can actually just image the SSD. I have a guide on updating the firmware here.

      To explain a little better what has happened is that back when I wrote this the Raspberry Pi could *not* boot from SSD. You had to do the SD card trick. This was true on the Raspberry Pi 3 and all previous models as well. It was only the Raspberry Pi 4 that got support to do this a couple of years back.

      I definitely understand you want to keep your system. Yes, this is possible. One thing you may need to do though is copy all of the files from your SD card’s boot partition to the SSD’s boot partition. They will have never been updated.

      I’m also concerned that your Raspberry Pi OS might be too old to do this. If you’ve had your system for years then it must be Raspberry Pi Jessie or Buster. Raspberry Pi cannot update itself to the latest versions so you have to be running an ancient one (no, a sudo apt full-upgrade will not upgrade your Raspberry Pi OS to a newer version). It might be too ancient to do this in which case you will need to start with a fresh image of the latest “Bullseye” version of Raspberry Pi OS. Unless you have manually edited /etc/apt/sources.list to upgrade your OS manually (not recommended especially from one several years old) you are running Buster or maybe even Jessie.

      If it isn’t too old though you could basically undo what you do in this guide. Change the UUIDs to all go back to /etc/fstab basically. In theory this is easy. In practice though I think the age of your operating system may be a problem here. It’s certainly worth a try though as long as you have everything backed up first.

      Honestly though? For yours I would recommend just imaging the SSD directly with Raspberry Pi OS Bullseye. It’s time to upgrade it and you’re going to start having other problems from having a several year old copy of Raspberry Pi OS (that can’t update itself to newer versions, only security updates). You can absolutely change it to boot from SSD though (if the OS is new enough). Hopefully that helps!

      1. Avatar for Greg

        Hey, thanks for the fast reply. I’ve updated my pi earlier today, so im running bullseye with whatever the lastest stable rpi firmware releases are in the repo.
        Problem is, im not sure is i really used your guide back then. when i use lsblk -l it only shows a boot partition on my sd.

        $ lsblk -l
        NAME MAJ:MIN RM SIZE RO TYPE MOUNTPOINT
        sda 8:0 0 232.9G 0 disk
        sda1 8:1 0 232.9G 0 part /
        mmcblk0 179:0 0 29.7G 0 disk
        mmcblk0p1 179:1 0 256M 0 part /boot
        mmcblk0p2 179:2 0 29.5G 0 part

        the cmdline.txt also looks different from your guide
        console=serial0,115200 console=tty1 root=PARTUUID=738a4d67-02 rootfstype=ext4 elevator=deadline fsck.repair=yes rootwait root=/dev/sda1 rootfstype=ext4 rootwait

        And when i run blkid i can seethat the root=PARTUUID matches the uuid of my sd card main partition.

        sudo blkid
        /dev/mmcblk0p1: LABEL_FATBOOT="boot" LABEL="boot" UUID="4BBD-D3E7" BLOCK_SIZE="512" TYPE="vfat" PARTUUID="738a4d67-01"
        /dev/mmcblk0p2: LABEL="rootfs" UUID="45e99191-771b-4e12-a526-0779148892cb" BLOCK_SIZE="4096" TYPE="ext4" PARTUUID="738a4d67-02"
        /dev/sda1: UUID="a6aa3e1c-f4cf-4bca-a09e-4ade2bbb4453" BLOCK_SIZE="4096" TYPE="ext4" PARTUUID="a260c615-01"

        To be honest im pretty confused, since i only know the basics about file systems and partitions.

        Im sure im on the ssd tho since findmnt -n -o SOURCE / outputs
        /dev/sda1
        and i noticed a significant speed increase when i set it all up a few years ago.

        Sadly i cant find the guide that i used to do it anymore, since im pretty sure it wasnt yours.

        Can you make any sense of those outputs?

        Greg

        1. Avatar for James A. Chambers

          Hey Greg,

          Perfect, that actually helps a lot! So it couldn’t have been my guide that you used to do this but it was probably a similar one. We all had to do it back in the day this way as we were talking about earlier and there are a lot of variations on ways to do it.

          I can absolutely help interpret some of these from the output you posted. This is interesting. So what we are looking at here:

          sda 8:0 0 232.9G 0 disk
          sda1 8:1 0 232.9G 0 part /
          mmcblk0 179:0 0 29.7G 0 disk
          mmcblk0p1 179:1 0 256M 0 part /boot
          mmcblk0p2 179:2 0 29.5G 0 part

          This is the key right here. So the guide you followed only created a single root partition on the SSD. Notice how mmcblk0p1 is a boot partition? With your setup /dev/sda1 is *not* a boot partition. The SSD has no boot partition with this setup and that is going to be a problem.

          The guide you used does not appear to use the cloning technique where you have a boot partition on both drives. You don’t have a boot partition on the SSD at all for us to copy the files to. It looks like they had you set it up directly to /dev/sda1 instead of /dev/sda2 with a boot partition present.

          It doesn’t look like they left room for a boot partition either. The root partition on the SSD is starting right at sector 0 of the drive and uses up the entire 232.9G capacity (notice how the capacity of /dev/sda and /dev/sda1 match, that’s because there’s no additional room left for other partitions and it was completely filled).

          This one would be an incredibly tough one to repair but I can tell you how we could do it theoretically. I’ll tell you right off the bat it’s hard enough that using a newer Bullseye might be easier but I don’t know exactly how much configuration you have done on the Pi so maybe for you it won’t be easier to do a new reimage.

          Theoretically though you could use gparted to fix this. You could put the SSD into another machine and move the root partition using gparted and create the exact right size boot partition (in the exact same place as the SD card). Basically you would have to clone your SD card’s partition configuration while resizing the drive to preserve the data. We need to have a boot partition for that SSD to be bootable.

          That would be the hard part. Once you’ve created / matched the partitions on the SD card you would simply copy your entire boot partition from the SD card to the SSD. After that you’d just need to fix the UUIDs and fstab and it should be good to go. Hopefully that helps!

          1. Avatar for Greg

            Hey James,
            that sounds like something that exceeds my skills. Im sure i could find the right commands but if something goes wrong i would have no idea what to do.

            I guess i will have to reinstall rasbian directly to the ssd.
            Until i do that: are there any downsides to using my current setup? After booting, system behaviour and performance should be the same as having the bootpartition directly on my ssd, correct?

            Another question: In your first post you said “Raspberry Pi cannot update itself to the latest versions so you have to be running an ancient one (no, a sudo apt full-upgrade will not upgrade your Raspberry Pi OS to a newer version).”
            I was under the impression that the usual linux upgrade commands to get to the newest stable release were enough to get to a state (os/system wise) that is almost identical to doing a fresh install with a freshly downloaded image of the newest release.
            Is that not the case? How so?

            And last but not least.
            When i do the fresh install, i would like to backup my ssd first, so that i can flash the backup onto it, if i realise i missed something important in the old(current) install.
            Can you recommend any tool, that makes it easy to backup a ssd sector by sector and reapply the backup if needed. Is that what i commonly called cloning in the disk/storage unit context?

            Many thanks for your detailed support so far, its much appreciated.

            Greg

            1. Avatar for James A. Chambers

              Hey Greg,

              No problem at all, and great questions again! I think you’re reaching the right conclusions here. It’s definitely possible to do but it isn’t so much that the steps are really hard but the process is annoying enough and enough can go wrong that as someone who could pull this off to rescue a system for work or something it’s not something I would do personally unless something needed to be saved that wasn’t backed up somewhere.

              So yes there is absolutely no disadvantage whatsoever to your existing setup other than you can’t use the SD card for something else. You will not lose any speed having the SD card serve as the boot loader. This only impacts the device for about 2-5 seconds as it is booting up then it completely switches over to the SSD and never touches the SD card again basically.

              That’s a great question about the Raspberry Pi OS updates and the only reason I’m so familiar with how the upgrades work is that I have some Minecraft scripts that are sensitive to people running older versions like Buster or Jessie. I’ve just encountered people having trouble a lot because they’re on one of these older ones. Most people don’t even notice though and unless you are running specific applications that require the packages in the newer OS versions they may never notice until the Pi dies.

              The way we can see your current release is:

              cat /etc/os-release

              If you are running the latest version you will see:

              PRETTY_NAME="Raspbian GNU/Linux 11 (bullseye)"
              NAME="Raspbian GNU/Linux"
              VERSION_ID="11"
              VERSION="11 (bullseye)"
              VERSION_CODENAME=bullseye
              ID=raspbian
              ID_LIKE=debian
              HOME_URL="http://www.raspbian.org/"
              SUPPORT_URL="http://www.raspbian.org/RaspbianForums"

              This will be your “major” release. In some versions of Linux this is updated by apt. Raspberry Pi OS has never supported this though. Some operating systems like Ubuntu have a separate major release updater. On Ubuntu you use a special command:

              sudo do-release-upgrade

              Unfortunately there’s no such thing for Raspberry Pi OS. The only way to upgrade it is to edit /etc/apt/sources.list.

              That guide above shows how to do it and there’s a million others like it out there. It’s really not that hard but the problem with upgrading major releases is that it’s not recommended by Raspberry Pi. Raspberry Pi actually recommends you reinstall completely. They don’t actually support upgrading.

              The older release you are upgrading from the more likely it is to have problems. If it’s Buster you will probably be okay. If it’s older than Buster then I would expect very weird problems to occur if you attempted to upgrade it. You definitely shouldn’t do anything without having everything backed up you could potentially lose as that’s how wrong things can go sometimes (and why they don’t recommend upgrading and recommend a clean install).

              You honestly probably won’t believe how much different Bullseye is for some of the packages than what you’re running. For example your OS is going to only have OpenJDK 11 in the repositories. That’s another common problem I hear from people stuck on old major releases like this. On the current Bullseye you can get OpenJDK 18. Literally 7 releases newer from upgrading from Buster to Bullseye for example. You will see no such option available for you to install.

              In other words it could do this (or Raspberry Pi could release their own do-release-upgrade tool like Ubuntu has) but it has never supported it and I don’t know of any plans for it to do so. Hopefully that helps!

              1. Avatar for Greg

                Hey James,

                very interesting infos on the upgrade process on raspberry pies. I did the upgrade earlier today by changing the sourcelist. Did upgrade from buster, so i guess i was lucky, that it wasnt older than than.
                Any hints on my last question regarding the ssd update from the last post? You might have missed it.

                And a shot in the blue: Do you know if there are any tools to track which files and folders the user alters during the lifetime of a system? I mean besides systemfiles that get changed by apt upgrade or logs etc.
                Would be really handy to track deployed programms or user changed config files etc., without having to write every change or addition down manually.

                Greg

              2. Avatar for James A. Chambers

                Hey Greg,

                Oops, you’re right I missed the backing up part of your last message. So for backing up you would typically use dd. There’s a good guide on how to do this here. It would probably look something like:

                sudo dd if=/dev/sda of=backup.img

                That sounds fantastic that you got upgraded from Buster. I think that was worthwhile for you to do and this should let you keep your configuration for a lot longer once everything is settled since you are now getting the latest packages!

  2. Avatar for Mikey

    Another for the bad list is the Inateck FE2010 2.5″ SATA to USB 3.0 Hard Drive Enclosure. It comes up as Unknown JMS578 based SATA bridge. Only works on USB2 not 3. No firmware update to be found. Using quirks I get read speeds off this thing around 7MB/s. Terrible!

  3. Avatar for Luca

    Hi James,

    Hope you’re well.

    I’m having an issue with a specific Retropie image on a 1tb ssd on my pi400 when running the command:
    sudo touch /forcefsck; sudo reboot

    The screen remains black and the Pi400 stuck on that screen.
    Actually the very first time I got the following message after 500secs: ext4_mb_generate_buddy:805: group 68
    but only the first time. All subsequent times the Pi400 just stayed on the black screen.
    This stuck issue didn’t happen when running the OS from a 32gb sdcard. And it does not happen when running a vanilla Retropie image from the same 1tb ssd.

    Anything I can check?
    I want to use such image and don’t necessarily need to run that command for checking boot errors, but I wonder how to protect and check the system errors after power cuts, or when accidentally unplugging the cable.

    Many thanks
    Luca

    1. Avatar for James A. Chambers

      Hey Luca,

      Welcome back! So the absolute most common thing I have seen fix issues like this is actually updating the Pi’s firmware. This is because a lot of people don’t run Raspberry Pi OS and what happens is it tends to never get any firmware updates if it’s not running Raspberry Pi OS full time. These very often will fix strange USB booting issues.

      The way to upgrade it is to use a SD card with a full Raspberry Pi OS installation and do a:

      sudo apt update && sudo apt full-upgrade -y
      sudo reboot
      sudo rpi-eeprom-update -a
      sudo reboot

      When it reboots the firmware should be all up to date. You don’t need to use Raspberry Pi OS again after that once the updates are installed. I always suggest this first because it fixes some really strange boot issues right off the bat.

      The second thing I would try is prechecking the fsck on the SSD after you image it. Instead of using forcefsck what you would do is after imaging the drive unplug it and replug it into a machine running Linux (another Pi works, anything). Try doing a:

      sudo fsck -yf /dev/sda2

      If there’s only one partition for RetroPie do /dev/sda1. This is different than an automatic repair (fsck -p or the /forcefsck file). The automatic repair ignores a lot of questions and this command will answer ‘y’ to all questions. I do this as a required step in most of the newer SSD boot guides I’ve wrote recently because it prevents/fixes a lot of strange fsck problems like this. I also do it with raw disk images when I’m preparing them for my projects such as my Orange Pi i96 image (after mounting them inside Linux as the .img file you can basically edit and fsck them).

      There’s also a third possibility. The RetroPie image you have might have older boot files on it. It’s possible the vanilla image may have newer bootloader files installed. It is possible to update these by dragging images from the “boot” partition of one to another generally but this doesn’t always work and there’s often a couple of “gotchas” when trying something like that but I’ve done it before with other images in the past. This would mean that it has the files necessary to boot from a SD card on the boot partition but not a SSD. If the image is a couple of years old it’s probably this and the bootloader files need to be updated.

      You know what you could try? You could try one of my new SSD booting methods for this one. Check out this article here. What you would do is follow this guide as if it’s a Raspberry Pi. It doesn’t matter that it’s for ODROID as I’ve wrote that exact same article like 5 times and it’s the same identical process. It is different than the one in this article though. It’s more evolved. It’s actually based on this article (from before the Pi supported native USB booting) but I eliminated several steps that this one has.

      The reason I think that my newer method may work for you is that you start with a SD card. You would actually start with your working 32GB SD card and fully update it. All updates. You’d then clone the SD card to the SSD and then change the SD card partitions UUID. After rebooting it should use the SD card as a bootloader and switch you over to the SSD. I bet anything that this will work but it will require you to sacrifice your SD card as a bootloader. That may or may not be a big deal depending on whether you have a bunch of old low capacity slow SD cards from 5-10+ years ago like I do. Normally you’d be able to rely on the standard USB booting but it doesn’t seem like that’s working with this image.

      In other words if the native USB booting isn’t working for this image you could do it the way we had to before USB booting existed (and still have to on many other boards, the Pi has only done this for a couple of years itself and could not when I originally published this article). This will definitely work but the cost is having to have a sacrificial SD card for sure.

      Now for the last part about protecting it from when the power cuts: unfortunately that is an unsolved problem. This is still an issue on all computers and devices. When the power is cut during the middle of a write it leaves the disk in a corrupted state basically. This happens on my computers as well a lot of the time when they lock up and I have to power cycle them (you’ll see the fsck pop up on boot and find a bunch of errors/unclean journals/etc. after I do that).

      On Windows you get the “Windows is attempting repairs” happy screen and if it fails they used to have to come see me when I was still a L3 tech. 90%+ of the time it will be able to repair itself just as 90%+ of the time when you need to run a fsck it will successfully repair it. The other 10% of the time the damage will likely lead to having to reimage. This is a big problem on Pis because they tend to lose power much, much more often than a PC. On most Pis I suggest using something like the PiSugar. The problem is there is no PiSugar UPS backup battery for the Pi 400.

      The best way to avoid it is to do a sudo shutdown or a sudo reboot and then disconnect the power so that it can close all applications. You could use something like a UPS to plug the Pi 400 into I suppose but they can still be unplugged unfortunately accidentally. Hopefully that helps!

      1. Avatar for Luca

        Thank you so much James for the super-helpful breakdown and suggestions.
        I run the commands above after booting with my alternative sdcard 32gb image, and just to confirm, I appear to have the latest eeprom installed 10/03/22, both beta and stable and latest are the same file. Default critical points to an older eeprom from 25/01/2022, but of course it is not in use.

        I’m flashing the image to the ssd again, then will boot from the sdcard and only afterwards plug the ssd and run sudo fsck -yf /dev/sda2, which I expect it’ll be an all nighter.

        I’ll do this and report back. Also somebody pointed out that that image has blanking enabled so no usual printouts to screen during boot. I’ll make sure to change the cmdline and config text files before testing the forcefsck after having booted from the ssd (no sdcard).

        P.s.
        I’m afraid I don’t have another sdcard around.
        Yes system starts up and shutdowns properly, apart from when I accidentally turn off the wall switch by mistake 🙂

        1. Avatar for James A. Chambers

          Hey Luca,

          No worries at all! We can absolutely just do it for testing at least to rule things out for sure and it sounds like this is the path you are on. Versions look good. You’re doing better than my Pi 400 (which I didn’t run sudo apt full-upgrade first):

          pi@pi400:~ $ sudo rpi-eeprom-update -a
          BOOTLOADER: up to date
          CURRENT: Thu 10 Mar 2022 11:57:12 AM UTC (1646913432)
          LATEST: Thu 10 Mar 2022 11:57:12 AM UTC (1646913432)
          RELEASE: stable (/lib/firmware/raspberrypi/bootloader/stable)
          Use raspi-config to change the release.

          Notice how it still thinks it’s up to date. That is because it isn’t actually checking anything but your own SD card’s local files which is why you have to do the sudo apt full-upgrade first. Your version sounds good though.

          The way I would image the SSD is probably like this to try the SD card method as a test:

          cat /dev/mmcblk1 > /dev/sda
          sudo fsck -yf /dev/sda2

          Then the command you use to trick it to boot from SSD instead of the SD card is this:

          sudo tune2fs -U random /dev/mmcblk1p2

          It might be mmcblk0 as well. It depends on the OS and how they are mapping the devices.

          This changes the SD card’s root partition to a completely random UUID that won’t match the root partition anymore. Only the SSD’s root partition will be found which is why the SSD is mounted as the root filesystem. I usually completely delete all partitions off the SSD with fdisk before doing this. This may spare you a very long fsck too by just deleting it completely off first.

          That will copy your live image (and all it’s updates) to the SSD instead of using the outdated downloaded image directly onto the SSD if that makes sense. I look forward to seeing what you find!

        2. Avatar for Luca

          Hang on, I’m not seeing the latest firmwares on my Pi400.

          I’m just taking a peek and there seem to be newer stable versions which are not coming through. See:
          It’s stuck to the 10th of March but there are newer versions all the way up to September on github:
          pieeprom-2022-09-02.bin

          1. Avatar for James A. Chambers

            Hey Luca,

            Ahh, yes yours is stuck on the same version mine is then. I’m patching mine right now to see if I can get it to upgrade.

            There’s another way to upgrade it which is using the Raspberry Pi Imager. It can create a special bootloader update SD card that will update all of the bootloader stuff as well. This is what you have to do when it’s *really* stuck and I’ve covered it in my Raspberry Pi firmware recovery guide.

            The files are actually at /lib/firmware/raspberrypi/bootloader/. You have every version of every bootloader ever released on your Pi 400 (everyone does) up to how new the apt packages installed on the Pi are. This is where it “checks for updates” from so it’s very misleading. These are updated through the apt packages. You could just download the latest one from GitHub and put it in there though most likely. We’ll see if mine jumps in a minute here!

            EDIT: Ugh, 50%, it would have been faster to reimage it and it’s due for a reimage since this one has been upgraded from like Jessie and is a mess!

            EDIT #2: Nope. I’m guessing those aren’t available in the apt packages yet. You can still update it like this:

            cd /lib/firmware/raspberrypi/bootloader/stable
            sudo curl -L -k -o pieeprom-2022-09-02.bin 'https://github.com/raspberrypi/rpi-eeprom/blob/master/firmware/stable/pieeprom-2022-09-02.bin?raw=true'
            sudo rpi-eeprom-update -d -f ./pieeprom-2022-09-02.bin

            Here was mine:

            pi@pi400:/lib/firmware/raspberrypi/bootloader/stable $ sudo rpi-eeprom-update -d -f ./pieeprom-2022-09-02.bin
            *** INSTALLING ./pieeprom-2022-09-02.bin ***

            CURRENT: Thu 10 Mar 2022 11:57:12 AM UTC (1646913432)
            UPDATE: Fri 02 Sep 2022 02:10:12 PM UTC (1662127812)
            BOOTFS: /boot

            EEPROM updates pending. Please reboot to apply the update.
            To cancel a pending update run "sudo rpi-eeprom-update -r".

            I now after rebooting see:

            pi@pi400:~ $ sudo rpi-eeprom-update
            BOOTLOADER: up to date
            CURRENT: Fri 02 Sep 2022 02:10:12 PM UTC (1662127812)
            LATEST: Fri 02 Sep 2022 02:10:12 PM UTC (1662127812)
            RELEASE: stable (/lib/firmware/raspberrypi/bootloader/stable)
            Use raspi-config to change the release.

            VL805_FW: Using bootloader EEPROM
            VL805: up to date
            CURRENT: 000138a1
            LATEST: 000138a1

            1. Avatar for Luca

              Hi James,

              Somebody mentioned to me that the bootloader may intentionally be old because Retropie is based on Buster rather than Bullseye as it’s deliberately tagged Buster.
              Question is, is it safe to update to the 02/09/2022 version manually as you showed above?

              Also I didn’t quite fully get the commads regarding mixing the sdcard (boot) and ssd (root), but it’s ok as I’m going to avoid testing that. I plan on the following instead, what do you think:
              -turn on the pi400 with just a vanilla up-to-date retropie image on the 32gb sdcard.
              -plug in the usb3 1tb ssd with the reflashed 1tb retropie image, without booting from it
              -running sudo fsck -yf /dev/sda2
              -see if anything odd comes up and investigate
              -Disable screen blanking by temporarily copying cmdline and config txt files from the vanilla retropie boot partition to the ssd’s one
              -remove sdcard
              -boot from ssd
              -run forcefsck
              -see if anything odd comes up and investigate

              The 1tb retropie image I’m going to use has been created this year and released in August, so maybe it’s recent enough.

              Also, do you think is this a big fuss about nothing? is forcefsck not run automatically at boot anyway, when the Pi400 has powerloss, and is that different to forcefsck?
              On the retropie image discord somebody is suggesting turning fsck off as it never worked for them, and admittedly, I do not know what it does 🙂

              Thanks again for your invaluable help

              1. Avatar for James A. Chambers

                Hey Luca,

                Yes I absolutely think this is worth a try! The image doesn’t sound too old. It’s strange that there’s so many fsck errors. Let’s see what startup looks like with the screen blanking turned off!

                I wonder if the image itself has issues. You could try mounting and doing an fsck on the image before you do the imaging but let’s see what happens with the other testing first here.

              2. Avatar for Luca

                So, I updated the eeprom to the 9th September manually.
                Then I flashed the image on the ext ssd drive.
                Then booted from the sdcard 32b vanilla retropie and plugged the ssd back and unmounted it. then run the commands and here what it came back with:

                pi@retropie:~ $ sudo fsck -yf /dev/sda2
                fsck from util-linux 2.33.1
                e2fsck 1.44.5 (15-Dec-2018)
                Pass 1: Checking inodes, blocks, and sizes
                Inode 8184 extent tree (at level 1) could be narrower. Optimize? yes

                Inode 11640 extent tree (at level 2) could be narrower. Optimize? yes

                Inode 34646 extent tree (at level 1) could be narrower. Optimize? yes

                Inode 263243 extent tree (at level 2) could be narrower. Optimize? yes

                Inode 3277495 extent tree (at level 1) could be narrower. Optimize? yes

                Inode 3277544 extent tree (at level 2) could be narrower. Optimize? yes

                Inode 3403742 extent tree (at level 1) could be narrower. Optimize? yes

                Inode 3409033 extent tree (at level 1) could be narrower. Optimize? yes

                Inode 3409108 extent tree (at level 1) could be narrower. Optimize? yes

                Inode 3530171 extent tree (at level 1) could be narrower. Optimize? yes

                Inode 4030867 extent tree (at level 1) could be narrower. Optimize? yes

                Inode 4030925 extent tree (at level 1) could be narrower. Optimize? yes

                Inode 4034134 extent tree (at level 1) could be narrower. Optimize? yes

                Inode 4034135 extent tree (at level 1) could be narrower. Optimize? yes

                Inode 20152356 extent tree (at level 1) could be narrower. Optimize? yes

                Inode 20152358 extent tree (at level 1) could be narrower. Optimize? yes

                Pass 1E: Optimizing extent trees
                Pass 2: Checking directory structure
                Pass 3: Checking directory connectivity
                Pass 4: Checking reference counts
                Pass 5: Checking group summary information

                retropie: ***** FILE SYSTEM WAS MODIFIED *****
                retropie: 328796/58654272 files (1.7% non-contiguous), 209554979/244124086 blocks
                pi@retropie:~ $ sudo fsck -yf /dev/sda1
                fsck from util-linux 2.33.1
                fsck.fat 4.1 (2017-01-24)
                0x25: Dirty bit is set. Fs was not properly unmounted and some data may be corrupt.
                Automatically removing dirty bit.
                Performing changes.
                /dev/sda1: 311 files, 12525/65467 clusters

                What does it mean? 🙂

              3. Avatar for Luca

                also I unmounted /dev/sda2 but accidentally forgot to unmount /dev/sda1 before running the command above

              4. Avatar for James A. Chambers

                Hey Luca,

                That looks like a successful repair! Is it still not able to boot yet? Those are the types of issues that the normal fsck automatic repair would ignore so I’m glad you ran it this way so it would fix all of those!

                How much of the filesystem is actually in use? I know you said the img was 1TB but there are tools to shrink that so that it would fit on a SD card unless there is actually 1TB of real data inside the img itself (that isn’t just free space).

                I’d definitely give it a try as that looks like a clean repair! You may want to check the /etc/fstab file and make sure it’s pointing to the right places as well on the root filesystem of the SSD (and check the /boot partition as well for anything that might be pointing to a different/wrong place such as /dev/mmcblk0p2 or anything like that).

              5. Avatar for Luca

                Many thanks, that seem to have helped a lot!
                I’m happy overall!
                The forcefsck with printouts enabled shows that it now runs correctly and it checked 100%. It ends with some root permission warnings and press enter to continue, but pressing enter doesn’t register. However control alt del reboots and the next boot works just fine.

                To answer your question, the disk is 880Gb full, so pretty full eheh.

                Finally, the /etc/fstab should be good I think:
                proc /proc proc defaults 0 0
                PARTUUID=26a9bc7f-01 /boot vfat defaults 0 2
                PARTUUID=26a9bc7f-02 / ext4 defaults,noatime 0 1
                # a swapfile is not a swap partition, no line here
                # use dphys-swapfile swap[on|off] for that

                Thanks for your help once again!

              6. Avatar for James A. Chambers

                Hey Luca,

                Excellent work, no problem at all, I’m glad you were able to get it! That’s a very good sign. That explains why it took so long as there was that much actual data!

                Enjoy and take care!

  4. Avatar for Heinz

    i think you mixed up something in that line with the 3.1

    StarTech 2.5″ SATA to USB 3.1 Adapter* 2.5″ SATA to USB 3.0 Verified working in comments (thanks Fredrick)
    StarTech 2.5″ SATA to USB 3.0 Adapter* 2.5″ SATA to USB 3.1 Verified working great by myself and others on Pi 4

  5. Avatar for BassT

    So, my new case arrived (Sabrent EC-SNVE) and what should I say. It wirks like a charm with my Crucial P2 CT250P2SSD8 250GB and without exta powering.
    THX for the guide!

    1. Avatar for James A. Chambers

      Hey BassT,

      Excellent, great work! That is a USB 3.2 adapter and I have definitely noticed that USB 3.2 seems to be more compatible with the Pi (despite the fact that the Pi only has a USB 3.0 bus).

      No problem at all, I’m glad the guide helped! The P2 is a great drive as well. Enjoy and take care!

  6. Avatar for BassT

    I’m now also try to switch to SSD as Harddrive because of weak read/write rates with SD.
    I baught an Crucial P2 CT250P2SSD8 250GB within an IB-1816M-C31 Case.
    Without additional power it don’t work. Only some times for a few hours.
    So I baught an Sabrent HB-UMP3 Hub, but with that the Raspi dont’t boot, because of back powing.
    I now baught an UGREEN Powerd HUB. Will arrive tomorrow. Hopefully it will work, …

    1. Avatar for James A. Chambers

      Hey BassT,

      I do have one tip for the Sabrent USB hub. It will perform a cold boot if you simply unplug the hub and plug it back in again. The UGREEN will backfeed power too. Nobody has found a hub that doesn’t backfeed power that isn’t about 10+ years old and none of them have been sold new for many, many years. They all do this. That is why I recommend the cheapest one. It doesn’t matter how much you spend as they will all do this (if you find one that doesn’t let me know, that is the holy grail and nobody has ever been able to link me to one in the years I’ve been asking whenever this comes up).

      Basically a quick unplug and plugging back in will cause it to boot from a cold boot. This issue does not impact rebooting. It is only cold boots that will get stuck until you unplug it for about a split second (you will see everything immediately light up the moment you remove the cable) and then plug back in again basically immediately before the boot process starts.

      I don’t like that they all backfeed power either to be clear but unfortunately that is normal. I’m not defending it. It’s not supposed to backfeed power but all the manufacturers do it because it’s cheaper to manufacture this way. Hopefully that helps!

      1. Avatar for BassT

        Thx for the input.
        Unplug and replug will not a good solution for me. I should restart (lets say once in a month for upgrading ubuntu) without be physically on the pi. It is my smarthome server running iobroker and mosquitto server.
        Now I baught an Sabrent EC-SNVE case (will arrive on monday). Hopefully this will work without extra powering.

      2. Avatar for BassT

        Now my new hub (shorturl.at/kpqv9) arrived.
        Its the UGREEN (Powerd by USB Micro). With this one there are no problems with reboot.
        Now only my SSD will not work, … (ICY BOX 1816M-C31). The alternative USB 3.0 HDD Case work without problems. No unplug from power is needed.

        1. Avatar for James A. Chambers

          Hey BassT,

          Yes some people have used the powered HDD enclosures before that had a use case where unplugging the device for a split second wouldn’t work. That will be a better alternative for you for sure!

    1. Avatar for James A. Chambers

      Hey Gompali,

      Welcome! So that sounds right for that enclosure and I’ll try to explain why. First check out the page for this enclosure at pibenchmarks.com.

      You’ll see that for this enclosure literally everyone is only identified as “ROGESD-S1C”. For whatever reason ASUS decided to make this enclosure to return itself no matter how you query it. hdparm, inxi, all of those tests only return the name of the enclosure. This is unusual and only a few of them work this way. It’s much more common for it to not identify itself at all so I’d rather have this than that but I do wish hdparm worked on it.

      I have one of these as well. It’s one of my favorite enclosures but I do wish it wouldn’t block lshw/hdparm and all of those tests or it would be my #1 recommendation for sure but the blocking of tests is a problem for me and the storage benchmark. It’s the opposite of the adapters that provide nothing. It only wants to provide itself instead of the drive inside basically.

      To be clear this has no impact on performance and indeed the scores for that enclosure are among the top. It’s just annoying that you can’t see the drive through this one and I agree with that.
      Hopefully that helps!

Leave a Comment

Your email address will not be published. Required fields are marked *

Type here..

Exit mobile version