

Official support from Canonical for the Raspberry Pi has come a long way. We can now install officially supported Ubuntu on the Pi! In my previous guide for Ubuntu 18.04 on the Pi the Raspberry Pi was not officially supported yet and to be honest the experience was pretty janky.
The previous LTS “unofficial” release had so many problems I actually rolled my own image with dozens of fixes to common ailments before I quickly realized that maintaining a Linux distro, even in such a limited capacity as patching in and distributing fixed binaries, was a monumental undertaking.
Fortunately the current Ubuntu 20.04 LTS release is officially certified for the Raspberry Pi. This combined with Ubuntu’s full 64 bit userland/system environment allows you to take full advantage of the 8 GB Pi’s memory without per-process 3GB memory limits (very useful if you are doing something like running a Minecraft server and want to allocate almost all of the 8 GB to it) means there has never been a better time to give Ubuntu a try on the Pi.
This guide takes it a step further and shows you how to get Ubuntu 20.04 / 20.10 / 21.04 / etc. working with a SSD. Let’s get started!
Equipment Used

The Kingston A400 has been a great drive to use with the Pi for years. It’s reliable, widely available around the world, has low power requirements and performs very well. It’s also very affordable. This drive has been benchmarked over 1000 times at pibenchmarks.com and is the #1 most popular SSD among the Pi community!
Links: AliExpress*, Amazon.com*, Amazon.ca*, Amazon.com.au*, Amazon.co.jp*, Amazon.co.uk*, Amazon.de*, Amazon.es*, Amazon.fr*, Amazon.it*, Amazon.nl*, Amazon.pl*, Amazon.se*, Amazon.sg*
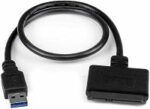
The USB 3.1 variant of the StarTech 2.5″ SATA adapter works well with the Pi 4. The USB 3.0 variant doesn’t have firmware updates available and is not recommended.
Links: Amazon.com*, Amazon.ca*, Amazon.com.au*, Amazon.co.jp*, Amazon.co.uk*, Amazon.de*, Amazon.es*, Amazon.fr*, Amazon.it*, Amazon.nl*, Amazon.pl*, Amazon.se*, Amazon.sg*
NVME Option (powered USB hub required, see “Power Requirements” section in my more generalized Raspberry Pi 4 USB booting guide):
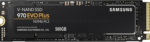
The Samsung 970 EVO Plus is a fantastic drive and has fallen in price substantially. It’s widely available around the world. The smaller capacities (such as the 250GB version) of this drive are perfect for the Pi! This is the top performance option without going into the “Pro” series of the lineup which are much more expensive.
Links: AliExpress*, Amazon.com*, Amazon.ca*, Amazon.com.au*, Amazon.co.jp*, Amazon.co.uk*, Amazon.de*, Amazon.es*, Amazon.fr*, Amazon.it*, Amazon.nl*, Amazon.pl*, Amazon.se*, Amazon.sg*
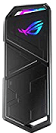
If you really want to take things over the top the ASUS Rog Strix M.2 NVMe enclosure uses the latest USB 3.2 Gen2 specification, is RGB capable and works with the Pi! Unsurprisingly, adding the extra lighting does take extra power! A powered USB hub is also required for this enclosure. More widely available than the ICY BOX but tends to be on the expensive side.
Links: AliExpress*, Amazon.com*, Amazon.ca*, Amazon.com.au*, *Amazon.co.jp*, Amazon.co.uk*, Amazon.de*, Amazon.es*, Amazon.fr*, Amazon.it*, Amazon.nl*, Amazon.pl*, Amazon.se*, Amazon.sg*
Prerequisites
Verify Power Supply Size (3.5A strongly recommended)
Check your Raspberry Pi’s power supply size and make sure it is delivering at least 3.5A. There are a lot of USB C adapters for the Raspberry Pi that are only 3.0A. These will typically work fine, until you plug in something like a SSD which draws power from the Pi and there is nothing left to give.
Most SSDs are quite power efficient but HDDs draw significantly more. Older generations of SSDs used quite a bit more power than newer ones as well. If you are using an older drive or a drive that you know is power hungry you need to pay extra attention to having a quality power source with plenty of capacity.
A good alternative option to relying on the Pi to power the drive is using a powered USB hub* so your drive doesn’t need to draw power from the Pi’s limited power budget. Make sure you get one that is compatible with the Pi as some powered USB hubs won’t work properly with it so check the reviews and do your research to make sure people are using it successfully with the Pi.
Using a 3.5A power supply* or powered USB hub* will ensure your drive is getting enough power without impacting the Pi’s stability.
Recommended Power Solutions
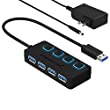
The Sabrent powered USB hub delivers a whopping 2.5A of dedicated power for your USB attached devices. This is almost as much as the Pi adapter itself is rated for (3.0A). It will easily power the most thirsty of setups such as NVMe enclosures.
Links: Amazon.com*, Amazon.ca*, Amazon.com.au*, Amazon.co.uk*, Amazon.es*, Amazon.it*, Amazon.nl*, Amazon.pl*, Amazon.se*
Note: Make sure Amazon doesn’t try to take you to the non-powered version and that it’s the one with the AC adapter that plugs in to provide extra power
The CanaKit 3.5A adapter has an extra half an amp (500 mA) of capacity to give some breathing room to your accessories. This is bigger than the official Pi power supply which provides 3.0A.
Links: Amazon.com*, Amazon.ca*, Amazon.com.au*, Amazon.sg*
Verify Storage Adapter Compatibility
You will need a USB 3.0 storage adapter. See my other article on USB booting not specific to Ubuntu for a lot more details on the storage adapters!
Get Latest Raspbian & Updates
To update your bootloader / firmware you should use Raspbian on a SD card. Right now support in third party operating systems to do anything with the new Raspberry Pi 4’s firmware or bootloader is very limited / nonexistent. You can use a third party operating system later once you set the boot mode, but to actually make these changes we will use official Raspbian.
First make sure that you have the absolute latest updates and firmware for the Pi. To upgrade all your packages and firmware to the latest version use the following command:
sudo apt update && sudo apt full-upgrade -y
Once the update has completed restart your Pi with a sudo reboot command to apply the latest firmware / kernel updates.
Verify EEPROM Bootloader is up to date
We can check if your Pi’s bootloader firmware is up to date with the following command:
sudo rpi-eeprom-updateIf your Raspbian is *very* out of date you may not have this utility and can install it using:
sudo apt install rpi-eepromThe output from rpi-eeprom-update will look like this if you are not up to date:
BCM2711 detected
VL805 firmware in bootloader EEPROM
*** UPDATE AVAILABLE ***
BOOTLOADER: update available
CURRENT: Thu 3 Sep 12:11:43 UTC 2020 (1599135103)
LATEST: Tue 24 Nov 15:08:04 UTC 2020 (1606230484)
FW DIR: /lib/firmware/raspberrypi/bootloader/beta
VL805: up-to-date
CURRENT: 000138a1
LATEST: 000138a1
If it says any updates are available they be installed manually by adding ‘-a’ to the end of our previous command like this:
sudo rpi-eeprom-update -aAfter the updates finish installing restart your Pi as firmware updates will not be applied until after a reboot. Now if you run rpi-eeprom-update to check for updates again it should say you are on the latest and up to date!
Changing rpi-eeprom’s Release Channel
Note: As of February 16th the firmware available in the “critical” branch is new enough to USB boot so I no longer recommend changing this. One reader even let me know in the comments that on the “stable” channel his storage was getting corrupted prompting a full reinstall!
By default you will only receive updates from Raspbian’s “critical” channel. This is a very conservative firmware update channel that will only give you very well tested firmware updates that are considered critical fixes for the device. Another channel that is available is “stable”.
Carlos and other commenters have reported that the current “critical” firmware didn’t work for them and they had to upgrade to the “stable” channel.
To switch to the stable channel we are going to edit the file /etc/default/rpi-eeprom-update:
sudo nano /etc/default/rpi-eeprom-updateChange the line FIRMWARE_RELEASE_STATUS=”critical” to:
FIRMWARE_RELEASE_STATUS="stable"
Now you can run sudo rpi-eeprom-update and you should see a new update available.
Install Ubuntu on USB Storage Device
The new official Raspberry Pi imaging tool is really good. It’s available on Windows, Linux and MacOS and is a small and fast download. It also works fine on most USB mass storage devices like SSDs. Since Ubuntu is now officially supported the image itself is also available in this tool which saves you the trouble of having to find and download the right image files.
64 bit images are recommended for the Pi 4 for better performance but the 32 bit images work as well.
If you want to do things the traditional way you can download the image from the main Ubuntu site and write it yourself using Etcher / dd / Win32diskimager / your preferred tool and skip to the next section. It’s recommended to create the media with the Raspberry Pi Imager unless you are having problems with that utility or are using this as a troubleshooting step.
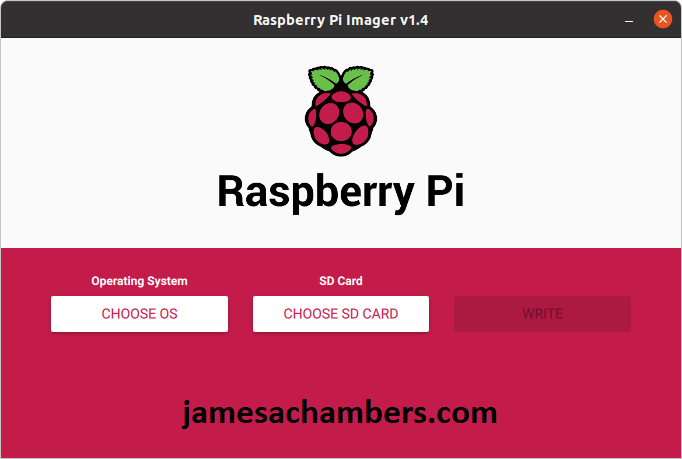
Once you’ve downloaded the tool run it as administrator/sudo to avoid permission errors. To run the utility from the command line is usually sudo rpi-imager. You’ll be greeted with this screen:
Next click the “Choose OS” button:
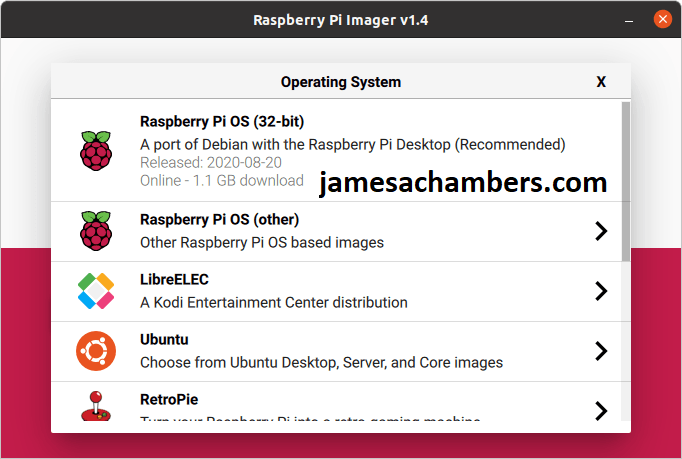
Ahh, the benefits of being officially supported! Ubuntu is right there on the list waiting for us. Select the Ubuntu option and you will get the different choices of flavors/architectures. There’s Ubuntu Desktop, Ubuntu Server, and Ubuntu Core in various forms of 64-bit (arm64) and 32-bit (armhf).
If you want to use the out-of-the-box Ubuntu Desktop edition you need to use the 64 bit Ubuntu 20.10 image as they never made a 20.04 desktop version for some reason. This really isn’t usually a big deal though because you can always choose the “Server” version and install Ubuntu’s desktop environment later with:
sudo apt install ubuntu-desktopOnce you’ve selected the edition you want go ahead and pick the “Choose SD Card” option and write the image. Despite not being a SD card my USB mass storage devices showed up anyway (writing the guide I used a StarTech adapter and a Kingston A400 SSD).
I’m sure some of you will manage to find unusual devices and configurations that may not show up in this tool. It doesn’t appear to show “fixed drives” that are physically installed in your machine. Regardless if it is causing a headache you may need to do it the old fashioned way and download the image from the main Ubuntu site and write the image using your favorite imaging tool instead.
Modifying Ubuntu for USB Booting
We need to make some changes to the Ubuntu drive we just created before we boot from it. Make sure your Pi is powered on and booted into Raspbian then plug in your newly imaged Ubuntu drive. We are going to make the changes using the Pi.
Find and Mount Storage Device
First let’s find your storage device using the command:
lsblk
This will show you all the storage devices attached to your system:
NAME        MAJ:MIN RM   SIZE RO TYPE MOUNTPOINT
sda           8:0    0 119.2G  0 disk
├─sda1        8:1    0   256M  0 part
└─sda2        8:2    0   2.8G  0 part
mmcblk0     179:0    0  59.5G  0 disk
├─mmcblk0p1 179:1    0   256M  0 part /boot
└─mmcblk0p2 179:2    0  59.2G  0 part /
Your SD card will always start with mmcblk so you can rule that one out. That leaves sda as the only other disk device on the system. This will be the same for most of you but depending on what type of drive and storage adapter you use this can vary. You can substitute whatever yours is in place of /dev/sda in these instructions going forward. If yours is sdb use /dev/sdb. If it’s nvme0 use /dev/nvme0, etc.
In my output under the “MOUNTPOINT” column you can see it is blank. This means the drive isn’t mounted on my system. My mmcblk0p1 mountpoint though is not blank and is “/boot” as an example of a non-blank mountpoint. If you are using the full “Desktop” version of Raspbian it may have automatically mounted your drive and created 2 shortcuts on your desktop that will take you to the files. If your mountpoint is not blank and has something like /media/pi/writable go ahead and unmount them now using the following commands substituting the mountpoint listed for your drive:
sudo umount /media/pi/writable
sudo umount /media/pi/system-boot
Now we are going to create two mountpoints and mount the Ubuntu drive. Use these commands substituting your own drive it is not /dev/sda:
sudo mkdir /mnt/boot
sudo mkdir /mnt/writable
sudo mount /dev/sda1 /mnt/boot
sudo mount /dev/sda2 /mnt/writable
Once you have mounted everything correctly your lsblk command’s output should look like this with the mountpoint field now populated:
NAME        MAJ:MIN RM   SIZE RO TYPE MOUNTPOINT
sda           8:0    0 119.2G  0 disk
├─sda1        8:1    0   256M  0 part /mnt/boot
└─sda2        8:2    0   2.8G  0 part /mnt/writable
mmcblk0     179:0    0  59.5G  0 disk
├─mmcblk0p1 179:1    0   256M  0 part /boot
└─mmcblk0p2 179:2    0  59.2G  0 part /
Modify Mounted Partitions – Option A – Automated Script
If you just want to get your Ubuntu partition bootable I have made an automated script to do this. As long as you have mounted the partitions as /mnt/boot and /mnt/writable the script will make the necessary changes for Ubuntu 20.04 / 20.10 to boot! The source code for the script is available at https://github.com/TheRemote/Ubuntu-Server-raspi4-unofficial/blob/master/BootFix.sh
Here is a one liner to run the script:
sudo curl https://raw.githubusercontent.com/TheRemote/Ubuntu-Server-raspi4-unofficial/master/BootFix.sh | sudo bash
You may also download it for inspection (such as nano BootFix.sh or opening it in the Text Editor if you are using Desktop Raspbian) with:
curl https://raw.githubusercontent.com/TheRemote/Ubuntu-Server-raspi4-unofficial/master/BootFix.sh -O BootFix.sh
chmod +x BootFix.sh
nano BootFix.sh
To execute the script use:
sudo ./BootFix.sh
As long as you mounted your partitions correctly it will modify the partition and tell you that it was successful. Now unmount your partitions with the following commands:
sudo umount /mnt/boot
sudo umount /mnt/writable
You may now shut down your Pi and remove the SD card from the Pi leaving just the USB mass storage device plugged in. Reconnect the power.
Modify Mounted Partitions – Option B – Manual Instructions
See bottom of the article for the manual instructions section
First Boot
If all went well the system should boot up into Ubuntu’s logon screen! The default credentials are:
Username: ubuntu
Password: ubuntu
Before logging in for the first time you will be forced to select a new password. Once you have done that you will be fully logged in!
Important Note: Upon logging in for the first time if the Pi is connected to the internet Ubuntu will immediately/soon start a lengthy update process via snapd and apt.  This can be annoying since you'll be ready to start configuring the system and if you do an apt install it will halt and wait for the updates to finish.

It may seem like they're stuck, but if you use the 'top' command you will see all sorts of apt/package/update/extraction related activity happening.  Even on my 8 GB Pi and a gigabit fiber connection these took a good 20 minutes or so before my CPU activity went back to 0 and the apt lock released.

I highly recommend letting these finish and not yanking the power on the Pi / forcing a reboot / trying to kill the processes.  It will often cause a ton of very nasty apt and dpkg problems to the point where it's easier to start over from a fresh image than try to fsck and apt install --fix-broken your way out of it  Try to do other necessary configuration that doesn't involve apt in the mean time and let these finish in the background.
Once the patching is finished your shiny new Ubuntu 20.04 system is fully ready to use!
Manual Instructions
These are the manual instructions to recreate what the automated script does. If you used the automated script you don’t need to do anything further in this section unless you want to understand more about how it works or you want to do the process manually.
Decompress the kernel
We need to decompress the kernel as we will be changing the way the Pi is booting. Ubuntu uses u-boot by default and we will be switching away from that. We can do this with the following command:
zcat -qf "/mnt/boot/vmlinuz" > "/mnt/boot/vmlinux"
Update config.txt with correct parameters
Now let’s update /mnt/boot/config.txt with the parameters we need to load the decompressed kernel. Open up config.txt with nano with:
sudo nano /mnt/boot/config.txt
Change the [pi4] section to the following contents:
[pi4]
max_framebuffers=2
dtoverlay=vc4-fkms-v3d
boot_delay
kernel=vmlinux
initramfs initrd.img followkernel
Create script to automatically decompress kernel
We are going to create a script to automatically decompress the kernel. If we don’t do this we have to decompress it every time Ubuntu updates. This particular part of the script was not written by me and was found at the post on the Raspberry Pi forums by egrechko.
First let’s create the decompression script. Open up a new file with nano using:
sudo nano /mnt/boot/auto_decompress_kernel
Paste the following contents:
#!/bin/bash -e
# auto_decompress_kernel script
BTPATH=/boot/firmware
CKPATH=$BTPATH/vmlinuz
DKPATH=$BTPATH/vmlinux
# Check if compression needs to be done.
if [ -e $BTPATH/check.md5 ]; then
   if md5sum --status --ignore-missing -c $BTPATH/check.md5; then
      echo -e "\e[32mFiles have not changed, Decompression not needed\e[0m"
      exit 0
   else
      echo -e "\e[31mHash failed, kernel will be compressed\e[0m"
   fi
fi
# Backup the old decompressed kernel
mv $DKPATH $DKPATH.bak
if [ ! $? == 0 ]; then
   echo -e "\e[31mDECOMPRESSED KERNEL BACKUP FAILED!\e[0m"
   exit 1
else
   echo -e "\e[32mDecompressed kernel backup was successful\e[0m"
fi
# Decompress the new kernel
echo "Decompressing kernel: "$CKPATH".............."
zcat -qf $CKPATH > $DKPATH
if [ ! $? == 0 ]; then
   echo -e "\e[31mKERNEL FAILED TO DECOMPRESS!\e[0m"
   exit 1
else
   echo -e "\e[32mKernel Decompressed Succesfully\e[0m"
fi
# Hash the new kernel for checking
md5sum $CKPATH $DKPATH > $BTPATH/check.md5
if [ ! $? == 0 ]; then
   echo -e "\e[31mMD5 GENERATION FAILED!\e[0m"
else
   echo -e "\e[32mMD5 generated Succesfully\e[0m"
fi
exit 0
Create apt script to call kernel decompression script automatically
This is a one liner to create a script to call the auto_decompress_kernel script:
echo 'DPkg::Post-Invoke {"/bin/bash /boot/firmware/auto_decompress_kernel"; };' | sudo tee /mnt/writable/etc/apt/apt.conf.d/999_decompress_rpi_kernel
Verify Drive Performance
You can make sure everything is running correctly (and as fast as it should be) by running my quick storage benchmark. You can run the benchmark with the following one-liner:
sudo curl https://raw.githubusercontent.com/TheRemote/PiBenchmarks/master/Storage.sh | sudo bash
This will give you a score you can compare to the other Raspberry Pi Storage Benchmark results and make sure that you are getting an equivalent speed to your peers with the same device!
Fix (some) USB Adapter Problems Using Quirks
Some storage adapters don’t work very well with the Raspberry Pi 4. There is an option that can get a lot of them working using quirks. If your Ubuntu is booting to emergency mode but not in normal mode it’s worth giving quirks a try. This lowers performance, but it’s still much faster than a SD card and your adapter won’t go to waste.
To find out the quirks mode string to use we need to find the device ID string for your adapter and then add an entry to cmdline.txt telling the kernel to apply them on boot.
Find Your Adapter
To apply the quirks we first need to get the adapter id. We will use the sudo lsusb command:
$ sudo lsusb
 Bus 003 Device 001: ID 1d6b:0002 Linux Foundation 2.0 root hub
 Bus 002 Device 002: ID 174c:55aa ASMedia Technology Inc. Name: ASM1051E SATA 6Gb/s bridge, ASM1053E SATA 6Gb/s bridge, ASM1153 SATA 3Gb/s bridge, ASM1153E SATA 6Gb/s bridge
 Bus 002 Device 001: ID 1d6b:0003 Linux Foundation 3.0 root hub
 Bus 001 Device 002: ID 2109:3431 VIA Labs, Inc. Hub
 Bus 001 Device 001: ID 1d6b:0002 Linux Foundation 2.0 root hub
On line 2 we can see my ASM1051E SATA 6Gb/s bridge adapter (it’s the known working StarTech.com 2.5″ SATA to USB 3.1* adapter). You will see something very similar to mine when you run the command and it shouldn’t be too hard to figure out which device it is. If you need more information add a -v switch to make the command sudo lsusb -v. This can sometimes add some additional details to make it easier to figure out which one is your adapter.
If you’re still not sure, we have another command that between the two that can narrow things down. Type / paste the following:
sudo dmesg | grep usb

 [0.828535] usb usb3: New USB device found, idVendor=1d6b, idProduct=0002, bcdDevice= 4.19
 [0.828568] usb usb3: New USB device strings: Mfr=3, Product=2, SerialNumber=1
 [0.828597] usb usb3: Product: DWC OTG Controller
 [0.828620] usb usb3: Manufacturer: Linux 4.19.75-v7l+ dwc_otg_hcd
 [0.828644] usb usb3: SerialNumber: fe980000.usb
 [0.830051] usbcore: registered new interface driver uas
 [0.830182] usbcore: registered new interface driver usb-storage
 [0.836488] usbcore: registered new interface driver usbhid
 [0.836511] usbhid: USB HID core driver
 [0.971598] usb 1-1: new high-speed USB device number 2 using xhci_hcd
 [1.154217] usb 1-1: New USB device found, idVendor=2109, idProduct=3431, bcdDevice= 4.20
 [1.154254] usb 1-1: New USB device strings: Mfr=0, Product=1, SerialNumber=0
 [1.154281] usb 1-1: Product: USB2.0 Hub
 [1.301989] usb 2-1: new SuperSpeed Gen 1 USB device number 2 using xhci_hcd
 [1.332965] usb 2-1: New USB device found, idVendor=174c, idProduct=55aa, bcdDevice= 1.00
 [1.332999] usb 2-1: New USB device strings: Mfr=2, Product=3, SerialNumber=1
 [1.333026] usb 2-1: Product: ASM105x
 [1.333048] usb 2-1: Manufacturer: ASMT
 [1.333071] usb 2-1: SerialNumber: 123456789B79F
This is the dmesg log showing the hardware detection as hardware is activated on the Pi. If your log is really long you can generate fresh entries by just unplugging a device and plugging it back in and running the command again. Here we can clearly see that the ASM105x is what our StarTech adapter is being detected as.
Now we can go back to our first lsusb command and we want the 8 characters from the ID field that comes right after the Device:
Bus 002 Device 002: ID 174c:55aa ASMedia Technology Inc. Name: ASM1051E SATA 6Gb/s bridge
Our adapter’s ID is: 174c:55aa
Applying Quirks
To apply the quirks to our USB adapter we are going to edit /boot/firmware/cmdline.txt. Type:
sudo nano /boot/firmware/cmdline.txt
We are going to add the following entry into the very front of cmdline.txt:
usb-storage.quirks=XXXX:XXXX:u
In place of the X’s above you will put in your adapter’s ID that we got before. With the example commands I gave above mine would look like this: usb-storage.quirks=174c:55aa:u. After this my cmdline.txt looks like this (everything should be one continuous line, no line breaks!):
usb-storage.quirks=174c:55aa:u dwg_otg.lpm_enable=0 console=serial0,115200 console=tty1 root=LABEL=writable rootfstype=ext4 elevator=deadline rootwait fixrtc
Now reboot the Pi. If the Pi fails to boot you can plug the SD card into the computer and go to /boot/cmdline.txt and undo the change we did so you can boot back in with your SD card.
Verifying Quirks
Once you have rebooted after changing cmdline.txt we can verify the quirks have been applied by doing another dmesg | grep usb command:
sudo dmesg | grep usb
 [1.332924] usb 2-1: New USB device found, idVendor=174c, idProduct=55aa, bcdDevice= 1.00
 [1.332957] usb 2-1: New USB device strings: Mfr=2, Product=3, SerialNumber=1
 [1.332983] usb 2-1: Product: ASM105x
 [1.333006] usb 2-1: Manufacturer: ASMT
 [1.333028] usb 2-1: SerialNumber: 123456789B79F
 [1.335967] usb 2-1: UAS is blacklisted for this device, using usb-storage instead
 [1.336071] usb 2-1: UAS is blacklisted for this device, using usb-storage instead
 [1.336103] usb-storage 2-1:1.0: USB Mass Storage device detected
 [1.336479] usb-storage 2-1:1.0: Quirks match for vid 174c pid 55aa: c00000
 [1.336611] scsi host0: usb-storage 2-1:1.0
This time we can see in dmesg that UAS was blacklisted for the device and it has loaded with the usb-storage driver instead. This driver tends to be more compatible with the “problematic adapters” but the performance is usually significantly lower. It’s definitely worth a try though as some adapters do better with the quirks performance-wise. The only way to know for sure is to run a benchmark (see “Verify Drive Performance” section).
Other Resources
I compiled the 2022 Raspberry Pi Storage benchmarks which shows the fastest storage devices for the Pi
For easy headless imaging (does support Ubuntu) check out my Headless Raspberry Pi configuration guide
To find out where to get the 64 bit version of Raspberry Pi OS: where to get the 64 bit Raspberry Pi OS image
To find out how to add a UPS backup battery to your Pi check out my UPS for Raspberry Pi guide


Hi I’m having a problem where Ubuntu just wont seem to boot. Nothing happens on the pi itself and a new connected device doesn’t show up on my network.
I’ve tried plugging it into a desktop PC and it just displays a black screen with a blinking white cursor.
I’m using the Startech cable you recommended but just to check if it was the problem, I tried running Raspbian on it which worked just fine when USB booting.
Any ideas what the problem might be? I’m sure I’ve followed all the steps correctly.
Thanks in advance!
Hey Josh,
You did a lot of good testing here to narrow things down. The StarTech cable is definitely fine and running Raspbian rules a lot of stuff out too.
Which version did you try to do? Was it the 20.10 desktop image? It almost just sounds like a bad image. Have you tried burning the 20.10 desktop image again?
Ah I should have specified I using 20.04, and tried burning it twice to no avail. Have since tried 20.10 to see if it would make a difference and it seems to be having the same problem.
I’ve been using the Raspberry Pi imager and so I suppose I could try doing it manually with another program if that might help?
Thanks for your help!
Hey Josh,
It’s definitely worth a try. I do recall someone else in the past having difficulty with the Raspberry Pi imager tool and then it worked for them manually. Typically it’s the rpi-imager that fixes it but in your case yes let’s try manually imaging it!
Ah forgot to mention it was the server image for both versions.
Hey Josh,
I uploaded a new version of BootFix.sh here as well that may help if you want to give it a try!
Hi,
Your step by step tutorial is great.
I only have question regarding overclocking. After running your script and restarting things from SSD drive (UBUNTU 20.10)
it seams that my “overclocking” was erased or changed to default.
I used to had settings shown below in my “config.txt”:
#Overcloocking setupover_voltage=4
arm_freq=2000
gpu_freq=650
Where should I make changes to get my overclocking active again?
Hey EBR,
The script overwrites your config.txt to make the changes necessary to boot. The config.txt is located on the “boot” volume or in /boot/firmware/config.txt on the SSD. Simply add those lines back in there and reboot to restore your overclock!
Thank You very much.
1)
I already found it in /boot/firmware. I have changed both of the files:
/boot/firmware.config.txt/boot/firmware.usrcfg.txt
Since I was not sure which one is more appropriate. I remember from the past that suggestion was for “usrcfg” file…
but not sure is better overall ?
2)
The only thing I did noticed my system is using a bit more load than before.
Before (htop relevant) it was on average–> 0.35 0.30 025 (htop)
Now after the changes including overclocking –> 1.15 1.10 1.05 (htop)
I’m running the same configuration where my UBUNTU server only acts as SERVER for:
– SNORT NIDS
– PIHOLE server
Even my load is not to high…..Are there maybe some general optimizations (“patches”) possible or required to reduce the “load numbers” as they were before switching from SD card to SSD disc bootup ?
Any advise would be more then welcomed… And once again thank You for the time and very fast response.
BR, EBR
Hey EBR,
No problem at all! I think I can help with the other pieces too.
I believe the usrconfig in there means “user config”. I’d just make changes like overclocking in the main firmware.config.txt file (theoretically). It’s possible that during updates it might replace the system wide config and leave the usrconfig alone (or vice versa) so if your changes start disappearing you can try putting them in the other config file.
This would be the only concern I would have. Either file should work but firmware updates through apt-get dist-upgrade might replace some of them potentially so if that happens switch the lines into the other file. That may be why Ubuntu is calling it the “user config” so that it doesn’t get replaced during updates but I couldn’t find the documentation on it in a quick search so you may have to experiment.
For the CPU usage piece I have an article I’m writing about this but when you switch from a SD to a SSD it ends up using about 1-2% of your CPU polling insanely fast over and over for the SD card slot to have a card inserted. There’s two ways to fix it. The first way is that you can plug the SD card back in after it boots up on the SSD. You should immediately see it drop back to 0% usage. The second and better solution is to add this line to config.txt:
dtparam=sd_poll_onceThis tells the Pi not to poll for the SD card over and over. Once you put that in config.txt and reboot the Pi it should take care of your CPU usage!
Hi again,
Your reply rate is outstanding ! 🙂
1)
Yes I think “user config” is something like on the “router”… when You need to preserve configuration(s)
after firmware changes… So for now I will have duplicate settings in both files…and will pay attention when upgrading. I will let You know how it worked.
2)
dtparam=sd_poll_onceThank You for the “heads up”
I will test this and let You know if I run on any issues…
——————————————————————–
Once again THANK YOU for such a great support and all the help !
BR, EBR
Hey EBR,
Yes, precisely! That is what I believe is going on, basically a separate configuration file meant for users to make persistent configuration changes that can survive updates exactly like a enterprise/high-end router would have. This seems to be an Ubuntu/u-boot thing that they have split them up like this and I don’t think I’ve seen any other Pi OS that has this type of a configuration but maybe there’s some more out there (that probably also use u-boot).
I had some better luck with my web searches today after trying to find some documentation again and at least found an article on usefulramblings that clarifies that this is indeed the file meant for you to put your changes in.
It looks like this was a 20.04 change. I think you’re on the right track. I’m excited to see how your testing turns out!
Hi, James
First of all I tried to reply here few times.. but I can’t se my reply published.. all goes well but when I refresh Your page nothing is shown.. like I didn’t reply at all (so if You already got my reply.. please ignore this one)
1)
For the first subject:
/boot/firmware.config.txt
/boot/firmware.usercfg.txt
It is just like we discussed. If I remove “overclocking lines” from /boot/firmware.config.txt and leave it only at /boot/firmware.usercfg.txt, I still get my CPU “overclocked” when I reboot. If I remove “overclocking lines” also from /boot/firmware.usercfg.txt, my CPU goes to idle values after reboot. So I can confirm it works like we expected. For now I will leave duplicate setting in both files (just in case)
2)
“dtparam=sd_poll_once”
After adding this line.. My load was back to same values as before. Once gain THANK YOU soo MUCH !
3)
The only unusual thing I noticed is that sometimes my load is getting high even nothing is running xfce causing high system load ..). If I reboot it, it works again OK for while (there is no rule how long it takes to start with higher load again..). If You have any advice for this subject as well … That would be great.., since You are expert on this field as I can see..
Take care !
Hey EBR,
Sorry about that! I checked the spam filter and Akismet did indeed eat your earlier replies. I marked them as “Not Spam” to hopefully train it to be smarter in the future!
I’m glad you replied again and got through since this is good news! I’m super glad the sd_poll_once trick got your CPU usage under control!
That is interesting about the XFCE load. Hopefully that is a bug that will be addressed in a near-term apt upgrade. Thanks a ton for letting us know how it all is going!
Thanks James,
You are doing a great job and Your reply rates are AMAZING..
Keep on with the good work and I will let You know how I SOLVED that bug (when I have 100% working solution..)
Enjoy Your Sunday.
Hey EBR,
Thank you again for the kind words! I feel like I have not lived up to that reputation this weekend as a lot of “real life” stuff was going on. I have a block of time hard scheduled today to get back to it here and get the Ubuntu fixes out!
Greetings James!
Read your tutorial a couple of times and the instructions are very detailed. Well done.
Just so I don’t get ahead of myself with the installation, can I confirm that Ubuntu Server 20.10 is indeed less hassle to install and we can skip this entire tutorial entirely and just update the rpi-eeprom and be done with it?
I have never install Ubuntu on the pi before and I read that Rob mentioned about extending the writable partition on the SSD. How does one actually do it if you don’t mind me asking?
As for the default boot order of 0xf41, would you think 0xf14 will also work if I would want the pi to boot from usb first then fallback to sd card?
Hey Simon,
Sorry for the late reply. You can absolutely skip this tutorial if you are using 20.10! It should expand to fill your hard drive automatically so you shouldn’t have to mess with this step unless the process fails for some reason (happens on some types of drives and capacities but most people shouldn’t experience it).
Hi James:
Thanks for the guide.
regarding to SSD filesystem.
I did use raspberry Pi imager software to select Ubuntu server 20.04 into SSD.
Should I do Resizing Filesystem of SSD ?
Br,
Leo Yang
Hey Leo,
This should be taken care of automatically for you. The initial Ubuntu setup script through cloud-init includes a step to expand the storage. The only time you should have to do it is if the operation fails on your drive for some reason (compatibility issues, etc).
I would give it a try and not worry about it unless the automatic resize fails!
I wish when people would put up instructions like this they would put headless instructions. In my case I don’t know whether my inability to connect is due to a problem or if there is a configuration I need to make from Raspian to to the Ubuntu boot volume to get SSH enabled. I did put the SD card back in and drop an SSH file like you do with Raspian, but while I see the IP address, I can’t get connected via PuTTY.
Hey Chris,
So if you followed these instructions the SD card doesn’t do anything at all anymore. You can remove it completely. The whole point of using native USB mass storage booting is that you will not need to use the SD card in any way. This is why creating the .ssh file or anything else on it won’t change anything. It no longer boots from it or even looks at it basically!
There are no instructions for headless because they are the same, and it sounds like you’re 90% of the way there already. You just need to do what you’re already trying to do on the SSD’s boot volume instead of the SD card and create the “ssh” file there. You should see the similar config.txt files on the “boot” volume if you plug your SSD into a computer you would see on the SD card.
You didn’t mention if you had set up SSH booting for Ubuntu before using a SD card or if you just jumped straight to Ubuntu but some of your phrasing makes me think you’re also asking how to set up SSH booting on Ubuntu altogether. I believe the empty “ssh” file trick on the boot volume works for the current versions but in the past and on x86_64 versions often openssh-server isn’t even installed and you have to install it with apt. If you’re still having trouble try with the “server” version for a headless setup as it’s designed for it. Either way, you may want to set it up on the SD card first to make sure you’re configuring it correctly but the changes will be exactly the same for the SSD setup.
Give that a try and let us know!
the kenel decompression start script mentions /boot/firmware/auto_decompress_kernel but you create the file under /mnt/boot/auto_decompress_kernel (which is later /boot/auto_decompress_kernel) shouldnt it be under /mnt/boot/firmware ?
Hey ghry,
In this case no. The /boot/firmware folder is the name of the folder when you are booted inside Ubuntu but it actually mounts the boot partiton there.
We are mounting the boot partition in /mnt/boot specifically instead of /boot/firmware which is the Ubuntu mountpoint for the same folder! Basically same files, different mappings.
I wanted to point out that this guide only worked for me after I read and changed the boot order after reading the comment pasted below.
I am using a pi4 8gb and tried installing ubuntu server 20.10 on a Kingston a400 120gb ssd
CHAD CORBINJANUARY 19, 2021 AT 9:06 AM
Thanks so much for this tutorial! Confirmed that Ubuntu MATE 20.10 also boots from USB natively (maybe not surprising to many). Also, may be obvious to others, but I still had to:
sudo nano /etc/default/rpi-eeprom-updateFIRMWARE_RELEASE_STATUS=”stable”
sudo rpi-eeprom-update -a
sudo -E rpi-eeprom-config –edit
BOOT_ORDER=0xf41
under Raspberry Pi OS before the Pi would boot to USB. The “rpi-eeprom-config” change was mentioned in the previous tutorial, but missing from this one.
Now booting successfully using the Argon One M.2 case and Samsung 860 EVO M.2 SSD.
One issue I’ve encountered (may be specific to the Argon One or may be common to USB boot in general) is that the Pi will freeze whenever it is put into suspend (automatically through power management, or manually from a menu), requiring a hard reset. I haven’t confirmed if this is the case with USB boot generally.
Thanks Norman!
Some people may even have to go as far as even using the recovery image to get their firmware to flash all the way up to date and get the correct boot options.
This is another thing that has came up a lot in my more generalized USB booting tutorial as well!
Hi James,
I am receiving my Pi4 very soon. Do you think this is still necessary to go through the firmware process for recently produced Pi?
If Ubuntu Mate is natively bootable from USB should, why is not it the same for Ubuntu Server 20.10?
In short, I would great if I could just prepare the image on the SSD and just plug it to run the OS.
Thanks for the great article.
Hey Olivier,
That’s a good question! The last person I spoke with a few weeks ago in the comments that got a new one did end up needing to update theirs. It’s only a matter of time though before new ones start coming with it up to date (at least up to date enough to USB boot without needing further updates)!
If you have to update it let us know and if it’s up to date also let us know!
I bought mine just before Christmas and it came with the Sept 02 version of the firmware. I had to go into the raspi-config and enable the USB booting, to get it set properly for that, no firmware update was needed.
Thanks for the update Stephen, it sounds like people are starting to get Pis with the latest firmware!
I’ll let people know going forward that some people have started receiving updated ones. Hooray!
Sorry did not have time to update the thread.
Same here, I had the latest critical firmware. I took the time to update it to the latest stable, just in case I got some issue with Ubuntu 20.10.
Overall, it has been easy. Too bad Pi 4 does not come with the SSD boot enabled out of the box.
Forgot to mention I bought the Samsung T5 specifically because of its very low consumption (after reading the test on AnandTech).
At the moment, no issue running the Pi 4 with just a 5V-3A power supply. Still need to put a real fan instead of the heatsinks
Hey Olivier,
That’s fantastic! That article you posted does something we already do in this tutorial. We use rpi-eeprom-update to update your firmware as well. Changing from critical to stable is necessary.
You’ve used the exact same tool (rpi-eeprom-update) to flash an updated version of the EEPROM to the chip. Doesn’t matter if you do this in Raspbian or Ubuntu now! It’s the exact same process (and indeed even the very same utility)!
Basically the changes you posted from that article have nothing to do with Ubuntu and can be done in Raspbian as well. If you take out your Ubuntu imaged drive completely and try to boot fresh with a different OS it will still work. You’ve modified the Pi’s EEPROM chip and it doesn’t matter what OS you run now if that makes sense. This is a permanent hardware-level OS-independent change and it won’t change unless you follow the same process and reflash the firmware chip.
Just wanted to clarify what was happening here since if you followed my tutorial you are flashing the bootloader EEPROM chip with rpi-eeprom-update twice. There’s only one EEPROM chip and they didn’t put a separate “Ubuntu” EEPROM chip, nor does this linked tutorial modify any files (bootconf.txt is only used to generate the bootloader, not stored anywhere on Ubuntu).
This is all very counterintuitive to how Pis have always worked. The reason I had to modify some of the Ubuntu images is because they are broken and they have been for years. I did the same with Ubuntu 18.04. If Ubuntu fixed them no changes should be necessary on any of them as long as you have the updated firmware! 20.10 is the first one *ever* to actually boot without any help other than updating fimrware!
Also, Ubuntu Server 20.10 is bootable. You simply need to use Etcher and put the image on the SSD. Nothing special to do.
Hey Olivier,
Absolutely! The 20.10 image works better in pretty much every way. The Ubuntu 20.04 image on the other hand is a different story. The 64 bit one really needs it’s hand held and I feel like it doesn’t work as well in the end either. This is the image that almost everyone posts problems with!
You still need up to date firmware (bootloader specifically) and this is what most people are going to run into. We’ve been waiting literally years for a working bootable image and 20.10 is it!
Hi james
I’m using Ubuntu 20.04 on Raspi 4
changed from critical to stable,
Using sudo rpi-eeprom-update -a ,the system updated the firmar to 11/12/20
Following your tutorial it seems to me that now just a simple command:
sudo -E rpi-eeprom-config --editwould change the boot sequence permanently in the eprom, WITHOUT :
-any script for auto decompression of the Kernel in boot partition (yours way)
-nor any bootloader expansion an eprom udpate (as suggested from ubuntu site)
When the command is issued (sudo -E rpi-eeprom-config –edit ) , the system answer:
Updating bootloader EEPROM

...

...

EEPROM update pending. Please reboot to apply the update.
So it seems that everything is made for us under the hood.
MAY be that NOW even in ubuntu 20.04 the ssd boot is a matter of few commands.
IS it ?
WHICH are TODAY the differences remained between 20.10 boot and 20.04 boot from usb ?
My idea would be to boot ubuntu 20.04 from SSD
-do I stil need the script for auto decompression of the Kernel in boot partition ?
-May I use only the said command (sudo -E rpi-eeprom-config –edit) and flash the ubuntu image on the SSD and the simply connect&start ?
Hey Guiliano,
That would be great news if they have updated it! The 20.04 one has not been working previously without running the script on it (which creates the auto decompress kernel script). The 20.10 one has been working for a while now!
Did you try 32 bit or 64 bit, and was it desktop or server? That can make a difference as well!
Hi James,
I’m using Raspi4 – 8Gb with with Ubuntu 20.04 (64) server, with fw config set to “stable”:
$ lsb_release -aNo LSB modules are available.
Distributor ID: Ubuntu
Description: Ubuntu 20.04.2 LTS
Release: 20.04
Codename: focal
$ uname -a
Linux ubuntu 5.4.0-1028-raspi #31-Ubuntu SMP PREEMPT Wed Jan 20 11:30:45 UTC 2021 aarch64 aarch64 aarch64 GNU/Linux
$ sudo rpi-eeprom-update
BCM2711 detected
VL805 firmware in bootloader EEPROM
BOOTLOADER: up-to-date
CURRENT: Fri Dec 11 11:15:17 UTC 2020 (1607685317)
LATEST: Fri Dec 11 11:15:17 UTC 2020 (1607685317)
FW DIR: /lib/firmware/raspberrypi/bootloader/stable
VL805: up-to-date
CURRENT: 000138a1
LATEST: 000138a1
$ sudo -E rpi-eeprom-config --edit
Updating bootloader EEPROM
image: /lib/firmware/raspberrypi/bootloader/stable/pieeprom-2020-12-11.bin
config_src: vcgencmd bootloader_config
config: /tmp/tmppsla_wu1/boot.conf
################################################################################
[all]
BOOT_UART=0
WAKE_ON_GPIO=1
POWER_OFF_ON_HALT=0
DHCP_TIMEOUT=45000
DHCP_REQ_TIMEOUT=4000
TFTP_FILE_TIMEOUT=30000
TFTP_IP=
TFTP_PREFIX=0
BOOT_ORDER=0xf41
SD_BOOT_MAX_RETRIES=3
NET_BOOT_MAX_RETRIES=5
[none]
FREEZE_VERSION=0
Following a thread on raspberrypi.org, seems that form 20.04.1, the usb boot feature is implemented into the 20.04 LTS release.
The same user (ptTrR) holds a github project, to cross-compile updated version of the arm64 kernel, up to 5.10
I Uddate the boot config directly with
sudo -E rpi-eeprom-config --editto let the USB boot if there is no SDcad, and on next boot, giving the same command, the config showed updated.
That makes me believe that now the command can update the config without any manual fix.
I take a SSD disk and intalle with rapsiImage an Ubuntu 64 image over it.
I will take a consolle, plug it and see if it can boot without any manual fix.
BR
BAD NEWS !
:-(((((
I tryed to boot from the SSD drive, but the USB system does NOT START.
( Kingston SSD 120GB SATA 3 2.5” + Sabrent USB3 controller)
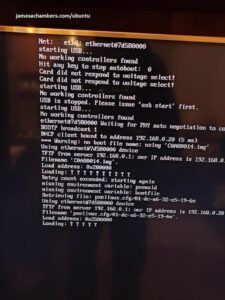
Here is the screenshot of the monitor showing system freeze
As you can see, error messages say:
.......Card did non respond to voltage select!
Starting USB...
Not working controller found
USB i stopped
......
IF I connect the SSD+USB3adapter on a running Raspi4, it seems to work…
This is what I get from CLI in Raspi4
(the SSD was used to install ubuntu and a 16gb swap patition)
Have you got some ideas if it may be a HARDWARE or a SOFTWARE ISSUE ?
$ lsblkNAME MAJ:MIN RM SIZE RO TYPE MOUNTPOINT
loop0 7:0 0 48.9M 1 loop /snap/core18/1949
loop1 7:1 0 48.9M 1 loop /snap/core18/1990
loop2 7:2 0 61.6M 1 loop /snap/lxd/19040
loop3 7:3 0 27M 1 loop /snap/snapd/10709
loop4 7:4 0 61.7M 1 loop /snap/lxd/19206
loop5 7:5 0 27M 1 loop /snap/snapd/11043
sda 8:0 0 223.6G 0 disk
├─sda1 8:1 0 256M 0 part
├─sda2 8:2 0 2.8G 0 part
└─sda3 8:3 0 10.6G 0 part
mmcblk0 179:0 0 29.7G 0 disk
├─mmcblk0p1 179:1 0 256M 0 part /boot/firmware
└─mmcblk0p2 179:2 0 29.5G 0 part /
$ lsusb
Bus 002 Device 002: ID 152d:1561 JMicron Technology Corp. / JMicron USA Technology Corp. JMS561U two ports SATA 6Gb/s bridge
Bus 002 Device 001: ID 1d6b:0003 Linux Foundation 3.0 root hub
Bus 001 Device 002: ID 2109:3431 VIA Labs, Inc. Hub
Bus 001 Device 001: ID 1d6b:0002 Linux Foundation 2.0 root hub
It sounds like it’s not working after all out of the box. Have you tried running my bootfix.sh script on it yet?
I would honestly disregard whatever you have read and try running this guide. I’m not sure about all these other people’s posts and instructions and can only stand behind my own here. From what I’ve seen 20.04 and 20.04.1 need these fixes (I *think* both 32 and 64 bit, but you could try one or the other if you need stick with 20.04, there were differences between the two and how difficult it was to get them to work).
If you want it to “just work” out of the box without any additional fixes I would try 20.10 if you haven’t already!
I think once you can run apt-get dist-upgrade on 20.04 / 20.04.1 the fixes are live but they don’t ship with the base image. Maybe that’s the point of confusion. Did they specify whether the official release images can boot with 20.04 / 20.04.1 or that booting is *now* possible with a fully patched up to date distro? The latter is definitely true, from what I’ve seen it will boot once you fully patch without kernel decompression or other tricks but that the release images still wouldn’t last time I tried it. I’m not sure if you can get a newer image from the Ubuntu official web site than the rpi-imager tool gives you, but I’d be interested to hear where you got your copy. Is it the web site one or is it from rpi-imager?
After a dist-upgrade you can probably delete all the fixes the script implements but I think your issue is the firmware (and by firmware I mean the start.elf files and such on the “boot” partition which BootFix.sh and this guide update manually, not the bootloader firmware which is on a separate independent EEPROM chip) that ships on the “base” Ubuntu images doesn’t have these fixes yet unfortunately! It will eventually, which is why I was very interested in your results, it’s only a matter of time!
It’s possible you have one of the adapters that needs to be ran in “quirks” mode. There’s a section on enabling that in this guide if you want to try to enable it, that has fixed weird SSD / adapter boot issues here before in the past if nothing else is working! Oh wait, I see you’re running the Sabrent USB 3 to 2.5″ SATA adapter. That’s a pretty well known one around here.
I think it is going to be the quirks now that I see the adapter you’re using. All Sabrent 2.5″ SATA adapters are notorious for this. Lots of people have been reporting problems with these here in my more generalized USB booting post. I actually have a couple of these that I used with Raspberry Pi 3’s and they have always been problematic with the Pi 4. Enabling quirks mode has a small performance penalty but otherwise should get it to behave!
Try enabling quirks mode and let’s see if it can boot without any other changes. If it can that means the base image has finally been updated!
thanks James for your kind reply.
Following your link, I found my Sabrent 3.0 USB3.0/SATA Adapter is one of the WORST possible adapter…. It’s a pity…
I’ve just bought YOURS (StarTech USB3S2SAT3CB SATA to USB Cable USB 3.0 to 2.5” SATA III)… it will arrive tomorrow… Let’s see il 20.04.02 works out of the box…
Which other adapter you would suggest as a BEST match with Raspi4 ?
BR
PS
I didn’t catch if you script, get still working IF I update/upgrade the system where there is a new kernel release from Ubuntu, or need a manual fix each time…
Hey Guiliano,
I think that’s a good plan! I’m positive the StarTech adapter won’t give you any trouble on that end (it’s definitely the most popular one at this point).
I’m very curious if it will work without any changes after that, definitely let us know!
Hi James,
BAD news…
I wrote a brand new image 20.04.2 on the SDD from .
Connected the new Startech, but the boot was a FAILURE …
Once again the same message:
…….
Card did non respond to voltage select!
Starting USB…
Not working controller found
USB i stopped
……
I also bought an Ugreen adapter (coming tomorrow) but the problem seems to stay in the 20.04 version.
It is very strange that, with the updated 20.04.02 version, they did not update the boot capabilities …
:-(((
Hi james,
I found something strange…
This is a lsblk output, when I boot from SD card, BUT have the USB connected.
What the program is telling us (AFAIU), is that root partition an boot partion are NOW on the SDD, and NOT on teh SD card….
In a certain way, booting from SD but finding an USB/SDD drive, made the system switch…
Just to be clear, both the SD card and SDD disk have an ubuntu image 20.04.2 over it…
ubuntu@ubuntu:~$ lsblkNAME MAJ:MIN RM SIZE RO TYPE MOUNTPOINT
loop0 7:0 0 48.9M 1 loop /snap/core18/1949
loop1 7:1 0 27M 1 loop /snap/snapd/10709
loop2 7:2 0 61.6M 1 loop /snap/lxd/19040
loop3 7:3 0 27M 1 loop /snap/snapd/11043
loop4 7:4 0 48.9M 1 loop /snap/core18/1990
loop5 7:5 0 61.7M 1 loop /snap/lxd/19206
sda 8:0 0 223.6G 0 disk
├─sda1 8:1 0 256M 0 part /boot/firmware
└─sda2 8:2 0 223.3G 0 part /
mmcblk0 179:0 0 29.7G 0 disk
├─mmcblk0p1 179:1 0 256M 0 part
└─mmcblk0p2 179:2 0 29.5G 0 part
What would you suggest?
The problem is that it is NOT possibile to use your method because
pdate
-StarTEch + Ubuntu 20.10, DOES works out of the box like a charm
-Sebrent + Ubuntu 20.10 , does NOT work (Sabrent is a real piece of …)
-StarTeck + Ubuntu 20.04.02 + Your script does NOT work !!!
You need to patch the bash script at line
if cat "$mntWritable/etc/os-release" | grep -q "Ubuntu 20.04.1"; thenThe new version (20.04.02) si failing this tests, and things get messed up…
the image does not work. I can NOT even connect via ssh, and the device has NO network connection…
Fixing the script, seems to solve the problem (now the ubuntu is performing an unattended upgrade…)
Ran into the same issue. How to ddo the update you suggest?
“You need to patch the bash script at line
if cat “$mntWritable/etc/os-release” | grep -q “Ubuntu 20.04.1”; thenDid everything as above but the network port isn’t seen at all and both lights remain lit when the cables plugged in.
Using a cheapo USB3 drive.
Hey Peter,
Give the latest version a try and it should take care of the network issue for you!
Hey Guilano,
Thanks for the feedback and even the fix, wow! I’ll get this change in today on BootFix.sh. Miles had an issue as well in the replies so I think it’s everyone doing 20.04.2. It looks like the 20.04.2 base images have been updated!
Very good work and thank you!
@Peter
the bash script from James need to be update to check ALSO against the presence of the NEW Ubuntu 20.04.02
Otherwise, the install script will NOT work (because will be NOT recognising the O.S. version string)
Wait for the new version, of apply by hand the fix
@James
I would REALLY recommend a CHANGE in your update procedure.
TLDR
Do NOT use the “stable” firmware version, but ONLY the last “critical” version, supporting USB boot, id est the September 2020 version (as far as today)
A week ago a started testing the last stable firmware. (november 2020)
My Raspy4 8G, uses a Tomcat+Jetty+Postgres+Alfresco+Solr6…
in other words the 8Gb of ram get constantly used, and there is a lot of disk I/O
This was the reason to test the SUB boot + STA
BUT
What discovered is that, moving to the “stable” version of November, the system crashed BADLY.
The disk image get corrupted and a full reinstall is necessary.
This happaned three times.
This happened EVEN unsing ONLY the SD card.
This of course happened also using ONLY the SDD disk.
The crash can eve be reproduced with the Alfresco install procedure..
Previously, using the September “critical” firmware for a full month, resulted in uptime of.. a full month without any crash ! (Well done Raspy!)
BUT now I discovered tha the last critical firmware of September DOES support the usb boot from SATA disk
So I struggled hard to get back the the previous “critical” firmware version, and after two days of Alfresco running, I got NOT a single crash !!!
What I also noticed, is that the system is more responsive and fast with the critical version
It’s really worth the “critical” tag !!!
For *production* level usage, DO not use the “stable” version,
use the CRITICAL one.
Seems to me that “stable” is something more than “beta”, but it is not worth to be installed for production environment.
BR
Giuliano
Hey Giuliano,
I have uploaded the new version of the script and it is live here!
On the firmware release channels I would also definitely recommend staying with critical now if the current version on critical is the one that can USB boot (it wasn’t when I wrote this but it was/is only a matter of time). It gives you some insulation from issues like this.
I’ve updated the article with a strikethrough on changing the release channel and put a warning that you experienced problems serious enough to prompt a full reimage on the “stable” channel and that leaving it on “critical” is recommended now that the “critical” branch firmware is new enough to USB boot correctly. Your sacrifice will not be in vain and will hopefully help others avoid this in the future. Thanks for your follow ups!