
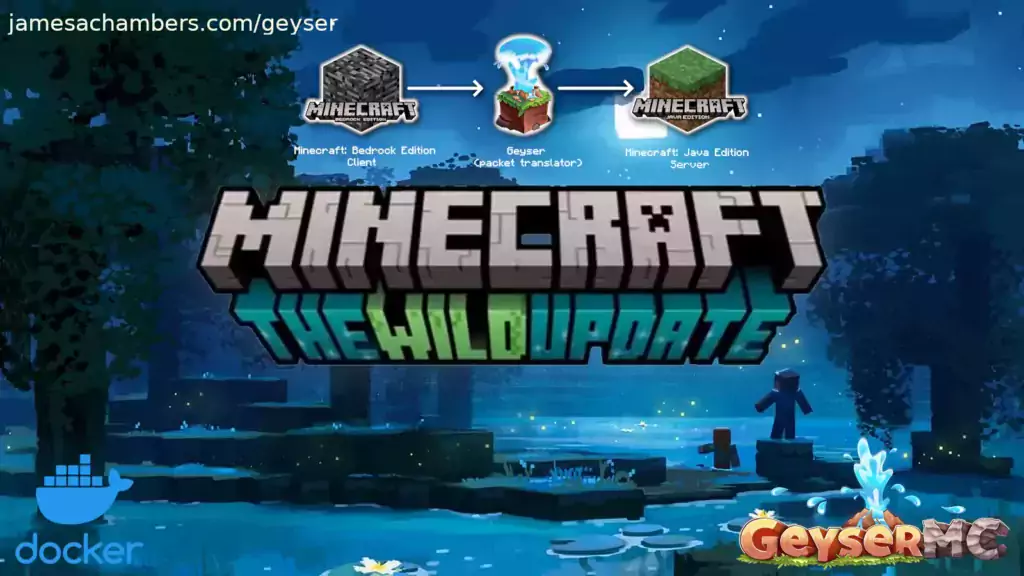
This is a new Docker container to automatically set up and run a Minecraft server that both Java and Bedrock players can connect to! This allows everyone to play on your server no matter which edition of Minecraft you are using. It uses the Geyser and Floodgate plugins to accomplish this.
Since it uses the Paper Minecraft server it also supports any additional plugins that are compatible with Paper / Spigot. This gives you the ability to do many things that are currently impossible to do in Bedrock if you are hosting the official Bedrock dedicated server.
It is fully compatible with my Paper Minecraft Java Server Container and you can swap between these two containers without changing any configuration.
The official GitHub page is located here.
The Docker Hub page for the container is located here.
It’s now possible to convert your worlds between Bedrock and Java versions. Check out my guide on Chunker here for more information.
Features
- Sets up fully operational Minecraft server that allows both Java and Bedrock clients to connect
- Runs the highly efficient “Paper” Minecraft server
- Runs Geyser to allow Bedrock clients to connect and Floodgate to allow them to authenticate with their Bedrock credentials to a Java server
- Plugin support for Paper / Spigot / Bukkit
- Uses named Docker volume for safe and easy to access storage of server data files (which enables more advanced Docker features such as automatic volume backups)
- Installs and configures OpenJDK 18
- Automatic backups to minecraft/backups when server restarts
- Full logging available in minecraft/logs folder
- Updates automatically to the latest version when server is started
- Runs on all Docker platforms including Raspberry Pi
Usage
First you must create a named Docker volume. This can be done with:
docker volume create yourvolumename
Now you may launch the server and open the ports necessary with one of the following Docker launch commands.
With default ports:
docker run -it -v yourvolumename:/minecraft -p 25565:25565 -p 19132:19132/udp -p 19132:19132 --restart unless-stopped 05jchambers/legendary-minecraft-geyser-floodgate:latest
With custom ports:
docker run -it -v yourvolumename:/minecraft -p 12345:12345 -e Port=12345 -p 54321:54321/udp -p 54321:54321 -e BedrockPort=54321 --restart unless-stopped 05jchambers/legendary-minecraft-geyser-floodgate:latest
With a custom Minecraft version (add -e Version=1.X.X, must be present on Paper’s API servers to work):
docker run -it -v yourvolumename:/minecraft -p 25565:25565 -p 19132:19132/udp -p 19132:19132 -e Version=1.17.1 --restart unless-stopped 05jchambers/legendary-minecraft-geyser-floodgate:latest
With a maximum memory limit in megabytes (optional, prevents crashes on platforms with limited memory, -e MaxMemory=2048):
docker run -it -v yourvolumename:/minecraft -p 25565:25565 -p 19132:19132/udp -p 19132:19132 -e MaxMemory=2048 --restart unless-stopped 05jchambers/legendary-minecraft-geyser-floodgate:latest
Using a custom timezone:
docker run -it -v yourvolumename:/minecraft -p 25565:25565 -p 19132:19132/udp -p 19132:19132 -e TZ="America/Denver" --restart unless-stopped 05jchambers/legendary-minecraft-geyser-floodgate:latestSkipping backups on a certain folder:
docker run -it -v yourvolumename:/minecraft -p 25565:25565 -p 19132:19132/udp -p 19132:19132 -e NoBackup="plugins" --restart unless-stopped 05jchambers/legendary-minecraft-geyser-floodgate:latestSkipping permissions check:
docker run -it -v yourvolumename:/minecraft -p 25565:25565 -p 19132:19132/udp -p 19132:19132 -e NoPermCheck="Y" --restart unless-stopped 05jchambers/legendary-minecraft-geyser-floodgate:latestChange number of backups:
docker run -it -v yourvolumename:/minecraft -p 25565:25565 -p 19132:19132/udp -p 19132:19132 -e BackupCount=1 --restart unless-stopped 05jchambers/legendary-minecraft-geyser-floodgate:latestConfiguration / Accessing Server Files
The server data is stored where Docker stores your volumes. This is typically a folder on the host OS that is shared and mounted with the container. I’ll give the usual locations here but if you’re having trouble just do some Googling for your exact platform and you should find where Docker is storing the volume files.
You can find your exact path by typing:
docker volume inspect yourvolumenameThis will give you the fully qualified path to your volume like this:
{
        "CreatedAt": "2022-05-09T21:08:34-06:00",
        "Driver": "local",
        "Labels": {},
        "Mountpoint": "/var/lib/docker/volumes/yourvolumename/_data",
        "Name": "yourvolumename",
        "Options": {},
        "Scope": "local"
}
On Linux it’s typically available at:
/var/lib/docker/volumes/yourvolumename/_data
On Windows it’s at
C:\ProgramData\DockerDesktop
but may be located at something more like
\wsl$\docker-desktop-data\version-pack-data\community\docker\volumes\
if you are using WSL (Windows Subsystem for Linux).
On Mac it’s typically
~/Library/Containers/com.docker.docker/Data/vms/0/
If you are using Docker Desktop on Mac then you need to access the Docker VM with the following command first:
screen ~/Library/Containers/com.docker.docker/Data/com.docker.driver.amd64-linux/ttyYou can then normally access the Docker volumes using the path you found in the first step with docker volume inspect.
Most people will want to edit server.properties. You can make the changes to the file and then restart the container to make them effective.
Backups are stored in the “backups” folder
Log files with timestamps are stored in the “logs” folder.
Plugin Support for Paper / Spigot / Bukkit
This is a “Paper” Minecraft server which has plugin compatibility with Paper / Spigot / Bukkit.
Installation is simple. There is a “plugins” folder on your Docker named volume.
Navigate to your server files on your host operating system (see accessing server files section if you don’t know where this is) and you will see the “plugins” folder.
You just need to drop the extracted version of the plugin (a .jar file) into this folder and restart the container. That’s it!
Some plugins have dependencies so make sure you read the installation guide first for the plugin you are looking at.
A popular place to get plugins is: dev.bukkit.org
Troubleshooting Note – Oracle Virtual Machines
A very common problem people have with the Oracle Virtual Machine tutorials out there that typically show you how to use a free VM is that the VM is much more difficult to configure than just about any other product / offering out there.
It is because there are several steps you need to take to open the ports on the Oracle VM. You need to both:
- Set the ingress ports (TCP/UDP) in the Virtual Cloud Network (VCN) security list
- *and* set the ingress ports in a Network Security Group assigned to your instance
Both of these settings are typically required before you will be able to connect to your VM instance. This is purely configuration related and has nothing to do with the script or the Minecraft server itself.
I do not recommend this platform due to the configuration difficulty but the people who have gone through the pain of configuring an Oracle VM have had good experiences with it after that point. Just keep in mind it’s going to be a rough ride through the configuration for most people.
Troubleshooting Note – Hyper-V
There is a weird bug in Hyper-V that breaks UDP connections on the Minecraft server. The easy workaround for this is that you have to use a Generation 1 VM with the Legacy LAN network driver.
There is a second fix that was shared by bpsimons here. For that fix you need to install ethtool first with sudo apt install ethtool. Next in your /etc/network/interfaces file add “offload-tx off” to the bottom as the issue appears to be with TX offloading.
Here’s an example:
# The primary network interface
auto eth0
iface eth0 inet static
address 192.168.1.5
netmask 255.255.255.0
network 192.168.1.0
broadcast 192.168.1.255
gateway 192.168.1.1
offload-tx off
This can also be done non-persistently with the following ethtool command:
ethtool -K eth0 tx offAdditional Support
The comments section right here is the best place for support. The second best place is the GitHub issues section.
I will add additional documentation based on what problems people are running into / questions people are asking because right now I’m not really sure what those will be yet. Definitely let me know if you need any of these things!


Hey there,
I’m finally getting my server back up and running, and after a reboot, paper updated, and now when connecting, my Minecraft version shows 26.1.2 which is freaking out a bunch of plugins because they’re looking for 1.21.xx
Is there something I need to do to get that fixed? This is the first time this has happened. Maybe something is broken on my server?
Microsoft changed the Minecraft version numbering system. The plugins will need to be updated by the author to use the new version numbering scheme.
For plugins that are actively developed this should already have happened. If the plugin developers are inactive / slow then it may take some time.
I would check to see if there are already updated versions of the plugins in question. The change has been out for a while now so there should be updates for most of them available!
Okay thanks! Looks like I won’t be using DynMap for a while…. It’s the main one I really need to work, but seems like they may be slow to update…
Hey there,
Is the Java Runtime inside the container, or is it based on the host system?
I had a couple of updated plugins erroring telling me that they were compiled using a newer version of Java Runtime. I’ve rolled back to older versions of those plugins, but I’m wondering if I need to update Java inside or outside of the container. If inside, what’s the best way to do it?
Many thanks
Hey Anthony,
Java is actually stored inside the container / image. I do refresh these from time to time.
When is the last time you pulled the container? I last refreshed it about 3 months ago. Pulling the newest version should update the Java being used. Try a:
docker pull 05jchambers/legendary-bedrock-container:latestCould you give that a try and see if it’s new enough here?
Hi James,
Thanks for the reply. I’ve tried pulling the image again and remaking the container, but I’m still getting this message on updated versions of some plugins
[quote]de/oliver/fancynpcs/loaders/FancyNpcsLoader has been compiled by a more recent version of the Java Runtime (class file version 69.0), this version of the Java Runtime only recognizes class file versions up to 65.0[/quote]
For now, I’m holding off on updating those plugins and staying on 1.21.11 =)
Hello Anthony,
Sorry about that! So today I completely updated all the containers from OpenJDK 21 to OpenJDK 25. This should *definitely* fix it this time.
Could you try pulling the latest version and trying again?
Hi James,
Thanks so much. That has cleared all the java errors up
Now I’m going to take a deep breath before migrating to 26.2. Supposedly, the world folder structure is different, so I’m betting a bunch of things will break 😂 I’ll try to get it all running on a second instance before migrating the server proper
Hello Anthony,
That’s great news! As long as you have good backups I am sure you will be successful.
Take care!
Is anybody else having issues with launching the docker containers?
My minecraft instances are not working any more, throwing a lot of error, unable to connect to api addresses like api.geysermc.org, for example
Hey elborderas,
I tried on mine and the download was pretty slow and seemed like I was getting throttled. How many instances are you running? One risk we may run into is if enough requests are coming from a certain IP with their new API (without some sort of additional authentication) you may get blocked / rate limited.
I have not had any reports of this so far but I knew it was possible reading about the API changes. Is it just a generic unable to connect you are getting every once in a while?
Hi James,
Thanks for answering (I missed you did 6 days ago, maybe I am not good at checking the comments here 🙂 )
I am running 3 instances most of the time.
I just tried starting up only one and it worked, so it may be the throttling issue. I will check spinning up the others and see if i can reproduce the errors again.
If they happen, do you know of any alternative to avoid the throttling?
Other servers, or any other option?
Thanks
Hey elborderas,
If you check out the Paper Minecraft downloads service page they mention needing to use a user agent header that clearly identifies what you are.
Right now it is identifying as Google Chrome but I suppose changing that user agent may help (or hurt) with the throttling!