My girlfriend and I are huge fans of the Nintendo Switch and especially The Legend of Zelda: Breath of the Wild. The Switch is praised for its portability but whenever she comes over she brings the Switch but carrying all the accessory was a big pain.
There are over a dozen amiibo figurines that work with Breath of the Wild and can give you very powerful items and abilities. But bring her whole collection of amiibo figures on top of the switch itself became too big of a load. To solve this she found a very compact and protective carrying case that made it very easy to take the Switch around safely.
Mobile Switch Case Solution
After researching many different case options she chose the Nintendo Switch Game Traveler Deluxe System Case*
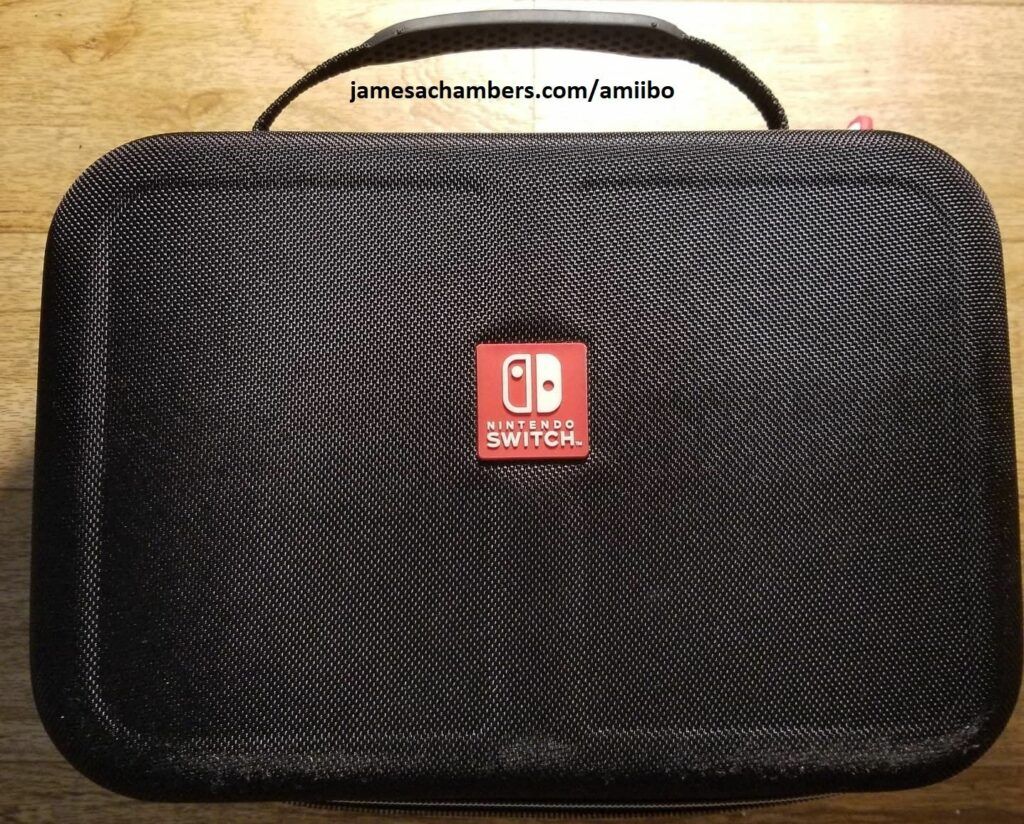
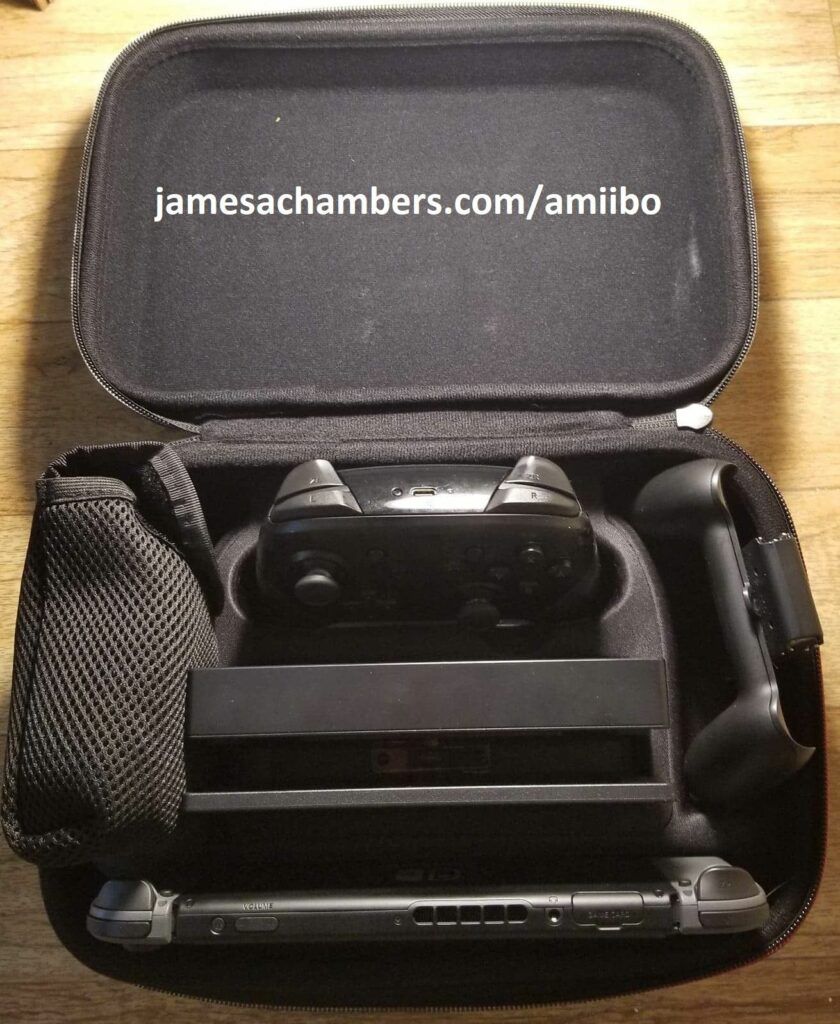
With that problem resolved, we now had to figure out how in the world we were going to transport a dozen amiibos back and forth all the time. Thus, we looked for a way to be able to back up the amiibos so that she could just bring that instead and I was able to discover several other methods. The easiest and cheapest solution is to buy NTAG215 tags from Amazon and back them up using a NFC capable Android phone. The most robust solution is to buy a special chip called a N2 elite or sometimes called “Amiiqo”. I will cover using both of these methods to make working backups of your amiibos in this article.
Solution A – Write your own NTAG215 amiibo backups
Equipment Needed:
- Official Nintendo amiibo – We will be using the official Nintendo Wolf Link amiibo *for this exercise:


- Tags *MUST* be NTAG215!* Not 213, not 216, only NTAG215 *will work. Any other type of tag will immediately be rejected by the Switch or a 3DS.
- NFC capable Android phone – The Samsung Galaxy S8 was used for this article. Check Google to see if your Android phone supports NFC as it is required to be able to communicate with the chips.
- iPhones and iPads will not work at this time because Apple has disabled the NFC chip for everything except ApplePay.
Android is an excellent solution for making backups of your figures because they are extremely durable and portable. They fit nicely in her carrying bag and allow her to leave her amiibo figures safely at home.
The tags featured above are tough plastic that can be written on with a sharpie to label which amiibo is backed up on it. They also can easily be attached to anything.
I recommend a spare keychain as it keeps them all neatly together. They can also easily be put into a safe to protect against fire or theft.
Required Software for amiibo Backups
The best software I have found for writing amiibo backups to NTAG215 chips is called TagMo. This software is not available in the Google Play store at this time but it is still very easy to install.
Step 1: Go to your Android applications menu and choose the Settings app. Now scroll down to “Lock Screen and Security”. Scroll down to the security section and enable “Unknown Sources”. This will allow you to install applications from outside the Google Play store. This step can vary slightly by phone, so if you are having trouble finding this setting then google how to enable packages from unknown sources on your Android model.
Step 2: Download TagMo from your phone’s browser. The latest TagMo is located on GitHub at the TagMo Official Page. Download the latest TagMo.apk file. Once the download completes open it and choose to install.
Step 3: Go to your applications and open TagMo. It will look like this initially:
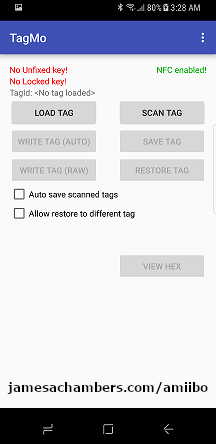
Step 4: Scan your amiibo. Click the “Scan Tag” button and hold your amiibo against the back of the phone. It will detect your amiibo and tell you what it is. In this case, I scanned in Wolf Link and got this:
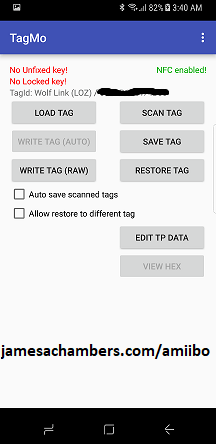
Step 5: At this point your amiibo has been detected and you can actually click “Save Tag” and save a copy of your amiibo to your phone. You can also restore this backup to your amiibo at any time. If you just want a file backup of your amiibo you can stop here. However, if we want to write our amiibo to one of our cool PVC tags, there are a couple more steps we need to do first.
Step 6: At the top of the screen you will see 2 lines in red text that say “No unfixed key” and “No locked key”. We will need to resolve this to be able to back up our amiibo to another tag. We will need to download 2 more files to our phone that will allow us to back up amiibos. Note: I do not host these files and can’t guarantee they will stay around. I have no idea who uploaded them. All I know is that someone much smarter than me figured out these keys and shared them which allow us to back up our amiibos to other tags: Google Drive amiibo Bins File Collection (Keys available at the bottom)
Step 7: In TagMo click the dots in the upper right corner and select the files from your Downloads folder. They will be called “locked-secret.bin” and “unfixed-info.bin”. After this step your TagMo applications red lines should turn green and look like this:
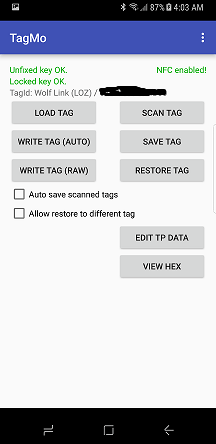
Step 8: Notice that every button in TagMo is now lit up. You are ready to back up your amiibo to a NTAG215. Choose the “WRITE TAG (AUTO)” option. It will ask you to hold up your NTAG215 and will back up the amiibo to the tag.
Backup Complete!
That is it! You have now created a backup tag of your amiibo for safe keeping. You may now test it by holding it over your Switch or 3DS reader and it will read identically to your normal amiibo. You can repeat this process for as many amiibos and tags as you have and create a full set of backups.
Solution B – The N2 Elite or “Amiiqo” chip – amiibo Storage Bank
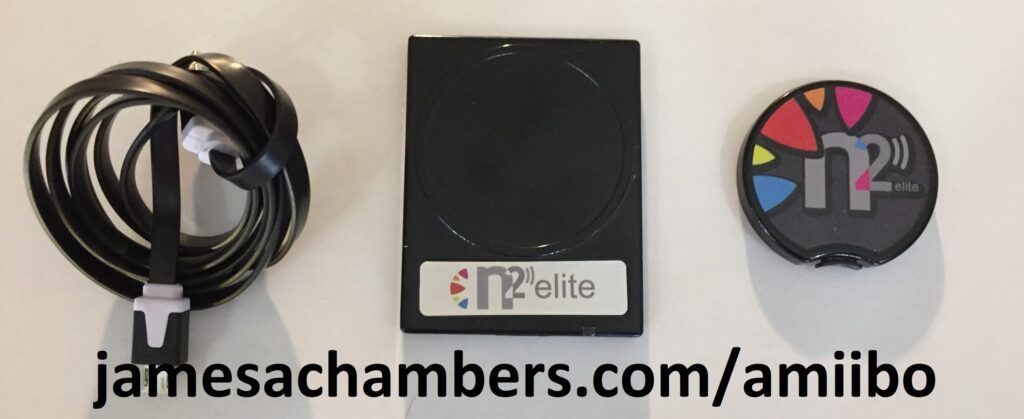
This is the gold standard for backing up amiibos. The chip is so popular now that it has become very difficult to find. With this chip you can use either a PC/Mac/Android to back up all of your amiibos into one chip. A single N2 Elite chip can hold up to *200* amiibos. But the best part about this chip is that it is re-writable. That means if you are for example leveling up Wolf Link you are able to save your progress to this chip.
Solution A tags are not re-writable so if you made progress with an amiibo that wasn’t maxed out you would need to use a new chip. You can switch amiibos using the little button on the bottom of the chip or by using the Android app. If you don’t have a NFC capable Android phone you definitely will want to get the USB reader/writer combo otherwise you will have no way to load your amiibos.
Equipment:
- N2 Elite with USB Reader/Writer
- *OR*
- N2 Elite Standalone (requires Android phone with NFC)
The N2 chip is much cheaper for the version without the USB reader (highly recommended for those of you with a NFC capable Android phone). If you don’t have a NFC capable phone get the version that includes the USB Reader/Write.
Android Instructions
The Android application for the N2 Elite is much better than the Windows/Mac software currently released. It is very easy to use. Follow these steps:
Step 1: Go to your Android applications menu and choose the Settings app. Now scroll down to “Lock Screen and Security”. Scroll down to the security section and enable “Unknown Sources”. This will allow you to install applications from outside the Google Play store. This step can vary slightly by phone, so if you are having trouble finding this setting then google how to enable packages from unknown sources on your Android model.
Step 2: Download the N2 Android application APK from here: N2 Elite Download Page
Step 3: Install the N2 Elite Android application and open it
Step 4: The N2 Elite application will open and is already ready to scan in your amiibo. Hold up your amiibo against the back of the phone. It should read your amiibo within a few seconds and you will see this:
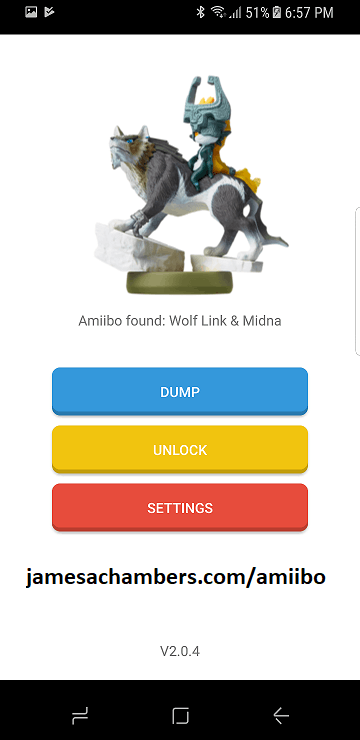
Step 5: Click the “Dump” button to save your amiibo to your phone. You should get a “dumped successfully” message and your backup has been created.
WARNING: I do not recommend using the lock/unlock buttons at all. Leave your original amiibos the way they are. Do not attempt to unlock them. Do not attempt to write to them. If you mess with them you could corrupt them making them useless. Let’s leave the writing for the N2 chip where if we make mistakes we can just try again.
Step 6: Now scan your N2 Elite chip. It will look like this:
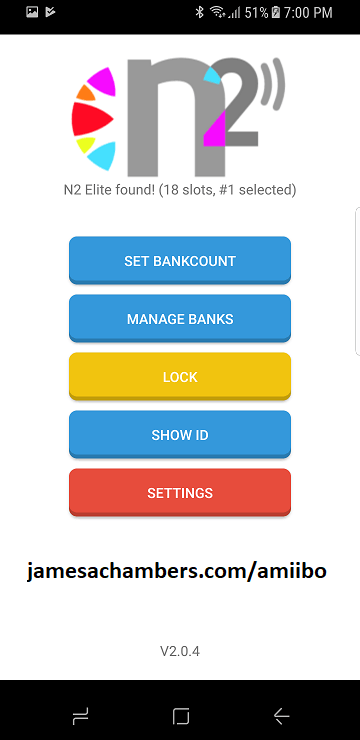
Step 7: The N2 chip has now been read. Go ahead and click “Manage Banks”. You will see the available bank slots on the N2. Choose one of the slots and hold press on it and a menu will pop up. Choose “Select an amiibo”. Navigate to your saved amiibo from Step 5.
Backup Completed!
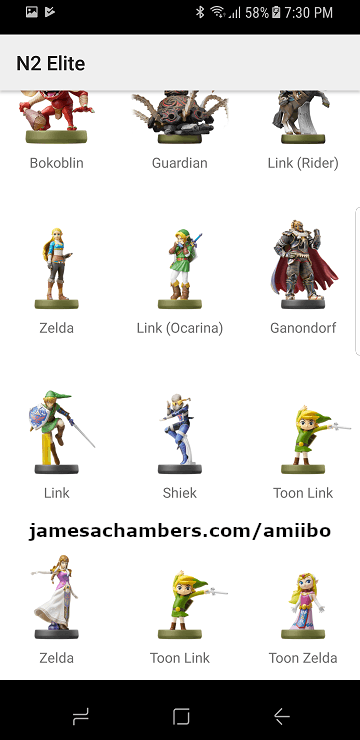
That is it! You should now see your amiibo saved in that slot. It is very easy to change which active amiibo you are using in Android or you can use the press button on the chip itself to cycle through available amiibos. Repeat this process for as many amiibos as you need to back up. If you need more slots, use the “Set Bankcount” option as you have up to 200 slots available. My set of backups looks like this:
PC Instructions
The Windows/Mac application is pretty awful but it does get the job done. Here is how it is used step by step.Step #1: Download and install the USB drivers from the N2 Elite Download Page under the line “PLEASE DOWNLOAD AND INSTALL USB DRIVERS”
Step #2: Next Download the Windows or Mac “N2 Manager” application for the operating system you are using and install
Step #3: Connect the N2 Elite USB reader to your computer
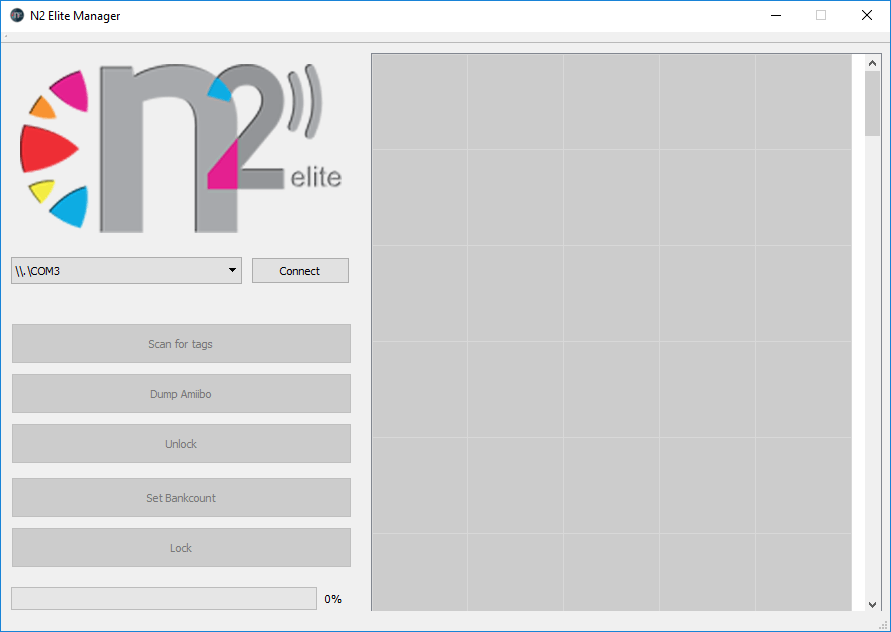
Step #4: Run the N2 Manager program. It will look like this:
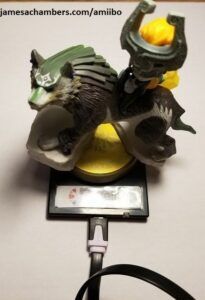
Step #5: Put your amiibo on the reader. Here is Wolf Link mounting the N2 Elite reader:
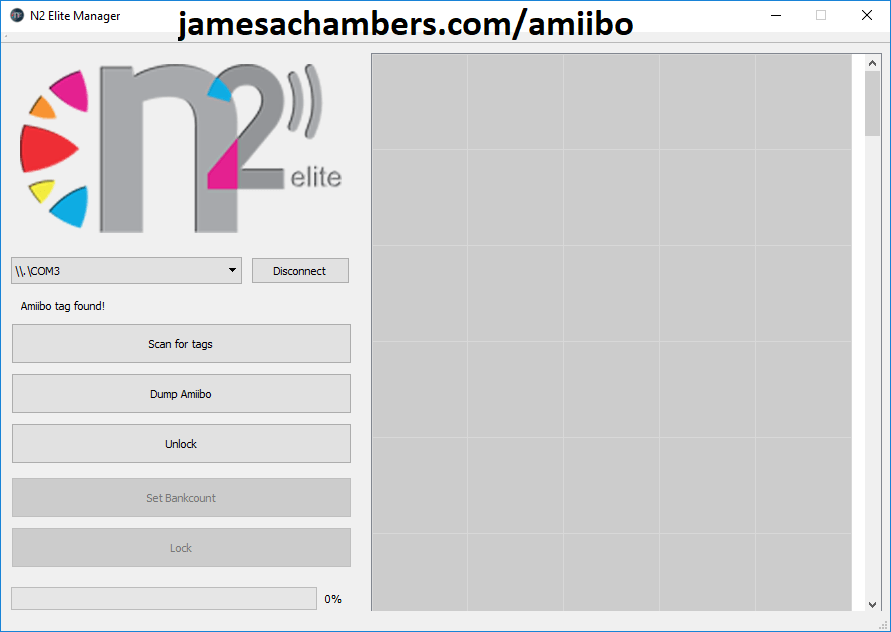
Step #6: Hit connect and you should get the message “amiibo tag found!” and will look like this:
Step #7: Hit “Dump amiibo” and it will bring up a dialog to save your amiibo data as a .bin file. You can save this wherever you want. We will be using it to load the backup on to the N2 Elite chip in the next steps so make sure to put it somewhere that you know where it is.
WARNING: I do not recommend using the lock/unlock buttons at all. Leave your original amiibos the way they are. Do not attempt to unlock them. Do not attempt to write to them. If you mess with them you could corrupt them making them useless. Let’s leave the writing for the N2 chip where if we make mistakes we can just try again.
Step #8: Click “Disconnect” and Unmount Wolf Link from the N2 USB Reader/Writer and put our N2 elite chip on there. Now hit Connect and it will connect to our N2 chip. It will look something like this:
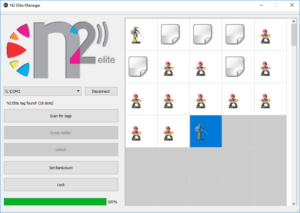
Step #9: As you can see we can see our different slots we have to load our amiibo backups into. By default there are usually 5-10 slots enabled but I recommend changing this setting first. Click the “Set Bankcount” button and enter the number of amiibo you plan to back up. This can be extended later and can go up to 200 amiibos. I recommend setting it to exactly the amount you have because each time you press the button on the chip it will cycle to the next amiibo. This means if you set it to 200 and only have 4 amiibos on it cycling the chip is going to be extremely annoying. Set it to the amount of amiibos you have so that when you press the button it cycles through correctly.
Step #10: Double click one of the empty slots in the bank grid on the right. It will bring up a dialog asking you for your .bin file. Navigate to where you saved your amiibo backup and select the file. Your amiibo backup will immediately be uploaded into that slot. The icon will probably be wrong or missing. Notice that my Wolf Link amiibo showed up in the N2 Manager as the Smash Brothers Link icon. This is because the Windows/Mac software is very cruddy like I mentioned earlier. Don’t worry about it, your amiibo is now on there and is ready to test!
Backup Complete!
That is it! You have now learned how to backup your amiibo onto the N2 Elite chip. Go ahead and take the chip to your Switch/3DS and test it to make sure it works. If everything looks good you can continue to back up the rest of your amiibo collection using the same steps. Just use a different slot for each amiibo and if you run out of slots use the “Set Bankcount” button to expand your storage up to 200 amiibos.
Conclusion
Backing up your amiibo figures is easy if you have the right equipment. Given that these can be a pretty large investment it is best to protect yourself. You also have the added benefit of being able to take a keychain of your amiibos with you!


Hey, can you explain how to write amiibo on Windows 10? I’ve been told it’s possible, but I found nothing on it. I’ve got the NTAG215 chips and the writer, but I can’t figure out how to write the amiibo data to the chip!
You could try using a Lego dimensions nfc reader/writer
is there a software to do it?
I can’t find software to use dimensions portal for nfc
Thanks for the article. I am looking for a third option, i.e. writing Amiibo NTAG215s on a Mac. Is that even possible?
Thanks
It’s absolutely possible. If you go to N2’s web site they have a download for the Mac software. You will need the USB reader/writer to do it but it can be done pretty much the same way as outlined in this article!