
**The new Raspberry Pi bootloader is out which makes these instructions only necessary if you want to continue to use the SD card as a bootloader. View the Raspberry Pi Bootloader Configuration Guide here!**
The Raspberry Pi 4* is finally here and has a lot of exciting changes. One very major downside is that it doesn’t support true USB booting yet out of the box (like the 3 series did). The Raspberry Pi foundation states that it is being worked on and will be added back with a future update. No timeline has been given yet for that to happen but they state it’s one of their top priorities.
Most of my projects heavily depend on having good performing storage so sitting and waiting was not an acceptable solution. In this guide I’ll show you a workaround to use USB devices as your rootfs device and use a Micro SD card as bootloader only which gives us full SSD performance after boot! To see exactly how much of a performance difference this makes (spoiler: it’s gigantic) check out the Raspberry Pi Storage Benchmarks.
I highly recommend doing this on a completely new install. If you try to upgrade your old ones and something goes wrong there’s a good chance you might lose data. We will be modifying the boot partition, resizing partitions, etc. so don’t use a drive with any data on it unless you are positive you have all of the steps down!
Compatible USB Adapters
The Raspberry Pi 4 is proving to be picky about what SATA, M.2, etc. adapters will work in the USB 3.0 port. The USB 3.0 ports are the ones in the middle that are blue inside. The black ones are USB 2.0 and won’t give you the faster speeds the new Pi offers.
It’s very likely that some of these will be fixed via software and firmware updates and the Raspberry Pi Foundation has several open known issues related to USB 3. Until that happens though I will maintain a list here of known working ones and known problematic ones. It’s still very early in the release of the Pi 4 so we still have a lot to learn about which adapters work / don’t work. If you have working and nonworking adapters leave a comment and I’ll add it in this list.
If the adapters worked before on older Pis then one thing you can try is putting them in the black USB 2.0 ports. Obviously this is stupid because we all want the Pi 4 performance gains but if you end up needing to buy a new adapter this will give you a workaround until a replacement arrives!
Find USB adapter chipset
There are certain chipsets used in adapters that are known to be working/not working.
pi@raspberrypi:~ $ lsusb
 Bus 003 Device 001: ID 1d6b:0002 Linux Foundation 2.0 root hub
 Bus 002 Device 002: ID 174c:55aa ASMedia Technology Inc. Name: ASM1051E SATA 6Gb/s bridge, ASM1053E SATA 6Gb/s bridge, ASM1153 SATA 3Gb/s bridge, ASM1153E SATA 6Gb/s bridge
 Bus 002 Device 001: ID 1d6b:0003 Linux Foundation 3.0 root hub
 Bus 001 Device 002: ID 2109:3431 VIA Labs, Inc. Hub
 Bus 001 Device 001: ID 1d6b:0002 Linux Foundation 2.0 root hub
This is a lsusb dump of all my connected USB devices. I have bolded the line with the USB bridge device. We can see that the chipset is ASM1153E. This is a really common one that works well with the Pi.
Known Working Adapters
This is a compiled list of known working adapters built by myself from adapters I’ve purchased and commenters from ones they have purchased in this article and my newer guide that utilizes the new Raspberry Pi 4’s native bootloader for USB booting.
| StarTech 2.5″ SATA to USB 3.1 Adapter* | 2.5″ SATA to USB 3.1 | Verified working in comments (thanks Fredrick) |
| Inateck FE2004 2.5″ SATA to USB 3.0 Hard Drive Enclosure* | 2.5″ SATA to USB 3.0 | Mirco reports that this enclosure is working but trim is not supported |
| Samsung 2.5″ SATA to USB 850 EVO Kit /w Adapter* (Alternate amazon.de link*) | 2.5″ SATA to USB 3.0 Kit | This is a kit that comes with a drive and adapter. Rene confirms the adapter works including with non-Samsung drives. |
| CSL 2.5″ SATA to USB 3.0 Adapter* | 2.5″ SATA to USB 3.0 | The CSL SL adapter is confirmed to be working by Krikitt in the comments. Available in Europe. Not available in US. |
| UGREEN 2.5″ SATA to USB-C 3.1 Enclosure Drive Caddy* | 2.5″ SATA to USB-C 3.1 | Confirmed to be working by CAProjects in the comments. Available in both Europe and US |
| UGREEN 2.5″ SATA to USB-C 3.1 “Protect What You Love” Case* (AliExpress Listing* – Make sure to select USB-C 3.1) | 2.5″ SATA to USB-C 3.1 | Reported working by Michal in the comments, thanks! |
| UGREEN 2.5″ to USB 3.0 “SATA USB Converter” Adapter* (AliExpress Listing*) | 2.5″ SATA to USB 3.0 | Also reported by Michal as working in the comments, thanks again! |
| UGREEN 2.5″ SATA to USB 3.0 Adapter Cable with UASP Converter* | 2.5″ SATA to USB 3.0 | This adapter is reported to be working by Mirco in the comments |
| SABRENT 2.5″ SATA to USB-C 3.1 Type A Adapter* | 2.5″ SATA to USB-C 3.1 Type A | The new USB-C 3.1 Type A version of the Sabrent adapter is reported as working in the comments by UEF. DO NOT get the USB 3.0 version as that one is below on the naughty list and won’t work! |
| SABRENT 2.5″ SATA to USB 3.0 Dual Bay Docking Station* | 2.5″ SATA to USB 3.0 | One of very few Sabrent adapters/enclosures to work. Reported working well by William Grey in the comments. Has two bays! |
| AliExpress Generic 2.5″ SATA to USB 3.0 3 colors Hard Disk Case* | 2.5″ SATA to USB 3.0 | Reported as working with UASP support by pierro78 in the comments |
| Orico 2.5″ 2139C3-G2 2.5 inch USB 3.1 Gen 2 10Gbps Transparent Enclosure* | 2.5″ SATA to USB 3.1 Gen 2 10Gbps | Make absolutely sure it’s the 10Gbps USB 3.1 Gen 2 version. There is another one that looks identical that is a USB 3.1 Gen 2 6Gbps that will not work. Confirmed working by RRT in the comments. |
| ASUS ROG STRIX Arion Aluminum Alloy M.2 NVMe SSD External Portable Enclosure Case Adapter* – (AliExpress Listing*) | M.2 NVMe (B+M Key) to USB/USB-C 3.2 Gen 2 | It’s bold. It’s beautiful. It’s also confirmed working by TADRACKET and Steve B. However, be warned, it takes a *lot* of power! Steve B. reports that even with the oversized 3.5A CanaKit adapter* it does not work. If you have the standard 3.0 adapter you can be practically certain it won’t power this enclosure. Does work with a powered USB hub*. |
| ICY BOX M.2 NVMe (M Key) to USB-C 3.1 Gen 2 Enclosure* (Alternate amazon.de listing*) | M.2 NVMe (B+M Key) to USB-C 3.1 Gen 2 | Returning legendary commentary Frank Meyer reports: Does not work with a 3.0A power adapter (also reported by TTE). It’s not enough power for this enclosure. Does work with a powered USB hub*. |
| TDBT M.2 NVMe (B+M Key) to USB-C 3.1 Gen 2 Enclosure* | M.2 NVMe (B+M Key) to USB-C 3.1 Gen 2 | Confirmed to be working well by WorkHard in the comments |
| AliExpress Generic M.2 NVMe (B+M Key) to USB 3.1 “M2 SSD Case NVME Enclosure”* | M.2 NVMe (B+M Key) to USB 3.1 Type A | Confirmed working by Jens Haase, thanks Jen! |
| SSK Aluminum M.2 NVMe (M Key) to USB 3.1 Gen 2 SSD Enclosure* | M.2 NVMe (M Key) to USB 3.1 Gen 2 | Brian L reports this is working well with beta firmware upgrades, but that it did not work at all without them! |
| ORICO M.2 NVMe SSD Enclosure, USB 3.1 Gen 2 (10 Gbps)* (AliExpress Listing*) | M.2 NVME to USB 3.1 Gen 2 | M.Yusuf has given the first ever report of a working Orico adapter! Make sure it’s the USB 3.1 Gen 2 version that says “Support UASP for NVMe SSD”. This is the way. |
| DELOCK 42570 M.2 SATA (B Key) to USB Micro-B 3.1 Gen 2 SSD Enclosure* | M.2 SATA (B Key) to USB Micro-B 3.1 Gen 2 | Andreas Franek reports that the enclosure works with a 3.0A power adapter (gets a little warm) |
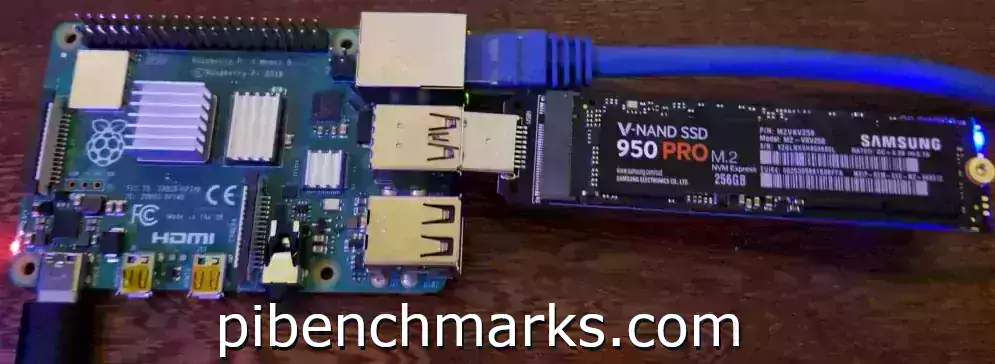
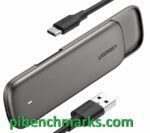
| Shinestar M.2 NVMe (M Key) to USB 3.0 Adapter* | M.2 NVMe (M Key) to USB 3.0 | This is the adapter I’m using in the picture at the top of the article. It is for NVMe M.2 drives only and is getting hard to find |
| UGREEN M.2 NVMe (B+M Key to USB-C 3.1 Gen 2 SSD Enclosure* | M.2 NVMe (B+M Key) to USB-C 3.1 Gen 2 | Confirmed working in comments by Chad D |
| UGREEN M.2 SATA (B+M Key) to USB 3.1 Enclosure* | M.2 SATA (B+M Key) to USB 3.1 Enclosure | Reported as working well in the comments by John H. Reinhardt with a ASM1051E chipset |
| QNINE M.2 SATA (B Key) to USB 3.0 Enclosure* | M.2 SATA (B Key) to USB 3.0 | I used this enclosure to benchmark M.2 SATA Lite-On and SanDisk drives — working great in 3.0 ports |
| Argon One M.2 SATA (B+M Key) Pi 4 Case* | M.2 SATA (B+M Key) Pi 4 Case | This case gives you a M.2 SATA port for your Raspberry Pi and is also a case! Confirmed working by Frank. |
| Tanbin mSATA to USB Adapter* | mSATA to USB 3.0 | I used this mSATA to USB adapter for my Crucial M550 benchmark — working in 3.0 ports |
| Generic mSATA to USB 3.0 Adapter (fe2008)* | mSATA to USB 3.1 | Confirmed working in comments by Nico |
| Canakit Raspberry Pi 4 Power Supply (USB-C)* | 3.5A USB-C Power Supply | Canakit has been making very reliable power supplies for several Pi generations now. Using a 3.5A power supply will give enough extra power for your Pi to power the drive without causing instability |
| Simplecom SE502 M.2 SSD Adapter* | M.2 SATA (B Key) to USB 3.0 | Quirks required, reported working by alan but only with quirks |
| Delock #61883 SATA to USB 3.0 Converter* | 2.5″ SATA to USB 3.0 | Reported working well by Joerg_H |
| Vantec SATA/IDE TO USB 3.0 Adapter* | 2.5″ SATA to USB 3.0 | Reported as working by JeffG but with an ugly messy appearance |
Known Problematic Adapters (Naughty List)
Here is a list of common USB adapters that are known to have problems with the Raspberry Pi 4. You can get some of these adapters working by using quirks mode (see the “Fix (some) USB Adapter Problems Using Quirks” section below).
| FIDECO M207CPS USB3.2 to M2 NVME/SATA SSD Enclosure* | M.2 NVME to USB 3.2 Gen 2 | Lee Myring reports that the FIDECO M207CPS has issues working with the Pi |
| UGREEN 30848 2.5″ SATA to USB 3.0 Hard Drive Enclosure* | 2.5″ SATA to USB 3.0 | Reporting as not working properly and disconnecting often by Mirco, thanks! |
| Sabrent USB 3.0 to 2.5″ SATA adapter* | 2.5″ SATA to USB 3.0 | Only works in the USB 2.0 ports. Will not boot in a USB 3.0 port. I have two of these and can confirm they don’t work. RIP to Sabrent, our previous king of the Pi 3 era of adapters. |
| Sabrent USB 3.0 to 2.5″ SATA Tool-Free External Hard Drive Enclosure* | 2.5″ SATA to USB 3.0 | Another nonworking Sabrent adapter reported by Alex, thanks Alex! |
| ELUTENG 2.5″ SATA to USB 3.0 Adapter* | 2.5″ SATA to USB 3.0 | Despite earlier reports as working Ryan and one other have reported this adapter does not work unless you enable quirks mode! Don’t make Ryan’s sacrifice in vain and avoid this one. |
| USB 3.0 to 2.5″ SATA III Hard Drive Adapter UASP Support-20cm, Black* | 2.5″ SATA to USB 3.0 | reported by dzm in the comments as having very poor I/O performance |
| ORICO 2.5″ SATA to USB C 3.0 Enclosure (Transparent)* | 2.5″ SATA to USB 3.0 | Several commenters have stated the transparent ORICO is not working. Avoid! |
| ORICO 2.5″ SATA to USB 3.0 Enclosure (Black) 2588US3-BKT* | 2.5″ SATA to USB 3.0 | Commenters report that the USB-C variant of the transparent ORICO enclosure also does not work |
| ORICO 2.5″ SATA to USB 3.0 Enclosure (Black/White) 2520U3* | 2.5″ SATA to USB 3.0 | Reported as not working by by Richon in the comments |
| ORICO 2.5″ SATA to USB-C 3.1 Gen 1 Enclosure (Transparent)* | 2.5″ SATA to USB-C 3.1 Gen 1 | Confirmed as not working by Andrea De Lunardi in the comments (thanks!) |
| Vantec 2.5″ SATA to USB 3.0 USB Adapter with Case* | 2.5″ SATA to USB 3.0 | Does not work after hours of testing and frustration by Moshe Katz in the comments! |
| AliExpress Generic 2.5″ SATA to USB 3.0 “New USB 3.0 To 2.5in SATA 7+15Pin Hard Drive Adapter”* | 2.5″ SATA to USB 3.0 | Extremely cheap adapter from AliExpress — MADATALIEXPRESS bought 5 of them and none worked, PPCM had one working, very unreliable and slow when it does work, not recommended even if you get lucky! |
| EWENT USB 3.0 to SATA EW7017 | 2.5″ SATA to USB 3.0 | Does not work – reported by Wouter in the comments, thanks! |
| CableCreation USB 3.0 to SATA Adapter Compatible 2.5″ SATA III HDD Hard Disk Driver, 0.5FT, Black* | 2.5″ SATA to USB 3.0 | Morgon reports not working in the comments — I also recognize this adapter as the “fake” StarTech adapter that is sold on AliExpress, thanks Morgon! |
| JSAUX USB 3.0 to SATA Adapter, USB 3.0 to 2.5 Inch SATA III Hard Drives/SSD/HDD Adapter* | 2.5″ SATA to USB 3.0 | Reported as not working by Bennie in the comments, thanks! |
| EZCast M.2 NVME SSD Enclosure Adapter* | M.2 NVMe to USB 3.1 Gen2 | Reported as problematic due to duplicate USB ids — best to avoid — thanks MikeC |
| Sabrent 2.5″ Aluminum Enclosure* | 2.5″ SATA to USB 3.0 | Reported as not working by JeffG |
Equipment Used
The Samsung 980 Pro (NVMe) is a professional grade SSD and one of the fastest in the world. The Samsung NVMe drives have been at the top of this category for a long time and are well trusted for both their performance and reliability / long life.
Links: AliExpress*, Amazon.com*, Amazon.ca*, Amazon.com.au*, Amazon.co.jp*, Amazon.co.uk*, Amazon.de*, Amazon.es*, Amazon.fr*, Amazon.it*, Amazon.nl*, Amazon.pl*, Amazon.se*, Amazon.sg*

The ICY BOX is basically a giant heatsink that you mount a high performance M.2 NVMe drive inside of. This enclosure is really fast but requires a powered USB hub. Not even the 3.5A adapter can reliably power it! The enclosure works well and will physically feel warm to the touch as it is pulling the heat off your NVMe drive!
Links: Amazon.com*, Amazon.ca*, Amazon.com.au*, Amazon.co.uk*, Amazon.de*, Amazon.es*, Amazon.fr*, Amazon.it*, Amazon.nl*, Amazon.pl*, Amazon.se*, Amazon.sg*
2.5″ SATA Option:

The Kingston A400 has been a great drive to use with the Pi for years. It’s reliable, widely available around the world, has low power requirements and performs very well. It’s also very affordable. This drive has been benchmarked over 1000 times at pibenchmarks.com and is the #1 most popular SSD among the Pi community!
Links: AliExpress*, Amazon.com*, Amazon.ca*, Amazon.com.au*, Amazon.co.jp*, Amazon.co.uk*, Amazon.de*, Amazon.es*, Amazon.fr*, Amazon.it*, Amazon.nl*, Amazon.pl*, Amazon.se*, Amazon.sg*
Compact Option:
The SanDisk Extreme Pro USB SSD is a true solid state drive. This is different than a typical “flash drive” which uses extremely cheap memory and has very low random I/O performance/throughput compared to a real solid state drive. I’ve used both the USB 3.1 and USB 3.2 variants with the Pi successfully and they benchmark very well!
Links: AliExpress*, Amazon.com*, Amazon.ca*, Amazon.com.au*, Amazon.co.jp*, Amazon.co.uk*, Amazon.de*, Amazon.es*, Amazon.fr*, Amazon.it*, Amazon.nl*, Amazon.pl*, Amazon.se*, Amazon.sg*
You may use other types of drives with the Pi such as M.2 SATA to USB 3.0 and m-SATA to USB 3.0. Here’s some adapters I’ve used for those types of drives:
The VL716 mSATA enclosure lets you connect micro SATA drives to the Pi. These drives are an older type of SSD (usually seen in laptops) predating the M.2 slot but are still widely available and perform extremely well!
Links: AliExpress*, Amazon.com*, Amazon.ca*, Amazon.com.au*, Amazon.co.jp*, Amazon.co.uk*, Amazon.de*, Amazon.es*, Amazon.fr*, Amazon.it*, Amazon.nl*, Amazon.se*, Amazon.sg*
The UGREEN M+B enclosure is a great enclosure for the Pi for M.2 SATA 2280 NGFF drives. It supports both B-key and M-key drives. Does not support newer NVMe drives. As with other types of enclosures it requires more power than other options!
Links: AliExpress*, Amazon.com*, Amazon.ca*, Amazon.com.au*, Amazon.co.jp*, Amazon.co.uk*, Amazon.de*, Amazon.es*, Amazon.fr*, Amazon.it*, Amazon.nl*, Amazon.pl*, Amazon.se*, Amazon.sg*

The Argon ONE M.2 is a M.2 SATA Pi 4 case / storage solution. With the case and M.2 SATA expansion board you can completely enclosure your Pi 4 and have a built in M.2 slot! The M.2 SATA board is sometimes sold separately from the case itself and can be used as well. Does not support NVMe, this is for SATA M.2 drives only!
Links: AliExpress*, Amazon.com*, Amazon.ca*, Amazon.com.au*, Amazon.co.jp*, Amazon.co.uk*, Amazon.de*, Amazon.es*, Amazon.fr*, Amazon.it*, Amazon.nl*, Amazon.pl*, Amazon.se*, Amazon.sg*
Power Requirements
Power can be a serious problem with these drives. We are learning from the comments that you are especially likely to run into power issues with NVMe enclosures. A powered USB hub or a power adapter that puts out 3.5A comes not only just strongly recommended, it may actually be required that you choose one option or the other for your drive to function.
The specific requirements of how much power you’ll need depend on the adapter/enclosure and the model of your drive itself. As a very rough guideline, older models of drives tend to use more power than newer models of drives. 3.5″ form factor drives also use more power than 2.5″ drives. The earliest SSD models like first and second generation models are also well understood to use significantly more power than newer models. This is due to changes and improvements in technology over the years and even using different more efficient memory like 3D NAND. Some super high end performance drives will consume more power as well.
Here’s the current recommendations based on everyone’s comments combined with stuff I’ve personally used with the Pi:
The CanaKit 3.5A adapter has an extra half an amp (500 mA) of capacity to give some breathing room to your accessories. This is bigger than the official Pi power supply which provides 3.0A.
Links: Amazon.com*, Amazon.ca*, Amazon.com.au*, Amazon.sg*
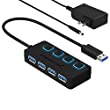
The Sabrent powered USB hub delivers a whopping 2.5A of dedicated power for your USB attached devices. This is almost as much as the Pi adapter itself is rated for (3.0A). It will easily power the most thirsty of setups such as NVMe enclosures.
Links: Amazon.com*, Amazon.ca*, Amazon.com.au*, Amazon.co.uk*, Amazon.es*, Amazon.it*, Amazon.nl*, Amazon.pl*, Amazon.se*
Note: Make sure Amazon doesn’t try to take you to the non-powered version and that it’s the one with the AC adapter that plugs in to provide extra power
Fixing (some) USB Adapter Problems Using Quirks
Some of the very common adapters on the naughty list above (such as the Sabrent) can be made to work by using USB quirks to disable UAS mode on the drive. This lowers performance, but it’s still much faster than a SD card and your adapter won’t go to waste.
To find out the quirks we need to find the device ID string for your adapter and then add an entry to cmdline.txt telling the kernel to apply them on boot.
Find Your Adapter
To apply the quirks we first need to get the adapter id. We will use the sudo lsusb command:
$ sudo lsusb
 Bus 003 Device 001: ID 1d6b:0002 Linux Foundation 2.0 root hub
 Bus 002 Device 002: ID 174c:55aa ASMedia Technology Inc. Name: ASM1051E SATA 6Gb/s bridge, ASM1053E SATA 6Gb/s bridge, ASM1153 SATA 3Gb/s bridge, ASM1153E SATA 6Gb/s bridge
 Bus 002 Device 001: ID 1d6b:0003 Linux Foundation 3.0 root hub
 Bus 001 Device 002: ID 2109:3431 VIA Labs, Inc. Hub
 Bus 001 Device 001: ID 1d6b:0002 Linux Foundation 2.0 root hub
On line 2 we can see my ASM1051E SATA 6Gb/s bridge adapter (it’s the known working StarTech.com 2.5″ SATA to USB adapter*). You will see something very similar to mine when you run the command and it shouldn’t be too hard to figure out which device it is. If you need more information add a -v switch to make the command sudo lsusb -v. This can sometimes add some additional details to make it easier to figure out which one is your adapter.
If you’re still not sure, we have another command that between the two that can narrow things down. Type / paste the following:
sudo dmesg | grep usb

 [    0.828535] usb usb3: New USB device found, idVendor=1d6b, idProduct=0002, bcdDevice= 4.19
 [    0.828568] usb usb3: New USB device strings: Mfr=3, Product=2, SerialNumber=1
 [    0.828597] usb usb3: Product: DWC OTG Controller
 [    0.828620] usb usb3: Manufacturer: Linux 4.19.75-v7l+ dwc_otg_hcd
 [    0.828644] usb usb3: SerialNumber: fe980000.usb
 [    0.830051] usbcore: registered new interface driver uas
 [    0.830182] usbcore: registered new interface driver usb-storage
 [    0.836488] usbcore: registered new interface driver usbhid
 [    0.836511] usbhid: USB HID core driver
 [    0.971598] usb 1-1: new high-speed USB device number 2 using xhci_hcd
 [    1.154217] usb 1-1: New USB device found, idVendor=2109, idProduct=3431, bcdDevice= 4.20
 [    1.154254] usb 1-1: New USB device strings: Mfr=0, Product=1, SerialNumber=0
 [    1.154281] usb 1-1: Product: USB2.0 Hub
 [    1.301989] usb 2-1: new SuperSpeed Gen 1 USB device number 2 using xhci_hcd
 [    1.332965] usb 2-1: New USB device found, idVendor=174c, idProduct=55aa, bcdDevice= 1.00
 [    1.332999] usb 2-1: New USB device strings: Mfr=2, Product=3, SerialNumber=1
 [    1.333026] usb 2-1: Product: ASM105x
 [    1.333048] usb 2-1: Manufacturer: ASMT
 [    1.333071] usb 2-1: SerialNumber: 123456789B79F
This is the dmesg log showing the hardware detection as hardware is activated on the Pi. If your log is really long you can generate fresh entries by just unplugging a device and plugging it back in and running the command again. Here we can clearly see that the ASM105x is what our StarTech adapter is being detected as.
Now we can go back to our first lsusb command and we want the 8 characters from the ID field that comes right after the Device:
Bus 002 Device 002: ID 174c:55aa ASMedia Technology Inc. Name: ASM1051E SATA 6Gb/s bridge
Our adapter’s ID is: 174c:55aa
Applying Quirks
To apply the quirks to our USB adapter we are going to edit /boot/cmdline.txt. Type:
sudo nano /boot/cmdline.txt
We are going to add the following entry into the very front of cmdline.txt:
usb-storage.quirks=XXXX:XXXX:u
In place of the X’s above you will put in your adapter’s ID that we got before. With the example commands I gave above mine would look like this: usb-storage.quirks=174c:55aa:u. After this my cmdline.txt looks like this (everything should be one continuous line, no line breaks!):
usb-storage.quirks=174c:55aa:u console=serial0,115200 console=tty1 root=PARTUUID=d34db33f-02 rootfstype=ext4 elevator=deadline fsck.repair=yes rootwait
Now reboot the Pi. If the Pi fails to boot you can plug the SD card into the computer and go to /boot/cmdline.txt and undo the change we did so you can boot back in with your SD card.
Verifying Quirks
Once you have rebooted after changing cmdline.txt we can verify the quirks have been applied by doing another dmesg | grep usb command:
sudo dmesg | grep usb
 [    1.332924] usb 2-1: New USB device found, idVendor=174c, idProduct=55aa, bcdDevice= 1.00
 [    1.332957] usb 2-1: New USB device strings: Mfr=2, Product=3, SerialNumber=1
 [    1.332983] usb 2-1: Product: ASM105x
 [    1.333006] usb 2-1: Manufacturer: ASMT
 [    1.333028] usb 2-1: SerialNumber: 123456789B79F
 [    1.335967] usb 2-1: UAS is blacklisted for this device, using usb-storage instead
 [    1.336071] usb 2-1: UAS is blacklisted for this device, using usb-storage instead
 [    1.336103] usb-storage 2-1:1.0: USB Mass Storage device detected
 [    1.336479] usb-storage 2-1:1.0: Quirks match for vid 174c pid 55aa: c00000
 [    1.336611] scsi host0: usb-storage 2-1:1.0
This time we can see in dmesg that UAS was blacklisted for the device and it has loaded with the usb-storage driver instead. This driver tends to be more compatible with the “problematic adapters” but the performance is usually significantly lower. It’s definitely worth a try though as some adapters do better with the quirks performance-wise. The only way to know for sure is to run a benchmark (see storage benchmark section near the end).
USB Boot Instructions
There are a lot of steps to follow to set everything up properly. If you make a mistake the first time don’t spend too much time trying to correct it or figure out what you did wrong. It’s usually faster to burn the images again and reconfigure again rather than try to figure out which step you might have made a typo on. It’s much easier the second time!
Prepare SD Card
Download the latest Raspberry Pi OS release from the Official Raspberry Pi download page. Both Lite or Desktop versions will work. Win32DiskImager (Windows) or balenaEtcher (Linux, Mac OS X, Windows) are highly recommended to burn the images.
Note: Don’t attempt to use raw dd commands to write the images. Too many silly things can go wrong that are checked for/fixed by the recommended programs. Do yourself a big favor and use one of the recommends to avoid spending a ton of time troubleshooting basic imaging problems!
Preparing SSD
We are going to burn a second identical copy of Raspbian to the SSD. This ensures everything the Pi needs to boot is there so we can use the SD card as a bootloader but our actual system will be on our nice fast SSD drive.
Note: Make sure you create the empty file named “ssh” on the boot partition of both drives if you are headless or don’t have a mouse/keyboard attached so you can ssh in on the first boot.
First Boot (SD card only, SSD unplugged)
Insert your freshly imaged SD card into the Pi and connect the power. Sign into the Pi for the first time.
Don’t do an apt-get upgrade/dist-upgrade or any additional configuration yet. Just stick with the instructions until we have finished configuration (especially since if something goes wrong you may have to start over and any other setup you did will be lost).
Once the Pi has finished booting and you have signed in for the first time plug in your SSD to your Pi’s USB 3.0 ports. The USB 3.0 ports are the ones that have the blue plastic inside instead of the black plastic (the black ones are USB 2.0 ports).
Change PARTUUID
We need to change the PARTUUID of our SSD’s partitions so the Pi doesn’t get confused about what device to boot from. Right now the partitions on both the SD card and the SSD are an exact match and we need them to be different so we can tell the Pi to boot specifically from our SSD’s partition.
We are going to use fdisk to change the SSD’s PARTUUID to the hexadecimal d34db33f to make our SSD easy to identify. Use the following:
$ sudo fdisk /dev/sda

 Welcome to fdisk (util-linux 2.33.1).
 Changes will remain in memory only, until you decide to write them.
 Be careful before using the write command.
 Command (m for help): p
 Disk /dev/sda: 238.5 GiB, 256060514304 bytes, 500118192 sectors
 Disk model: ASM105x
 Units: sectors of 1 * 512 = 512 bytes
 Sector size (logical/physical): 512 bytes / 512 bytes
 I/O size (minimum/optimal): 512 bytes / 512 bytes
 Disklabel type: dos
 Disk identifier: 0x6c586e13
 Device     Boot  Start       End   Sectors   Size Id Type
 /dev/sda1         8192    532479    524288   256M  c W95 FAT32 (LBA)
 /dev/sda2       532480 500118191 499585712 238.2G 83 Linux
 Command (m for help): x
 Expert command (m for help): i
 Enter the new disk identifier: 0xd34db33f
 Disk identifier changed from 0x6c586e13 to 0xd34db33f.
 Expert command (m for help): r
 Command (m for help): w
 The partition table has been altered.
 Syncing disks.
That’s it. Let’s verify our change using blkid:
$ sudo blkid

/dev/mmcblk0p1: LABEL_FATBOOT="boot" LABEL="boot" UUID="5203-DB74" TYPE="vfat" PARTUUID="6c586e13-01"
/dev/mmcblk0p2: LABEL="rootfs" UUID="2ab3f8e1-7dc6-43f5-b0db-dd5759d51d4e" TYPE="ext4" PARTUUID="6c586e13-02"
/dev/sda1: LABEL_FATBOOT="boot" LABEL="boot" UUID="5203-DB74" TYPE="vfat" PARTUUID="d34db33f-01"
/dev/sda2: LABEL="rootfs" UUID="2ab3f8e1-7dc6-43f5-b0db-dd5759d51d4e" TYPE="ext4" PARTUUID="d34db33f-02"
Your /dev/mmcblk0 and /dev/sda devices should now be different from each other. The SD card’s ID is 6c586e13 and the SSD’s PARTUUID is now
Update /boot/cmdline.txt
We are going to change cmdline.txt to point to the SSD for booting instead of the SD card. First make a backup of your existing cmdline.txt file with the following command:
sudo cp /boot/cmdline.txt /boot/cmdline.txt.bak
We’ve now created a backup you can restore if something goes wrong. If you need to restore your backup plug the SD card into a computer/device and replace cmdline.txt with cmdline.txt.bak that we made above. Now your Pi should boot normally again.
Open up /boot/cmdline.txt using nano or your favorite text editor:
sudo nano /boot/cmdline.txt
The existing file will look like this:
console=serial0,115200 console=tty1 root=PARTUUID=6c586e13-02 rootfstype=ext4 elevator=deadline fsck.repair=yes rootwait quiet init=/usr/lib/raspi-config/init_resize.sh
We are going to change the root=PARTUUID section to point to our new d34db33f PARTUUID like the following:
console=serial0,115200 console=tty1 root=PARTUUID=d34db33f-02 rootfstype=ext4 elevator=deadline fsck.repair=yes rootwait quiet init=/usr/lib/raspi-config/init_resize.sh
Make the change and double check the line is what it should be,then press Ctrl+X to save our changes.
Note: cmdline.txt should be one long solid line with no breaks — don’t add any line breaks or the system won’t boot and you’ll need to restore the backup we made earlier!
Test SSD
We are now ready to test booting from the SSD. Restart your Pi by issuing a
sudo reboot
The first boot with your SSD can be slow due to running fsck on the drive. If you have a really large SSD it can take surprisingly long to check all that space. Once the check completes it will mark the drive clean and skip the disk check from now on. It can take over a minute or two sometimes for really big drives so give it at least that much time before assuming it didn’t work.
After signing in we can verify that the SSD is being used like this:
$ findmnt -n -o SOURCE /

 /dev/sda2
Verify that partition has switched over as shown below to /dev/sda2 (SSD) instead of /dev/mmcblk0p2 (SD card).
Update /etc/fstab
We are now ready to edit the /etc/fstab file to point to our updated drive. To edit the file type:
sudo nano /etc/fstab
Your current file will look like this:
$ cat /etc/fstab
proc            /proc           proc    defaults          0       0
PARTUUID=6c586e13-01  /boot           vfat    defaults          0       2
PARTUUID=6c586e13-02  /               ext4    defaults,noatime  0       1
sudo nano /etc/fstab
Your current file will look similar to this (PARTUUID varies based on your Raspbian image version):
cat /etc/fstab
proc            /proc           proc    defaults          0       0
PARTUUID=6c586e13-01  /boot           vfat    defaults          0       2
PARTUUID=6c586e13-02  /               ext4    defaults,noatime  0       1
We want to change the root ( / ) partition (PARTUUID ending with -02) to load our SSD’s PARTUUID instead of the SD card. Replace the 2nd partition’s PARTUUID field on the last line in the file with the d34db33f label we applied earlier with fdisk. After making the change my /etc/fstab file looks like this:
proc            /proc           proc    defaults          0       0
PARTUUID=6c586e13-01  /boot           vfat    defaults          0       2
PARTUUID=d34db33f-02  /               ext4    defaults,noatime  0       1
Press Ctrl+X to tell nano to save our changes. Now type sudo reboot to restart the Pi.
Note: We want to leave the first partition (/boot) on the SD card. If you change this to the SSD then apt will update your SSD instead of the SD card so they won’t be used during boot! Remember that we are using the SD card as a bootloader and that is why the firmware updates (such as start.elf, etc) should go there instead of the SSD’s boot partition (which is never used).
Resizing Filesystem
By default the partition on the SSD / Flash drive will only be 1.8G. The Pi expands this automatically on micro SD drives but we will need to do it ourselves for a SSD / Flash drive. To do this we need to expand the partition and then resize the file system.
First let’s open fdisk and print the partitions:
pi@raspberrypi:~ $ sudo fdisk /dev/sda
 Welcome to fdisk (util-linux 2.33.1).
 Changes will remain in memory only, until you decide to write them.
 Be careful before using the write command.
 Command (m for help): p
 Disk /dev/sda: 238.5 GiB, 256060514304 bytes, 500118192 sectors
 Disk model: ASM105x
 Units: sectors of 1 * 512 = 512 bytes
 Sector size (logical/physical): 512 bytes / 512 bytes
 I/O size (minimum/optimal): 512 bytes / 512 bytes
 Disklabel type: dos
 Disk identifier: 0xd34db33f
 Device     Boot  Start     End Sectors  Size Id Type
 /dev/sda1         8192  532479  524288  256M  c W95 FAT32 (LBA)
 /dev/sda2       532480 4390911 3858432  1.9G 83 Linux
There is the line we need. Our start value for /dev/sda2 (rootfs) is 532480. Next we need to remove and recreate the partition as a larger size.
If you make any mistakes during this command just close fdisk by pressing q. The changes won’t be written to disk. If you mess up any of the commands the drive will no longer boot and you’ll have to start over again so be careful!
Command (m for help): d
 Partition number (1,2, default 2): 2
 Partition 2 has been deleted.
 Command (m for help): n
 Partition type
    p   primary (1 primary, 0 extended, 3 free)
    e   extended (container for logical partitions)
 Select (default p): p
 Partition number (2-4, default 2): 2
 First sector (2048-500118191, default 2048): 532480
 Last sector, +/-sectors or +/-size{K,M,G,T,P} (532480-500118191, default 500118191): 500118191
 Created a new partition 2 of type 'Linux' and of size 238.2 GiB.
 Partition #2 contains a ext4 signature.
 Do you want to remove the signature? [Y]es/[N]o: N
 Command (m for help): w
 The partition table has been altered.
 Syncing disks.
If everything went well then type “w” and press enter. Otherwise press “q” to quit and try again. Once you enter “w” the changes will be permanently written to disk!
Now reboot the system. Type “df -h” to view the current disk:
pi@raspberrypi:~ $ df -h
 Filesystem      Size  Used Avail Use% Mounted on
 /dev/root       1.8G  1.3G  415M  76% /
 devtmpfs        1.8G     0  1.8G   0% /dev
 tmpfs           2.0G     0  2.0G   0% /dev/shm
 tmpfs           2.0G  8.5M  1.9G   1% /run
 tmpfs           5.0M  4.0K  5.0M   1% /run/lock
 tmpfs           2.0G     0  2.0G   0% /sys/fs/cgroup
 /dev/mmcblk0p1  253M   52M  201M  21% /boot
 tmpfs           391M     0  391M   0% /run/user/1000
We can see our disk is still 1.8G even after resizing the partition. That’s because we still have one more step! We need to resize the filesystem to fill our new partition space. For this we will use “sudo resize2fs /dev/sda2”:
sudo resize2fs /dev/sda2
 resize2fs 1.44.5 (15-Dec-2018)
 Filesystem at /dev/sda2 is mounted on /; on-line resizing required
 old_desc_blocks = 1, new_desc_blocks = 15
 The filesystem on /dev/sda2 is now 62448214 (4k) blocks long.
Now let’s check df -h again:
pi@raspberrypi:~ $ df -h
 Filesystem      Size  Used Avail Use% Mounted on
 /dev/root       235G  1.3G  224G   1% /
 devtmpfs        1.8G     0  1.8G   0% /dev
 tmpfs           2.0G     0  2.0G   0% /dev/shm
 tmpfs           2.0G  8.5M  1.9G   1% /run
 tmpfs           5.0M  4.0K  5.0M   1% /run/lock
 tmpfs           2.0G     0  2.0G   0% /sys/fs/cgroup
 /dev/mmcblk0p1  253M   52M  201M  21% /boot
 tmpfs           391M     0  391M   0% /run/user/1000
And that’s it! You will now be using all of your space on your drive.
Verify SSD Functionality / Performance
You can make sure everything is running correctly (and as fast as it should be) by running my quick storage benchmark. You can run the benchmark with the following one-liner:
sudo curl https://raw.githubusercontent.com/TheRemote/PiBenchmarks/master/Storage.sh | sudo bash
This will give you a score you can compare to the other Raspberry Pi Storage Benchmark results and make sure that you are getting an equivalent speed to your peers with the same device!
Update Pi using apt
Now that we’ve updated fstab it is safe (and highly recommended) to update your Pi’s software. Type “sudo apt-get update && sudo apt-get dist-upgrade” to update the system and firmware.
Your system will now be running completely from your USB drive! To verify this, run the command “findmnt -n -o SOURCE” / to ensure your root partition has switched over as shown below to /dev/sda2 instead of /dev/mmcblk0p2.
Conclusion
The Samsung 950 Pro NVMe drive in the featured picture scored a 9189 on the Raspberry Pi Storage Benchmark. The previous all-time record score on a Pi 3B+ was 3561. The performance gains are very real and very dramatic.
For me getting this performance is well worth having to waste a micro SD card just to be a bootloader. I am largely after the USB 3.0 bus and gigabit ethernet performance improvements and using this method I am able to achieve the performance I was after without waiting an indeterminate amount of time for the feature to be added back in!
Although there are ongoing compatibility issues and we lack the super easy native USB booting support we had before I’m more than willing to go through the growing pains to finally get rid that ancient USB 2.0 bus! Just make sure if you are planning to build a system you plan your adapters and parts accordingly.
Other Resources
If you want to see which Pi storage performs the fastest and get an idea of what kind of drives to look for check out my 2020’s Fastest Raspberry Pi 4 Storage Benchmarks
If you have one of the new Raspberry Pi 400 kits *then don’t miss my Pi 400 Overclocking and SSD Setup Guide


Samsung 980Pro (500GB) in Sabrent USB Type-C Tool-Free Enclosure for M.2 PCIe NVME and SATA SSDs (EC-SNVE) using a Sabrent 4-Port USB 3.0 Powered Hub worked out of the box. The enclosure uses a Realtek 9210 controller, which supports UAS, but Pi 4 is using usb-storage driver. Is there a way to force UAS? Also, unplugging and plugging the hub back in on reboots is inconvenient, is there a solution for that?
Hey PSiler,
Great question! So usually the only way to get UAS enabled on it is to attempt to update the firmware (for some controllers). I’m not sure about this one but the Realtek controller rings a bell. This is a very new chipset (relatively speaking) and is USB 3.2 I believe. It may be worth seeing if there are any firmware updates out there for this adapter/enclosure. You could also try adding your controller to the list of UAS supported devices and see if it works like this.
The powered USB hub needing to be unplugged and replugged is a very old issue. You can read a bunch about that here. It’s generally the way the hubs are wired and there are modifications you can make to different hubs to fix this of varying difficulty. Finding one that consistently won’t do this out of the box is very difficult but people have found some over the years.
Mostly people modify them or just unplug/replug but that at least gives you some options if you wanted to go further!
Thank you for the response. I’ll see if I can find solutions through the links you’ve provided.
I updated the firmware using the most recent file on Sabrent’s website. It’s now showing up as UAS! That solved that problem. I’ve also purchased a Pi 4 power supply that is 3.5 A and taken the USB hub out of the equitation so that I don’t have to deal with plugging and unplugging on shutdown. Everything is working as desired! Thanks for your information and insight.
Excellent results, I’m glad the firmware updates got it, I have heard of firmware updates fixing/enabling UAS support but it’s nice to have a confirmation in the wild.
I’ve added the EC-SNVE adapter to my fixing storage adapters with firmware updates guide as well here. Thanks for leaving this!
Hello, I have the same adapter and have been experiencing random shutdowns with my ssd. I get disk i/o error in home assistant and everything stops working. The only way to fix it is to unplug and replug or repower everything. Any clues?
Hey Andrew,
I have heard of this unfortunately. Check out this thread from Bill and there have been a couple of others as well.
His investigation on this was *extensive* and I don’t believe it has been solved to this day. It seems to be specific to HA/Home Assistant. If you tried using another OS it doesn’t seem to happen (if it’s the same issue as Bill, which it certainly sounds like it).
He even last came back about 3 months ago to say he tried even using a powered USB hub and it *still* made no difference. I’m surprised this is still going on but I think Bill even went to the devs and hasn’t found a solution!
Bill has made some progress on the HomeAssistant / HA / HAOS freeze issue for anyone who has encountered it.
Post here.
I have almost the exact same hardware as you, but I have a Samsung 980 Pro 2TB, and instead of using a powered USB hub, I’m just using the Argon One power supply (5.25V, 3.5A) plugged into my Pi 4B (which is fine, as the enclosure + SSD only reported to require 896mA from lsusb, more to follow on this) . Out of the box, I’ve been getting lots of USB disconnect issues documented here[1], here[2], and here[3], but they only show up after installing a Kubernetes distribution such as Minikube, k3s or k0s.
I’ve found out that I could actually update the firmware on the 980 Pro, so I went to Samsung’s website to download the firmware update[4] and flashed the ISO onto a Sandisk USB drive. I don’t have a PC that I could plug the NVMe drive directly onto an M.2 M key slot, so I took out my old Macbook Pro 2014, plugged the 980 Pro into a M.2 M Key NVMe to SATA adaptor[5], and boot the Mac into the Linux ISO and flashed the SSD. This worked and lsusb now reports the Sabrent + 980 Pro only use 500mA, and the USB disconnect and I/O Errors seem to have gone away.
However, the RTL9210 in the Sabrent is still running on the usb-storage driver in Ubuntu Focal, so no UAS. Now the Sabrent firmware zip file comes with 2 bin files that I’m sure are the firmware. There must be a way I could flash them onto the enclosure with Linux or a Mac…
[1]: GitHub raspberrypi Repository – Issue #3404
[2]: Raspberry Pi Forums – Topic 270410
[3]: GitHub raspberrypi Repostiroy – Issue #3814
[4]: Samsung 980 Pro .iso File
[5]: Sintech-Adapter-Upgrade-2013-2015-MacBook
Hey wyuenho,
I think you’re incredibly close. That’s great information about the Samsung firmware update. I do indeed actually have a 980 Pro 2TB, an identical drive although it’s being used in my main x86_64 PC at the moment! I’ve used the 960 256MB and 1GB modules a lot in my testing though and though they can’t hit the same numbers as the 980 Pro they’re still great today and are generally what I’ve been using with the Pi at the moment. I’m sure the 980 Pro will make it’s way down the chain eventually to the Pis when the 990 Pro comes out or whatever the next tech is.
So your question about flashing these from Linux is a good one. I’ve never heard of anyone successfully doing it from Linux. The main issue is that the Sabrent firmware update is going to be different from the other manufacturers and we know that Sabrent does not distribute a Linux-based update binary for sure. That’s the main problem is just that Sabrent doesn’t package their updates for Linux (although they don’t seem to be alone in this). I’m guessing there are some that can be for Mac but they are probably more Thunderbolt-style adapters (at least traditionally).
Does that mean it’s impossible? No, I’m sure it’s not impossible. It’s probably possible to flash that .bin file to the USB adapter using fwupd or some Linux utility to flash that bin file to it as Linux is generally very good at this stuff. Will it work? It would probably work but since I couldn’t find a record of anyone doing it then we can’t rule out that Sabrent has some “magic” in their update utility and that a general flash might not work / cause problems if they are expecting Sabrent’s update program to send a “magic” command to tell it that it’s finished updating or something like that.
I could not find a record of anyone ever doing this. When I google “update sata to usb adapter within linux” or “linux fw upgrade usb to sata adapter” the top result on Google is actually my article How to fix storage adapters with firmware updates. That is without even mentioning Sabrent at all, just updating *any* USB to SATA adapter in Linux and there’s nobody even asking how to do it or anything like that. If you try something like a generic flash definitely let me know how that goes (you wouldn’t want to do this unless you’re willing to risk killing it for science).
I almost feel like you should just grab VirtualBox (a free VM program) and download the latest Windows image. You can download it right from Microsoft legally from here. If you visit this page on Linux / Mac (I run Linux as my main OS so I did this as I’m writing this) you will be able to download the ISO.
Install this iso on VirtualBox and then configure your adapter for USB passthrough (there’s a “Devices” list where you can configure the adapter to go through VirtualBox). Windows has something like 14 or 30 days before it needs to be activated with a license. You would basically just use it during the “trial” period to perform this update as once it is done you never have to use Windows again.
If you find another solution let me know but as I said earlier I have never seen anyone do this successfully outside of a narrow range of specific adapters that have Linux / Mac firmware upgrade support available explicitly (which there’s usually a reason for such as being an Apple partner or something like that). Hopefully that helps a little!
So I’ve flashed the Sabrent EC-SNVE to the latest firmware (1.25), and the interface protocol is still showing up as Bulk-Only from lsusb. The drive does show up as UASP in Windows tho. I’m not sure if this was a firmware problem or a kernel problem. I’m still on kernel 5.4 under Ubuntu Focal.
Hey wyuenho,
Have you ran a benchmark on this at pibenchmarks.com yet by chance? I’d be curious to take a look at your benchmark and see how it’s all being detected. My storage test basically uses udev, lshw, hdparm and inxi to identify drives. Different adapters and different drives will not support some of these methods but usually between one of them I can identify the drives. It’s definitely not too uncommon for a lot of these adapters to block a bunch of this information.
Do you have quirks mode enabled by chance? Quirks mode will disable UASP within Linux so I wanted to ask that just to make sure. You may have had quirks mode on to test it with before the update and it’s still on for example. It looks like you are using USB attached SCSI but it is in bulk mode instead of UAS mode. Make sure it’s plugged into one of the blue USB 3.0 ports as well as USB 2.0 will not support UAS.
I do have one report of this adapter (Sabrent EC-SNVE) being fixed by the firmware updates (including true UASP for Linux) at this article: Fixing Storage Adapters for Raspberry Pi via Firmware Updates. Basically we have confirmed reports of the firmware updates fixing it for this adapter which is why I wanted to check the quirks. It’s one of the few that we have documented successful cases of people getting this one working (many adapters people post about here don’t have firmware updates available for them at all unfortunately).
Can you post the output of your:
dmesgcommand? This should tell us the disk detection sequence and if anything was blacklisted. It definitely could be power related as well as that’s the #1 problem with NVMe across the board no matter which adapter/enclosure you have. Have you had any stability issues / freezes / crashes? If this is a 1TB or higher capacity module I can nearly guarantee you will need a powered USB hub from years of helping people diagnose these.
It’s definitely possible it doesn’t have enough power to run in UASP mode and is running in bulk mode as a fallback. This would explain why you’re getting full UASP speeds and reporting on Windows as the PC has more available power to pass through to the drive than the Pi does.
There’s several other things it could be that are worth checking. You may need to update your Pi’s firmware (such as the bootloader firmware, etc.). There have been Raspberry Pi firmware-level fixes that are specific to Sabrent that may help (we had a case of this here where nothing worked including the Sabrent firmware updates but updating the Pi’s firmware itself finally fixed it). The easiest way to do this is to create the “Recovery Image” that you put on a blank spare SD card that will update everything in only a few seconds. I wrote a guide to do the firmware updates here.
We also had a mystery case not too long ago with a Sabrent adapter that was solved by actually updating the firmware on the SSD itself (I think it was a Samsung in that case but I vaguely recall a Kingston one and some others as well, I’m sure I could find some with the comment search if we need to investigate further / none of these fixes immediately help). These may or may not be available for your specific SSD/drive but they are for many of them and we have had a few tough cases cracked by installing drive manufacturer firmware updates.
I would definitely recommend running my storage benchmark on pibenchmarks.com with this. Let’s see if it’s getting the speeds it’s supposed to be. My benchmark also will scan it for some common configuration issues that may help!
So I’ve bought one more ORICO M2PJ-C3[1] and another ICY BOX IB-1817M-C31[2]. The ORICO has the same RTL9210 as the Sabrent, but has a newer firmware available (1.27, tricky to find, but it does exist on the Chinese version of the website, apparent has stability fixes for the Samsung 980 Pro), the ICY BOX has a JMS583. I’ve updated the Pi to the latest default firmware on Github[3], and the all 3 enclosures to their latest firmwares.
Preliminary testing shows that with the newer firmware on the ORICO, lshw shows the uas driver is being used, whereas the Sabrent is just using plain old usb-storage. The ICY BOX however, is so power hungry, even with a UGREEN powered USB hub connected, I couldn’t get it to stop spewing timeout errors.
I haven’t tried flashing the ORICO firmware to the Sabrent tho, maybe that’s something I should try after some tweaking of config file.
I’m running the phoronix disk benchmarks now, it says it’ll take about 20 hours, so I’ll let you know the results tomorrow lol.
[1]: Orico USB 3.1 M.2 NVMe
[2]: ICY Box M.2 NVMe Enclosure
[3]: rpi-eeprom Official GitHub Project Page
Hey wyuenho,
That is fantastic information! If it says it’s going to take 20 hours don’t bother. That is running *extremely* slow to put it mildly! The score is going to be like < 200-300 points I'm certain if it's taking that long. The power hungry and ICY Box also strikes me as correct. I've always had to use a powered USB hub with my ICY Box pretty much. The most power efficient ones I've found are the ones that look like little USB sticks and are basically just a barebones PCB with a M.2 slot and a USB port on the end of it. It makes sense these would use the least as they often don't even have status indicator lights and all the circuitry is minimal. An even worse one I covered was the ASUS Rog Strix RGB enclosure which uses absurd levels of power but is actually really nice for thermals/cooling. I actually really love this enclosure. I originally bought it because of how stupid I thought it was putting user-controlled RGB in an NVMe enclosure and wanted to test how ridiculous the power requirements would be (exactly what you’d expect) but I know it will always need a hub when I use this one.
Do you have access to a powered USB hub? If it’s showing up as UAS but running this slow then it is very likely power related. I’ve seen this behavior on NVMe running in lower power modes. Even doing a cd will have a several second (or longer) delay sometimes when it’s in this state. I think you’ve probably got the adapters in fine shape and they may just need more power. If you plug them into a PC I bet it’s lightning fast as well.
You have enough hardware coming in that for sure something like the ~$20ish Sabrent powered USB hub (2.5A of dedicated power) would be worth it to test a bunch of scenarios with these. I have personally used and powered every drive I’ve thrown in it off of that. It’s also very physically small, or a lot smaller than what you would think when you hear “powered USB hub”. If you have any of these around it would be great to try for a test on all of these. I am fairly certain your firmware is in tip-top shape and that some of these are bumping up against power (like you’ve said with the ICY Box).
There are different power failure levels if that makes sense. You have won’t even boot but there’s a bunch inbetween that. In fact it sounds like a lot of low power states are working on yours that I wouldn’t even necessarily expect to work on the Pi. It’s definitely not hitting the high performance states here though it doesn’t sound like by the time length of that benchmark!
I gave up on the phoronix benchmark, here’s the pibenchmark instead. It looks pretty decent to me, considering it’s running on btrfs.
Pi Benchmarks #58655
Oh wow, that looks much better and tells us a lot! It actually isn’t bad at all. I looked through your benchmark and it turns out your adapter does report power levels which is pretty cool:
Device-1: 2-2.1:4 info: Realtek type: Mass Storage driver: uas interfaces: 1 rev: 3.2speed: 5 Gb/s power: 896mA chip-ID: 0bda:9210 class-ID: 0806 Hub-6: 3-0:1 info:
Here we can see that during the benchmark your drive was pulling 896mA of power. This I would say is definitely not P0 (the highest performance power level) but is actually still a really respectable score! If you click on the 980 Pro brand you can see that 9000-9500ish is about as good as it gets on a Pi 4 without jumping to a CM4 and using real NVMe through a PCIe 1x adapter or something like that.
I checked several other adapters and they all had the same power reading so maybe this isn’t actually a reading (or it’s not very accurate, I’d never noticed this reading so I’ll have to look into that more as I checked 3-4 of them and they all said the same thing so that seems like it may be an estimate or a static value perhaps).
The btrfs is really cool. I wonder if that has any performance overhead. I know it has a ton of incredible features. I can actually see that here:
fs: btrfs block-size: 4096 B dev: /dev/sda maj-min: 8:0 label: MobileCatuuid: 8fc20653-6244-X-X-XXX
I’d be really curious to see a comparison if you do end up trying a powered hub on any of these enclosures. For ones like the ICY Box I think it would definitely be worth it. I am betting that the 980 Pro can do more in there as well but honestly depending on what you’re doing you may be totally happy with it. It’s still probably 7-8x faster than even the fastest SD card benchmarks even without hitting P0 state.
The only indication that anything could be improved is just that the score is a little on the low end (if you go to the “latest” page there were some 980 regulars a few benchmarks behind yours that did 7800 and 8800 and your drive is far superior) but that could be due to btrfs overhead (or maybe it’s faster and with more power it will be 10k+, I’m not sure in this case).
It would be interesting to see some comparisons with your other enclosures using the same drive as I know you said you had a bunch of them you recently purchased. You should be able to just swap the module to a different enclosure and just boot (or at least I’ve always been able to). I wonder if the more power efficient enclosures will give higher performance scores (or lower). Everything looks good overall!
So, I’ve done more testing. I’ve bought the Sabrent powered USB hub and tried it on both the Sabrent EC-SNVE and ORICO M2PJ-C3, it makes no difference whatsoever, both scored in the mid 6000 in your benchmark on btrfs. On ext4 however, I managed to get about 2000 more [1], so there’s that. As to the max power reading from lsusb, I think it’s dynamic and depends on your combo of SSD and RTL9210 firmware versions. On RTL9210 firmware = 1.25, it’s now back to 896mA. There are config options for max power you can tweak in the firmware config files. They are in HEX and there are 2 PHYs, so maybe that’s something to try next, to incrementally increase the max power setting on the enclosure. According to the Samsung 980 Pro’s spec[2], the max power draw can go up to 7-9W, the USB3 port on the Pi 4 can only deliver up to around 6W, while I don’t think the USB3 port can ever drive the 980 Pro to draw that much power, I’ll be keeping the Sabrent powered USB hub just in case and return the UGREEN, because the USB-C PD port is very loose and it doesn’t come with a power supply, so I had to cannibalize a Pi power supply.
Back to the ORICO on the 1.27 firmware, I use it as a Samba time machine and I left it to backup around 500GB of data from my Mac overnight. It disconnected like the older firmware this morning. This issue did not happen for the Sabrent on the 1.25 firmware. I’ve just flashed the 1.27 firmware onto the Sabrent, the Kernel is now using the uas driver for it. I’ll try backing up 500GB to it and see if it disconnects.
Also, I’ve just discovered that newer ICY BOX enclosures like the IB-1817MCT-C31[3] seem to have even newer RTL9210 firmware (1.29) with more compatibility fixes for Samsung SSDs, so that’s also something I’ll try flashing onto the Sabrent and see if it improves things even further.
[1]: Pi Benchmarks #58667
[2]: Samsung 980 Pro Page
[3]: ICY BOX Official Product Page
Hey wyuenho,
Great testing! You actually answered my burning question which is what effects does btrfs has on performance. This also led me to fixing any benchmarks that were submitted when using BerryBoot (the drive was showing up as none for some btrfs submissions and after investigating I was able to correct the parsing of that) which solved about 112 mystery submissions for me and fixed them!
Your power draw numbers sound right to me for sure. The 980 Pro has a fantastic power controller and has many additional power states that other drives don’t have at all. I think this is a great choice.
The Sabrent hub has come in handy for me for tons of things for sure. There are other situations on the Pi where it really comes in handy to have such a small unit (not much bigger than the Pi itself) that can independently power accessories on the Pi. I’ve been able to test countless things I wouldn’t have been able to try and probably would have forgot about if I didn’t keep one of these around for sure.
I definitely think the ICY BOX firmware fixes would be worth a try. The main reason is what I was talking about earlier with the 980 Pro having a bunch of new technology and power states onboard. These fixes likely either fix issues with those power states or enable them to work in the first place which will definitely only help for sure. I will make sure to install these on mine as I had not seen these ones before.
Everything is looking great (other than the few lingering issues you’re chasing down with the various firmware versions)! Your latest submission scored 8,488 which is right on the money for USB 3.0. The only way to break into those really high scores of 10k+ is to jump to true NVMe or a higher USB revision than currently comes on the Pi 4 but comes on some CM4 IO boards.
Thanks a ton for sharing your findings. I’m sure they will help others and I personally learned several things!
Final report: the Orico, despite having a RTL9210 chip inside, it’s actually using an older RTL9210_VB, whereas the Sabrant has a new RTL9210B_CG. Even with the latest RTL9210 firmware, it still disconnected a long write session. I can’t find the datasheets of both chips, but the RTL9210B_CG in the Sabrant is definitely the best I’ve tested. I’ve decided to return the Orico and the ICY BOX.
I believe the newer ICY BOX IB-1817MC-C31 and IB-1817MCT-C31 also use the RTL9210B_CG, so I’d like to see what others will find out as they have the absolute latest firmware available. My current recommendation for the smallest, fastest, most stable, most power efficient and cheapest(!!!) USB3.x NVMe enclosure is the Sabrant EC-SNVE, but you have to figure out the correct firmware combo. I’ll write down my process for posterity as it wasn’t documented anywhere on the internet.
1. Download the latest Sabrant firmware[1], unzip, and keep only the SA8307.cfg config file.
2. Download the latest firmware for the ICY BOX IB-1817MC-C31 or ICY BOX IB-1817MCT-C31 [2], they are the same.
3. Unzip the ICY BOX firmware, and replace the configure/IB-1817MC-C31.cfg file with the Sabrant SA8307.cfg.
4. Plugin the Sabrant, open UTHSB_MPtool_Lite.exe in Windows, and you should see MPtool has picked the SA8307.cfg file.
5. Click the Upload Device button and enjoy the latest, fastest and most stable firmware for your Sabrant.
[1]: Sabrent EV-SNVE Downloads
[2]: ICY BOX Firmware Update
Hey wyuenho,
Great additional findings! I just wanted to chime in with some pibenchmarks data to illustrate some of your points for sure.
Check out all the ICY BOX submissions with this search: Search IB-
Most people put their full model numbers which really helps get an idea of performance gaps / averages / etc.
For the RTL9210BN we can use this search. You can already see a bunch of high scores pop out on this adapter in the 8000-9000 range. It’s honestly almost about 50% are over 8000.
If we compare that to the ICY BOX there are a lot more ICY BOX submissions but only 2-3 of them ever broke 8,000 points.
For the VB series we had less data but it looks like someone did 4 benchmarks on it all at right around 8300 (very good). This isn’t really enough to draw many conclusions off yet though for the VB series as we’d like to see some other drives / adapters using that chipset submitted for that.
Basically the data does seem to support your conclusions. It definitely comes in handy to check some of this stuff as you can pretty much see it over all the benchmarks.
The only thing I would say is that the variations here are minimal between most of these. The reason for that is that the bottleneck is USB 3.0. You’re basically completely maxed out on the USB 3.0 bus with even a mid-range drive which is generally why I personally don’t worry too much about the minor variations as long as there isn’t a major compatibility issue.
What do I mean? Observe Pi Benchmark #48648 by myself using the CM4 with a PCIe 1x adapter (not using USB):
This was done by me in August of last year for my PCIe 1x NVMe on Raspberry Pi?! Compute Module 4 Guide.
Notice that the score is 20,641. That is using a several generation old Samsung 960 1TB (the EVO version even) and I am absolutely curb stomping 980 Pros all day by a factor of 2-2.5x. That is the bottlenecking for sure and is basically a “wall” for people over USB 3.0 as you are hitting the limitations of USB 3.0 themselves.
This is to illustrate / put in context how bottlenecked your drives actually are on the USB 3.0 bus on the Pi 4. Essentially any performance differences between the adapters are due to really strange firmware and compatibility issues as well as better power management and support.
If it is functioning correctly it doesn’t matter whether it’s a 6G/sec enclosure or a 10G or any of that because the Pi 4 only uses USB 3.0 and doesn’t use USB 3.1 or any of those features (and can’t, not on the Pi 4 at least, probably the next Pi will I think we all expect).
As far as actual raw performance goes you are completely bottlenecked and when you bypass this with the CM4 you can see how bad it is. I’d say any adapter scoring in the 7000-8000 range is doing just fine taking into account the bottlenecking. If you go to the “Top Scores” page you can see people who curb stomp anything I’ve ever done on the CM4 by putting things like the 980 Pro in it and absolutely 3-5X’ing the fastest USB 3.0 tests ever done if that makes sense.
Basically if extremely fast storage is a requirement the Compute Module 4 is what you should be using right now because the numbers that the Pi 4 can put up are a joke compared to a PCIe 1x passthrough like I am using in my article I linked. It’s annoying to have to get set up for it the first time but the numbers to make it worth it are more than there for the people who need that level of IO performance and I have some guides available for it to help get started at least.
It would be far more cost effective (and higher performing) to invest in a CM4 setup than going too crazy chasing the various enclosures as by going that route you are limiting yourself to speeds that a mid range M.2 SATA can hit over USB 3.0. Just today someone used a M.2 SATA Western Digital Blue drive and hit 8200 which is pretty much right at the USB 3.0 “wall” and he’s not even in the same league as NVMe with that drive. The enclosures are expensive and it will only take 2-3 of the spendier ones to make up an entire Compute Module setup (saying this from experience).
Note that this is information is for people chasing extreme performance. I know a lot of Google searches lead people here and for people looking for that I wanted to put into context that it actually doesn’t make sense to use any of these enclosures or the Pi 4 at all for extreme high performance scenarios and that the CM4 is multiple times faster for that and costs about the same as a Pi 4 setup from scratch but gives multiple times the performance.
To explain briefly what a Compute Module 4 is it’s basically a Raspberry Pi 4 that you get to choose your own motherboard for (called the IO board). That means we aren’t limited to what capabilities the Pi Foundation puts on the current/next Pi. Whoever makes the IO board decides what capabilities to put on it and since the Pi is running Linux it easily supports a very surprisingly wide range of hardware (it seems like almost anything I or other people try).
These can and do look like regular Raspberry Pis sometimes and lots of companies make all shapes and sizes of boards with varying capabilities for different purposes. The compute module just “snaps” in and out of those boards (there’s no soldering, it’s easy, you gently press and it clicks into place).
You do need a power adapter (12V recommended for NVMe and is an option for Compute Modules but 5V works too) and an IO board to place the Compute Module into (there’s a few starter pieces you need basically) but the overall cost is pretty comparable to a full Pi 4 setup (and cheaper after you buy things like the development IO board which you would presumably only purchase once). There are IO boards with higher version USB ports like 3.1 or 3.2 out there as well and that would solve a lot of these problems and greatly enhance your existing adapters as well.
I spent ~$120 or so for everything including the Compute Module itself (which like the Pi is available with multiple memory configurations or with the CM4 even eMMC and optional WiFi modules). Not too far off from starting fresh with a Pi 4 4GB-8GB and needing the power adapter, SD card and other accessories. I also got one of the larger memory sizes like I usually do with my Pi 4s as well as a built in eMMC and WiFi module so you can lower the cost substantially by opting out of some options I chose.
When you’re putting a 980 Pro in it then that drive is worth 2.5-3X an entire combined Compute Module 4 setup and like I outlined you would go from 6500-8500ish to undoubtedly higher than my 960 EVO score of 20,000 at least. She’s worth it I’d say and you can actually leverage this performance with a real official Raspberry Pi (just not the Pi 4) in the same or even better form factor (depending on what kind of IO board you want). I wouldn’t blame you for being happy enough at this point though but I know what that drive can do (it’s my main rig drive I’m using as I type this) and this type of setup is holding it back a lot because of the USB 3.0 bottleneck issue. It’s a bit like having a Ferrari and never exceeding the speed limit and running it on unleaded gas instead of premium when the Ferrari really just wants to go fast to be happy.
The leap would completely swamp any btrfs performance penalties as well. That took you from 8500 to 6500 very roughly or a 24% drop. My official on-the-record guess is that if you do try this (don’t feel pressured to if you’re happy with the setup, that is what counts) you’d get roughly the 23k of the benchmark I linked to with the CM4 980 Pro subtracted by 24% gives us… 17588. That is with btrfs enabled. Obviously this is just an educated guess for fun as it could end up that you’ve already “paid” the performance penalty for btrfs and all of the gains are just gains and the overhead won’t scale with the increased throughput. I divided that number by 6500 to get the performance increase and it would be a 2.70x increase.
Thanks a ton for the additional info / links and documenting this somewhere on the internet!
FYI: The idVendor and idProduct fields are just config file values the manufacturers have to fill out before flashing the firmware onto the drives, and they are customizable by the end user. Often times the manufacturers don’t even put their own brand name in there and not even a proper serial number, they just change the LED address and call it a day. All of these USB enclosures manufacturers, if they are using the same chip, they’ll also get some reference PCB design and a blackbox blob of firmware and flashing software from the chip vendor. There are only 2 known accurate ways to ID the chip: 1) open up the device and look at the part number. 2) Use the latest MPTool flashing software the manufacturer provide. If you are looking at a chip physically, if it’s missing a B, it’s a RTL9210_VB, if it says RTL9210B, it’s the RTL9210B_CG. There’s also another variant called the RTL9210BPD_CG, but I’ve never seen one so I don’t know how to ID it by eye, it’ll probably say RTL9210BPD or something.
Hey wyuenho,
Absolutely. I deal with this issue constantly. If it shows up on my storage benchmark web site then I’m detecting it (not always possible). That is a fully automated parsing engine. It’s usually pretty easy but the more generic and cheap the adapter or storage controller is directly related to whether it supports hdparm, smartctl, lshw, smartctl, nvme-cli and all the other methods to identify drives and adapters. Take a look at my MySQL backend here:
4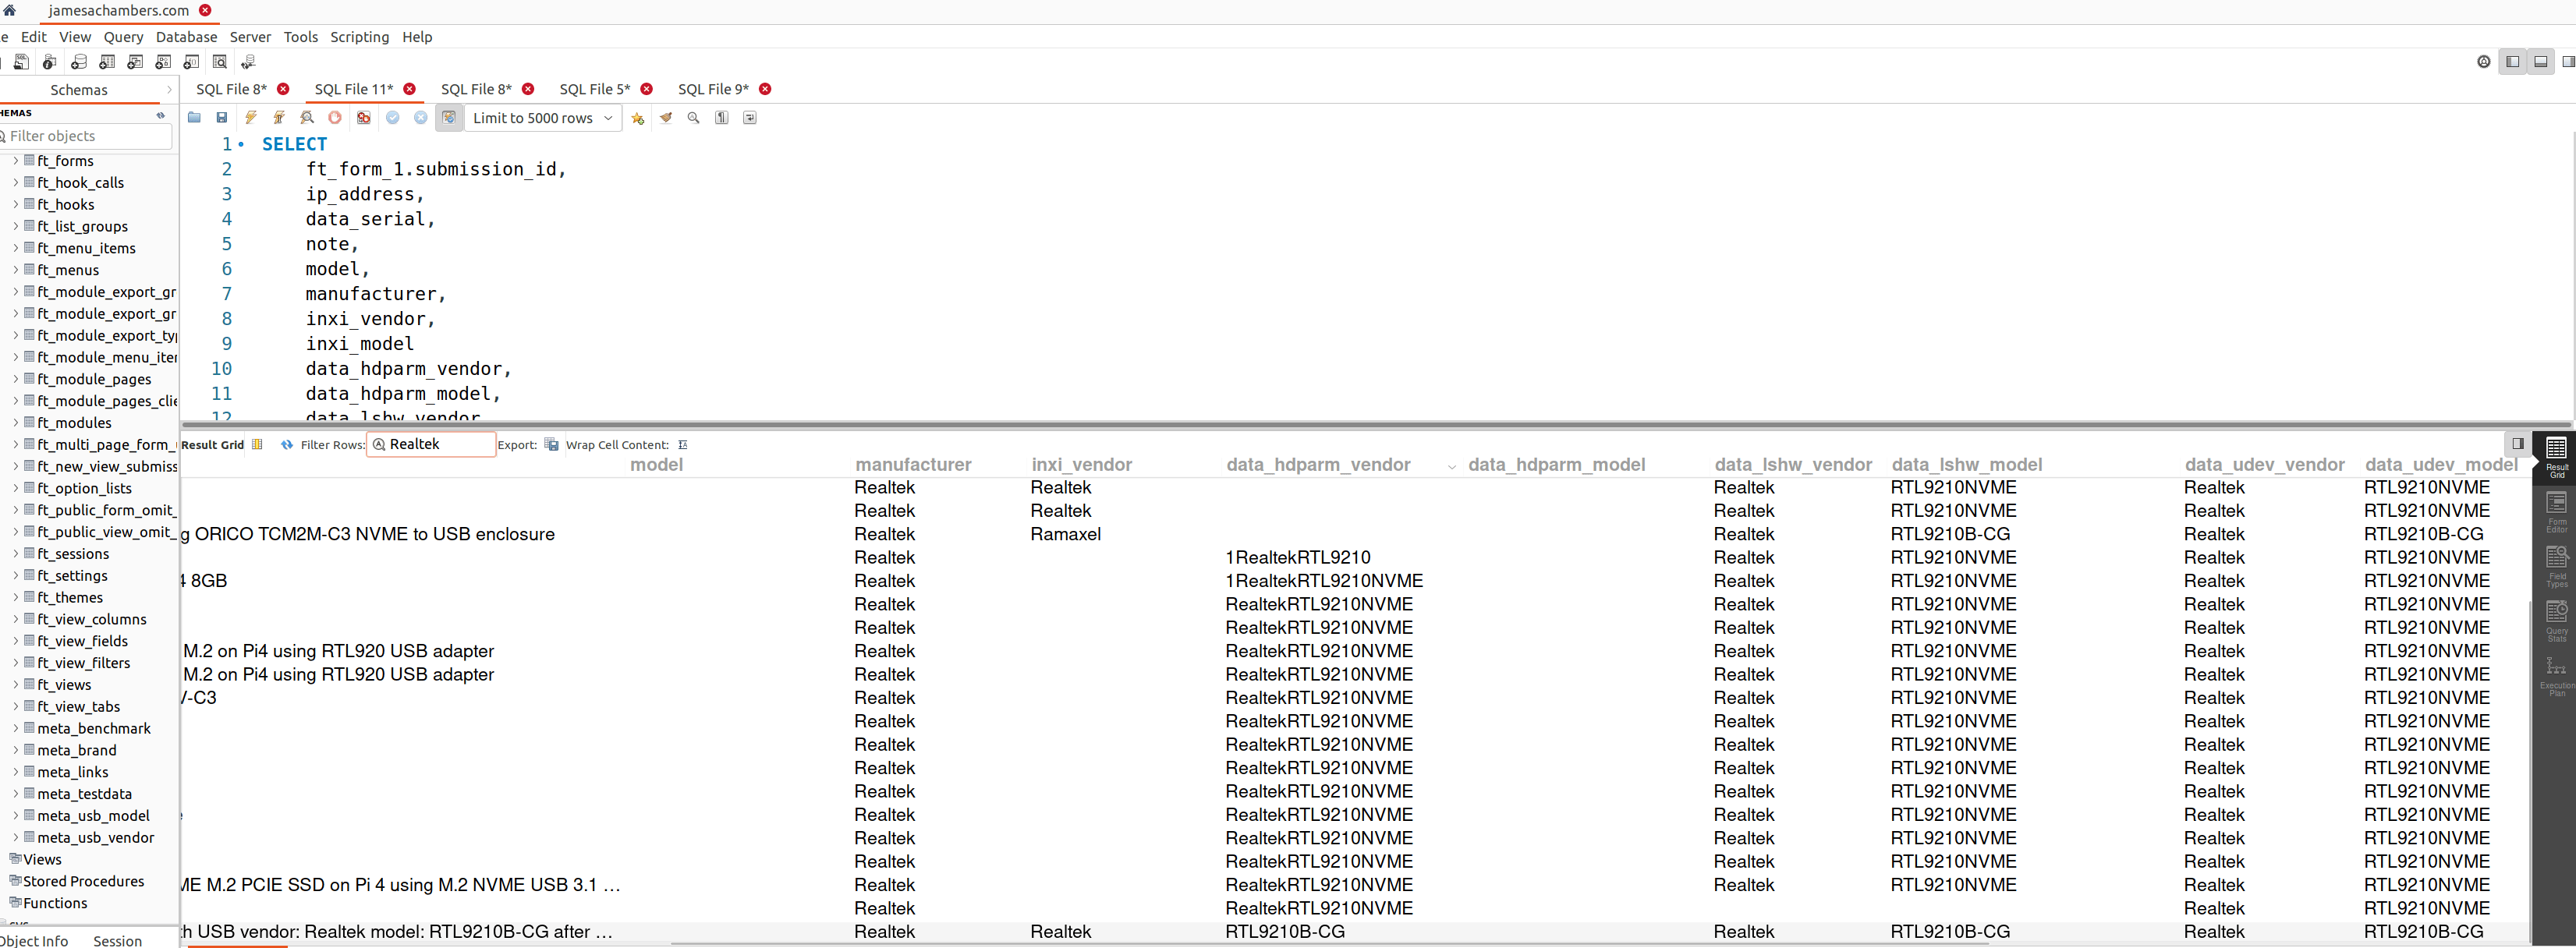
As you can see here the Realtek adapters are identifiable by nearly every test. Including the CG part. You have a lot of options and depending on what your drive manufacturer implemented all of them or none of them may work. I’ll often detect one with inxi and then another adapter will show up fine on udev or hdparm. Blocking hdparm is especially annoying as it makes it much less likely to identify the actual drive.
The Realtek ones are annoying to deal with sometimes because they are *too* gung-ho about reporting what they are. They often report themselves instead of their drive like you can see my hdparm tests are not finding the drive and are just finding the Realtek adapter again. That’s why they’re showing in this view. I actually can’t identify these outside of the chipset which is why they’re stuck.
Most of them are fully compliant with HDParm and will allow me to identify not only the adapter but the drive itself. The above screenshot is basically what I see when I’m working on the site. It’s pretty easy to spot new models and adapters but the worst offending most generic adapters will sometimes literally have that manufacturer field as “EnterManufacturer” or some placeholder template.
It’s basically directly related to how crappy your adapter is whether the manufacturers filled out these fields a lot of the time. If they didn’t then you shouldn’t expect them to have taken much care making sure the adapter is widely compatible. What are the chances they took every step to ensure TRIM and UASP would work properly across all devices? Very low. These are the most common adapters to have major issues.
If someone tries to manipulate these fields it basically wouldn’t be parsed and would be “stuck” until I update the parsing engine to parse that entry. It’s extremely rare people try this but a few spammers have tried spamming it with fake entries before and I have plenty of ways to deal with it but it’s quite rare.
Fascinating stuff, I wanted to show kind of how it worked on the backend. It’s probably smarter than people think. If people think I’m guessing or sitting here all day putting storage benchmarks on there one at a time I’d be ruined doing that for about a day (nor would I ever agree to it). It’s real basically. It’s literally all automated and parsed.
I don’t think there’s another site like it out there as I coded it from scratch. The benchmarks go all the way back years to something like 2019 and this has been a years long project. There’s only a few similar sites for PC and they are pretty crappy looking compared to mine, almost never have pictures, etc. Cheers!
I looked at your script, I don’t see any logic to reliably detect the adapter chip. For the Realtek specifically, AFAICT, all manufacturers set the USB vendor ID to 0xbda, which is Realtek’s registered vendor ID, and product ID to 0x9210, both of which is well known and registered at linux-usb.org. The description is also what lsusb displays and thus authoritative. This is the only somewhat reliable way to detect the chip family, but not the variant. To detect the variant, you need to be able to issue some undocumented magic command via USB to the chip, which MPTool does, so you have to reverse engineer that. Anything else you scrape is arbitrarily self-reported by the manufacturer, often they report the manufacturer and the product as Realtek, when in fact they should be ORICO or ICY BOX and some product model number. This practice is quite common among cheap USB device manufacturers. They just don’t care.
As to detecting the drive, I think you are doing the right thing, hdparm -I will issue an ATA IDENTIFY command directly to the drive, so for most cases you’ll get the correct drive info. For nvme you have nvme-cli.
Hey wyuenho,
Great questions, I’m glad you got to take a look at the script as well! There’s no logic in the script to detect it for sure. It’s all on the web site backend to detect the drives.
I’m able to detect and identify *most* drives over the Realtek adapters with about a 12% failure rate. Here’s what it looks like:
Here I just did a query for ‘data_udev_model like “RTL%”‘. If the “Brand” field is blank that is an unidentified benchmark. I was only unable to identify 43 out of 319 submissions. This is sometimes due to really old / bad firmware on the device or probably more likely they are using a drive that doesn’t implement hdparm (as in the drive itself doesn’t have anything to answer the identify command with or returns garbage which I see a lot) but if it did it could be passed through. That’s not to say it’s not a problem. That’s a 12% failure rate which is among the highest for any adapters on the site so these ones definitely do cause me some headaches.
hdparm is the only test that seems to really pick up anything on the Realtek. This is basically a hdparm -Ii /dev/sda2. This communicates directly with the drive to retrieve the information in the drive. Honestly it’s pretty similar to “undocumented magic” for sure and not all drive manufacturers implement it / support it. It does have nvme-cli parsing in there as well (if it’s available) although not many people have implemented true NVMe on the Pi that can be picked up with this tool unless they are using the CM4 so I only have a few benchmarks that use it.
A lot of the PC and other device benchmarks people have submitted have valid nvme-cli tests though and eventually as I keep improving it I would like to open it up to other devices. It has been a pretty overwhelming project though just to parse something like 32,000 identified tests. I cannot believe how many SSD manufacturers there are that I have never heard of out there. I’ve apparently individually identified (and classified so they’ll parse on the site) 1159 individual models of SSDs, SD cards, etc.
To give an idea of how it’s working here’s some higher level code:
function updateSubmission(&$pdo, &$stmt, &$value){
saveOldVariables($pdo, $stmt, $value);
parseComplete($pdo, $stmt, $value);
parseTests($pdo, $stmt, $value);
calculateScore($pdo, $stmt, $value);
updateHostInfo($pdo, $stmt, $value);
parseProductType($pdo, $stmt, $value);
if (!empty($value["product"])) {
if ("SD" == $value["product"]) {
parseSDInfo($pdo, $stmt, $value);
} elseif ("MMC" == $value["product"]) {
parseMMCInfo($pdo, $stmt, $value);
} else {
parseSSDInfo($pdo, $stmt, $value);
parseProductType($pdo, $stmt, $value);
}
} else {
parseSSDInfo($pdo, $stmt, $value);
parseProductType($pdo, $stmt, $value);
}
sanitizeFields($pdo, $stmt, $value);
parseAdapter($pdo, $stmt, $value);
parseBrand($pdo, $stmt, $value);
updateFlags($pdo, $stmt, $value);
updateChanges($pdo, $stmt, $value);
}
The juicy stuff looks more like this:
function parseBrand(&$pdo, &$stmt, &$value){
$value['model'] = str_replace(' ', '', $value['model']);
parseSpecialExceptions($pdo, $stmt, $value);
if (!empty($value['manufacturer'])) {
switch (mb_strtoupper($value['manufacturer'])) {
case 'SAMSUNG':
case 'CORPORATIONSAMSUNG':
case 'CORPORATION SAMSUNG':
parseBrandSamsung($pdo, $stmt, $value);
break;
case 'SANDISK':
parseBrandSanDisk($pdo, $stmt, $value);
break;
case 'KINGSTON':
parseBrandKingston($pdo, $stmt, $value);
...
function parseBrandKingston(&$pdo, &$stmt, &$value){
$value['manufacturer'] = 'Kingston';
if (startsWith($value['model'], 'SA400S37')) {
$value['brand'] = 'Kingston A400S Series';
$value['approved'] = 'true';
$value['class'] = 'SSD (2.5" SATA)';
$value['image'] = 'Kingston_SSD_A400S37.jpg';
} elseif (startsWith($value['model'], 'SA400M8')) {
$value['brand'] = 'Kingston A400M Series';
$value['approved'] = 'true';
$value['class'] = 'SSD (M.2 NVMe)';
$value['image'] = 'Kingston_SSD_A400M8.jpg';
} elseif (startsWith($value['model'], 'SQ500S')) {
$value['brand'] = 'Kingston Q500 Series';
$value['approved'] = 'true';
$value['class'] = 'SSD (2.5" SATA)';
$value['image'] = 'Kingston_SSD_A400S37.jpg';
...
That’s pretty much how the parsing logic works only extended by tens of thousands of lines. As far as the main parsing logic it looks more like this (to try to parse the drive info in as many ways as possible like we were discussing):
function parseSSDInfo(&$pdo, &$stmt, &$value)

{

    if (isVendor($value["data_hdparm_vendor"]) && isModel($value["data_hdparm_model"])) {

        $value['manufacturer'] = $value["data_hdparm_vendor"];

        $value['model'] = $value["data_hdparm_model"];

    } elseif (isVendor($value["data_hdparm_model"]) && isModel($value["data_hdparm_vendor"])) {

        $value['manufacturer'] = $value["data_hdparm_model"];

        $value['model'] = $value["data_hdparm_vendor"];

    } elseif (isVendor($value["data_lshw_vendor"]) && isModel($value["data_lshw_model"])) {

        $value['manufacturer'] = $value["data_lshw_vendor"];

        $value['model'] = $value["data_lshw_model"];

    } elseif (isVendor($value["data_udev_vendor"]) && isModel($value["data_udev_model"])) {

        $value['manufacturer'] = $value["data_udev_vendor"];

        $value['model'] = $value["data_udev_model"];

    } elseif (isVendor($value["data_nvme_vendor"]) && isModel($value["data_nvme_model"])) {

        $value['manufacturer'] = $value["data_nvme_vendor"];

        $value['model'] = $value["data_nvme_model"];

    } elseif (isVendor($value["inxi_vendor"]) && isModel($value["inxi_model"])) {

        $value['manufacturer'] = $value["inxi_vendor"];

        $value['model'] = $value["inxi_model"];

...
This is basically why there’s nothing in the script as it’s all done on the backend pretty much. Every test I basically try to parse every individual identification method available. You pointed out that lshw and udev basically have the same “sources” for the drive identification which is right. The reason I run all the tests anyways is that not every test succeeds on every system. There’s a lot of systems that will have udev and then not have lshw and fail to fetch the dependencies for it. When this happens I do everything I can to still identify it even without all the potential tests if that makes sense.
Another test I run but don’t parse yet is smartctl. I’ve seen submissions that I wasn’t able to identify through hdparm, lshw, or any other regular means that did have smartctl populated. This seems to talk directly to the SMART interface of the drive but again is definitely not implemented on all drives and some adapters will not pass/communicate this information. That’s on my todo list.
The reason I do it this way (as in parsing on the backend and not within the script) is it’s very easy for me to fix models if I make a mistake or figure out a way to identify more information I wasn’t able to parse before. I can regenerate the entire web site and the 30,000+ benchmarks in a couple of minutes from scratch by reparsing the tests with the new “parsing engine”. People have let me know I’ve miscategorized things before and I can retroactively fix it very easily which if it was all parsed by the script would be a very big problem if that makes sense. The way it is now I just tell it to update *all* submissions again and it will basically update everything with my latest changes.
You’re completely right though about the adapter IDs and everything you’ve said for sure. I think it’s really hdparm that has saved my bacon. This still seems to work through most NVMe to USB adapters or my site would have virtually no NVMe benchmarks on it I’d imagine (or the closest I’d be able to get is just identifying the adapter or even worse just the chipset). The individual drive magic is interesting. I almost wonder if I should try to implement some of the ones for the bigger manufacturers and see if it’s possible to scrape that data. Very interesting ideas!
Just an other question about Pi imager,
Wy are ssd’s imaged not readable in a windows 10 system.
It sees my USB adapter with ssd, but it isnot mounted.
Hey Tom,
Great question. So after you image the drive if you unplug and plug it back in you’ll see the “boot” volume. You’ll never see the second volume within Windows because it’s in ext4 and Windows doesn’t read that format.
I definitely have seen though where after imaging you still won’t see the “boot” volume within Windows. When you unplug the adapter and plug it back in it will re-read the partition table and detect the “boot” volume since that partition is always a MS-DOS partition so Windows will be able to read it!
I just tested the Raspberry pi imager to write an image to my ssd.
But that also didn’t work.
Of cource I set the USB boot bit and tested that.
The only thing I didn’t test it to enter the quirks.
Thanks for your advice.
If everything fails use BerryBoot, that worked for me.
Go here for your images.
I have a raspberry Pi 3B nothing seemed to work:
Updated the JMS768 USB3.0 controller with Sabrent updater
Used SD card copier from Raspbian buster, that automaticly fixes the UUIDs of the partions and also the cmdline.txt file.
Made a bootbin sd card with the bootcode.bin and the cmdline.txt file.
But nothing worked.
But Berryboot did the work for me.
Hey Tom,
That is interesting, it shouldn’t be necessary with almost any modern distro to use something like BerryBoot. Raspberry Pi OS especially supports native USB booting. All you need to do is write the image to your SSD using the Pi Imager.
Having to edit UUIDs is from before the Raspberry Pi supported mass storage device booting natively via firmware. You should just be able to write the image with the Pi Imager and be done with it (especially Raspberry Pi OS)!
BerryBoot as well as the method from this article still work but you shouldn’t need to do it anymore unless you’re running something really unusual but definitely nothing like Raspberry Pi OS / Ubuntu / etc. I wrote up the version of the article that uses the Pi’s native “bootloader” here.
If it works it works though! Maybe BerryBoot will help get some others unstuck that are having particular trouble but I feel like there must be firmware/bootloader/something else at play here.
Hopefully that helps!
SABRENT EC-OCUB 2.5″ SSD/SATA HARD DRIVE USB 3.0 ENCLOSURE – Tool Free Clear External Hard Drive Enclosure works on a Pi4 USB3 with latest eeprom drivers (Apr 2021)
I had bought this case before finding this thread.
Summary steps:
1) Booted Raspberry Pi OS on a spare SD card; confirmed the Pi eeprom release was the latest (Apr 2021)
2) Updated to boot from USB
3) Removed micro SD card and booted Raspberry Pi with PiOS USB3 from SSD
4) Rebooted from original Home Assistant micro SD card
5) Backed up Home Assistant by taking a snapshot and downloaded snapshot to my dekstop
6) Installed Home Assistant OS using Balena Etcher onto SSD in Sabrent case
7) Removed micro SD card and booted from SSD in USB3 port
8) Restored the snapshot by uploading it to Home Assistant
9) All was ok
Hey Bob,
Great find, thank you! I’m actually compiling a list of adapters that can be fixed with firmware updates at an article here: Fixing Storage Adapters for Raspberry Pi via Firmware Updates
I’m going to add this one to the list. Thanks again!
Sabrent EC-SSHD works fine you just have to update the firmware to v1_0_0_8.
Here is a link for the update
Hey Marton,
Thanks, I’m going to add this to the list at Fixing Storage Adapters for Raspberry Pi via Firmware Updates as well!
Quick (hopefully) question. I have an rpi4 8gb with a 128sd card from canakit. Originally to just tinker with HomeKit and HomeBridge. I’ve ended up using it for more and it’s now an integral part of all my home automations. Now fearing the dreaded sd failure… Deciding to switch to an SSD… is there any way at all to copy the SD card to an external ssd and then just take out the sd card once I change the boot?
Hey Anthony,
Great question, I don’t believe that is one that I have got before!
Yes, this is absolutely possible. The SD card imager utility as well as Win32DiskImager can both make complete copies of the disk and restore them. Here’s some instructions for Windows/Mac.
In the Pi accessories folder there is usually a “SD Card Copier” utility as well. When you insert your drive to a computer / Pi through a 2.5″ SATA or NVMe to SSD adapter these drives will show up in these utilities. You can absolutely clone like this. You can also clone it within Linux using dd which is the direct disk imaging CLI utility.
No matter what setup you are using the type of utility you are looking for is a “disk imaging” or “disk cloning” utility. It could be any of the examples I’ve given or others out there but that is what you want to do. You want to clone your SD card’s partition. You may need to follow some of the steps in this guide to fix /etc/fstab to point to the right disk if you go from something like a SD card (/etc/fstab will point to /dev/mmcblk0p2, or on newer ones it may point to a PARTUUID so make sure that matches just like this guide covers).
Hopefully that helps!