
UPDATE 12/5/2020 – If you are looking for installation instructions or USB booting instructions for Ubuntu 20.04 / 20.10 check out my new updated guide here
This is a unofficial distribution of Ubuntu Server 18.04.4 for Raspberry Pi 4. It is provided with the purpose of letting us all play with the new Pi 4’s new increased RAM and other capabilities until Ubuntu’s repositories are updated with support for the newest Pi.
I want to thank all the commenters on this article and my Ubuntu Server Installation Guide for Raspberry Pi 4 who have contributed a ton of fixes to help get the image to the point it is at now! I also want to thank anyone who has reported issues or pull requests on the official GitHub page. This has truly been a collaborative effort and I expect it will continue to be until official support is released.
Features
- Fully 64-bit kernel and userspace environment
- Updates normally via apt dist-upgrade from the official Ubuntu repositories
- Raspberry Pi userland utilities included (vcgencmd, dtoverlay, etc.)
- raspi-config utility included (good for enabling I2C, SPI, etc.)
- Uses the official 4.19.y Raspbian linux kernel built with arm64 flags
- Firmware updates from the Raspbian image and the RPi-Distro/firmware-nonfree repository
- 3D video hardware acceleration support via vc4-fkms-v3d stack. Videos / games are giving very high and smooth FPS.
- Includes kernel headers and the full kernel source tree used to build a kernel with your own custom flags (/usr/src/ directory)
- Can build out-of-tree and DKMS modules
- Full desktop support available via apt install kubuntu-desktop, xubuntu-desktop, xfce4, mate-desktop-environment, etc.
- 5 GHz WiFi channel support
- Working Bluetooth and WiFi
- KVM virtualization support
- Update script provided to update kernels/firmware/modules
GitHub Project Location
The image and source code to build the image are open source and freely available on GitHub:
GitHub – TheRemote – Ubuntu-Server-raspi4-unofficial
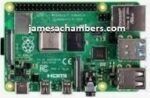
The Raspberry Pi 4 is available in different memory configurations all the way up to 8 GB. It’s about the size of a credit card and uses an extremely low amount of power making it ideal for all sorts of projects and ideas!
Links: AliExpress*, Amazon.com*, Amazon.ca*, Amazon.com.au*, Amazon*.co.jp*, Amazon.co.uk*, Amazon.de*, Amazon.es*, Amazon.fr*, Amazon.it*, Amazon.nl*, Amazon.pl*, Amazon.se*, Amazon.sg*

The Raspberry Pi 400 kit includes everything you need for a full Pi 400 desktop build. The Pi 400 is the fastest Raspberry Pi ever released and comes in the form factor of a keyboard!
Links: AliExpress*, Amazon.com*, Amazon.ca*, Amazon.com.au*,Amazon.co.jp*, Amazon.co.uk*, Amazon.de*, Amazon.es*, Amazon.fr*, Amazon.it*, Amazon.nl*, Amazon.pl*, Amazon.se*, Amazon.sg*
Update Bootloader Firmware First (using Raspberry Pi OS)!
One important new thing to understand about the Raspberry Pi 4 vs. older Pis is that the 4 now has real onboard firmware that is on a special chip separate from everything else. Older Raspberry Pis did not have real onboard firmware and loaded all of their firmware from the SD card every single boot.
Before you install this image you should run Raspbian and install the latest firmware using this command:
sudo apt-get update && sudo apt-get dist-upgrade -y
sudo rpi-update
Next we are going to check for bootloader updates. We do this using the new rpi-eeprom utility. The following command will check for updates:
sudo rpi-eeprom-update -a
For a lot more information about the new rpi-eeprom bootloader utility make sure you check out my Raspberry Pi 4 Bootloader Guide.
If you have multiple SD cards or storage devices laying around it is a good idea to designate one of them as the “Official Raspbian Firmware Updater” card. Using this method you can periodically swap out the card and install the latest firmware updates to your Pi 4 and then switch right back to Ubuntu.
Preinstalled Image Download / Instructions
To download the precompiled image see the releases section located at GitHub – TheRemote – Ubuntu-Server-raspi4-unofficial – Releases
The file you are looking for on the releases page is ubuntu-18.04.4-preinstalled-server-arm64+raspi4.img.xz. Download this file and extract the .img file from inside. Use the free and awesome 7-zip if you are on Windows to extract the .img file.
Now burn the .img file using your favorite program. I use Win32DiskImager. Now insert your SD card / storage device into the Pi and start it up!
Username: ubuntu
Password: ubuntu
Upon logging in for the first time you will be required to change the default password to something else. Once you have done that log back in and you should be all set!
Updates
Using apt-get
First and foremost 99% of your updates will be coming from Ubuntu’s official repositories directly from apt as it would with any official image. The only things set on package hold (using apt-mark hold flash-kernel linux-raspi2 linux-image-raspi2 linux-headers-raspi2 linux-firmware-raspi2) to prevent them from overwriting the firmware already on the image. If you wish, you may apt-mark unhold those same packages and you will be 100% official Ubuntu. Your installation will probably immediately break if you do it now, but when the RPI 4 support is backported this is how you can change back to theirs.
Included Updater
I have also included an updater that will give you the latest kernel/firmware/modules/fixes that are included in each release. If Ubuntu’s 18.04.4 update servers get working firmware for the Raspberry Pi 4 I will change the update script to remove the apt-mark holds on the Raspberry Pi firmware package in apt and close the project down (leaving this here for people to learn from to hack an unsupported device into their own distros, or until I do it again on the next Pi release!)
Usage
If you have V18 or later of the image the updater is located at /home/Updater.sh. Type/paste:
sudo ./Updater.sh
If you have an older version of the image or need to manually update your Updater script, use the following commands:
wget https://raw.githubusercontent.com/TheRemote/Ubuntu-Server-raspi4-unofficial/master/Updater.sh
chmod +x Updater.sh
sudo ./Updater.sh
Updates to the kernel/firmware/fixes to common problems will be provided as long as there is interest.
Forcing Update
If you want to force the update (if you suspect/know something went wrong during an update, or you are troubleshooting, etc) use the following commands:
cd /home
sudo rm /etc/imgrelease
sudo ./Updater.sh
These commands remove a small file that contains the version of the image you have installed. This will cause the updater to allow you update again.
Install Full Ubuntu Desktop Version
To install the full version of Ubuntu Desktop use one of the following:
- sudo apt-get update && sudo apt-get dist-upgrade -y && sudo apt-get install ubuntu-desktop -y
- sudo apt-get update && sudo apt-get dist-upgrade -y && sudo apt-get install xubuntu-desktop -y
- sudo apt-get update && sudo apt-get dist-upgrade -y && sudo apt-get install kubuntu-desktop -y
The xubuntu variant is lighter than the kubuntu variant but either one will need to download and install thousands of packages to complete the upgrade. This can obviously take quite a long time. How long it will take depends on your internet connection and the quality of your storage device.
Running this task overnight or when you have an errand to go run is definitely advised!
Performance
Storage
Beyond keeping your firmware and distribution up to date there is only one thing that sets apart one Ubuntu installation on a Pi from any other: your storage device. The difference between a low end to high end SD card can be a 2-3x performance, and the difference between a SD card and a solid state drive is a whole order of magnitude.
To help people know whether they have high performance storage I made the Raspberry Pi Storage Benchmark that will give you a performance score. Running the benchmark is really easy. Paste or type the following commands:
curl https://raw.githubusercontent.com/TheRemote/PiBenchmarks/master/Storage.sh | sudo bashThe storage benchmark will run several well known and respected benchmarks such as iozone and fio and calculate a score for your device.
Most importantly, to compare your score or if you want to just view other benchmark submissions check out the full results of all submissions in a searchable/sortable table at the Raspberry Pi Storage Benchmark Results Page.
Using USB Storage / Solid State Drive (SSD)
UPDATE 12/4/2020 – These instructions won’t work with Ubuntu 20.04 and 20.10. To USB boot those versions check out my new Ubuntu 20.04 / 20.10 USB booting guide here
Right now the Pi 4 still lacks USB boot support. However, you can still do it by using the trick of having a SD card that you use as a bootloader only and have the rootfs on your USB storage. This is kind of a waste of a SD card but it’s definitely worth it as it allows you to hit those full sweet sweet USB 3.0 transfer speeds right now without waiting until the USB booting firmware update is released.
Using a solid state on the Ubuntu image is incredibly easy (even easier than Raspbian). Here’s the instructions:
- Download the Desktop or Server image above and write it to your SD card
- Navigate to the /boot drive on your SD card and open cmdline.txt
- Change the part of the line that says root=/dev/mmcblk0p2 to root=/dev/sda2
- Now burn the image again to your SSD
- Plug in both the SSD and Micro SD and boot up the Pi
See my Raspberry Pi 4 USB Booting Guide for more information on USB booting / how this works / how to set it up.
Known Issues / Fixes
This section will be updated with known issues/fixes as people test the image and give feedback.
No display (HDMI)
If you have no display on your HDMI monitor you may need to toggle some options in /boot/config.txt. Put the SD card back in your computer and go to config.txt on the boot partition.
Here are some examples of good ones to try to get your display working:
#uncomment if you get no picture on HDMI for a default "safe" mode
#hdmi_safe=1

#uncomment if hdmi display is not detected and composite is being output
#hdmi_force_hotplug=1

#uncomment to force a specific HDMI mode (this will force VGA)
#hdmi_group=1
#hdmi_mode=1

#uncomment to force a HDMI mode rather than DVI. This can make audio work in DMT (computer monitor) modes
#hdmi_drive=2

#uncomment for composite PAL
#sdtv_mode=2
Which option or options may fix it for you is impossible to say. Everyone’s display is different so you may have to try a few times before you get it.
Kubuntu-Desktop display issues
If your windows are not drawing correctly in Kubuntu (missing window borders, black screens in windows, etc.) then you need to disable compositing.
Use the shortcut Alt + Shift + F12 to disable the compositor and everything will draw normally. Now go into the Settings app and go to the “Compositor” section and uncheck “Enable compositor at startup” to prevent it from turning back on when you reboot.
This has been resolved in V16+.
Build Instructions
If you don’t want to use the precompiled binaries you can also build it yourself with the provided build script!
The build script is meant to be ran in a *throwaway* Ubuntu 18.04.4 Virtual Machine (VM). Here are the reasons you shouldn’t ignore this:
- Absolutely no steps have been taken to make the process “secure” or “safe” for your main machine
- It assumes the home directory is safe to build in (it’s not on a main system)
- It installs hundreds of development packages that you only need to build the image (would bog down a main system)
- It chroots into at least 4 different images during the build and chroots leak (causing instability/security concerns)
- If things go wrong with the type of commands used in the script your system can get borked *real quick* (like instantly)
Now assuming you have your fresh throwaway VM ready download the build script:
cd ~
wget https://raw.githubusercontent.com/TheRemote/Ubuntu-Server-raspi4-unofficial/master/BuildPiKernel64bit.sh
chmod +x BuildPiKernel64bit.sh
Now is a good time to read through the build script to understand what it is doing. It will download several images and update them in a chroot and then extract the firmware. It then sets up all of the changes/fixes in the target image.
Once you feel you are ready to proceed run the build script with:
./BuildPiKernel64bit.sh
The script’s final output will be “ubuntu-18.04.4-preinstalled-server-arm64+raspi4.img” along with the xz compressed version and an updates.tar.xz file which is meant to bring a normal 18.04.4 installation up to date.
Release History
Release v28 – 2/24/2020
- Updated source image to Ubuntu 18.04.4
- Added xubuntu-desktop precompiled images
- Updated to kernel 4.19.105 (addresses critical vulnerability)
- Fixed flash-kernel package missing dtb files
- Fixed issue that could cause ssh keys to not be created properly
Release v27 – 1/20/2020
- Updated to kernel 4.19.97
- Updated to Ubuntu 19.10.1 for base firmware instead of 19.10
- Updated Raspbian firmware
Release v26 – 12/20/2019
- Updated to kernel 4.19.89
- Power management firmware features for WiFi are now enabled (saves 55mA (~270mW) of power on Pi 4)
- Updated firmware
Release v25 – 12/3/2019
- Fixed issue with desktop driver not loading properly (thanks tarsij!)
- Updated kernel with a few V3D and other fixes
Release v24 – 11/29/2019
- Updated kernel to 4.19.86
- Updated packages and firmware
- This kernel has additional USB and V3D improvements
Release v23 – 11/21/2019
- Updated kernel to 4.19.84
- Fixed problem that could cause desktop v22 release to not load
- Enabled AppArmor kernel flags
- Fixed display performance in headless mode by setting hdmi_force_hotplug=1 to enable the creation of a virtual display
- Added #dtparam=i2c0=on and #dtparam=i2c1=on examples to /boot/firmware/config.txt to help enable those interfaces if needed
Release v22 – 11/17/2019
- Updated kernel to 4.19.83
- This kernel includes a number of fixes to USB and other drivers — if you were having trouble with USB v22 is worth a try for you!
- Fixed issue where lightdm service (used by xubuntu-desktop) would not load properly
- Added bootcode.bin to /boot/firmware to allow older Pis to boot the image (3B+ confirmed to work so far, others need testing)
- Added README documentation to /boot/firmware/overlays folder for documentation inside dtoverlay command
- Updated firmware
Release v21 – 11/8/2019
- Preinstalled Desktop binary (ubuntu-desktop) now available in the releases section
- Netplan changes removed by popular demand — it was causing too many issues as everyone is using the image differently
- Updater now removes old kernel source code automatically (no more manual cleaning of these large folders needed)
Release v20 – 11/7/2019
- Fixed bug that was causing kernel modules to not load (updating using /home/Updater.sh recommended)
Release v19 – 11/6/2019
- Fixed PulseAudio only playing sound in mono, stereo now works!
- Added kernel flags to optimize speed/clean up warnings/fix crashes
- Moved most fixes to /etc/rc.local so they are applied after installing a *ubuntu-desktop package without waiting for the next update
- Removed machine-id from the base image so that cloned images wouldn’t all have a duplicate machine-id
- Fixed audit service error
- Fixed “spice-vdagent[2107]: Cannot access vdagent virtio channel /dev/virtio-ports/com.redhat.spice.0” error
- Fixed triggerhappy crash related to /lib/systemd/system/triggerhappy.socket being wrong type
Release v18 – 11/3/2019
- Update to kernel 4.19.81
- Added udev rule to allow users to use vcgencmd without sudo (thanks xlazom00)
- Fixed udev mounts not being visible (thanks wyuenho for the pull request)
- Build script improvements now gets cross chain compiler / qemu user static 4.1 / related build dependencies
- Build script now retrieves all dependencies for you on a blank Ubuntu 18.04.4 Virtual Machine (if you want to build)
Release v17 – 11/1/2019
- Fixed issue with CUPS preventing firmware modules from loading in xubuntu-desktop
- Fixed unescaped EOF issue that was messing up fixes in /etc/rc.local (thanks meisenzahl for the pull request!)
Release v16 – 10/31/2019
- Updated Pi firmware (sound / video fixes, see https://github.com/Hexxeh/rpi-firmware/commit/c5736330216628b5ff8e3d17dde7cc03ce2126e6
- Updated Ubuntu-side firmware from updates included on the preinstalled 1910 release image
- New 64 bit Raspberry Pi userland tools/libraries (vcgencmd) tools are now available — they are being freshly built each version now in the build script!
- Fixed issue where Pulse would not come back on after first reboot
- Fixed netplan so startup isn’t delayed by several minutes without an ethernet cable plugged in
- Fixed several kernel flags related to sound/video
v15 Official Release – 10/28/2019
Script to update between releases is finally ready, and with that I am taking this out of pre-release!
To get the update script use the following commands:
wget https://raw.githubusercontent.com/TheRemote/Ubuntu-Server-raspi4-unofficial/master/Updater.sh
chmod +x Updater.sh
sudo ./Updater.sh
You can update from any pre-release release version. Please make a backup first!
The updater is located at /home/Updater.sh on v15 and up (to run type sudo bash /home/Updater.sh)
Pre-Release v14 – 10/26/2019
- Kernel source tree and headers are now included in the image!
- The kernel build source tree is located at rpi-linux-“${KERNEL_VERSION}”
- Ubuntu’s first official release has come for the Pi 4 but it’s 19.10 only which is not a LTS release and support ends for it in -DKMS module building tested (you can test using apt install hello-dkms)
- If you want custom kernel flags you can go to the /usr/src/rpi-linux folder and run make menuconfig (see BuildPiKernel64bit.sh for more info)
- Rewrote build script to be more readable and reliable. It’s still a work in progress but I’m breaking things down into functions, etc.
Pre-Release v13 – 10/23/2019
- raspi-config tool is now included with the image for (testing only, don’t use on critical fully set up images). You can use it to turn on i2c/spi/etc. File an issue if you find problems!
- vcgencmd tool (and other libraspberrypi-userland packages) are now included (older build, works for essentials such as vcgencmd measure_temp, vcgencmd get_config int, vcgencmd get_throttled, etc)
- Added 5Ghz WiFi band support (default regulatory domain US, change in /etc/default/crda if desired)
- Updated kernel to 4.19.80
- Fixed sound artifacts when playing YouTube/videos in browser
- Fixed fsck errors during resize2fs operations
Pre-Release v12 – 10/6/2019
- Fixed Bluetooth not automatically attaching (now appears in both console and desktop mode)
- Updated firmware using the latest from the Raspbian image
Pre-Release v11 – 10/5/2019
- Updated kernel and modules to rpi-4.19.75
- Updated kernel to 4.19.76
- Fixed several video driver issues including very low performance, YouTube videos in full screen freezing the Pi, low color resolution in xubuntu-desktop and graphical artifacts in kubuntu-desktop
- Fixed bluetooth by adding missing firmware file not present in firmware-nonfree
- Updated /boot/firmware/config.txt with useful HDMI debug flags — uncomment some of these such as hdmi_safe if you are not getting display output
- Added lines in config.txt to configure SPI and i2C — you can uncomment these lines if you need to enable them
- Updated WiFi firmware
- Added missing regulatory.db files (used by WiFi) to /lib/firmware
- Note for Kubuntu desktop: the compositor needs to be disabled for everything to draw correctly. Use the shortcut Alt + Shift + F12 to disable the compositor and everything will draw normally. Now go into the Settings app and go to the “Compositor” section and uncheck “Enable compositor at startup” to prevent it from turning back on when you reboot.
Pre-Release v10 – 10/3/2019
- Fixed issue with wireless not showing in v9
- Fixed bad symlink creation (pull request #38)
Pre-Release v9 – 10/2/2019
- Updated kernel and modules to rpi-4.19.75
- start*.elf and fixup*.dat files (GPU firmware) are now updated with each release
- Kernel .config has been updated with the latest default config and Sakiki-‘s conform_config.sh parameters
- New conform_config_jamesachambers.sh script added to better keep track of kernel config changes
- SPI is now enabled
- CPU bandwidth provisioning for FAIR_GROUP_SCHED is now enabled (CONFIG_CFS_BANDWIDTH=y)
- Additional Ceph kernel config parameters enabled (see conform_config_jamesachambers.sh for all params)
- A lot of additional hardware support has been enabled via the official Raspberry Pi default kernel config params — if you were having trouble with a device try v9
- Cleaned up build script by adding additional needed dependencies to apt-get commands, broke up some sections and added additional comments
Pre-Release v8 – 9/21/2019
- Updated kernel to rpi-4.19.73
- Added hosts entry to prevent slow sudo command
- Added CONFIG_CGROUP_PIDS=y to .config file
- Committed extras folder to repository
- Added forcefsck file to run fsck on first boot
- Reduced image size substantially by running fstrim on .img
Pre-Release v7 – 9/8/2019
- Updated kernel to rpi-4.19.71
- Added CONFIG_BLK_DEV_RBD=y to kernel .config file to enable Ceph support
Pre-Release v6 – 9/7/2019
- Updated kernel to rpi-4.19.71
- Integrated all available updates from apt into the base image
- Fixed display driver issue — if you are running v5 you can fix it by commenting out dtoverlay=vc4-fkms-v3d from /boot/config.txt
- Enabled Ceph support in the kernel .config
- Added build flags to kernel build line to build a more complete device tree (dtbo files)
- Integrated all upstream updates since v5 from raspberrypi-linux and firmware-nonfree including a 3D driver fix for aarch64
Pre-Release v5 – 9/3/2019
- Desktop support added
- Expect lots of warnings in the logs. If you find solutions to them please leave a comment — many commits come from the comments!
- Be advised — installing can take quite a while on a Pi — overnight or when you have something to do is a good time
- Type one the following commands to install your preferred flavor of Ubuntu Desktop
- sudo apt-get install xubuntu-desktop # or
- sudo apt-get install kubuntu-desktop
Pre-Release v4 – 9/2/2019
- Recompiled kernel to include support for Ubuntu features that are not present in Raspbian
- Enabled USB UAS support
- Fixed video driver by modifying config.txt and compiling with 3D support
- System now boots clean and loads all modules (sudo systemd status)
Pre-Release v3 – 9/2/2019
- Fixed IPv6 and a few other module load errors
Pre-Release v2 – 8/31/2019
- Boot time reduced from 100s to around 30s
- Messing with apt-mark or flash-kernel is no longer necessary and the fix has been built into the image
- Fixed bluetooth firmware bug that was looking in /etc/firmware instead of /lib/firmware
- Fixed entropy bug causing slow startup
- Fixed mdadm.conf RAID warning
- Module.symvars is now available in /boot/firmware/ if you need it to build kernel modules
If you need the whole source tree check out the accompanying build script in the repository. It’s exactly the same as how the kernel and modules were built. - Various other fixes (special thanks to Joan at jamesachambers.com for contributing so many)
- More at https://jamesachambers.com/raspberry-pi-ubuntu-server-18-04-2-installation-guide/


Hello there!
I’m very happy and exited with these release, almost everything is working! I installed mate and working under xrdp is very smoth. The only thing I need to fix is the bluetooth and the tipicall “System problem error detect” while running xrdp with ubuntu.
Thank you very much James!!!
Hey James,
Great work! Thanks for your efforts. I am on v5 and it runs rock solid. I needed a 64bit linux to run a java app server which requires 64bit. I had it running on Manjaro before (which supports 64bit aarch) but seems to have stability issues. I typically run all my PI’s on some form of Xubuntu (Xfce) (and Centos 7 on a PI3 front end server) and this works perfectly and I prefer a debian based system over aarch. Thank you so much!
Hi James,
I tried your suggestion of editing the /boot/firmware/config.txt file, but that did not improve the xrdp sluggishness (which again, could be related to xrdp, and not display driver problems). I also found out that using my SDL Hercules without using xrdp or an HDMI screen was a lot more stable, but eventually it still became unresponsive whilst htop was still showing it running. So I will try your latest v6 image, but in order to try narrowing down my tests, I will at first not add any desktop stuff (xubuntu and xrdp etc.), and find out how that goes.
Thanks,
Peter
Hey James,
first of all thanks for this guide.
I did the steps you mentioned above exept the firmware update with raspi-config because I dont have much knowledge about Linux and Im quite insecure with bleedingedge firmware. Because I still want to be able to boot my Raspian setup safely and stable. However Im running the latest stable firmware.
Now to my problem.
I wanted the 64bit System because I have the 4GB Ram Pi and wanted to use 3G Ram for my Minecraft server. I first tried it on Raspian but the system capped me at about 2GB and when I tried to use -Xmx3072 f.e. the Java VM didnt even start. Error: “could not reserve enough space for object heap”
So I now use your Ubuntu v5 image and JDK8 64bit (I need the old JDK because its a modpack-server which won’t launch on newer versions).
Now there isnt an Error like the one above, but when I observe the RAM in htop, the total system RAM wont go above 2.2GB. Although I executed the Server jar with -Xmx3072 and didnt get an error from the java VM like I got it earlier in the 32bit environment.
Im not a native speaker so please be gentle with my english. I try my best. 😀
Thank in advance
Tizian 🙂
I installed 4GB model as per instructions. Boots OK in text mode, but when shifts to graphics mode monitor (Dell ST2421L, just HD) says “current input timing is not supported”. I can ssh into the system, so it’s definitely running. I did update the firmware with Rasperian. A 4K monitor just give gray fizz.
Hey Jim,
I think the image is currently having problems with 4K resolutions (EmilFR said the same thing). Something that worked for her was commenting out the line: “dtoverlay=vc4-fkms-v3d” in /boot/config.txt
This may be a good thing to try as a workaround until the image is updated for this!
Hi James I just imaged the v6 but still can’t get a display working. Seems like I get a different result every time I try it. Before it would show the colors from the raspberry logo, the scroll text for about 3 seconds, then the display would go dead. I’m using a TV for a monitor but it’s not 4K, only hd 1020. I really need this to work as Debian doesn’t work with the sensor we are trying to connect. Any help would be appreciated. Thanks, cob
I just installed Ubuntu 18.04.03 on a RPi 3B+, and I ran into a problem (so far unsolved) that I hope your installation does not have:
The Ubuntu Server only activates eth0, but not wlan0. I managed to get as far that I can activate it from the command line with “nmcli d connect wlan0”, but I cannot get it automatically activated at boot – it always waits an eternity for its (unconnected) eth0 instead.
So, please, offer a way to run it off wifi only!
Hey Christian,
Thanks I should be able to help with this. I’ll fire mine up and get things going!
Thanks to user chili555 on askubuntu I got it working.
It worked for me, except that I had to replace the name of the wlan interface from wlp1s0 to wlan0.
I successfully used your pre-release v5 image, added xubuntu and a bunch of other stuff, all leading up to a successful build of the SDL Hercules mainframe emulator on a RPI 4 with 4GB. The resulting Hercules can successfully IPL some mainframe operating systems. The speed shows great improvements over my last successful similar tests on a RPI 2 of a few years ago. I’ve seen Hercules reporting mainframe emulated MIPS rates of up to 76 MIPS.
But there are problems, probably not unexpectedly so, perhaps because of the pre-release nature of this RPI 4 Ubuntu, or of my not 100 % correct building of the SDL Hercules on the RPI 4 platform. I’ll need to investigate if had the right GCC options of the RPI 4 processor architecture. The problems manifest themselves in the Hercules emulator becoming slower and slower, as shown on an SSH connected “htop” screen. Eventually the RPI 4 freezes up completely, only power cycling restarts the RPI 4.
My standard RPI 4 usage is headless, via “xrdp” from a Windows 10 system. I will also try it via a regular HDMI 0 screen and USB keyboard and mouse.
Nevertheless, I thank you James for your efforts in trying to bring Ubuntu 18.04 64 bit to the RPI 4. Great work.
Cheers,
Peter
Hey Peter,
Thanks for trying it! I do have some more improvements to the image coming (such as a compiler flag that generates more DTBOs) that may help as well. Definitely keep us posted!
Hi James,
Thanks for your reply.
I have a bit more info which perhaps may be helpful to you.
First of the good news. I was able to circumvent my stability problems by (1) ensuring to not use xrdp (which seems a huge consumer of CP cycles), and, (2) limiting the SDL Hercules emulator mainframe memory MAINSIZE to 2.5 GB. I’m going to keep this running for days on end to see how stable it is. The “htop” screen (in a SSH session) shows “Mem … 3.09G/3.72G”.
On the negative side, when I use Ubuntu 18.04.3 on the RPI 4 via xrdp, even without this Hercules thing, then the response is very sluggish. E.g. moving a (xfce) window on the screen is verrry slow. This could be normal if xrdp needs more CPU resources than the RPI 4 has to offer. Or their might still some display driver problems in the RPI 4 Ubuntu ? Don’t know.
Anyway, SDL Hercules, which is what I’m mostly toying with, does not really needs a screen. It is a pure server thing (emulating a mainframe), so this is really already now working super good for me.
Cheers,
Peter
Hey Peter,
I’m about to release v6 shortly that fixes some display driver issues. If you want to try the fix on your v5 you have installed already do a sudo nano /boot/config.txt and comment out the line dtoverlay=vc4-fkms-v3d underneath the
Pi 4 section. Or you can try the v6 image and let me know if performance is improved!