
The new Raspberry Pi 4 bootloader has finally come out of beta and made it’s way into the official latest Raspbian! This has been long awaited since when the Raspberry Pi 4 was released it had no native support for booting from USB / Network but it was promised right from the start it would get it through a later update.
This guide will show how to configure the new bootloader and set up your Pi to boot from USB devices as well as the other boot options now available within the Raspberry Pi 4 bootloader.
If you are looking to use USB booting with Ubuntu you should check out my guide specifically for Ubuntu here.
If you are using the CM4 check out my guide for the Compute Module 4 here
Equipment Used
NVMe (High Performance) Option:
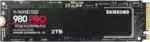
The Samsung 980 Pro (NVMe) is a professional grade SSD and one of the fastest in the world. The Samsung NVMe drives have been at the top of this category for a long time and are well trusted for both their performance and reliability / long life.
Links: AliExpress*, Amazon.com*, Amazon.ca*, Amazon.com.au*, Amazon.co.jp*, Amazon.co.uk*, Amazon.de*, Amazon.es*, Amazon.fr*, Amazon.it*, Amazon.nl*, Amazon.pl*, Amazon.se*, Amazon.sg*

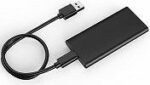
The ICY BOX is basically a giant heatsink that you mount a high performance M.2 NVMe drive inside of. This enclosure is really fast but requires a powered USB hub. Not even the 3.5A adapter can reliably power it! The enclosure works well and will physically feel warm to the touch as it is pulling the heat off your NVMe drive!
Links: Amazon.com*, Amazon.ca*, Amazon.com.au*, Amazon.co.uk*, Amazon.de*, Amazon.es*, Amazon.fr*, Amazon.it*, Amazon.nl*, Amazon.pl*, Amazon.se*, Amazon.sg*
2.5″ SATA Option:

The Kingston A400 has been a great drive to use with the Pi for years. It’s reliable, widely available around the world, has low power requirements and performs very well. It’s also very affordable. This drive has been benchmarked over 1000 times at pibenchmarks.com and is the #1 most popular SSD among the Pi community!
Links: AliExpress*, Amazon.com*, Amazon.ca*, Amazon.com.au*, Amazon.co.jp*, Amazon.co.uk*, Amazon.de*, Amazon.es*, Amazon.fr*, Amazon.it*, Amazon.nl*, Amazon.pl*, Amazon.se*, Amazon.sg*
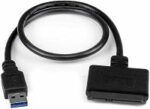
The USB 3.1 variant of the StarTech 2.5″ SATA adapter works well with the Pi 4. The USB 3.0 variant doesn’t have firmware updates available and is not recommended.
Links: Amazon.com*, Amazon.ca*, Amazon.com.au*, Amazon.co.jp*, Amazon.co.uk*, Amazon.de*, Amazon.es*, Amazon.fr*, Amazon.it*, Amazon.nl*, Amazon.pl*, Amazon.se*, Amazon.sg*
SD card option:

The SanDisk Extreme A1-A2 SD card has the best scoring SD card on pibenchmarks.com for years and is second in popularity only to the SanDisk Ultra (often included in combo kits). The application class (A1) means random I/O speeds (very important when running an OS) have to meet a higher standard. There’s no benefit on the Pi for A2 right now so get whichever is cheaper/available.
Links: AliExpress*, Amazon.com*, Amazon.ca*, Amazon.com.au*, Amazon.co.jp*, Amazon.co.uk*, Amazon.de*, Amazon.es*, Amazon.fr*, Amazon.it*, Amazon.nl*, Amazon.pl*, Amazon.se*, Amazon.sg*
You may use other types of drives with the Pi such as M.2 SATA to USB 3.0 and m-SATA to USB 3.0. Here’s some adapters I’ve used for those types of drives:
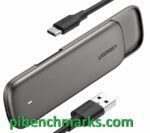
The UGREEN M+B enclosure is a great enclosure for the Pi for M.2 SATA 2280 NGFF drives. It supports both B-key and M-key drives. Does not support newer NVMe drives. As with other types of enclosures it requires more power than other options!
Links: AliExpress*, Amazon.com*, Amazon.ca*, Amazon.com.au*, Amazon.co.jp*, Amazon.co.uk*, Amazon.de*, Amazon.es*, Amazon.fr*, Amazon.it*, Amazon.nl*, Amazon.pl*, Amazon.se*, Amazon.sg*
The VL716 mSATA enclosure lets you connect micro SATA drives to the Pi. These drives are an older type of SSD (usually seen in laptops) predating the M.2 slot but are still widely available and perform extremely well!
Links: AliExpress*, Amazon.com*, Amazon.ca*, Amazon.com.au*, Amazon.co.jp*, Amazon.co.uk*, Amazon.de*, Amazon.es*, Amazon.fr*, Amazon.it*, Amazon.nl*, Amazon.se*, Amazon.sg*
Another option for M.2 SATA (not NVMe) is to use the Argon One Pi case:

The Argon ONE M.2 is a M.2 SATA Pi 4 case / storage solution. With the case and M.2 SATA expansion board you can completely enclosure your Pi 4 and have a built in M.2 slot! The M.2 SATA board is sometimes sold separately from the case itself and can be used as well. Does not support NVMe, this is for SATA M.2 drives only!
Links: AliExpress*, Amazon.com*, Amazon.ca*, Amazon.com.au*, Amazon.co.jp*, Amazon.co.uk*, Amazon.de*, Amazon.es*, Amazon.fr*, Amazon.it*, Amazon.nl*, Amazon.pl*, Amazon.se*, Amazon.sg*
Power Requirements
Power can be a serious problem with these drives. We are learning from the comments that you are especially likely to run into power issues with NVMe enclosures. A powered USB hub or a power adapter that puts out 3.5A comes not only just strongly recommended, it may actually be required that you choose one option or the other for your drive to function.
The specific requirements of how much power you’ll need depend on the adapter/enclosure and the model of your drive itself. As a very rough guideline, older models of drives tend to use more power than newer models of drives. 3.5″ form factor drives also use more power than 2.5″ drives. The earliest SSD models like first and second generation models are also well understood to use significantly more power than newer models. This is due to changes and improvements in technology over the years and even using different more efficient memory like 3D NAND. Some super high end performance drives will consume more power as well.
Here’s the current recommendations based on everyone’s comments combined with stuff I’ve personally used with the Pi:
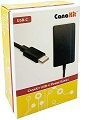
The CanaKit 3.5A adapter has an extra half an amp (500 mA) of capacity to give some breathing room to your accessories. This is bigger than the official Pi power supply which provides 3.0A.
Links: Amazon.com*, Amazon.ca*, Amazon.com.au*, Amazon.sg*
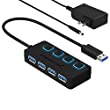
The Sabrent powered USB hub delivers a whopping 2.5A of dedicated power for your USB attached devices. This is almost as much as the Pi adapter itself is rated for (3.0A). It will easily power the most thirsty of setups such as NVMe enclosures.
Links: Amazon.com*, Amazon.ca*, Amazon.com.au*, Amazon.co.uk*, Amazon.es*, Amazon.it*, Amazon.nl*, Amazon.pl*, Amazon.se*
Note: Make sure Amazon doesn’t try to take you to the non-powered version and that it’s the one with the AC adapter that plugs in to provide extra power
Known Working Adapters
This is a compiled list of known working adapters built by myself from adapters I’ve purchased and commenters from ones they have purchased in this article and my older guide that utilized a SD card for USB booting.
| StarTech 2.5″ SATA to USB 3.1 Adapter* | 2.5″ SATA to USB 3.1 | Verified working in comments (thanks Fredrick) |
| StarTech 2.5″ SATA to USB 3.0 Adapter* | 2.5″ SATA to USB 3.0 | Verified working great by myself and others on Pi 4 |
| Inateck FE2004 2.5″ SATA to USB 3.0 Hard Drive Enclosure* | 2.5″ SATA to USB 3.0 | Mirco reports that this enclosure is working but trim is not supported |
| Samsung 2.5″ SATA to USB 850 EVO Kit /w Adapter* (Alternate amazon.de link*) | 2.5″ SATA to USB 3.0 Kit | This is a kit that comes with a drive and adapter. Rene confirms the adapter works including with non-Samsung drives. |
| CSL 2.5″ SATA to USB 3.0 Adapter* | 2.5″ SATA to USB 3.0 | The CSL SL adapter is confirmed to be working by Krikitt in the comments. Available in Europe. Not available in US. |
| UGREEN 2.5″ SATA to USB-C 3.1 Enclosure Drive Caddy* | 2.5″ SATA to USB-C 3.1 | Confirmed to be working by CAProjects in the comments. Available in both Europe and US |
| UGREEN 2.5″ SATA to USB-C 3.1 “Protect What You Love” Case* (AliExpress Listing* – Make sure to select USB-C 3.1) | 2.5″ SATA to USB-C 3.1 | Reported working by Michal in the comments, thanks! |
| UGREEN 2.5″ to USB 3.0 “SATA USB Converter” Adapter* (AliExpress Listing*) | 2.5″ SATA to USB 3.0 | Also reported by Michal as working in the comments, thanks again! |
| UGREEN 2.5″ SATA to USB 3.0 Adapter Cable with UASP Converter* | 2.5″ SATA to USB 3.0 | This adapter is reported to be working by Mirco in the comments |
| SABRENT 2.5″ SATA to USB-C 3.1 Type A Adapter* | 2.5″ SATA to USB-C 3.1 Type A | The new USB-C 3.1 Type A version of the Sabrent adapter is reported as working in the comments by UEF. DO NOT get the USB 3.0 version as that one is below on the naughty list and won’t work! |
| SABRENT 2.5″ SATA to USB 3.0 Dual Bay Docking Station* | 2.5″ SATA to USB 3.0 | One of very few Sabrent adapters/enclosures to work. Reported working well by William Grey in the comments. Has two bays! |
| AliExpress Generic 2.5″ SATA to USB 3.0 3 colors Hard Disk Case* | 2.5″ SATA to USB 3.0 | Reported as working with UASP support by pierro78 in the comments |
| Orico 2.5″ 2139C3-G2 2.5 inch USB 3.1 Gen 2 10Gbps Transparent Enclosure* | 2.5″ SATA to USB 3.1 Gen 2 10Gbps | Make absolutely sure it’s the 10Gbps USB 3.1 Gen 2 version. There is another one that looks identical that is a USB 3.1 Gen 2 6Gbps that will not work. Confirmed working by RRT in the comments. |
| ASUS ROG STRIX Arion Aluminum Alloy M.2 NVMe SSD External Portable Enclosure Case Adapter* – (AliExpress Listing*) | M.2 NVMe (B+M Key) to USB/USB-C 3.2 Gen 2 | It’s bold. It’s beautiful. It’s also confirmed working by TADRACKET and Steve B. However, be warned, it takes a *lot* of power! Steve B. reports that even with the oversized 3.5A CanaKit adapter* it does not work. If you have the standard 3.0 adapter you can be practically certain it won’t power this enclosure. Does work with a powered USB hub*. |
| ICY BOX M.2 NVMe (M Key) to USB-C 3.1 Gen 2 Enclosure* (Alternate amazon.de listing*) | M.2 NVMe (B+M Key) to USB-C 3.1 Gen 2 | Returning legendary commentary Frank Meyer reports: Does not work with a 3.0A power adapter (also reported by TTE). It’s not enough power for this enclosure. Does work with a powered USB hub*. |
| TDBT M.2 NVMe (B+M Key) to USB-C 3.1 Gen 2 Enclosure* | M.2 NVMe (B+M Key) to USB-C 3.1 Gen 2 | Confirmed to be working well by WorkHard in the comments |
| AliExpress Generic M.2 NVMe (B+M Key) to USB 3.1 “M2 SSD Case NVME Enclosure”* | M.2 NVMe (B+M Key) to USB 3.1 Type A | Confirmed working by Jens Haase, thanks Jen! |
| SSK Aluminum M.2 NVMe (M Key) to USB 3.1 Gen 2 SSD Enclosure* | M.2 NVMe (M Key) to USB 3.1 Gen 2 | Brian L reports this is working well with beta firmware upgrades, but that it did not work at all without them! |
| ORICO M.2 NVMe SSD Enclosure, USB 3.1 Gen 2 (10 Gbps)* (AliExpress Listing*) | M.2 NVME to USB 3.1 Gen 2 | M.Yusuf has given the first ever report of a working Orico adapter! Make sure it’s the USB 3.1 Gen 2 version that says “Support UASP for NVMe SSD”. This is the way. |
| DELOCK 42570 M.2 SATA (B Key) to USB Micro-B 3.1 Gen 2 SSD Enclosure* | M.2 SATA (B Key) to USB Micro-B 3.1 Gen 2 | Andreas Franek reports that the enclosure works with a 3.0A power adapter (gets a little warm) |
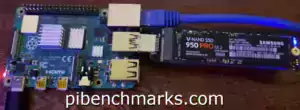
| Shinestar M.2 NVMe (M Key) to USB 3.0 Adapter* | M.2 NVMe (M Key) to USB 3.0 | This is the adapter I’m using in the picture at the top of the article. It is for NVMe M.2 drives only and is getting hard to find |
| UGREEN M.2 NVMe (B+M Key to USB-C 3.1 Gen 2 SSD Enclosure* | M.2 NVMe (B+M Key) to USB-C 3.1 Gen 2 | Confirmed working in comments by Chad D |
| UGREEN M.2 SATA (B+M Key) to USB 3.1 Enclosure* | M.2 SATA (B+M Key) to USB 3.1 Enclosure | Reported as working well in the comments by John H. Reinhardt with a ASM1051E chipset |
| QNINE M.2 SATA (B Key) to USB 3.0 Enclosure* | M.2 SATA (B Key) to USB 3.0 | I used this enclosure to benchmark M.2 SATA Lite-On and SanDisk drives — working great in 3.0 ports |
| Argon One M.2 SATA (B+M Key) Pi 4 Case* | M.2 SATA (B+M Key) Pi 4 Case | This case gives you a M.2 SATA port for your Raspberry Pi and is also a case! Confirmed working by Frank. |
| Tanbin mSATA to USB Adapter* | mSATA to USB 3.0 | I used this mSATA to USB adapter for my Crucial M550 benchmark — working in 3.0 ports |
| Generic mSATA to USB 3.0 Adapter (fe2008)* | mSATA to USB 3.1 | Confirmed working in comments by Nico |
| Canakit Raspberry Pi 4 Power Supply (USB-C)* | 3.5A USB-C Power Supply | Canakit has been making very reliable power supplies for several Pi generations now. Using a 3.5A power supply will give enough extra power for your Pi to power the drive without causing instability |
| Simplecom SE502 M.2 SSD Adapter* | M.2 SATA (B Key) to USB 3.0 | Quirks required, reported working by alan but only with quirks |
| Delock #61883 SATA to USB 3.0 Converter* | 2.5″ SATA to USB 3.0 | Reported working well by Joerg_H |
| Vantec SATA/IDE TO USB 3.0 Adapter* | 2.5″ SATA to USB 3.0 | Reported as working by JeffG but with an ugly messy appearance |
Known Problematic Adapters (Naughty List)
Here is a list of common USB adapters that are known to have problems with the Raspberry Pi 4. You can get some of these adapters working by using quirks mode (see the “Fix (some) USB Adapter Problems Using Quirks” section below).
| FIDECO M207CPS USB3.2 to M2 NVME/SATA SSD Enclosure* | M.2 NVME to USB 3.2 Gen 2 | Lee Myring reports that the FIDECO M207CPS has issues working with the Pi |
| UGREEN 30848 2.5″ SATA to USB 3.0 Hard Drive Enclosure* | 2.5″ SATA to USB 3.0 | Reporting as not working properly and disconnecting often by Mirco, thanks! |
| Sabrent USB 3.0 to 2.5″ SATA adapter* | 2.5″ SATA to USB 3.0 | Only works in the USB 2.0 ports. Will not boot in a USB 3.0 port. I have two of these and can confirm they don’t work. RIP to Sabrent, our previous king of the Pi 3 era of adapters. |
| Sabrent USB 3.0 to 2.5″ SATA Tool-Free External Hard Drive Enclosure* | 2.5″ SATA to USB 3.0 | Another nonworking Sabrent adapter reported by Alex, thanks Alex! |
| ELUTENG 2.5″ SATA to USB 3.0 Adapter* | 2.5″ SATA to USB 3.0 | Despite earlier reports as working Ryan and one other have reported this adapter does not work unless you enable quirks mode! Don’t make Ryan’s sacrifice in vain and avoid this one. |
| USB 3.0 to 2.5″ SATA III Hard Drive Adapter UASP Support-20cm, Black* | 2.5″ SATA to USB 3.0 | reported by dzm in the comments as having very poor I/O performance |
| ORICO 2.5″ SATA to USB C 3.0 Enclosure (Transparent)* | 2.5″ SATA to USB 3.0 | Several commenters have stated the transparent ORICO is not working. Avoid! |
| ORICO 2.5″ SATA to USB 3.0 Enclosure (Black) 2588US3-BKT* | 2.5″ SATA to USB 3.0 | Commenters report that the USB-C variant of the transparent ORICO enclosure also does not work |
| ORICO 2.5″ SATA to USB 3.0 Enclosure (Black/White) 2520U3* | 2.5″ SATA to USB 3.0 | Reported as not working by by Richon in the comments |
| ORICO 2.5″ SATA to USB-C 3.1 Gen 1 Enclosure (Transparent)* | 2.5″ SATA to USB-C 3.1 Gen 1 | Confirmed as not working by Andrea De Lunardi in the comments (thanks!) |
| ORICO 2.5″ SATA to USB 3.1 Gen 1 Enclosure (Silver) M2PF-C3-BK-EP* | 2.5″ SATA to USB-C 3.1 Gen 2 | Looks really similar to the ICY BOX. Confirmed not working by auanasgheps in the comments. |
| Vantec 2.5″ SATA to USB 3.0 USB Adapter with Case* | 2.5″ SATA to USB 3.0 | Does not work after hours of testing and frustration by Moshe Katz in the comments! |
| AliExpress Generic 2.5″ SATA to USB 3.0 “New USB 3.0 To 2.5in SATA 7+15Pin Hard Drive Adapter”* | 2.5″ SATA to USB 3.0 | Extremely cheap adapter from AliExpress — MADATALIEXPRESS bought 5 of them and none worked, PPCM had one working, very unreliable and slow when it does work, not recommended even if you get lucky! |
| EWENT USB 3.0 to SATA EW7017 | 2.5″ SATA to USB 3.0 | Does not work – reported by Wouter in the comments, thanks! |
| CableCreation USB 3.0 to SATA Adapter Compatible 2.5″ SATA III HDD Hard Disk Driver, 0.5FT, Black* | 2.5″ SATA to USB 3.0 | Morgon reports not working in the comments — I also recognize this adapter as the “fake” StarTech adapter that is sold on AliExpress, thanks Morgon! |
| JSAUX USB 3.0 to SATA Adapter, USB 3.0 to 2.5 Inch SATA III Hard Drives/SSD/HDD Adapter* | 2.5″ SATA to USB 3.0 | Reported as not working by Bennie in the comments, thanks! |
| EZCast M.2 NVME SSD Enclosure Adapter* | M.2 NVMe to USB 3.1 Gen2 | Reported as problematic due to duplicate USB ids — best to avoid — thanks MikeC |
| Sabrent 2.5″ Aluminum Enclosure* | 2.5″ SATA to USB 3.0 | Reported as not working by JeffG |
Prerequisites
Get Latest Raspbian & Updates
To edit the bootloader configuration you should have a copy of Raspbian on a SD card. Right now support in third party operating systems to do anything with the new Raspberry Pi 4’s firmware or bootloader is very limited / nonexistent. You can use a third party operating system later once you set the boot mode, but to actually make these changes we will use official Raspbian.
First make sure that you have the absolute latest updates and firmware for the Pi. To upgrade all your packages and firmware to the latest version use the following command:
sudo apt update && sudo apt full-upgrade -y
Once the update has completed restart your Pi with a sudo reboot command to apply the latest firmware / kernel updates.
Verify EEPROM Bootloader is up to date
We can check if your Pi’s bootloader firmware is up to date with the following command:
sudo rpi-eeprom-update
If your Raspbian is *very* out of date you may not have this utility and can install it using:
sudo apt install rpi-eeprom
The output from rpi-eeprom-update will look like this if you are not up to date:
BCM2711 detected
VL805 firmware in bootloader EEPROM
*** UPDATE AVAILABLE ***
BOOTLOADER: update available
CURRENT: Thu 3 Sep 12:11:43 UTC 2020 (1599135103)
LATEST: Tue 24 Nov 15:08:04 UTC 2020 (1606230484)
FW DIR: /lib/firmware/raspberrypi/bootloader/beta
VL805: up-to-date
CURRENT: 000138a1
LATEST: 000138a1
If it says any updates are available they be installed manually by adding ‘-a’ to the end of our previous command like this:
sudo rpi-eeprom-update -a
After the updates finish installing restart your Pi as firmware updates will not be applied until after a reboot. Now if you run rpi-eeprom-update to check for updates again it should say you are on the latest and up to date!
Verify Power Supply Size (3.5A strongly recommended)
Check your Raspberry Pi’s power supply size and make sure it is delivering at least 3.5A. There are a lot of USB C adapters for the Raspberry Pi that are only 3.0A. These will typically work fine, until you plug in something like a SSD which draws power from the Pi and there is nothing left to give.
Most SSDs are quite power efficient but HDDs draw significantly more. Older generations of SSDs used quite a bit more power than newer ones as well. If you are using an older drive or a drive that you know is power hungry you need to pay extra attention to having a quality power source with plenty of capacity.
A good alternative option to relying on the Pi to power the drive is using a powered USB hub* so your drive doesn’t need to draw power from the Pi’s limited power budget. Make sure you get one that is compatible with the Pi as some powered USB hubs won’t work properly with it so check the reviews and do your research to make sure people are using it successfully with the Pi.
Using a 3.5A power supply* or powered USB hub* will ensure your drive is getting enough power without impacting the Pi’s stability.
Prepare Bootable Drive
Image your bootable drive (your SSD / HDD / USB Flash Drive / etc.) the same way you imaged your micro SD card. You write the image of the operating system you want to run to the disk with Etcher / Win32DiskImager / however you normally would write one.
Once this is finished we are ready to edit the bootloader configuration to tell it to boot to our drive instead of the built in microSD slot.
If you are wanting to do a USB mass storage device boot with Ubuntu 20.04 or 20.10 check out my specific USB booting guide for Ubuntu 20.04 / 20.10 here.
Editing Bootloader Configuration
If you’ve completed the prerequisites you are now ready to edit your Raspberry Pi’s bootloader configuration to tell the Pi to boot from a specified device instead of the built in microSD slot. To edit the bootloader configuration use the following command:
sudo -E rpi-eeprom-config --edit
The default configuration will look like this:
[all]
BOOT_UART=0
WAKE_ON_GPIO=1
POWER_OFF_ON_HALT=0
DHCP_TIMEOUT=45000
DHCP_REQ_TIMEOUT=4000
TFTP_FILE_TIMEOUT=30000
TFTP_IP=
TFTP_PREFIX=0
BOOT_ORDER=0xf41
SD_BOOT_MAX_RETRIES=3
NET_BOOT_MAX_RETRIES=5
[none]
FREEZE_VERSION=0
Our target is the BOOT_ORDER parameter in bold above. It is 0x1 in firmware versions up until 2020-05-150 and was changed to 0xf41 (try SD card first, then boot from USB if that fails) in newer versions after that. Here are the different configuration options for the BOOT_ORDER parameter (from Raspberry Pi documentation):
| Value | Mode | Description |
|---|---|---|
| 0x1 | SD CARD | SD card (or eMMC on Compute Module 4) |
| 0x2 | NETWORK | Network boot |
| 0x3 | USB DEV | USB device boot – See usbboot (since 2020-09-03) |
| 0x4 | USB MSD | USB mass storage boot (since 2020-09-03) |
| 0xe | STOP | Stop and display error pattern (since 2020-09-03). A power cycle is required to exit this state. |
| 0xf | RESTART | Start again with the first boot order field. (since 2020-09-03) |
The configuration option we want is USB mass storage device boot or option 0x4. We can use this option by itself or combine it with other options in the table placed in the order we want the Pi to try to boot from. To understand how to do this, let’s examine the default Raspberry Pi OS value of 0xf14. The values are read from right to left so this value means it will try USB booting first and then fall back to SD storage next.
If you want to leave the SD card and the “restart on failure” fallback options in place you can change it to 0xf14 (remember, the order is from right to left). Go ahead and use your arrow keys to navigate to the BOOT_ORDER line and change it 0x4 or 0xf14 so it reads:
BOOT_ORDER=0x4

or

BOOT_ORDER=0xf14 (to enable falling back to SD card if USB boot fails)
This translates to attempt to boot from USB mass storage first. If that fails, try to boot from SD card. If that fails, start over from step 1 and try again (back to USB mass storage). As another example, if you wanted to add booting from the network you could add the 0x2 value from the table for the “NETWORK” option and make it the final BOOT_ORDER value 0xf124. If you wanted to change the order so that the network boots first instead you could reorder it to 0xf142.
Choose the appropriate BOOT_ORDER you would like and use your arrow keys to move down to the BOOT_ORDER line. Change the line and press Control+X and then ‘y’ to save your changes. Make sure you have your boot device we set up in the prerequisites section plugged into one of the blue USB ports as these ports are USB 3.0 and the black USB ports are USB 2.0 (slower). Now restart the Pi.
If all went well the Pi will immediately boot up from your boot device instead of the SD card!
Help, something went wrong!
Try Booting from SD card
Generally if the Pi fails to boot from the USB device it will fall back to booting from the SD card. If the Pi didn’t boot after making the change try unplugging your USB device and just booting from the SD card again by removing power from the Pi and plugging it back in again.
If the device is booting fine from the SD card but not from the external drive double check that you have a compatible adapter and that the drive was imaged correctly. Plug it into a PC and make sure it has the files on it and perhaps try giving it a clean image again just in case something went wrong with imaging the first time.
Verify rpi-eeprom-config configuration
Make sure your changes that we made earlier actually stuck by verifying the configuration using the command:
sudo -E rpi-eeprom-config --edit
and verify that the BOOT_ORDER=0x1 line is changed to BOOT_ORDER=0x4.
Restore Bootloader to Defaults
If things are *really* broken and the Pi will not boot at all with your SD card or otherwise then you may need to restore the bootloader back to defaults.
To do this we need to prepare a SD card with the Raspberry Pi 4 EEPROM boot recovery tool. The easiest way to do this is to use the official Raspberry Pi Imager tool from the Raspberry Pi foundation to prepare the recovery image.
Here is how we create the recovery image inside the utility. Choose the “Misc utility images” category as shown below:

Next choose the “Raspberry Pi 4 EEPROM boot recovery” option:
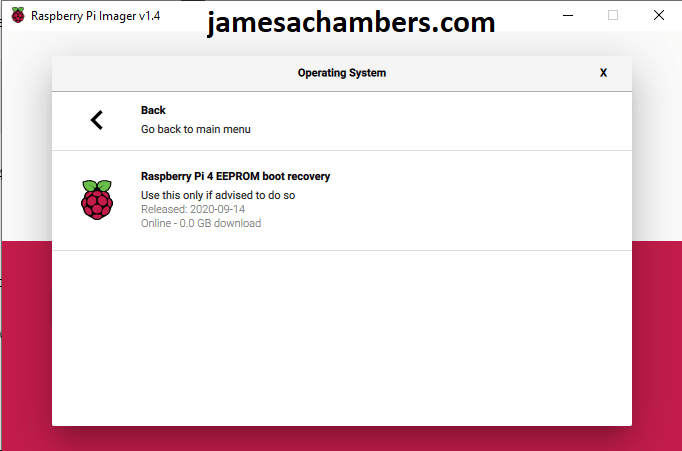
Next choose your SD card and then choose “Write”. Now unplug your Pi and put in the newly prepared SD card. Connect the power and let it boot. This will restore your bootloader to defaults. You should see a continuous rapid green blinking light. You may now disconnect the power and put your original SD card back / reinstall Raspbian and boot the Pi normally!
For a more detailed step by step guide on this check out my Bootloader Recovery Guide
Try Beta Firmware
The beta firmware released since the original USB mass storage device support launched contains a bunch of fixes related to USB mass storage devices and USB booting. The downside is the beta firmware is not as well tested so you shouldn’t install it unless you are doing it to fix a specific issue addressed in those updates.
If your drive / USB storage adapter isn’t working then it is worth considering trying the beta firmware to see if the fixes in the versions released not on stable yet will help with your device.
To switch to the beta channel edit the configuration file with the following command:
sudo nano /etc/default/rpi-eeprom-update
Change the line FIRMWARE_RELEASE_STATUS=”critical” (sometimes it can be “stable”) to:
FIRMWARE_RELEASE_STATUS="beta"
Now press Ctrl+X and then ‘y’ to save our changes in nano. Now execute a Pi firmware update using:
sudo rpi-eeprom-update -a
The updater will tell you whether updates were applied or not. Now do a full reboot of your Pi as the firmware updates won’t be applied until you do! If you want to switch back to normal firmware simply change the configuration back to “stable” or “critical”.
Verify Drive Performance
You can make sure everything is running correctly (and as fast as it should be) by running my quick storage benchmark. You can run the benchmark with the following one-liner:
sudo curl https://raw.githubusercontent.com/TheRemote/PiBenchmarks/master/Storage.sh | sudo bashThis will give you a score you can compare to the other Raspberry Pi Storage Benchmark results and make sure that you are getting an equivalent speed to your peers with the same device!
Fix (some) USB Adapter Problems Using Quirks
Some of the very common adapters on the naughty list above (such as the Sabrent) can be made to work by using USB quirks to disable UAS mode on the drive. This lowers performance, but it’s still much faster than a SD card and your adapter won’t go to waste.
To find out the quirks we need to find the device ID string for your adapter and then add an entry to cmdline.txt telling the kernel to apply them on boot.
Find Your Adapter
To apply the quirks we first need to get the adapter id. We will use the sudo lsusb command:
$ sudo lsusb
 Bus 003 Device 001: ID 1d6b:0002 Linux Foundation 2.0 root hub
 Bus 002 Device 002: ID 174c:55aa ASMedia Technology Inc. Name: ASM1051E SATA 6Gb/s bridge, ASM1053E SATA 6Gb/s bridge, ASM1153 SATA 3Gb/s bridge, ASM1153E SATA 6Gb/s bridge
 Bus 002 Device 001: ID 1d6b:0003 Linux Foundation 3.0 root hub
 Bus 001 Device 002: ID 2109:3431 VIA Labs, Inc. Hub
 Bus 001 Device 001: ID 1d6b:0002 Linux Foundation 2.0 root hub
On line 2 we can see my ASM1051E SATA 6Gb/s bridge adapter (it’s the known working StarTech.com 2.5″ SATA to USB 3.1* adapter). You will see something very similar to mine when you run the command and it shouldn’t be too hard to figure out which device it is. If you need more information add a -v switch to make the command sudo lsusb -v. This can sometimes add some additional details to make it easier to figure out which one is your adapter.
If you’re still not sure, we have another command that between the two that can narrow things down. Type / paste the following:
sudo dmesg | grep usb

 [0.828535] usb usb3: New USB device found, idVendor=1d6b, idProduct=0002, bcdDevice= 4.19
 [0.828568] usb usb3: New USB device strings: Mfr=3, Product=2, SerialNumber=1
 [0.828597] usb usb3: Product: DWC OTG Controller
 [0.828620] usb usb3: Manufacturer: Linux 4.19.75-v7l+ dwc_otg_hcd
 [0.828644] usb usb3: SerialNumber: fe980000.usb
 [0.830051] usbcore: registered new interface driver uas
 [0.830182] usbcore: registered new interface driver usb-storage
 [0.836488] usbcore: registered new interface driver usbhid
 [0.836511] usbhid: USB HID core driver
 [0.971598] usb 1-1: new high-speed USB device number 2 using xhci_hcd
 [1.154217] usb 1-1: New USB device found, idVendor=2109, idProduct=3431, bcdDevice= 4.20
 [1.154254] usb 1-1: New USB device strings: Mfr=0, Product=1, SerialNumber=0
 [1.154281] usb 1-1: Product: USB2.0 Hub
 [1.301989] usb 2-1: new SuperSpeed Gen 1 USB device number 2 using xhci_hcd
 [1.332965] usb 2-1: New USB device found, idVendor=174c, idProduct=55aa, bcdDevice= 1.00
 [1.332999] usb 2-1: New USB device strings: Mfr=2, Product=3, SerialNumber=1
 [1.333026] usb 2-1: Product: ASM105x
 [1.333048] usb 2-1: Manufacturer: ASMT
 [1.333071] usb 2-1: SerialNumber: 123456789B79F
This is the dmesg log showing the hardware detection as hardware is activated on the Pi. If your log is really long you can generate fresh entries by just unplugging a device and plugging it back in and running the command again. Here we can clearly see that the ASM105x is what our StarTech adapter is being detected as.
Now we can go back to our first lsusb command and we want the 8 characters from the ID field that comes right after the Device:
Bus 002 Device 002: ID 174c:55aa ASMedia Technology Inc. Name: ASM1051E SATA 6Gb/s bridge
Our adapter’s ID is: 174c:55aa
Applying Quirks
To apply the quirks to our USB adapter we are going to edit /boot/cmdline.txt. Type:
sudo nano /boot/cmdline.txt
We are going to add the following entry into the very front of cmdline.txt:
usb-storage.quirks=XXXX:XXXX:u
In place of the X’s above you will put in your adapter’s ID that we got before. With the example commands I gave above mine would look like this: usb-storage.quirks=174c:55aa:u. After this my cmdline.txt looks like this (everything should be one continuous line, no line breaks!):
usb-storage.quirks=174c:55aa:u console=serial0,115200 console=tty1 root=PARTUUID=d34db33f-02 rootfstype=ext4 elevator=deadline fsck.repair=yes rootwait
Now reboot the Pi. If the Pi fails to boot you can plug the SD card into the computer and go to /boot/cmdline.txt and undo the change we did so you can boot back in with your SD card.
Verifying Quirks
Once you have rebooted after changing cmdline.txt we can verify the quirks have been applied by doing another dmesg | grep usb command:
sudo dmesg | grep usb
 [1.332924] usb 2-1: New USB device found, idVendor=174c, idProduct=55aa, bcdDevice= 1.00
 [1.332957] usb 2-1: New USB device strings: Mfr=2, Product=3, SerialNumber=1
 [1.332983] usb 2-1: Product: ASM105x
 [1.333006] usb 2-1: Manufacturer: ASMT
 [1.333028] usb 2-1: SerialNumber: 123456789B79F
 [1.335967] usb 2-1: UAS is blacklisted for this device, using usb-storage instead
 [1.336071] usb 2-1: UAS is blacklisted for this device, using usb-storage instead
 [1.336103] usb-storage 2-1:1.0: USB Mass Storage device detected
 [1.336479] usb-storage 2-1:1.0: Quirks match for vid 174c pid 55aa: c00000
 [1.336611] scsi host0: usb-storage 2-1:1.0
This time we can see in dmesg that UAS was blacklisted for the device and it has loaded with the usb-storage driver instead. This driver tends to be more compatible with the “problematic adapters” but the performance is usually significantly lower. It’s definitely worth a try though as some adapters do better with the quirks performance-wise. The only way to know for sure is to run a benchmark (see “Verify Drive Performance” section).
Other Resources
The Raspberry Pi Imager has a bunch of new headless configuration options that may be of assistance
If you are looking for storage adapters or the best SSDs to use: Best Storage Adapters / SSDs for the Pi 4 / 400 guide
To find out where to get the 64 bit Raspberry Pi OS beta: Where to get 64 bit Raspberry Pi OS article here
If you want to see which Pi storage performs the fastest and get an idea of what kind of drives to look for check out my 2022 Raspberry Pi Storage Benchmarks


Thanks for this useful post! I’m currently running Slackwareaarch64-current on a Pi400, and have been trying to get it to boot directly from USB for ages. The developers have now produced an installer that bypasses u-boot and allows the use of the Pi’s native bootloader. Great. And your tweaks to the rpi-eeprom-config file have worked brilliantly! However, the fallback time if I choose to boot from an SD card is excessively long. I assume this is to do with those timeout settings. Could you please amplify what each of those does? The DHCP ones seem obvious, but may not be! I have searched the Pi documentation but can’t find any reference to these. Where did you find them? Or is that a trade secret? 😉
Hi,
I tried using this:
GeekerChip 2.5 inch USB 3.0 HDD SSD Case Esterno per Disco Rigido 7-9.5mm 2.5″ SATA I/II/III Hard Disk con USB 3.0 Cavo,Strumento Gratuito Supporto UASP
And i can say that it works with my raspberry pi 4 8GB using Raspberry Pi Os Desktop 64 bit.
I use it on the port 3.0 with a Samsung SSD 840 EVO 500GB and it works with usb-storage compatibility, so no UAS, but can go approximately to 200/220 MB/s
Hi,
I tried using the UGREEN M.2 NVMe 10 Gbps SSD Enclosure (https://eu.ugreen.com/products/ugreen-m2-nvme-10-gbps-ssd-enclosure), but it didn’t work as expected. The adapter unmounts improperly, and I couldn’t get it to function properly. You might want to add it to the list of problematic adapters.
Let me know if you need further details!
Hi
Amazing guide
I bought my adapter and SSD before finding this site.
I am running on this:
– Crucial BX500 240GB
– Sabrent USB 3.0 to 2.5″ SATA adapter
– Raspberry Pi 4B rev 1.2 4GB
– Raspberry Pi OS lite (64-bit) – Debian Bookworm
– Power supply: Official 3A USB-C Adapter.
– pibenchmarks score: 9466
I am missing something? Because this adapter appears as one of the naughty ones and I didn’t apply quirks or made anything. Unbox, burn the SO with Raspberry Pi Imager, update the system, edit the bootloader and reboot.
Something has been change since the list was edited?
Should I be worried about some data lost or shortage using this setup?
Thank you in advance.
Hey RafaPascual,
That one has been fixed if it’s the EC-SSHD (which it almost always is when people are talking about these even though Sabrent has dozens of other models). It was fixed by a Pi firmware update years ago.
Hopefully that helps!
Okay, you are a lifesaver! The quirks trick did it for me!!! I have an “Other World Computing External SATA Hard Drive Adapter cable PA023U3”. This does not work without quirks but it works well with quirks!
Hey Aniansh,
Excellent, I’m relieved that took care of that one! That’s not an adapter I recognize but the quirks trick is pretty widely applicable and looks like it did the trick here.
Thanks for sharing and enjoy and take care!