
On December 8th NVIDIA officially released RTX support on Minecraft Bedrock Edition for Windows 10. To use this feature you need to have a resource pack installed.
Fortunately the dedicated server not only supports resource packs, but in this guide I will show you how to set it up so that resource packs are automatically downloaded to your player’s device and activated!
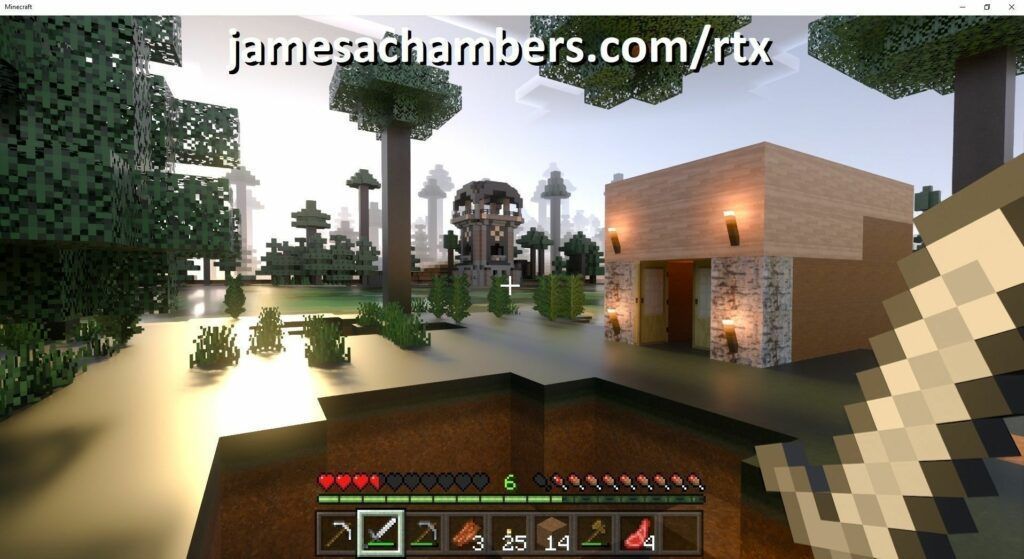
The featured image for this article is not single player. It is running on my Minecraft Bedrock dedicated server
Prerequisites
If you don’t have a Minecraft Bedrock Edition dedicated server already view my automatic setup script and guide first to get one up and running.
You will also need to have a resource pack / packs in mind. For this guide I will use the RTX enabled 512×512 feature pack. This resource pack is available on GitHub for free.
All of these versions support cross-platform play with each other (but not with the Java edition).

This is the PC Minecraft for Windows 10 (Bedrock) edition of Minecraft. It is able to play cross-platform with other players on Android / iOS / Playstation / Xbox / Switch. Available as a code that is instantly activated to give you permanent access to the game!
Links: Amazon.com*, Amazon.co.jp*, Amazon.co.uk*, Amazon.de*, Amazon.es*, Amazon.fr*, Amazon.it*

The Sony PlayStation version of Minecraft: Bedrock edition.
Links: Amazon.com*, Amazon.ca*, Amazon.com.au*, Amazon.co.jp*, Amazon.co.uk*, Amazon.de*, Amazon.es*, Amazon.fr*, Amazon.it*, Amazon.nl*, Amazon.se*, Amazon.sg*
This is the Nintendo Switch version of Minecraft: Bedrock edition.
Links: Amazon.com*, Amazon.ca*, Amazon.com.au*, Amazon.co.jp*, Amazon.co.uk*, Amazon.de*, Amazon.es*, Amazon.fr*, Amazon.it*, Amazon.nl*, Amazon.pl*, Amazon.se*, Amazon.sg*

This is the Microsoft Xbox version of Minecraft: Bedrock edition.
Links: Amazon.com*, Amazon.ca*, Amazon.com.au*, Amazon.co.uk*, Amazon.de*, Amazon.es*, Amazon.fr*, Amazon.it*, Amazon.nl*, Amazon.sg*
Preparing the Resource Pack
Resource packs can be bundled a couple of different ways. The first way is the way that the example we are using in this guide is packaged. It looks like this:
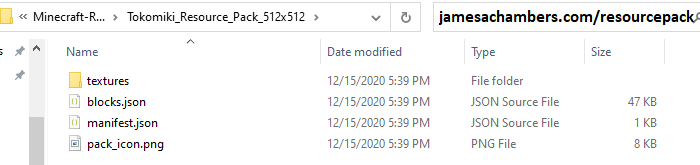
We have the main folder (Tokomiki_Resource_Pack) that will contain a manifest (manifest.json). If your resource pack looks like this you’re good to go. You can skip to the next step.
The second way that resource packs are often distributed is as one solid .mcpack file. An example of this is NVIDIA’s RTX texture example pack (scroll down to “NVIDIA and Partner Resource Packs” section, they have a few different ones you can play with, the one in this example is the PBR textures).
If your resource pack looks like this and is a .mcpack it is not good to go and we’re going to have to extract the files we want out of it. Fortunately this is very easy. All you have to do is rename it from a .mcpack file to a .zip file. I’m not joking, go ahead and try it:

Perfect, that looks exactly like what we want and our previous example! Go ahead and extract the zip archive into a new folder. It actually doesn’t matter what you name the folder because the pack will be located by UUID so just pick something short and descriptive.
Examine the Manifest
Every resource pack contains a UUID, or a “universally unique identifier”. This is what the server uses to identify which resource pack is which. Your resource pack’s UUID is located in the manifest.json file. Let’s take a look at our 512×512 example pack’s manifest.json:
{
    "format_version": 2,
    "header": {
        "name": "Tokomiki Test Textures 512k",
        "description": "Reducing RTX textures size",
        "uuid": "75a26ecc-8351-11ea-bc55-0242ac130003",
        "version": [ 1, 0, 1 ],
        "min_engine_version": [ 1, 15, 0 ]
    },
    "modules": [
        {
            "type": "resources",
            "uuid": "75a27110-8351-11ea-bc55-0242ac130003",
            "version": [ 1, 0, 1 ]
        }
    ],
    "capabilities" : [
            "raytraced"
    ]
}
There it is. This particular resource pack’s UUID is 75a26ecc-8351-11ea-bc55-0242ac130003. The version is [ 1, 0, 1 ]. Perfect, we’re now ready to configure the dedicated server!
Configuring Dedicated Server for Resource Packs
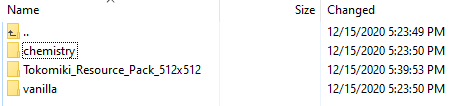
First we need to copy/upload your resource pack to the server’s “resource_packs” folder:
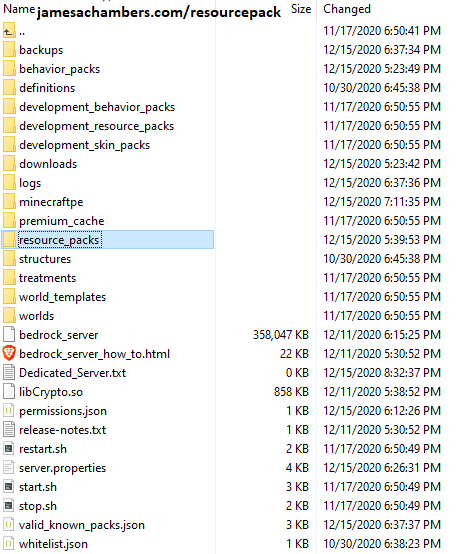
Your folder’s structure may vary slightly depending on version and whether you are running on Windows or Linux. Either way, you should have this folder. We are going to place the folder of our resource pack here. Usually there will already be a “vanilla” folder and a “chemistry” folder in there that are included with the server. We’re going to add a third folder by coping in our new resource pack like this:
Excellent, there’s just one last step now to enable the resource pack.
Create world_resource_packs.json
First you need to locate the folder on the server that your “world” is stored in. The base folder is just “worlds” but inside there will be another directory inside of it. If you left your server.properties as the default it will likely be “Bedrock level”. If you set a custom “level-name” variable in your server.properties file it should be that. This is your world’s folder.
The final step to enabling our resource pack is to create the world_resource_packs.json file inside our world’s folder you just located. This file is actually created and used on the client side as well when you modify your resource packs (it’s at C:\Users\XyouruserX\AppData\Local\Packages\Microsoft.MinecraftUWP_8wekyb3d8bbwe\LocalState\games\com.mojang\minecraftWorlds\XyourworldX\world_resource_packs.json).
You can actually use that exact file if you’ve applied the same feature pack you’re trying to install on the server. The format of it is pretty simple though, so it’s a lot easier to just create it yourself.
Go ahead and create a new file called world_resource_packs.txt (if on Linux you can just create it as world_resource_packs.json) and type/paste the following matching the pack_id to your resource pack’s UUID and version from the earlier steps:
[
         {
                 "pack_id" : "75a26ecc-8351-11ea-bc55-0242ac130003",
                 "version" : [ 1, 0, 1 ]
         }
 ]
Now save the file and rename it from world_resource_packs.txt to world_resource_packs.json.
That’s it, now restart the server! Upon connecting new players will now automatically download and apply your feature pack. They do not have to download or install it themselves. It will look like this when they join:
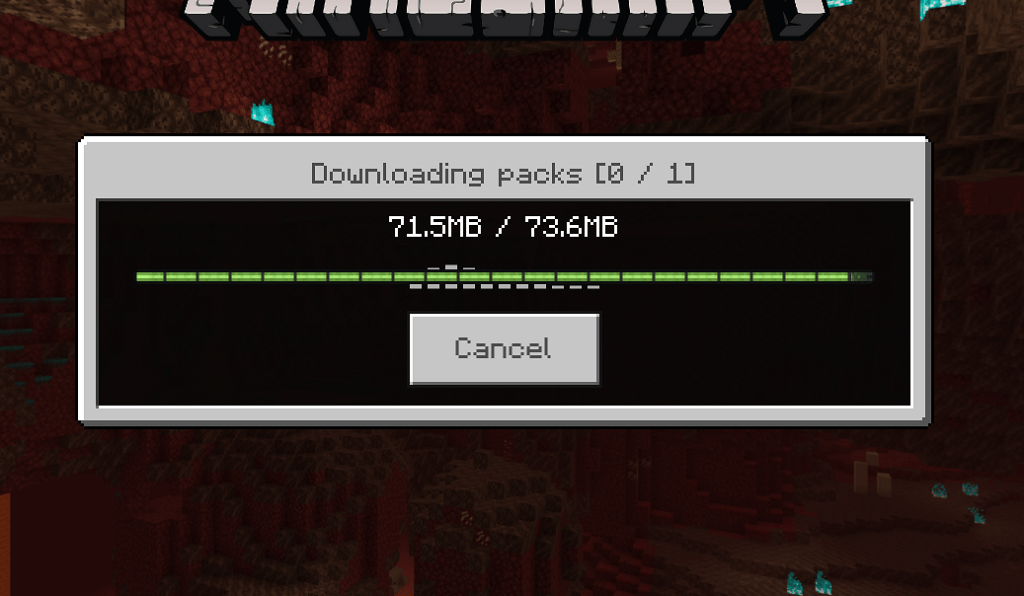
This download works on all platforms. For example, for this guide I tested connecting with my Android phone to try without using Windows and see if it would still work. When you log on with a platform that doesn’t support RTX they will still see the new textures. They just won’t have the fancy RTX lighting and raytracing but it still looks great compared to vanilla!
Adding Multiple Resource Packs
You can add as many resource packs as you want. Copy the additional resource pack folder to your resource_packs folder by before.
Updating the world_resource_packs.json file is similar to what we did earlier but the JSON syntax can get a little tricky. Here is how you want to format adding multiple entries to world_resource_packs.json:
[
        {
                "pack_id" : "75a26ecc-8351-11ea-bc55-0242ac130003",
                "version" : [ 1, 0, 1 ]
        },
        {
                "pack_id" : "a1673412-cb04-4604-8000-04b6396afe80",
                "version" : [ 0, 9, 0 ]
        }
]
Notice the comma after the closing brace of the first entry. It’s super common to miss it and it is invalid JSON without it. The last entry will NOT have a comma, but if you add a second, third, fourth it will like this:
[
        {
                "pack_id" : "75a26ecc-8351-11ea-bc55-0242ac130003",
                "version" : [ 1, 0, 1 ]
        },
        {
                "pack_id" : "a1673412-cb04-4604-8000-04b6396afe80",
                "version" : [ 0, 9, 0 ]
        },
        {
                "pack_id" : "fake example 1",
                "version" : [ 0, 5, 1 ]
        },
        {
                "pack_id" : "fake example 2",
                "version" : [ 0, 2, 4 ]
        }
]
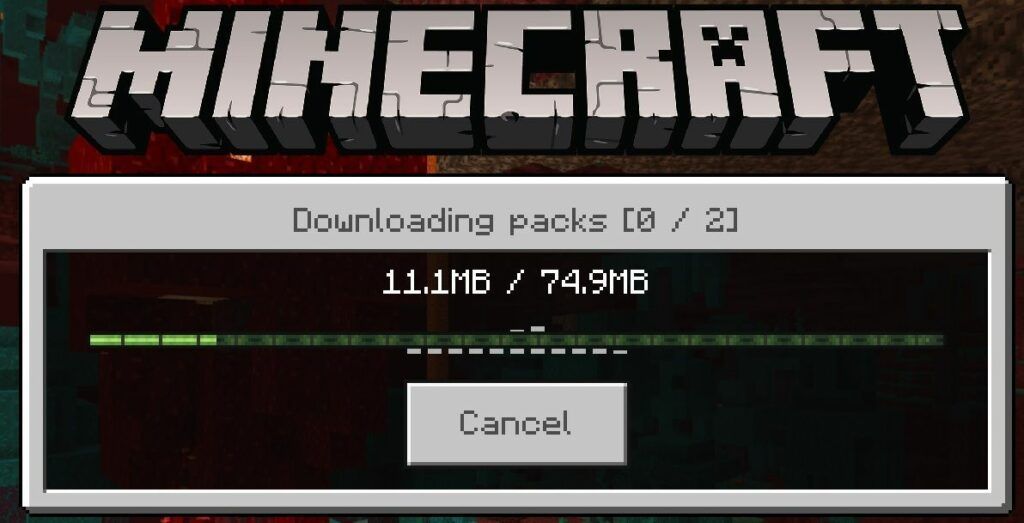
That’s it! After restarting your server newly connecting players that haven’t downloaded the resource pack yet will see 2 (or more) resource packs queued like this:
Force Resource Pack Using server.properties
The default settings for Minecraft is that connecting players will automatically download and apply the resource packs they need so usually this isn’t necessary. In some cases though you may want to actually force them to use the resource pack. Otherwise they can unload it or load different ones.
There is an option in server.properties that will absolutely force them to use them if you desire. Open your server.properties file and look for these lines:
texturepack-required=false
# Force clients to use texture packs in the current world
# Allowed values: "true" or "false"
Change to true to force texture packs to be used!
Bedrock Server Automatic Deployment Script
Here’s my one-liner to deploy a new Minecraft server on Linux:
curl https://raw.githubusercontent.com/TheRemote/MinecraftBedrockServer/master/SetupMinecraft.sh | bash
See Minecraft Bedrock Edition – Linux Dedicated Server automatic installation/updating/backup script for full breakdown!
More Resources
Minecraft Bedrock Edition Dedicated Server on Raspberry Pi*
Minecraft Bedrock Docker Server


Thanks so much for this guide, it was the only one that made any sense in relation to hosting servers in linux. I think its a really good learning experience using linux to host a world, but once you’ve got a few then things like Crafty Controller are awesome help!
Thank you!
When I try to add a marketplace addon to the server I have had running previously, it does not start instead giving an error that “network port is occupied, can’t start server.” I got the resource and behavior packs from the client machine premium_cache folder and placed them on the server in the same location. I also copied the world_behavior_packs.json and world_resource_pack.json from a world folder on the client PC’s to the world folder on the server. Did I miss any steps that is causing my addon to prevent the server from starting?
Hey Brad,
Try restarting your entire device / server. This error likely means that another copy of the server is running on there and the easiest way to get rid of it is to reboot. You can also look through a task manager or top and then kill the process.
Hopefully that helps!
The exact same as Brad is happening to me, and definitely isn’t really the port but something caused by adding the addon files that prevent the server from starting. Any solution?
It’s very unlikely your add-on is compatible with the latest version. There are tons of outdated add-on out there. There’s actually far more add-ons that are incompatible / outdated out there then there are add-ons that stay up to date version after version.
Can you tell us which add-on you are trying to run? If you provide that my first step will be to Google the add-on and see what versions it claims to be compatible with. Most likely I will find things like 1.19, 1.20, etc. (but not the latest version) as this is how these posts usually go.
how i can activate the experimental option for addons?
Hey Jose,
The only way I know of is to do it with the client by checking the experimental option. After that you transfer that world from single player to a dedicated server (basically by going to the folder and copying the files).
Many of the settings don’t really seem to do anything for a dedicated server though. Some of them do though so this may be worth it for your use case.
Hopefully that helps!