
My primary purpose for buying the Intel Compute Stick was to have an ultra portable x86_64 server to get around ARM limitations. Therefore the dated Ubuntu 14.04 GUI install had to go. In this guide we will walk through installing Ubuntu Server 20.04 on the Intel Compute Stick!
Hardware
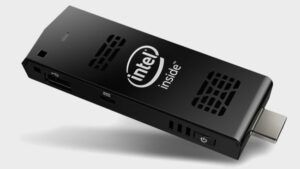
For this project I used the Intel Compute Stick.* It costs about the same as a Raspberry Pi (update: no longer costs less than a Raspberry Pi, but still much less than a full computer!) making it an extremely cheap x86_64 single board computer. It has a Intel Atom 1.33GHz 64 bit processor and 1GB of RAM. This one is the cheapest one. There are various more expensive models that have more USB ports and run Windows 10 and have much more memory/power.
Since this model of Compute Stick only has 1 USB port you will need a USB hub if you don’t already have one. It does not need to be powered for this guide. I used a cheap Sabrent USB 3.0 hub:
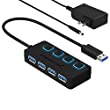
The Sabrent powered USB hub delivers a whopping 2.5A of dedicated power for your USB attached devices. This is almost as much as the Pi adapter itself is rated for (3.0A). It will easily power the most thirsty of setups such as NVMe enclosures.
Links: Amazon.com*, Amazon.ca*, Amazon.com.au*, Amazon.co.uk*, Amazon.es*, Amazon.it*, Amazon.nl*, Amazon.pl*, Amazon.se*
Note: Make sure Amazon doesn’t try to take you to the non-powered version and that it’s the one with the AC adapter that plugs in to provide extra power
And last but not least you will need a USB Ethernet adapter. I used my trusty Belkin USB 2.0 adapter.* Make sure yours is Linux compatible, preferably plug and play without needing extra drivers.
Recommended SD card (optional):

The SanDisk Extreme A1-A2 SD card has the best scoring SD card on Pi Benchmarks for years and is second in popularity only to the SanDisk Ultra (often included in combo kits). The application class (A1) means random I/O speeds (very important when running an OS) have to meet a higher standard. There’s no benefit on the Pi for A2 right now so get whichever is cheaper/available.
Links: AliExpress*, Amazon.com*, Amazon.ca*, Amazon.com.au*, Amazon.co.jp*, Amazon.co.uk*, Amazon.de*, Amazon.es*, Amazon.fr*, Amazon.it*, Amazon.nl*, Amazon.pl*, Amazon.se*, Amazon.sg*
Prepare Installation Media
Download Ubuntu Server from Ubuntu Server Official Download Page and create a bootable USB flash drive with whatever your favorite method is (Etcher, Win32DiskImager, etc).
Update BIOS
First we need to update the Compute Stick’s BIOS. My Stick came out of the box with a BIOS that was 3 years out of date. Go to https://downloadcenter.intel.com/ and search for your model of Intel Compute Stick (mine is STCK1A8LFC). You’ll see the BIOS update on the search. Go there and download it (it’s a .BIO file) and put it on your USB flash drive.
Now plug your flash drive into the Intel and power it on. Repeatedly press F7 during startup. This will take you into a “BIOS Flash Update” screen. Select your flash drive and navigate to where you put the .BIO file. Select this file and confirm that you want to flash. After about 2 minutes the stick will finish updating the BIOS and restart.
Configure BIOS Settings
Boot the compute stick and repeatedly press F2 during startup until you enter the BIOS menu. Choose the “Configuration” tab at the top. Make sure that USB Boot is set to “Enabled” and power state is set to “Always On”. Make sure the peripherals are enabled such as USB and SD Card (if using).
If you have a Windows version of the compute stick you need to change the “Select Operating System” option from Windows to Ubuntu. Press F10 to save BIOS settings.
Install Operating System
Insert your USB flash drive with Ubuntu Server on it. Restart the stick and press F10 repeatedly until you get into the boot selection screen. Choose your flash drive and the Ubuntu installer will load.
Choose your language and and proceed to the Install Ubuntu screen. Make sure that the stick is getting an IP address through your USB ethernet adapter. Proceed with the defaults until you get to the Filesystem setup screen. Choose “Use an Entire Disk” and select either the internal storage (limited space, mine was ~8GB) or your SD card. Confirm settings and press done.
Enter your desired username/password in the profile setup screen. Configure snaps if you want any (or just configure the OS once it’s booted how you want it). The operating system will now install to your chosen drive.
First Boot
Initially you may be seeing some warnings. Ignore these for now as we will fix them after updating.
The first thing you want to do is update your Ubuntu. Type:
sudo apt-get update && sudo apt-get dist-upgrade -y
Reboot your system. This will put you on the latest kernel, linux-firmware, amd64-microcode and other important packages that will fix a bunch of issues right off the bat.
Fixing Warnings
If you installed to the internal storage you may be seeing warnings such as systemd-gpt-auto-generator : Failed to dissect: Input/output error. To fix this we will edit our kernel boot parameters. The details of why we get this warning have to do with the internal MMC storage and are extraordinarily dull. You can google it if you want more details but to just fix it type:
sudo nano /etc/default/grub
Scroll down to the line GRUB_CMDLINE_LINUX_DEFAULT=””. This is where we will add systemd.gpt_auto=0 in between the empty quotes to stop the warnings. The correct line after you change it will be:
GRUB_CMDLINE_LINUX_DEFAULT="systemd.gpt_auto=0"
Press Ctrl+X and then answer yes to save our changes. Then we need to tell grub to update the bootloader. We do this by typing:
sudo update-grubNow reboot your system and the gross warnings will be gone!
Run Trim
Trim is a command that tells your storage to overwrite anything on the drive that is considered “free space”. This is essentially the same as “optimizing” your drives in Windows. We can run the trim command on all devices with:
sudu fstrim -av
This will give a number of bytes that were trimmed from the storage. You should notice an overall snappier device!
Final Steps
(Optional) – If you want to get more performance out of the Compute Stick we can change the power mode to “Performance” in the BIOS. You will get a warning that only a single USB device will work in this mode because more power is going to the CPU so we will need to unplug our USB hub. Since this is a headless server this should be fine. I use my Ethernet to USB adapter in my only USB port.
You can now switch to using SSH and unplug the device from your monitor/TV. Simply unplug it and point your favorite SSH client at the Compute’s IP.
The Compute Stick is now ready to configure for whatever purpose you have in mind!


Booting any installer on STCK1A32WFC does not work for me: After selecting th usb-boot-device (or SD-Card) there’s only a black screen.
Tried it with 18.04 and 20.04 and 14.x
Do I have to select a special version?
Hey Michael,
It has been a minute since I tried but I still have my trusty STCK. How are you imaging the device (like which program)? Did you do the BIOS updates beforehand? Is the STCK getting enough power (probably, but worth checking if you have spare adapters).
I will definitely get mine out and test here today and make sure everything is still working as written (and update if necessary). Hopefully that helps and I’ll update shortly! (EDIT: I’m behind on this, lots to catch up on, but it’s on my list)
I was able to look into this more today. I originally logged in to see if my original image was still working:
james@intelcompute:~$ sudo lshw -shortH/W path Device Class Description
==========================================================
system STCK1A8LFC
/0 bus STCK1A8LFC
/0/0 memory 64KiB BIOS
/0/28 memory 1GiB System Memory
/0/28/0 memory 1GiB DIMM DDR3 1333 MHz (0.8 ns)
/0/28/1 memory DIMM [empty]
/0/32 memory 224KiB L1 cache
/0/33 memory 2MiB L2 cache
/0/34 processor Intel(R) Atom(TM) CPU Z3735F @ 1.33GHz
/0/100 bridge Atom Processor Z36xxx/Z37xxx Series SoC Transaction Register
/0/100/2 display Atom Processor Z36xxx/Z37xxx Series Graphics & Display
/0/100/1a generic Atom Processor Z36xxx/Z37xxx Series Trusted Execution Engine
/0/100/1d bus Atom Processor Z36xxx/Z37xxx Series USB EHCI
/0/100/1d/1 usb1 bus EHCI Host Controller
/0/100/1d/1/1 bus USB hub
/0/100/1d/1/1/1 bus USB2.1 Hub
/0/100/1d/1/1/1/1 generic AX88x72A
/0/100/1d/1/1/1/2 input USB Receiver
/0/100/1d/1/1/1/3 generic USB 10/100/1000 LAN
/0/100/1f bridge Atom Processor Z36xxx/Z37xxx Series Power Control Unit
/1 enx0050b60bb195 network Ethernet interface
/2 enx3c18a078e70b network Ethernet interface
/3 wlan0 network Wireless interface
james@intelcompute:~$ uname -a
Linux intelcompute 4.15.0-52-generic #56-Ubuntu SMP Tue Jun 4 22:49:08 UTC 2019 x86_64 x86_64 x86_64 GNU/Linux
james@intelcompute:~$ cat /etc/os-release
NAME="Ubuntu"
VERSION="18.04.2 LTS (Bionic Beaver)"
ID=ubuntu
ID_LIKE=debian
PRETTY_NAME="Ubuntu 18.04.2 LTS"
VERSION_ID="18.04"
HOME_URL="https://www.ubuntu.com/"
SUPPORT_URL="https://help.ubuntu.com/"
BUG_REPORT_URL="https://bugs.launchpad.net/ubuntu/"
PRIVACY_POLICY_URL="https://www.ubuntu.com/legal/terms-and-policies/privacy-policy"
VERSION_CODENAME=bionic
UBUNTU_CODENAME=bionic
james@intelcompute:~$
Everything fired up and was good to go. Now the next test was to see if I could install the latest version on it.
Are you using the server version? The desktop version of Ubuntu says it requires a minimum of 4GB of memory now so I definitely wouldn’t recommend that. The server version is what I’m going to attempt here first.
I downloaded the latest Ubuntu Server iso from ubuntu.com/download/server. I then renamed my file from ubuntu-20.04.3-live-server-amd64.iso to ubuntu-20.04.3-live-server-amd64.img. Using Win32DiskImager I opened the .img file. I wrote the installer media on a USB drive.
After connecting the STCK to my computer monitor I started pressing F10. When I pressed F10 I got nothing but a black screen either. Then it dawned on me. The BIOS mode doesn’t work on computer monitors if I remember correctly. I think you need to connect it to a TV (like a 720P or 1080P TV) to access the BIOS. It’s kind of like having no video drivers installed in the BIOS menus (it only supports low resolution display modes).
Sure enough, if I just let it boot normally into my previous OS install, you can’t see the BIOS / startup screens and actually don’t see anything until real Ubuntu starts booting (i.e. it loads the video drivers that can output a high enough resolution to display on a modern PC monitor).
Once you’ve done that and got Ubuntu installed you can connect it to a regular PC monitor like I am. You will see nothing but a black screen though until the OS is installed on a modern PC monitor as it’s too low of a resolution but it should work on a 720P or 1080P capable HDTV. You’d only do this the initial installation then you can switch to a monitor. Can you give that a try?
I followed these instructions to install Ubuntu Server 19.04 on an Intel Compute Stick STCK1A32WFC (2GB RAM, 32GB MMC internal storage).
Thank you for the useful tips. I would add:
– You need the ALTERNATIVE install package, not the default LIVE package; the LIVE package hangs because it cannot detect the hardware environment.
– Ubuntu 19.04 apparently includes WiFi and Bluetooth support that was not available in 16.04; however I have not tested this
Hello any update on this ? Has anybody been able to confirm that wifi and bluetooth work out of the box after Ubuntu Server 19.04 install ? Thank you !
I had set up a number of these compute sticks with lubuntu 18.04 for family as a way to add smarts to non smart TVs. One thing you did not mention or encounter, which I did, was the CSTATE issues with this particular Intel CPU that caused repeated hangs and instability. It took a lot of searching to nail this down, so if it affects you this might help. More detail at https://bugzilla.kernel.org/show_bug.cgi?id=109051, but the TL;DR workaround is to add “intel_idle.max_cstate=1” to GRUB_CMDLINE_LINUX_DEFAULT in /etc/default/grub.conf and run update-grub again.
That is awesome, thanks Rob! It makes sense to disable c-states for the use cases we are interested in with this stick because c-states are primarily to save power and the stick uses negligible power anyways!
Has anyone confirmed if this c-state issue applies to the 18.04 server version James was giving instructions for, or is this specific to lubuntu?