
It’s quite a bit more tricky to install Android on the Orange Pi than Linux (which is as simple as writing the image to the SD card with Etcher).
As long as you know the right software to use and where to get it though it’s not too bad. In this guide I’ll show you how to set up Android on the Orange Pi from start to finish. Let’s begin!
Hardware Used
For this guide I used the Orange Pi Zero 2 when writing the instructions but any Orange Pi will work.
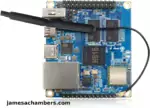
The Orange Pi Zero 2 is a low-cost board from the Orange Pi line of SBCs. It has both a 512 MB or 1 GB RAM option available. Built-in WiFi with included external antenna. Also includes case and a short USB-c power cable. Seems to be pretty widely available in most countries.
Links: Amazon.com*, AliExpress.com*, Amazon.ca*, Amazon.co.jp*, Amazon.co.uk*, Amazon.de*, Amazon.es*, Amazon.fr*, Amazon.it*, Amazon.nl*, Amazon.pl*, Amazon.se*
The Orange Pi runs hot so a decent heatsink kit with conductive thermal adhesive really helps:

The Geekworm copper heatsink set is designed to fit many different single board computers. It uses thermal conductive adhesive which many “cheap” heatsink kits for SBCs don’t have. Eliminates hotspots and reduces throttling. Can be further enhanced by powered cooling over the heatsinks.
Links: Amazon.com*, Amazon.ca*, Amazon.co.jp*, Amazon.co.uk*, Amazon.de*, Amazon.es*, Amazon.fr*, Amazon.it*
Getting the Android Image
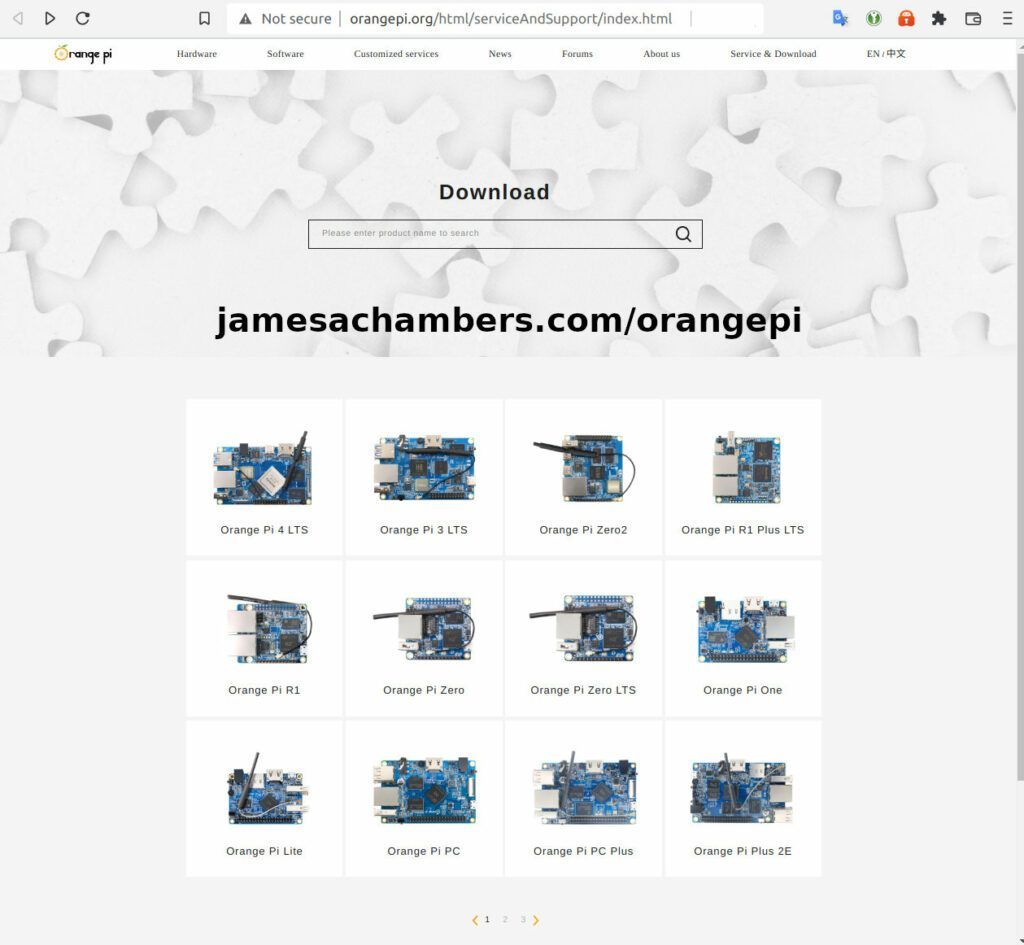
First we need to get the Android image from the Orange Pi web site. The official Orange Pi downloads page is here.
Choose your model of Orange Pi and it will take you to this page:
The “Android Image” is what we are looking for. Click on “Android Image” and it will take you to a Google Drive location that has the image to download.
At time of writing this was OrangePi_Zero2_Android10_v1.1.tar.gz. Start the file download now (it’s around 400 MB or so).
Getting PhoenixCard
While we are still in the downloads section of the Orange Pi site there is another utility we need. Now click the “Office Tools” link on the Orange Pi site for your model.
This will take you to another drive with a whole bunch of utilities on it. The utility we need is called PhoenixCard. The filename on Google Drive is PhonixCard-4.2.5.zip at time of writing.
Note: This is a Windows only utility. Here is what the Orange Pi documentation says about PhoenixCard:
The Android image of the development board can only be burned into the TF card using the PhoenixCard software under the Windows platform, and the version of the PhoenixCard software must be PhonixCard-4.2.8.
Please do not use software that burns Linux images, such as Win32Diskimager or balenaEtcher, to burn Android images.
In addition, the PhoenixCard software does not have versions for Linux and Mac platforms, so it is impossible to burn Android images to TF cards under Linux and Mac platforms.
This is definitely a bit of a bummer and I wish you didn’t have to use this proprietary flashing software for Android but that is the situation. This probably won’t be a problem for most of you as even if you don’t run Windows my guess is that you’ll be able to find a Windows PC to use temporarily to write this image to the SD card.
If you extract the zip file you will see a folder that has “PhoenixCard.exe” in it. That’s the flashing application!
Writing Image to SD Card
First we need to extract the image from the OrangePi_Zero2_Android10_v1.1.tar.gz file we downloaded earlier. If you are on Windows you may need a utility to extract a .tar.gz file. I recommend 7zip for that which is a great open source utility that can extract just about anything.
Once you extract the .tar.gz you should find the file OrangePi_Zero2_Android10_v1.1.img. This is the file we are going to use inside PhoenixCard.
Now open PhoenixCard. Press the “Image” button in the top left of the screen. Navigate to where you extracted the files and select OrangePi_Zero2_Android10_v1.1.img.
If you haven’t already insert the SD card you are going to write the image to. Press “Refresh” and it should populate in the window:
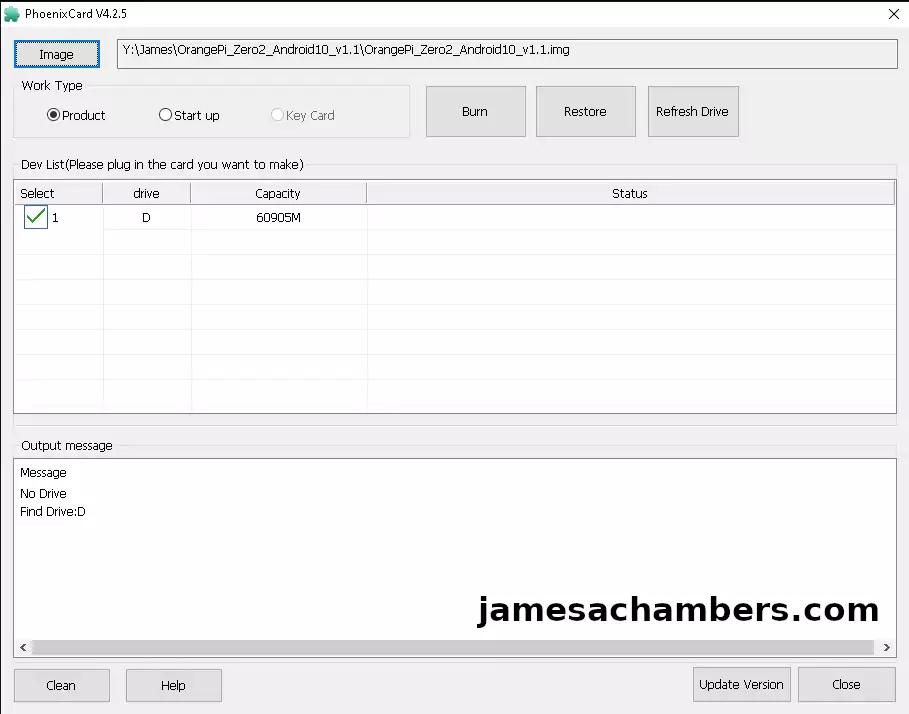
You can see my drive “D” on the list. Now change the “Work Type” from “Product” to “Start up”. This will create an Android image that boots from your SD card. I’ll cover the “Product” type in the next section (it’s for creating a SD card that writes itself to the eMMC).
Now go ahead and press “Burn”. If you are one of the lucky ones that doesn’t experience issues with this program then you should see this in your “Output message”:
D: Formatting the card ......
D: Start Burning...
D: [phoenix card_00]Burn Success
D: [phoenix card_10]Burn Success
D: [MBR ]Burn Success
D: [bootloader ]Burn Success
D: [env ]Burn Success
D: [boot ]Burn Success
D: [super ]Burn Success
D: [misc ]Burn Success
D: [recovery ]Burn Success
D: [cache ]Burn Success
D: [vbmeta ]Burn Success
D: [DATA File] Burn Success
D: Magic Complete
D: Burn End...
Testing Orange Pi
Now put the device into the Orange Pi and connect it to a screen/monitor and connect the power:
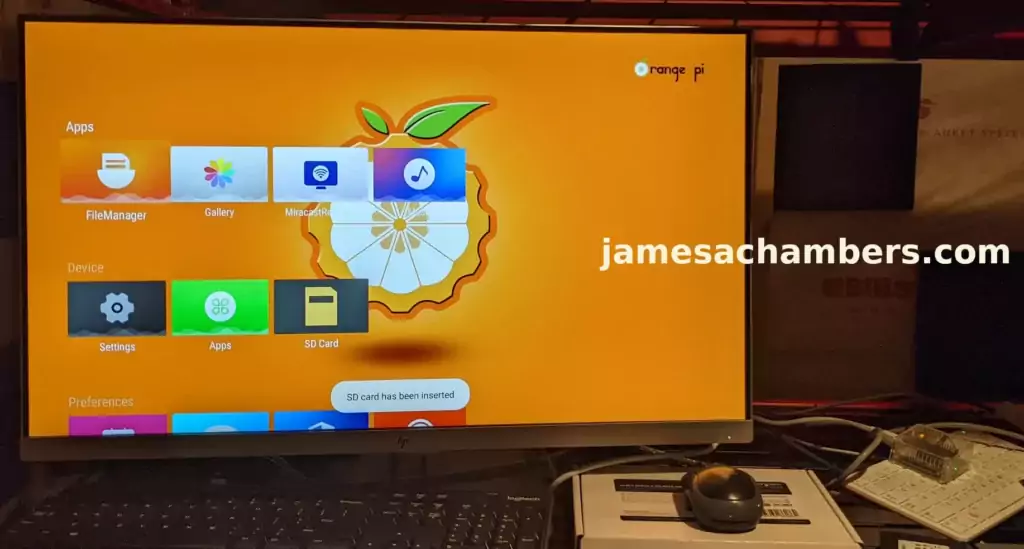
and we’re in! The device is now ready to be configured.
Writing Image to eMMC
To create a SD card that writes the image to the eMMC built into the Orange Pi you need to successfully complete a burn in PhoenixCard in “Product” mode. This is the mode that I and many others have trouble with. Mine specifically would freeze at 32-33% after writing the MBR and another small partition successfully.
Tips for fixing this ranging from having all of your Windows updates to using something like Windows XP. It’s all over the map. Changing which version of PhoenixCard you are using seems to make the most difference.
Perhaps if I had the version 4.2.8 that Orange Pi references in the documentation it would do a successful “Product” mode burn. If any of you successfully have completed this let us know in the comments what version you used or any tricks you used to get it to successfully create this type of SD card.
See this page from the Orange Pi documentation for more information on that. I plan to update this section more once I’ve figured this out but for now all I can say is I was not able to create this type of image successfully yet. Orange Pi uploading the right version of the PhoenixCard utility to the board’s “Utilities” page would probably do it. Let’s hope someone from there sees this guide and puts it up there for us!
Conclusion
It’s so much easier to image these with Linux. No doubt about it. The biggest problem with the Android images is that you have to use PhoenixCard which is literal garbage and I doubt any of you will disagree once you’ve used it. Hopefully additional / better solutions become available to create bootable Android images for the Orange Pi.
I definitely recommend trying the SD-based boot before trying to write the image to the eMMC as that seems to be where people really run into problems and the right version of the PhoenixCard software (according to Orange Pi’s documentation) doesn’t seem to be available.
I strongly recommend Linux. It’s so much smoother of an experience than the current state of Android mostly thanks to PhoenixCard I would say. If you’re having a lot of problems with Android the Linux one will start right up.
All that being said I was able to successfully boot Android with a SD based installation on the Orange Pi Zero 2. Not bad for a ~$35ish board! I also recently received a Orange Pi i96 that was on sale for only $10 that can also run both Linux and Android images and I’ll have a getting started guide out for that one soon and I’m very excited to finish that board’s guide!
Other Resources
Check out my Orange Pi Zero 2 review for some additional tips


Hello there
Is the 1 GB / 1.5 GB version enough for Android or it needs more RAM?