
Recently for my storage benchmarking site I had a GitHub issue opened about the Orange Pi Zero 2 not being able to complete the storage benchmark successfully. We were able to get the board going after a lot of troubleshooting but it was pretty difficult to troubleshoot as I had never had one of these boards before.
Until now! I recently received my first and only ever hardware donation to the site from munecito who graciously donated one of these boards to help improve the benchmark (it did not only for SBCs but it now supports PCs as well). Thank you munecito!
I was very interested in how this board compares to the Raspberry Pi experience and ecosystem because we are having a massive Raspberry Pi shortage right now and that is exactly what we are going to do. I also have some general tips for getting the most out of the Orange Pi based on our troubleshooting experience. Let’s proceed!
Hardware Used
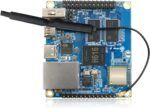
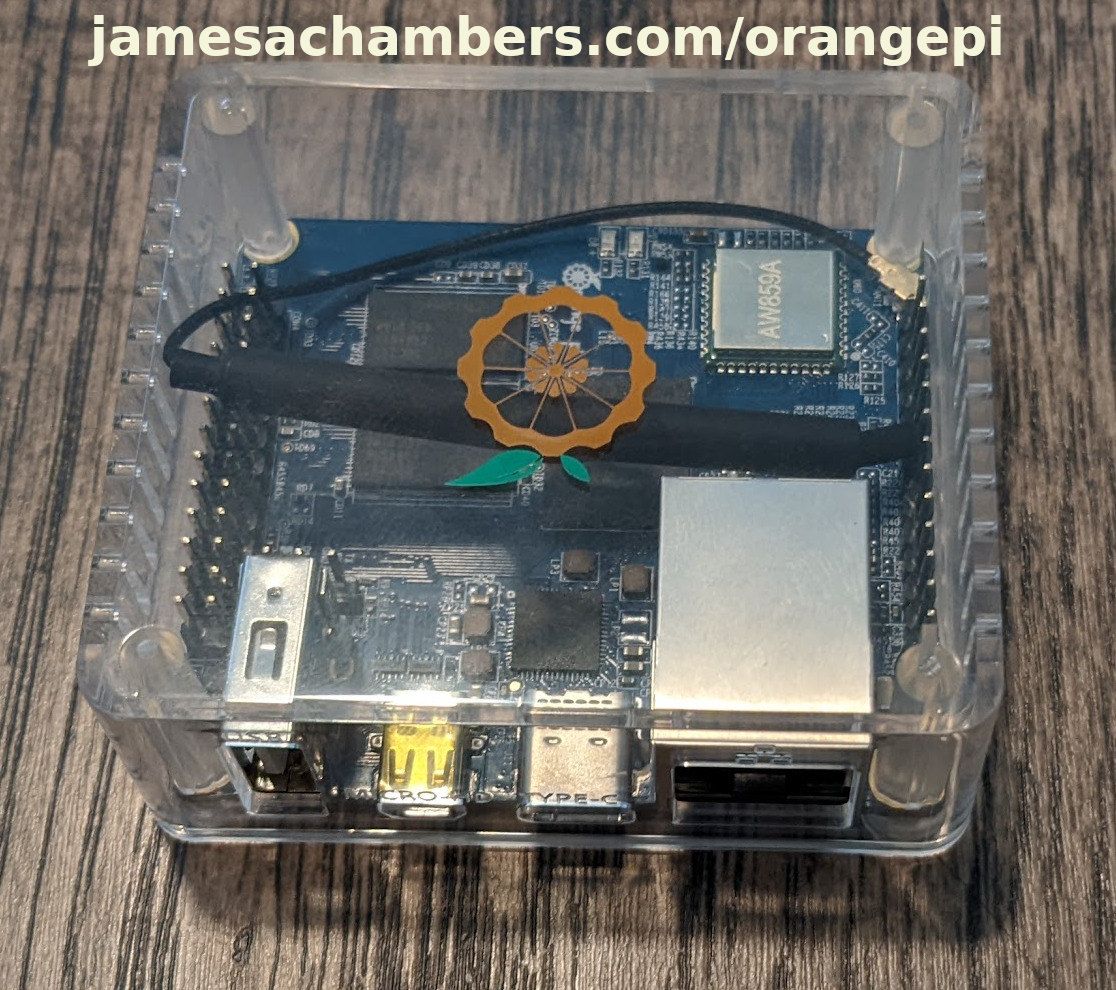
The Orange Pi Zero 2 is a low-cost board from the Orange Pi line of SBCs. It has both a 512 MB or 1 GB RAM option available. Built-in WiFi with included external antenna. Also includes case and a short USB-c power cable. Seems to be pretty widely available in most countries.
Links: Amazon.com*, AliExpress.com*, Amazon.ca*, Amazon.co.jp*, Amazon.co.uk*, Amazon.de*, Amazon.es*, Amazon.fr*, Amazon.it*, Amazon.nl*, Amazon.pl*, Amazon.se*

The Orange Pi official mouse uses 2.4GHz wireless to give you a wireless mouse experience with the Orange Pi
Links: Amazon.com*, AliExpress*

The Orange Pi monitor is meant to be a portable monitor you can take anywhere. It has a resolution of 1080P and features a hinge in the back that folds out to support the monitor.
Links: Amazon.com*, AliExpress*
Unboxing
I don’t do the unboxing stuff very often and typically leave that for YouTube. In this case though we are exploring the experience vs. Raspberry Pi so it’s a useful endeavor. Given that let’s do what I assume is the first blog-based unboxing of a hardware product in a written medium that anyone has bothered to do in years!
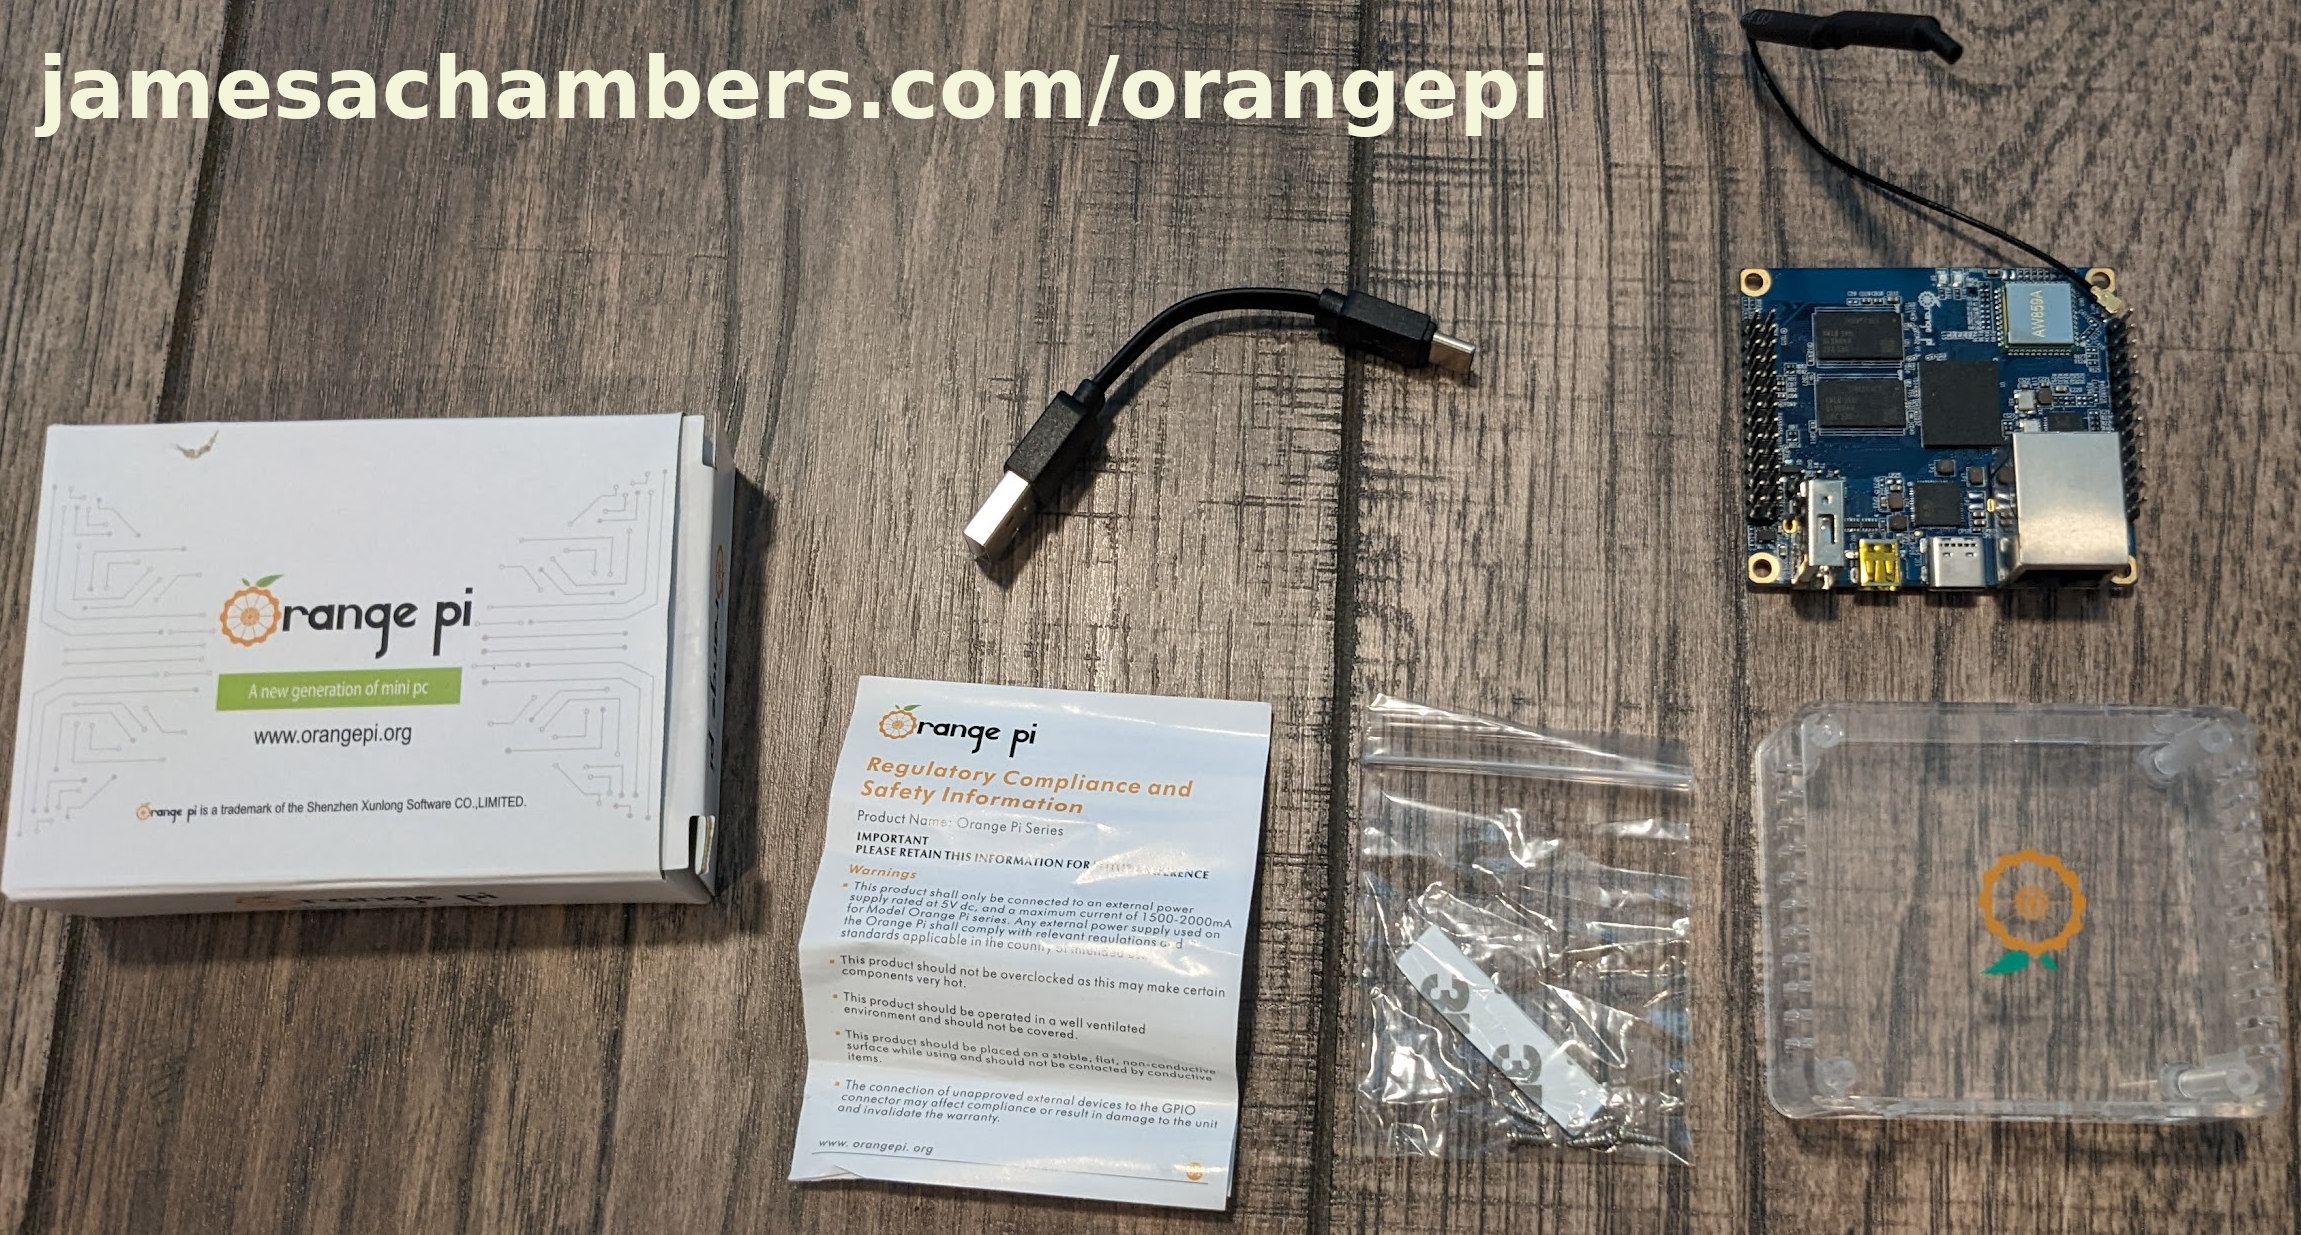
From that little white box came all of these accessories! It includes a case, the power cable (USB) and the WiFi external antenna.
That’s really generous as unless you buy a vendor bundle with a Pi you usually get nothing (with the exception of the Pi 400 Desktop Kit*).
So far so good. They gave us everything we need to start except the SD card. Now it’s time to take a look at their web site and see what the experience of getting an image looks like!
Orange Pi Images / Web Site
The official web site to download Orange Pi images is here at orangepi.org. It’s remarkably straight forward to use (especially compared to other SBCs) and looks like this:
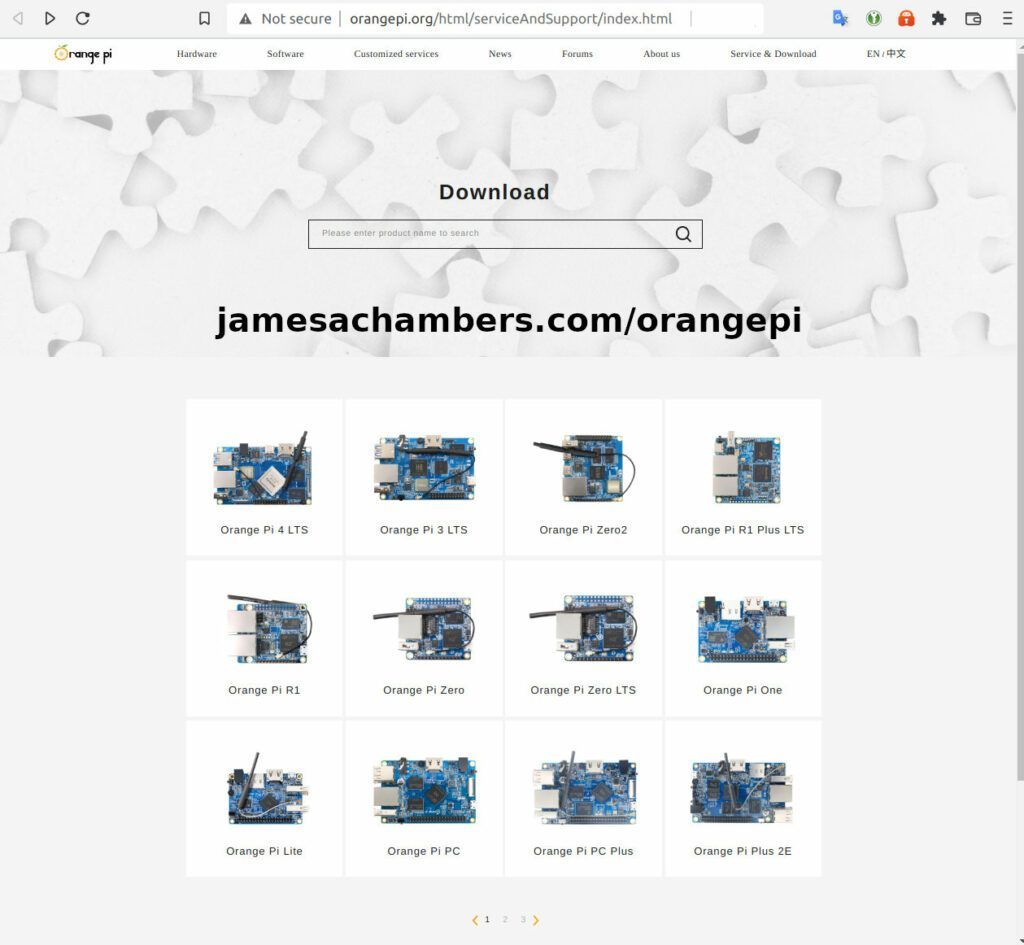
Other than a really huge amount of empty space around the search box in the middle of the page for no reason I really like it.
I clicked the Orange Pi Zero 2 model specific download page:
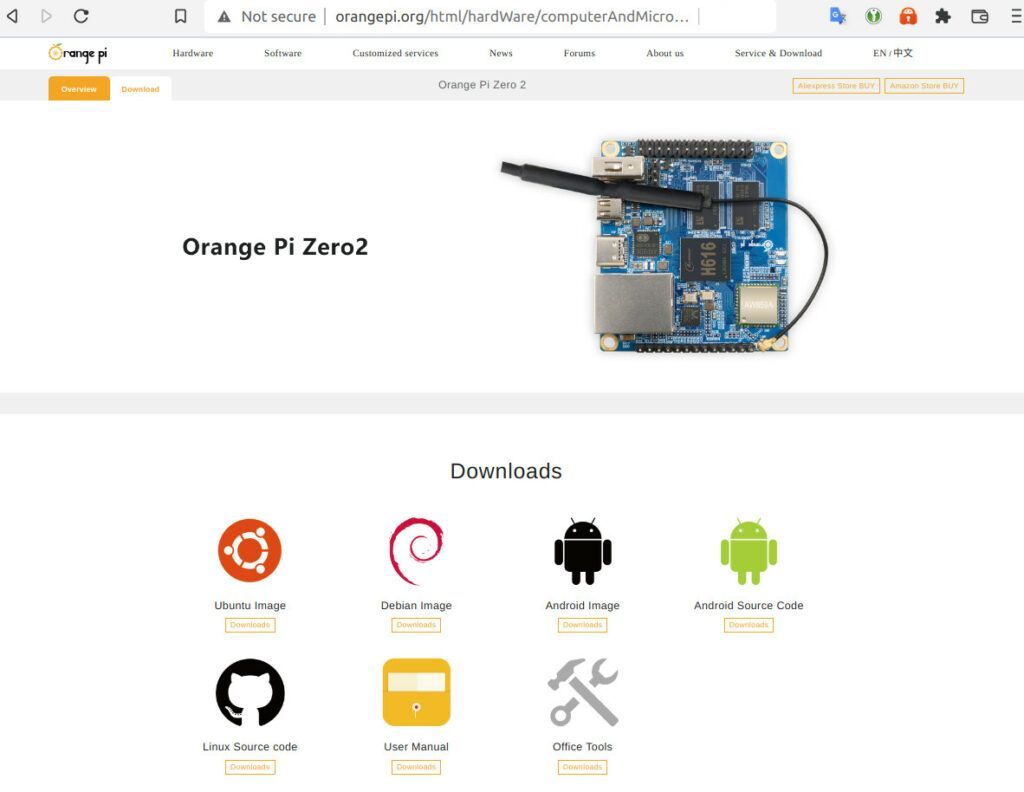
This surprised me a little bit. They actually have an Ubuntu image, an Android image and a Debian image all ready to go! They also have the respective source code available for Linux and Android.
I chose the Ubuntu image. There were many versions available which brings us to our most important tip.
Pro Tip: Choose the newest image / kernel
During my testing on GitHub with munecito we discovered that using the older “stable” image he could not successfully complete several tests on my storage benchmark without the Orange Pi completely locking up / crashing.
I recognized these types of lockups / crashes as usually being related to the kernel. I’d seen some of these kernel fixes for Raspberry Pi take *years* to make it through all the necessary checks / processes to make it into to the kernel. Once that happens it then needs to be backported into the specific kernel you are using.
Given how long this process can take for a manufacturer as big as Raspberry Pi I figured for Orange Pi that some of them may never make it into some of those old “stable” backported kernels. We then tried imaging it with a newer 5.X kernel and finally after much frustration he was able to successfully complete the storage benchmark!
The newer kernel had fixed the issues that were causing it to crash. On these smaller board manufacturers it’s definitely best to go with a newer kernel. The older “stable” kernels make sense for well-established boards that are well supported. These boards are new and fixes are being made all the time and you definitely want to have those!
Pro Tip #2: Use a heatsink kit
The Orange Pi boards are known to run hot as is the case with many single board computers. It really goes a long way to get a good heatsink kit that has thermally conductive adhesive (cheap heatsink kits can sometimes have non-conductive adhesive which basically traps the heat and has an opposite effect).
Something like the Geekworm copper heatsink kit (designed to fit many different SBCs including Orange Pi) works wonders:

The Geekworm copper heatsink set is designed to fit many different single board computers. It uses thermal conductive adhesive which many “cheap” heatsink kits for SBCs don’t have. Eliminates hotspots and reduces throttling. Can be further enhanced by powered cooling over the heatsinks.
Links: Amazon.com*, Amazon.ca*, Amazon.co.jp*, Amazon.co.uk*, Amazon.de*, Amazon.es*, Amazon.fr*, Amazon.it*
Imaging
Imaging was pretty straight forward. You just use a standard imaging tool like Etcher or Win32DiskImager or any of the other many image writing tools.
I actually just used Ubuntu’s built in “Disk Imager” tool to write the image which worked perfectly.
Testing Performance
After finishing writing Ubuntu Server with the latest available kernel (5.16.17 at time of writing) I plugged in the Orange Pi. Everything lit up appropriately so I logged into my router to find the assigned IP.
I connected with SSH to that IP and used the username of root and a password of orangepi:
root@192.168.50.24's password:
  ___  ____  _   _____             ____
 / _ \|  _ \(_) |__  /___ _ __ ___|___ \
| | | | |_) | |   / // _ \ '__/ _ \ __) |
| |_| |  __/| |  / /|  __/ | | (_) / __/
 \___/|_|   |_| /____\___|_|  \___/_____|

Welcome to Orange Pi 3.0.4 Jammy with Linux 5.16.17-sun50iw9

System load:   27%           	Up time:       8 min
Memory usage:  14% of 984M   	IP:	       192.168.50.24
CPU temp:      54°C           	Usage of /:    3% of 58G

[ 11 security updates available, 16 updates total: apt upgrade ]
Last check: 2022-07-13 20:40

[ General system configuration (beta): orangepi-config ]

New to Orange Pi? Support: http://www.orangepi.org

root@orangepizero2:~#
and we’re in, with a cute little ASCII art message of the day greeting! I already had some apt updates available so I started with those first:
apt update && apt dist-upgrade -y
Once the updates completed I wanted to benchmark the Pi Zero 2. I am using an application class (A1) SanDisk Ultra card that I have benchmarked while using the Pi so I know what the score “should” be that we can compare with what the Pi Zero 2 gets for a meaningful comparison.
I ran my Pi Benchmarks storage benchmark with the following command:
sudo curl https://raw.githubusercontent.com/TheRemote/PiBenchmarks/master/Storage.sh | sudo bash
and I ended up with a very nice score of 1,081. You can see this benchmark (#61,129) on Pi Benchmarks here. It looks like this:
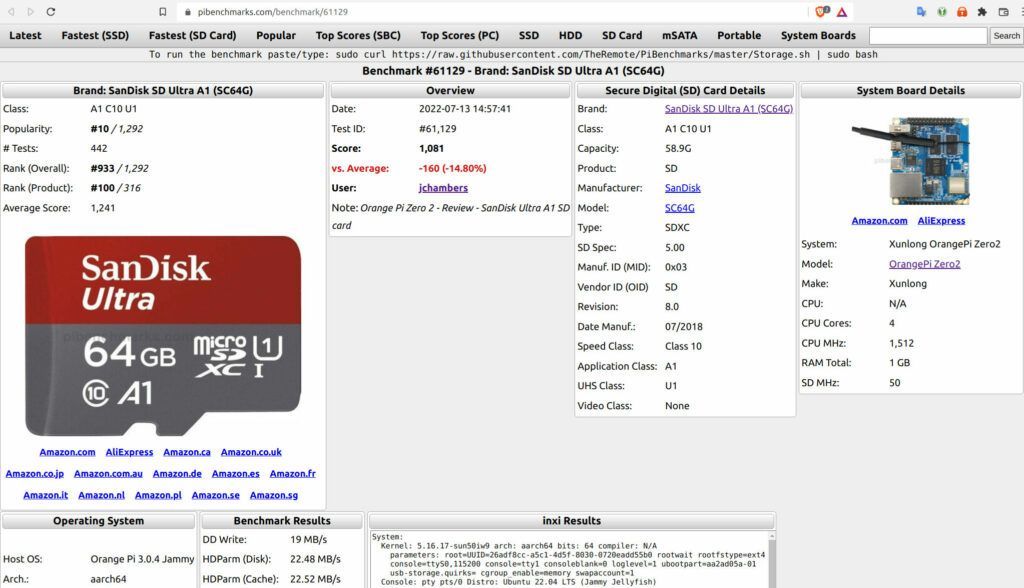
This was higher than I was expecting as I knew this was not as powerful of a board as something like the Pi 4. I was only down about 15% from the average for the Pi 4. You can see the -15% vs average in the above screenshot.
When munecito tested his board his was off by 20-25% or so as well so I fared slightly better than him but I think we could say it’s roughly 20% of a performance penalty from something like a Pi 4. It’s certainly a lot more than 20-25% cheaper than a Pi 4 though! You are getting a lot of bang for your buck here.
Pros / Cons
Pros
- Armbian support and good up-to-date official images
- Price is extremely attractive for what you get
Cons
- Although smaller than most boards it’s not as small as a Pi Zero
- Not the best choice for desktop performance (best for headless use)
Conclusion
The Orange Pi Zero 2 at a price of around ~$35 or so reminds me a lot of the original Raspberry Pi. This is a much more accessible board than the Raspberry Pi today both in availability and price. There are many models of Orange Pi available that are both less powerful and significantly more powerful than the Orange Pi Zero 2.
I hope the Raspberry Pi foundation gets back to their roots a little bit here and offers realistic options at this price point again. They made a decision to support the industrial partners through this shortage above consumers because they acknowledge that people have built their entire business models and livelihoods around the product. The pain for non-industrial users is real though in the mean time and for that reason I wanted to examine some alternatives.
The original intended use for this board by munecito is for a Pi Hole. That is a perfect use case for a board like this. You don’t need to buy a Raspberry Pi for a Pi Hole anymore and you shouldn’t if it is costing you $100+. I would highly recommend it for projects like a PiHole or other low powered servers / services as you will save a fortune getting a board like this and the performance is more than enough for that use case.
Is it as good as the Raspberry Pi? No it’s not as good as the Raspberry Pi. If the Raspberry Pi is 5 stars I would give Orange Pi about 4 stars which is the closest any other manufacturer has come that I’ve tested.
Other Resources
I’ve also reviewed the Orange Pi portable monitor here
The Orange Pi Zero 2 can actually use a SSD! Check out my Orange Pi Zero 2 SSD Booting Guide
If you want to install Android on your Orange Pi instead of Linux definitely check out my Orange Pi Android Installation Guide
For strategies on dealing with the Pi shortage check out my Raspberry Pi Shortage Survival Guide
For ideas on other SBCs to buy many of them have been tested on Pi Benchmarks and you may get some good ideas there!


I cant get hold of Phoenix Card 4.2.8 to flash Android 10, OP tell you to use this but theres no URL to download it from, does anyone know where this can be DL?
Hey Andrew,
Welcome! I don’t believe I said Phoenix Card specifically as I don’t know what that is. All you need to do is use Etcher or any other image writing program to write it to the disk (SD card typically). You can get Etcher from here. When I’m on Windows I like to use the free Win32DiskImager program to write these kinds of images because I’ve been using it for more than a decade (although these days Linux is my main OS) and it is meant to write raw images specifically whereas Etcher is a little more multipurpose (ISOs, etc.)
Specifically I used Ubuntu Linux’s “Disk Writer” program which is basically built into the OS. It’s the equivalent of using the Windows GUI and only Microsoft’s built-in tools to write a disk image (you can do this to burn a CD or data DVD for example from within Windows Explorer / the built-in utilities).
Unfortunately Windows can’t natively write these types of images though without installing something third party. It also can’t extract a .tar.gz so grab 7zip to be able to extract those (it’s basically a free open source version of WinRAR without the licensing silliness but arguably even more powerful). All you need to do though is write the image to the SD card or whatever storage device you are booting from using any disk imaging software you’d like.
If you download the Android image from Orange Pi’s web site you should get OrangePi_Zero2_Android10_v1.1.tar.gz. If you extract that archive inside will be “OrangePi_Zero2_Android10_v1.1.img”. That is the file you will write to your SD card with Etcher. Then put the SD into the Orange Pi and connect the power. It should boot up normally (no flashing necessary for this device like it would be with a phone for sure). Hopefully that helps!
I was wrong about this. Very wrong. It turns out the Orange Pi Zero 2 (and the i96 I recently received) both actually have a eMMC and you can flash it! That’s on me. I’m brand new to Orange Pi too and although I have a lot of experience with SBCs I’m honestly stunned they were able to include an onboard eMMC for the price point these boards are sold at. I literally didn’t even notice it nor is it very obvious on the board like it is on a Compute Module 4 when it has a eMMC soldered on instead of a big empty gap.
I was reading the documentation to write my new Orange Pi i96 Getting Started guide and I found out you actually can flash Android (and Linux) to the eMMC! If I had known it even had a eMMC I would have known this but I totally missed it. I’ve done similar things on the Raspberry Pi many times such as on the Compute Module 4 which also has a eMMC.
This is where that PhoenixCard application comes in. Apparently this is the only way to properly write a Android image. You do *not* have to use it with the Linux installations and my instructions for Linux I gave you were 100% correct.
They aren’t for Android though. I honestly don’t understand why this is necessary. Here’s what they say about writing Android images:
Ewww. That’s pretty crappy, no doubt about it. I wonder if it works under Wine. They even name my Win32DiskImager as software that *won’t* work even under Windows!
Here is the documentation on how to image the card for Android.
It basically is flashing software. It has to be. If it was just writing a disk image then Win32DiskImager, Etcher, and those other ones would work. Something more is happening here that doesn’t have to happen with Linux. Android has some sort of special magic getting written that you can only use this proprietary software to achieve (supposedly, I’ll be looking into this to find out why Linux can do this and Android can’t). Shame on Android for not being able to handle a real disk image without proprietary flashing shenanigans. It’s almost certainly intentional and I’m already upset about the answer even though I have no clue on a technical level what it is yet.
Okay, now to answer your question on where to get PhoenixCard. I went to the “Utilities” section of the Orange Pi web site and it took me here which has it. This is ALL the official utilities for Orange Pi Zero 2 and contains PhoenixCard as well as Win32DiskImager and other software for imaging for Linux as well.
You were right about this Andrew! The Android one is a lot trickier and I tested Ubuntu because I’m a Linux guy. I’m going to specifically have to do an Android install because it’s completely different apparently. I’m going to do an Android install for my upcoming Orange Pi i96 article and I will update this one as well as I dive into the Android issues you’ve brought to my attention more. Thanks for asking this question!
UPDATE: I wrote a guide after diving into it here that may be of some assistance: Android Installation for Orange Pi Guide
Now, now, now. I didn’t know this either!
What size eMMC are we talking about in the zero 2?.
So what you are telling me is that I can have it running without the SD card.
I did read in the documentation of the i96 but I seem to remember it being quite small.
Hey munecito,
That’s absolutely correct!
On the Orange Pi Zero 2 it is 8 GB. UPDATE: It’s the plus model that has the eMMC, not the Orange Pi Zero 2. On the i96 it seems to only be 512 MB.You can install Linux onto the eMMC (if it has one), and not only that, people say it’s much faster than using the SD card on it. The command to do it with Armbian (and maybe Ubuntu as well, I haven’t tried it yet) is:
nand-sata-installCheck out this from Armbian.
Good YouTube video (it’s actually Orange Pi’s official channel too at least seemingly) showing an install with this command
This is on my to-do list to write a guide for / install but it looks like doing it the Armbian way is pretty easy and has worked for a long time!
Great stuff sir. And may I add that as a pihole, the orange pi zero 2 has been working flawlessly (other than a log full issue that I don’t seem to be able to fix).
Hey munecito,
Welcome! That actually is fantastic to hear that it continues to do well. My wife asked me how different it was from a Raspberry Pi and I showed her that same SSH terminal and the welcome screen:
Since I’m using a Linux xterm-256color terminal the ASCII art even is colored. This may seem like a superficial thing but it’s honestly the little touches like this from Orange Pi that earned what we could basically sum up as a 4 / 5 star “would use” recommendation from me! It’s really the little things that make these boards either a joy to use from day to day or absolutely miserable. It’s a lot of other little things like the apt updates ready to go before my first sign in (and it not even being that far behind all things considered). Another way to describe this is “polish” and this experience has much more polish than other Pi competitors I’ve seen.
For people who haven’t used other SBCs before Raspberry Pi is dreamland compared to how miserable of an experience it can be. For example having to get cross-compiling build chains set up on your machine, having to deal with images that are with kernels from literally a decade ago, vendors dropping model and board support much sooner than they said or led on, etc. Orange Pi has put a lot of effort into making this experience *not* like that and I would not recommend it if it was anything like that (I have plenty of SBCs that are that I wouldn’t talk about on here or ever promote for this reason).
Now for your terminal issue I imagine you are having a variation of this issue. I’d imagine that most likely it’s PiHole doing too much / too verbose of logging and that if you turn some of the unnecessary logging parts down (there’s a lot of extras you can turn off without losing any functionality) it should get this under control.
There’s also a possibility you’re having some kind of kernel / dmesg error. This is pretty common in Linux if there’s some sort of driver or hardware issues where basically your system.log or kernel.log or one of those core log files essentially gets flooded with hundreds or even thousands of lines per second making it fill up the entire drive.
I believe on the Orange Pi this is configured to be a RAM disk. This means it won’t actually fill your physical disk but once it’s full you’ll start seeing those “log full” messages as you’ve described basically until you reboot (which unless the source is addressed it will fill up again and rinse and repeat). Once you reboot the machine the RAM drive contents will be lost as they are only temporary but something is either throwing constant errors or PiHole is probably set to log unnecessary things as this is a common configuration issue with PiHole for sure.
Thank you for letting me play with one of these boards basically as I wouldn’t have got to try this board if you didn’t (at least not any time soon). I was really impressed. I have lots of other SBCs like the Tinker Board and a lot of the other competitors and while not perfect the fact is you could buy at least 4 of these boards for what a single Raspberry Pi 4 costs on Amazon right now for one of the 4-8GB models.
It’s literally $164 on amazon.us right now for the 8GB Pi 4 and dropping all the way down to 1-2GB will only get you down to $116. That will actually get you 3 Orange Pi Zero 2’s (and that’s at the 1-2GB model price, for the 8GB model price you could get 4.71 or just about 5 Zero 2s) and thanks to your initial benchmark and mine we know that it’s only a roughly 20% performance penalty.
That is a really difficult value proposition to ignore. Having all the different OS images available (including Android) in a very clean and straight forward site is refreshing from some of the other SBCs I’ve used as well. Thanks again and take care!