
I’ve been upgrading all of the devices in my home to work with Home Assistant and eliminate subscriptions to proprietary services. One of the last remaining subscription services I have in my home is the Ring door and window sensors. The Ring ones have honestly been fine but the subscription is not free. Since I know these sensors will be installed in my home for 10+ years it will save me money to switch to something else that has no subscription.
That is why I was excited to see that Zooz has released a new series of Z-Wave door and window sensors that are completely self-managed by either a Z-Wave hub or Home Assistant running as a Z-Wave hub. The advantage of Z-Wave and Zigbee devices is they use much less power than WiFi so it’s a much better suited technology for devices that run on battery power (such as wireless door and window sensors).
In this review I’ll cover the Zooz 700 Z-Wave door and window sensors and cover the upsides and downsides of the system. Let’s get started!
Hardware Used

The Zooz 700 Z-Wave door/window sensors use a newer Z-wave chip that uses less power and has increased range. Works well with Home Assistant and existing Z-Wave hubs.
Links: Amazon.com*, Amazon.ca*, Amazon.co.uk*, Amazon.com.au*, Amazon.de*, Amazon.es*, Amazon.fr*, Amazon.it*, Amazon.nl*, Amazon.pl*, Amazon.se*, Amazon.sg*
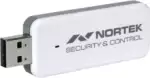
The Nortek Security & Control USB dongle gives a device running Home Assistant Z-Wave and Zigbee capabilities allowing it to act as both a Z-Wave and Zigbee hub!
Links: Amazon.com*, Amazon.ca*, Amazon.co.uk*, Amazon.co.jp*, Amazon.com.au*, Amazon.de*, Amazon.fr*, Amazon.it*, Amazon.nl*, Amazon.pl*, Amazon.se*, Amazon.sg*
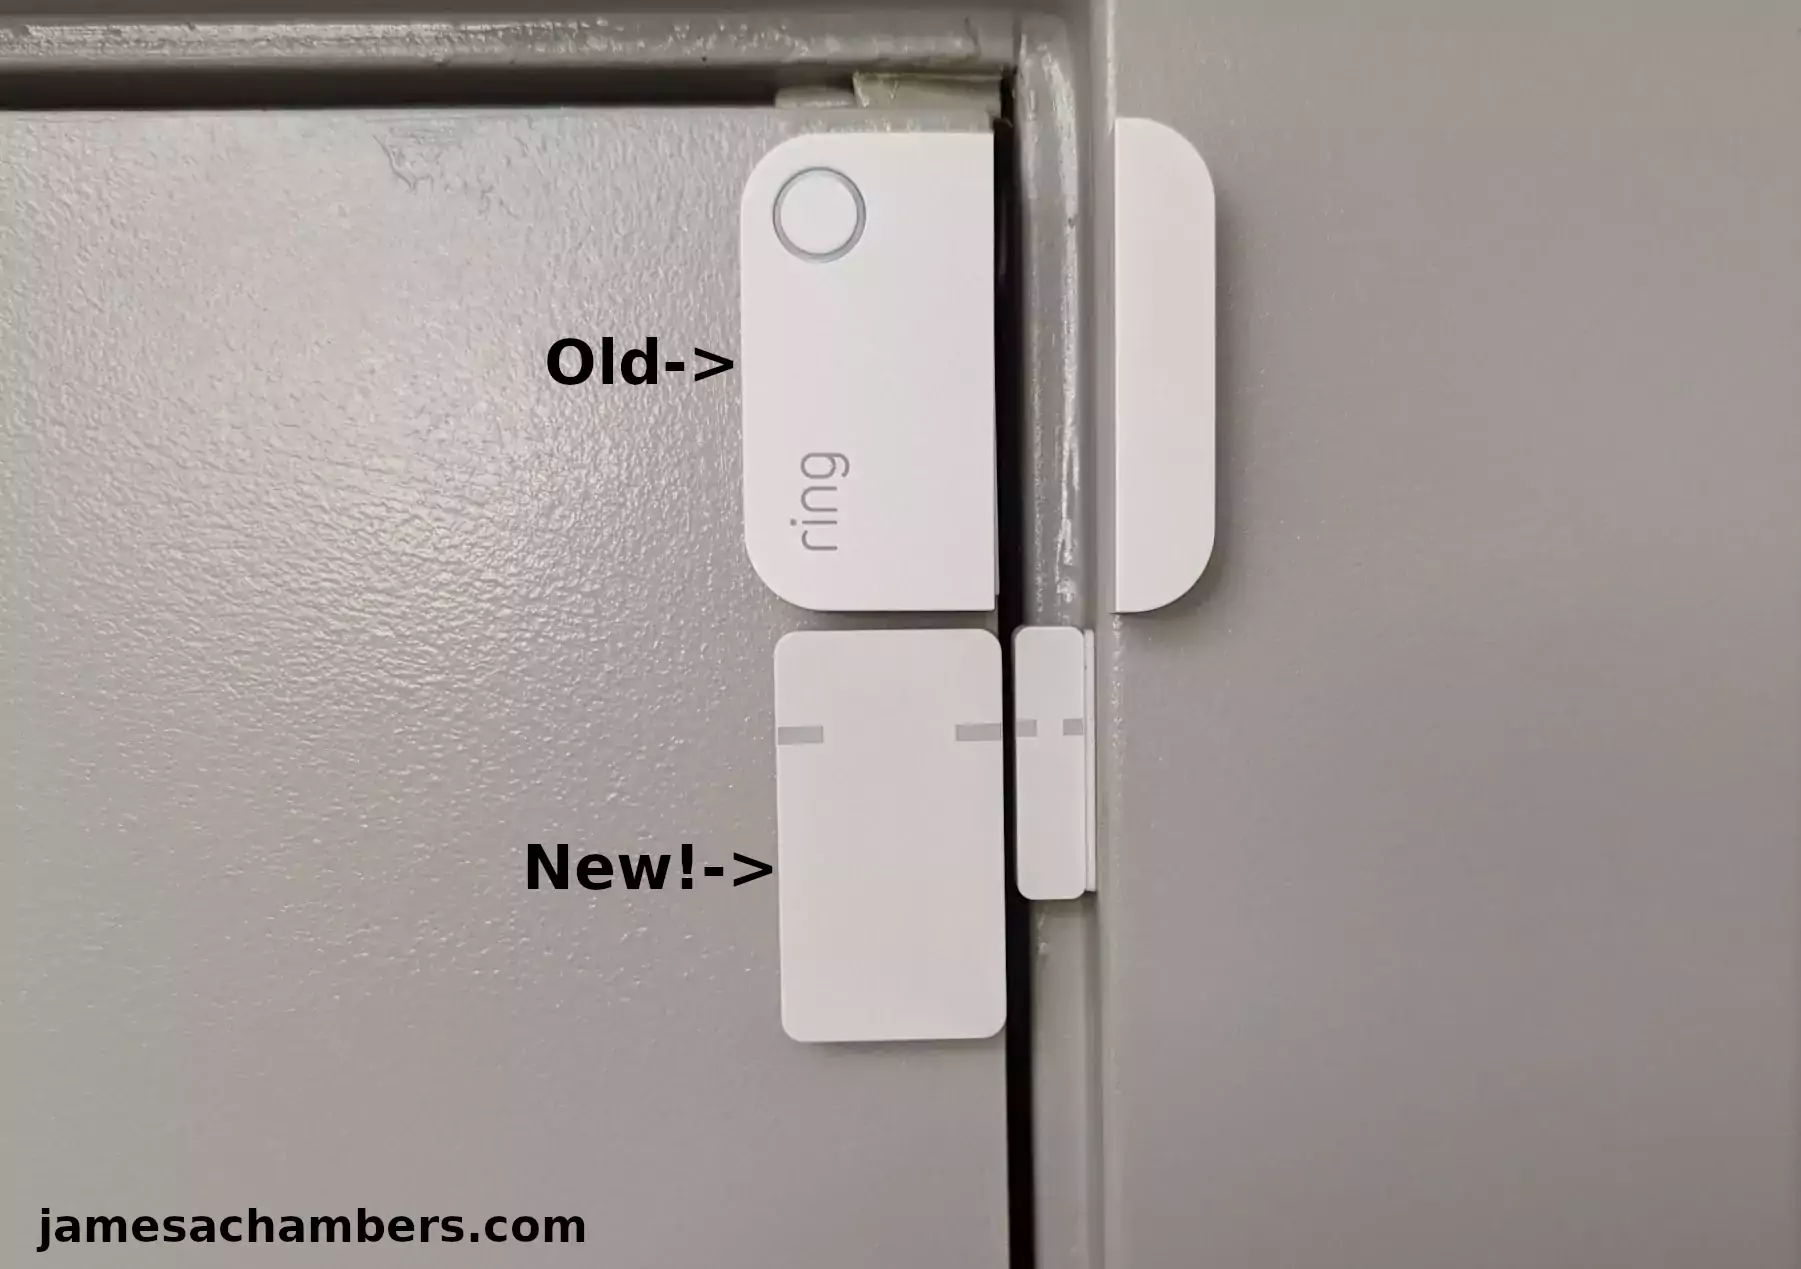
Old System
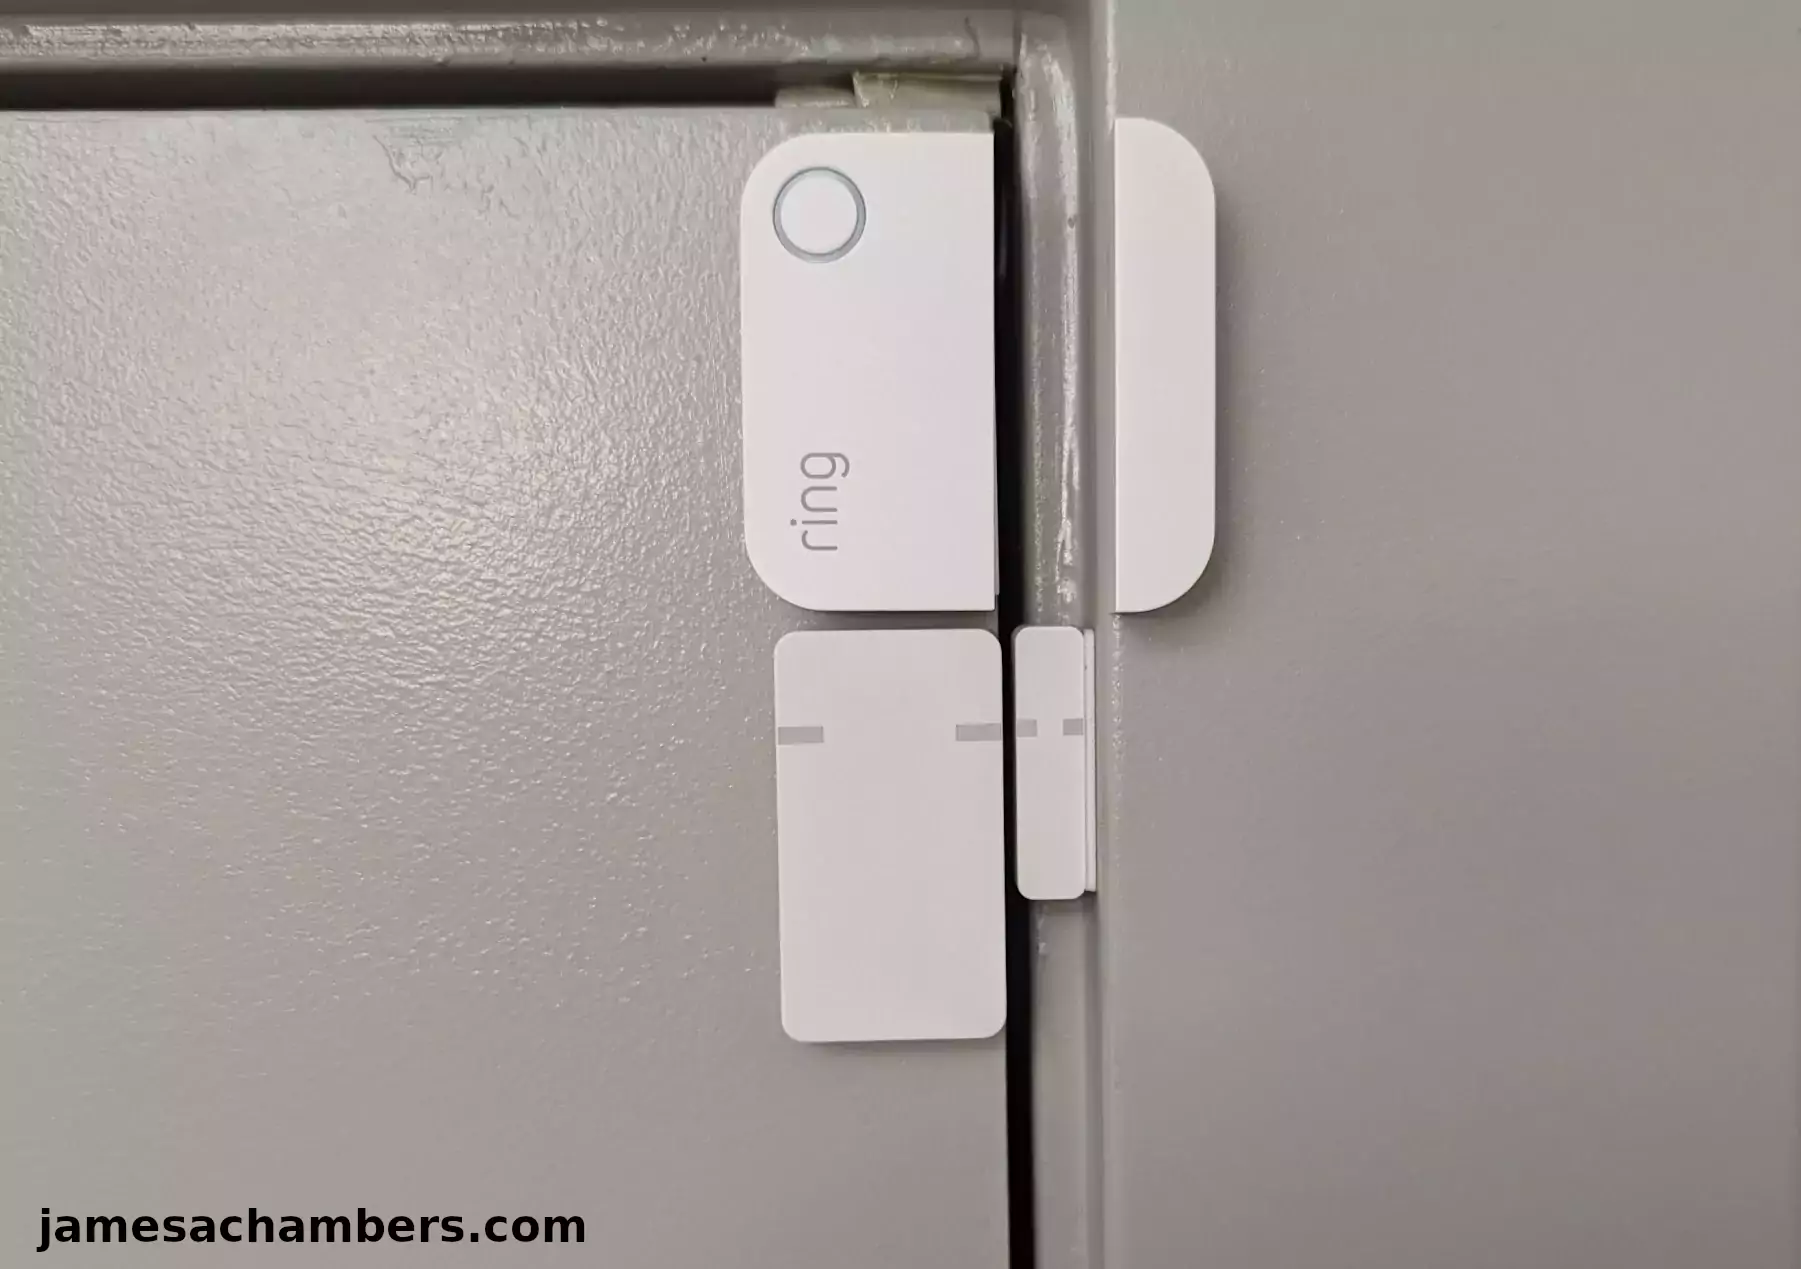
My criteria for this upgrade is that I don’t want a worse system than I started with. This makes things a little difficult because the system I started with works pretty well and is very compact. The existing Ring system looks like this:
Here’s a closer up shot:
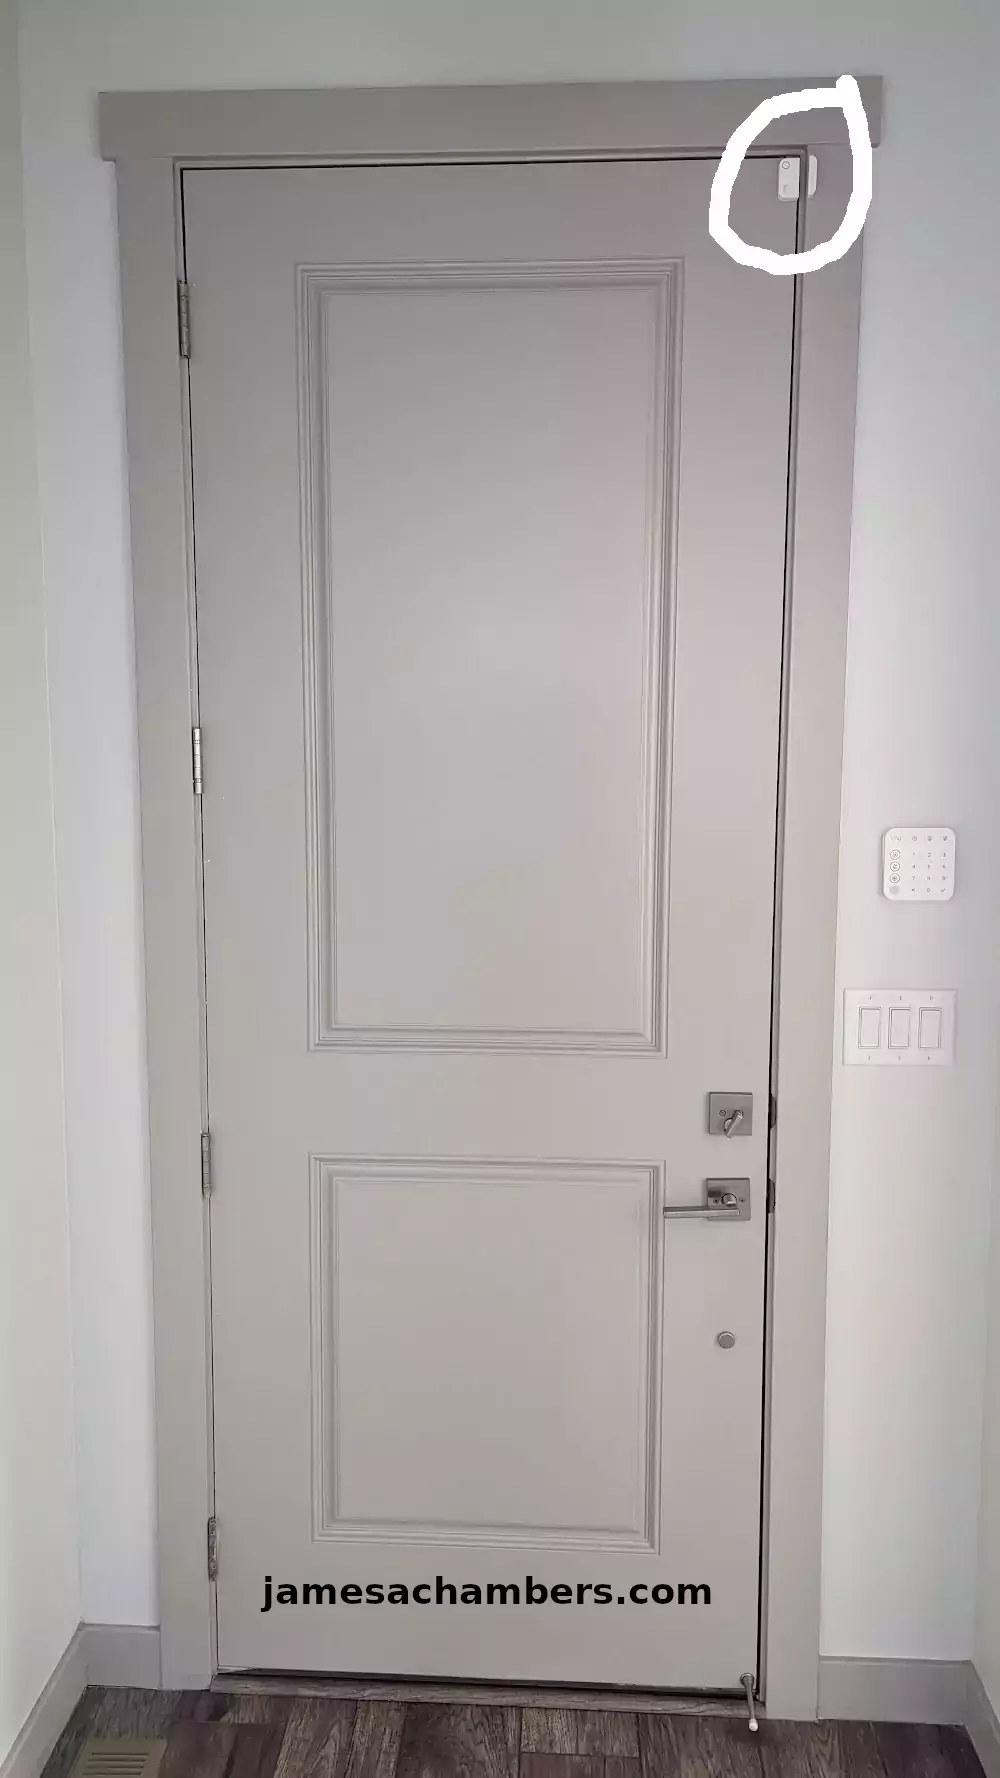
On my windows it looks like this:
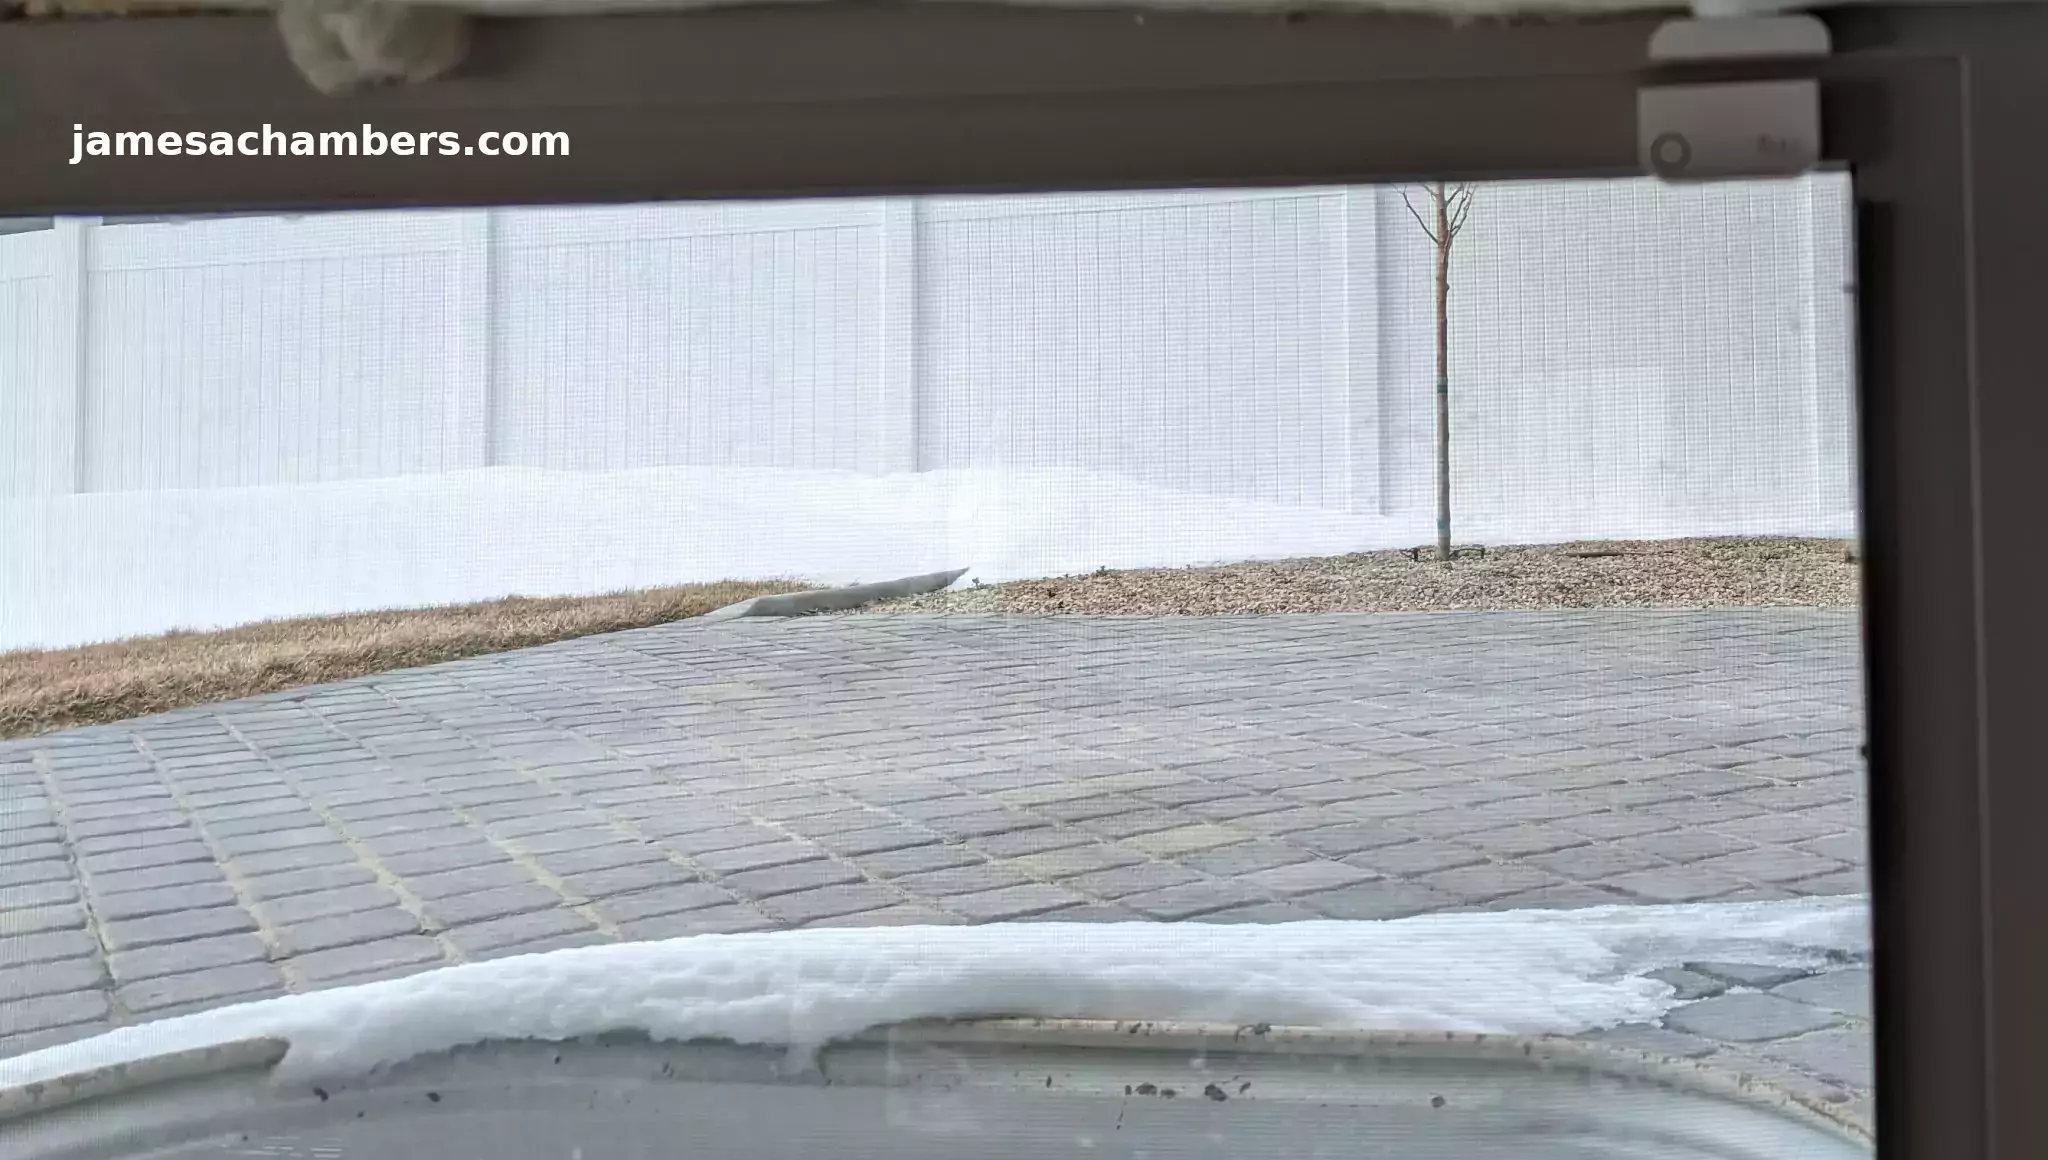
As you can see these are pretty small. They’re completely battery powered and wireless. This is what I’ll be comparing the Zooz sensors against.
Specifications
| Manufacturer | Zooz |
|---|---|
| Part number | ZSE41 |
| Included components | Z-Wave |
| Batteries Included? | No |
| Batteries Required? | No |
| Battery Cell Type | Lithium |
| Length | 1.9 inches |
| Width | 1 inches |
| Height | 0.3 inches |
| Manufacturer | Zooz |
| Manufacturer reference | ZSE41 |
| Product Dimensions | 4.83 x 2.54 x 0.76 cm; 32 Grams |
| ASIN | B09JKKLRLW |
Build Quality
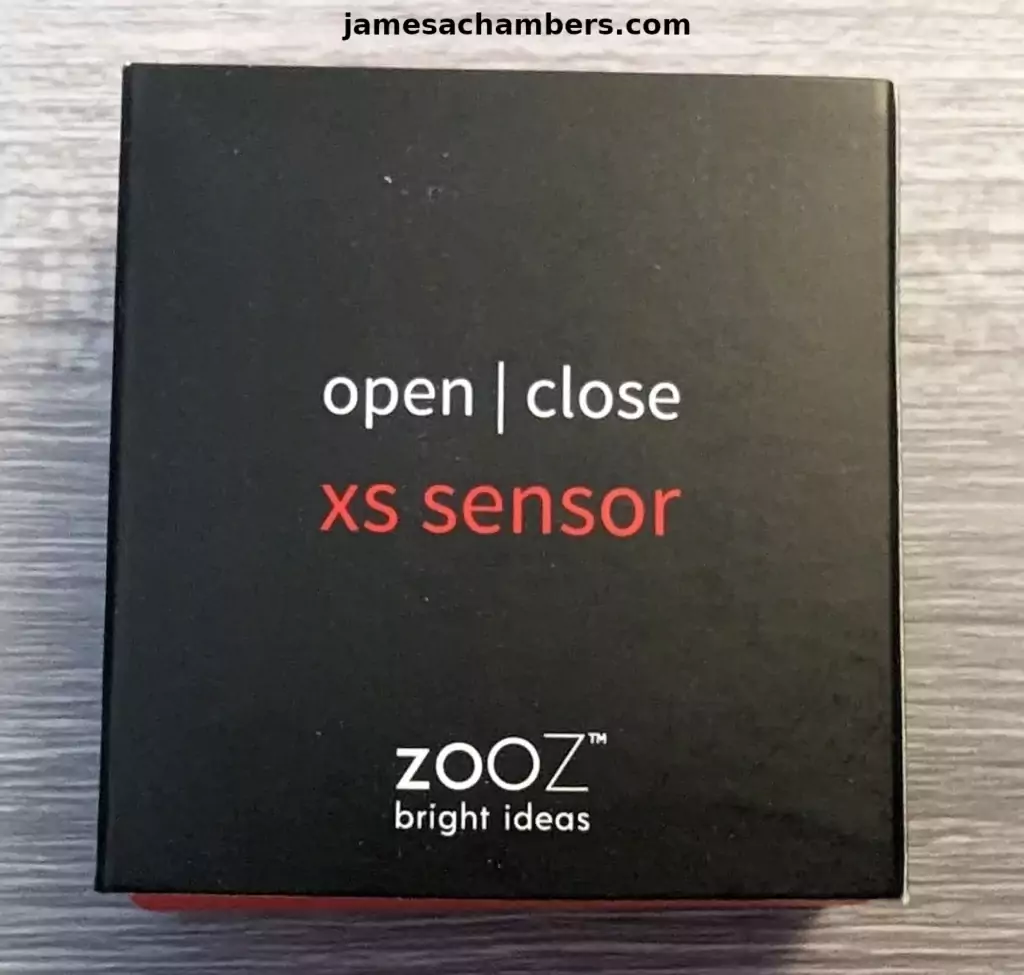
Let’s start with the packaging. The sensor will come in a box like this:
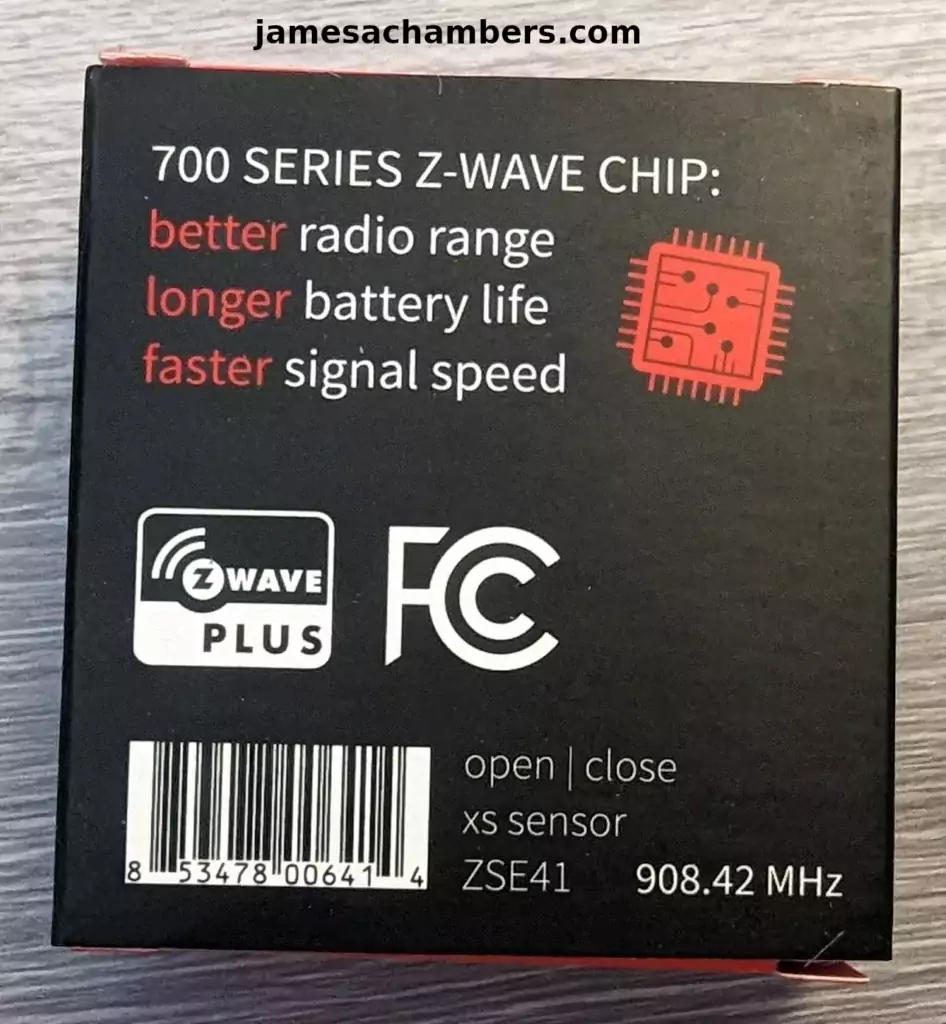
And the bottom:
Inside everything is packed up like this:
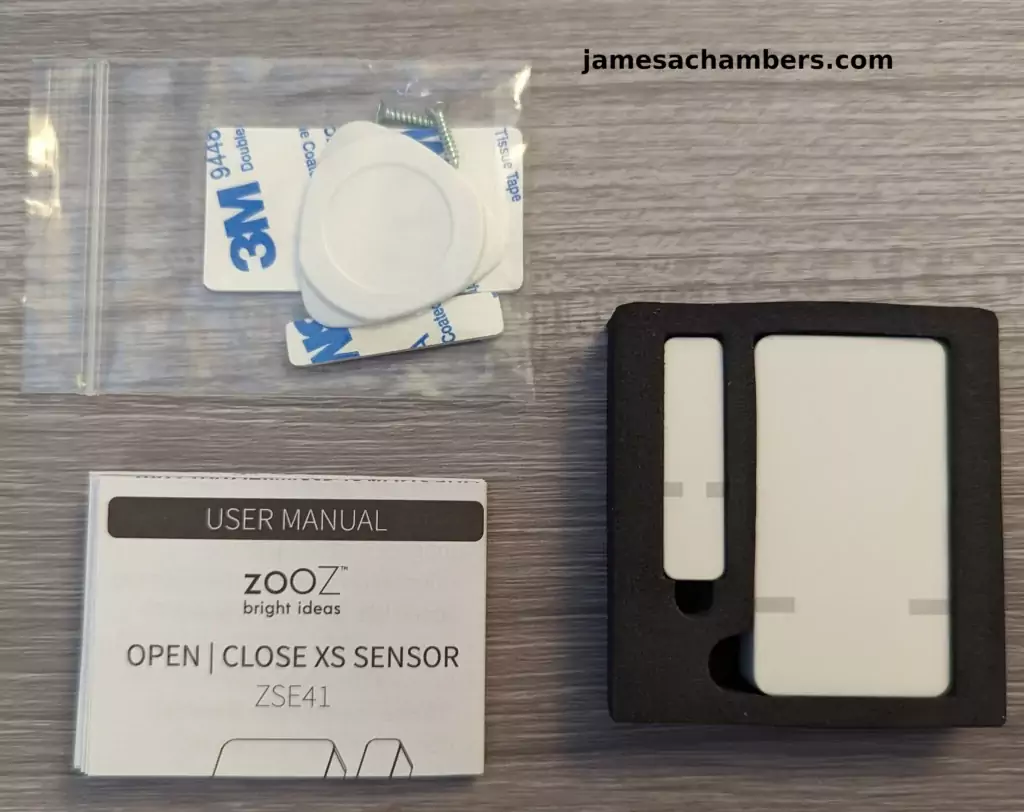
This type of packing material is really great for shipping. It gives a lot of soft protection around the device yet is firm enough to prevent the device from getting smashed if there’s too much pressure. The device should make it to you safely.
You can see that they’ve included double sided sticky tape, mounting screws as well as a plastic pick to help you open the battery compartment. The battery is also included.
Configuration
Before installing the sensor we need to configure it. To do this we need to open the sensor. It opens like this:

Now the important thing to know about opening this is that it’s going to open exactly the opposite of how you think it will.
It seems like the part that is lifting off from this is the lid. It’s not. The lid is actually the big part. You can see what I mean here:
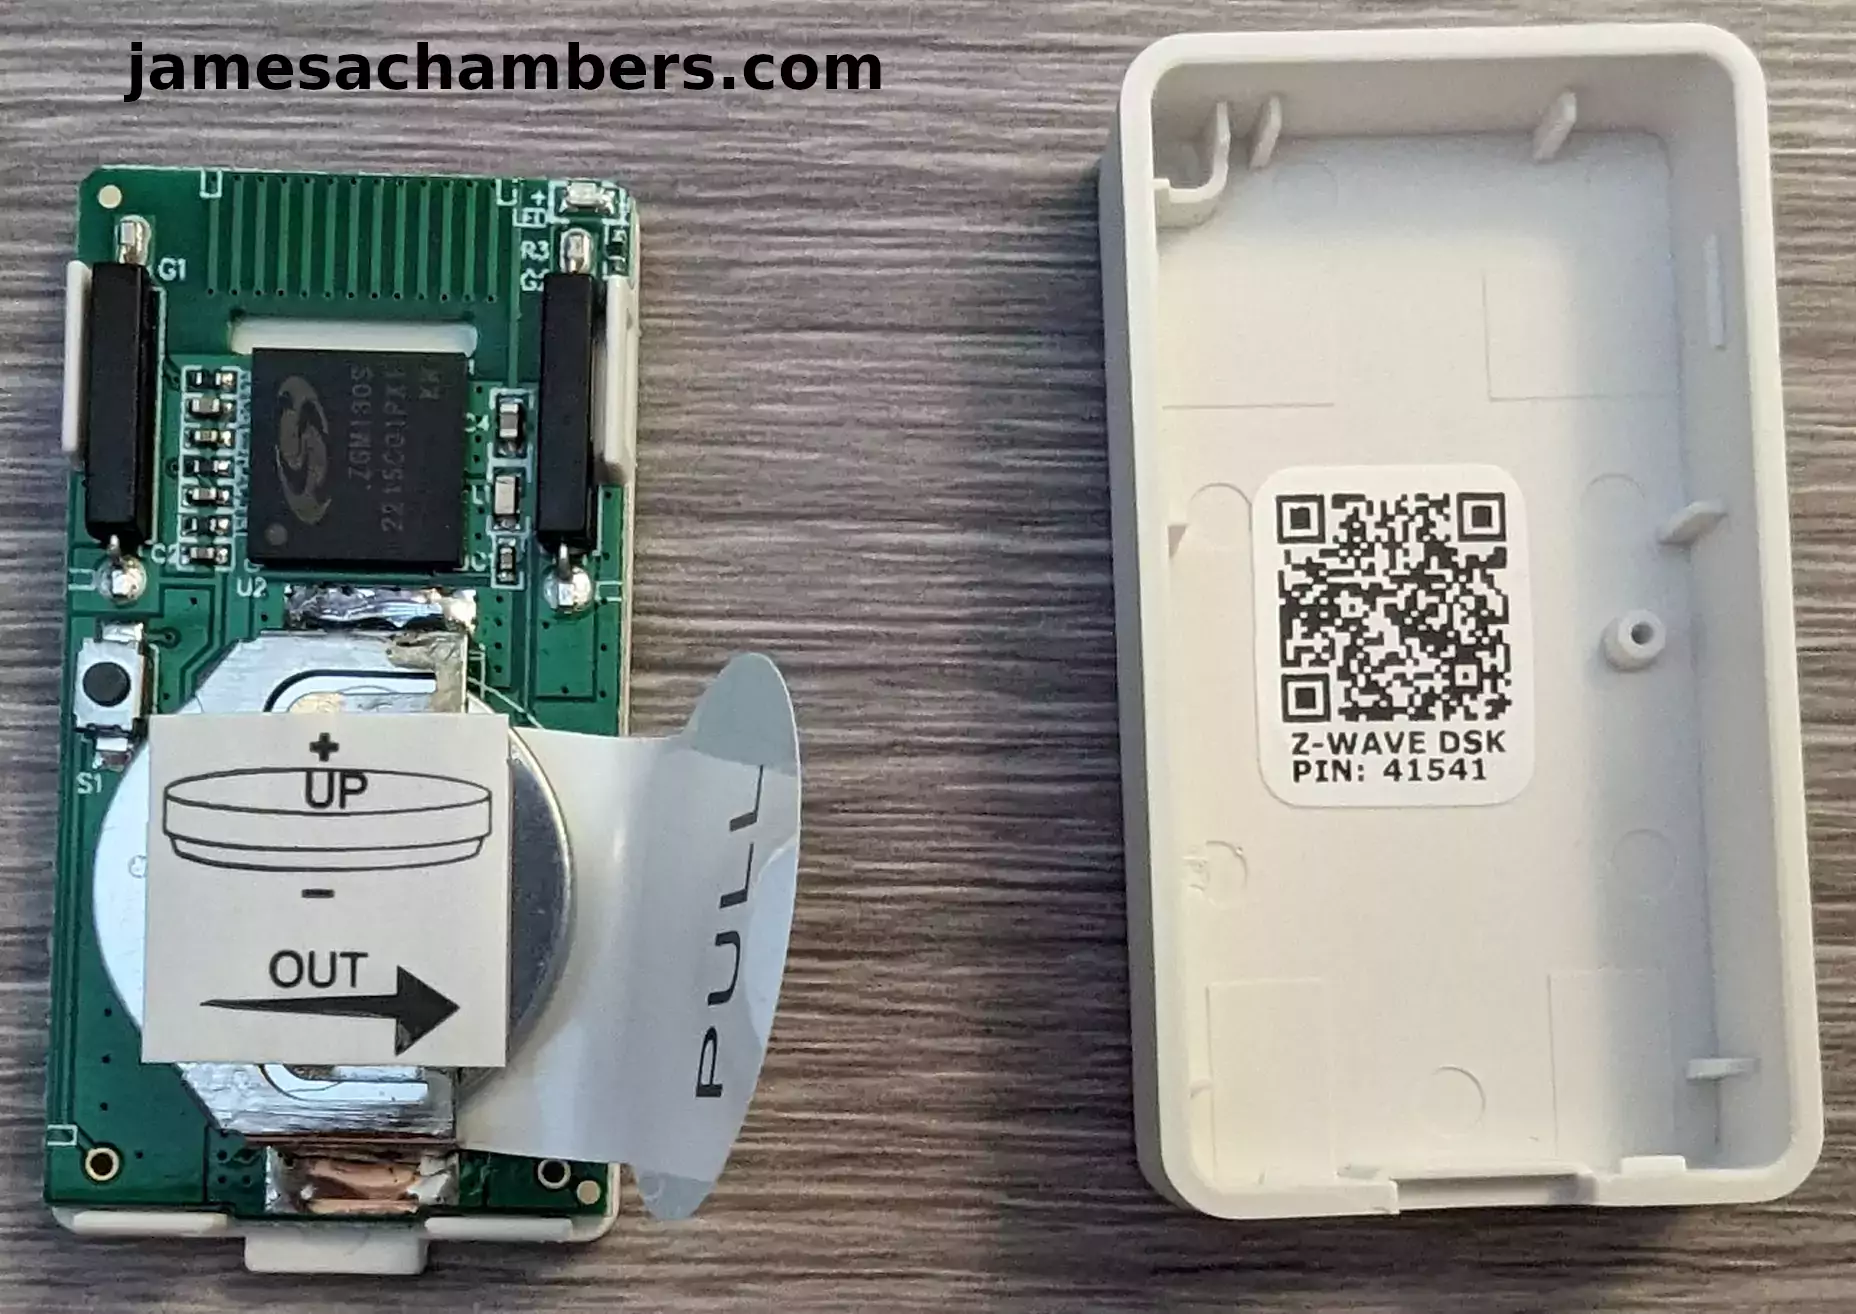
The two little white clips at the bottom are the only thing holding it in place. I did not need the provided pick to open this device. All you need to do is provide a little pressure and then try to lift and it will come off the two retaining clips.
Now once we remove the “Pull” tab we can add the device to the Z-Wave network.
Adding to Home Assistant
Within Home Assistant go to Settings -> Devices and Integrations and then click “Add Integration” in the bottom right hand of the screen. You should see this:
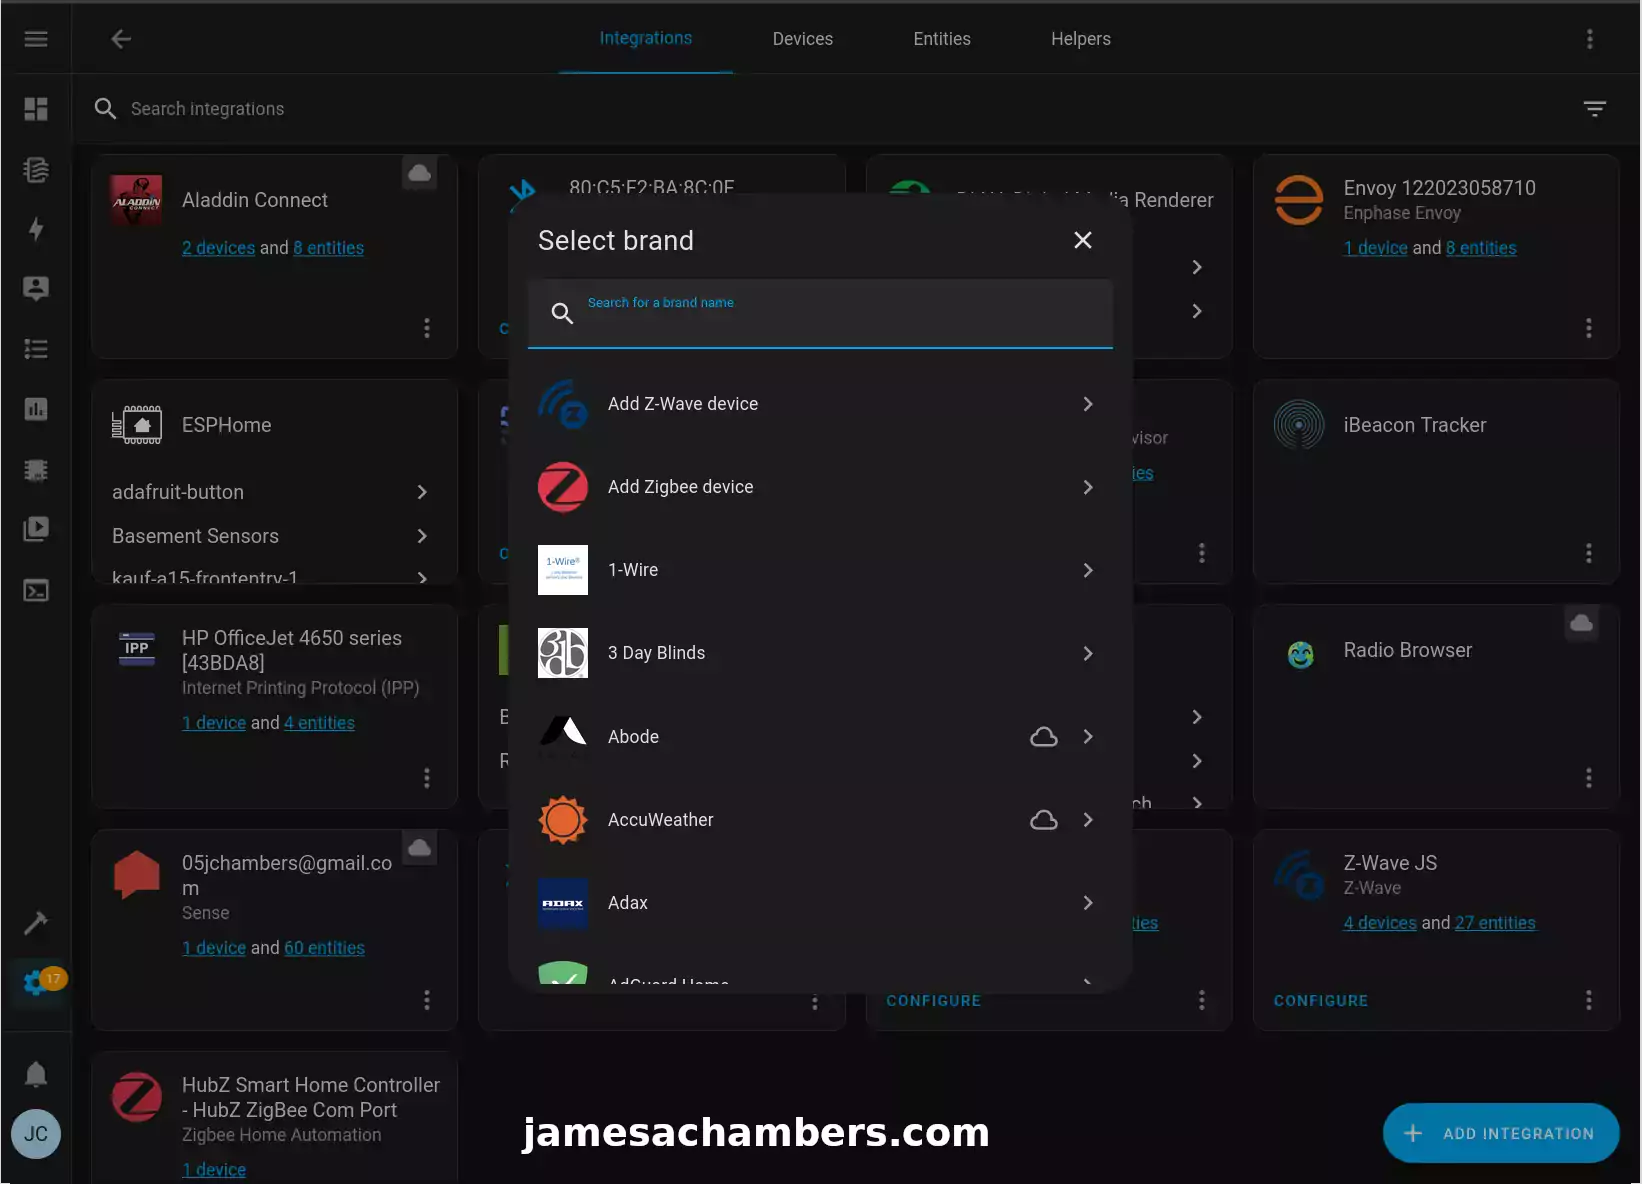
Now select “Add Z-Wave Device”. If you haven’t already now pull the tab on the Zooz to activate the battery.
Now press the small button next to the battery three times quickly. This will put the device in pairing mode. The light on the device should start blinking.
You should get a message shortly after that the device has been found and added to Home Assistant! You will be asked for a PIN which is on the inside of the lid.
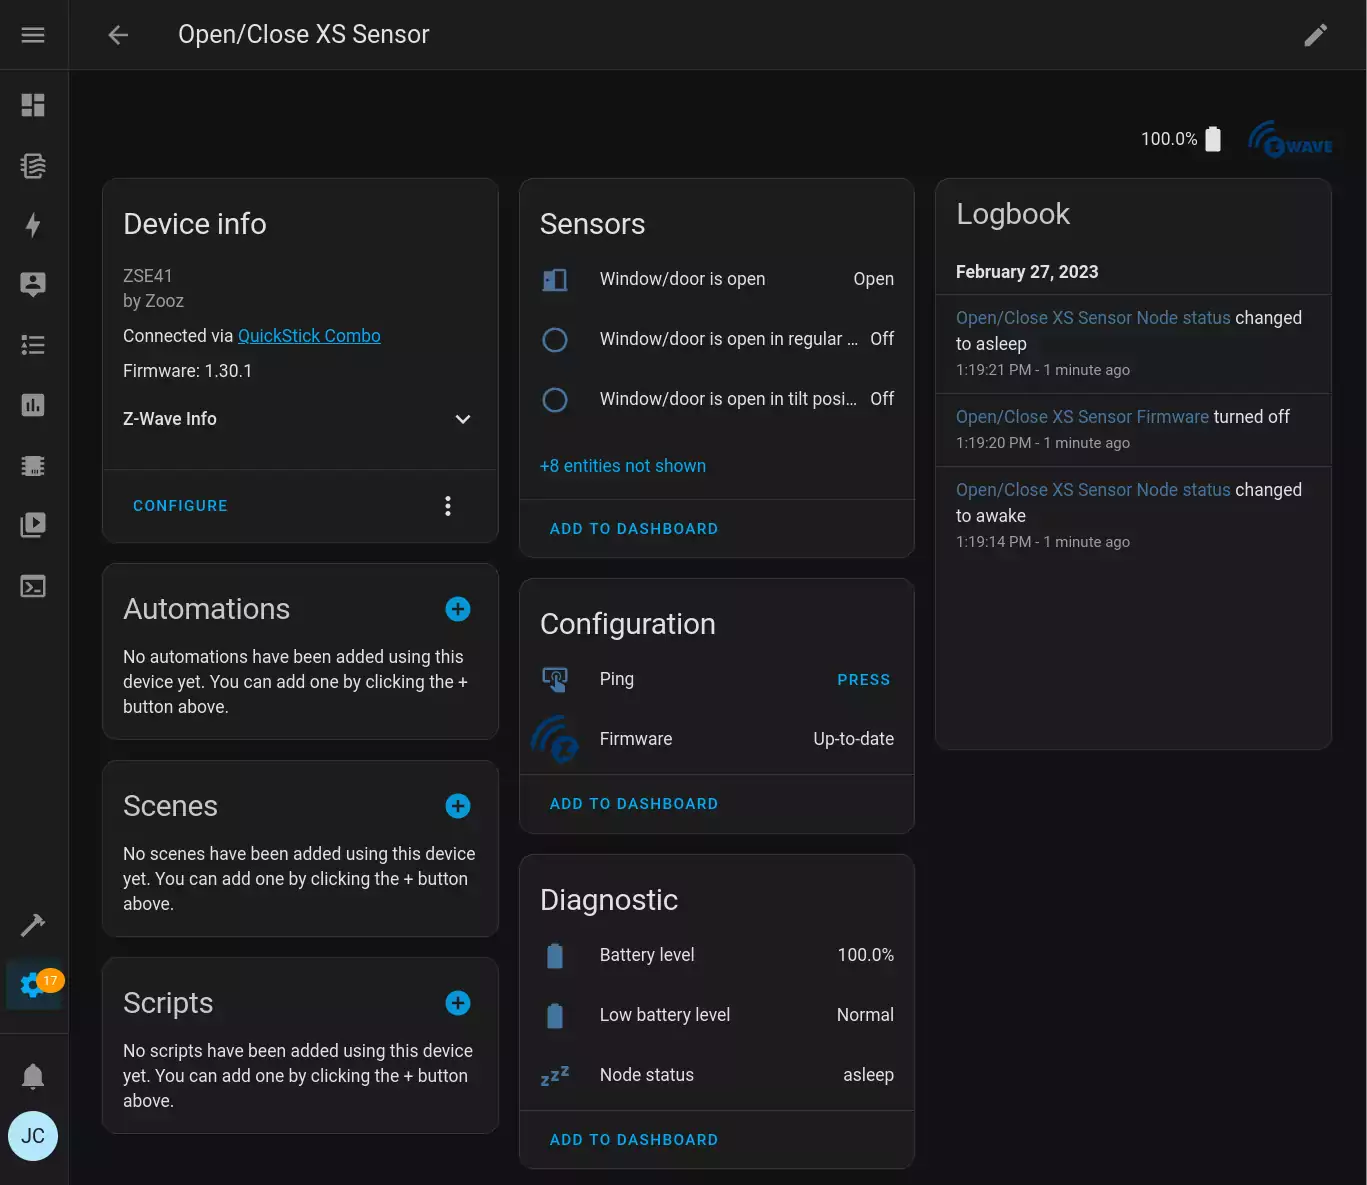
Once added the entity will look like this:
I now recommend clicking the pencil in the top right of the screen to edit the device and assigning it a name to let you know which sensor it is and assign it to a location.
Installation
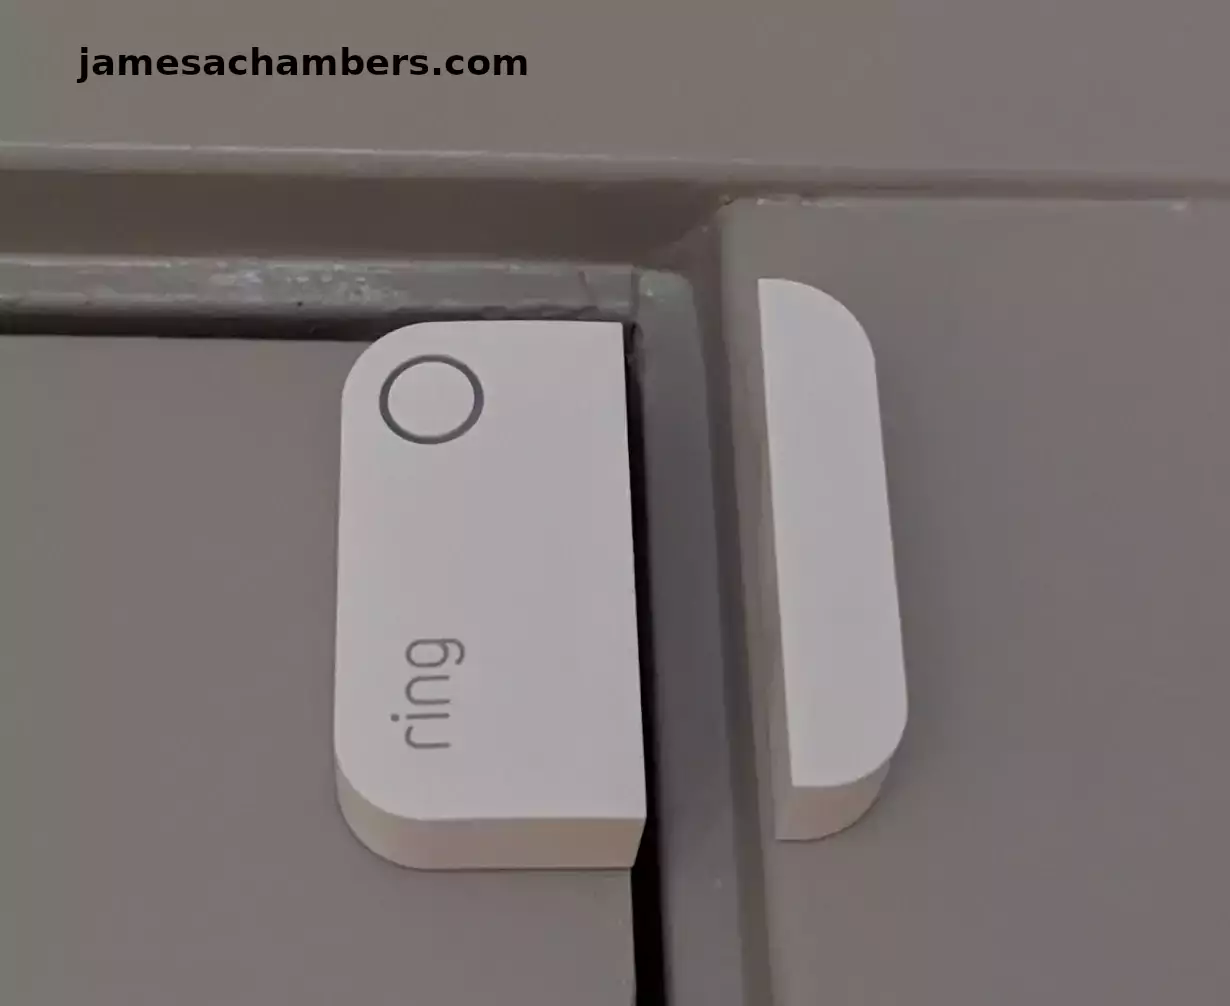
Installation is easy. Put the device back together and grab the double-sided sticky tape. Place it in position like this:
And look at that! The Zooz sensor is ever so slightly smaller than the Ring sensor. This allowed me to get a much better mounting position for the magnet.
Note that you need to line up the grey lines like I have. This is so the magnetic sensors are aligned with the magnet. That’s pretty much all there is to it!
Pros / Cons
Pros
- New 700 series chip gives better range and longer battery life
- Doesn’t require a subscription or cloud services
- Works well with Home Assistant
- 5 year warranty
Cons
- More expensive than subscription-based services
Conclusion
That’s pretty much it for Ring here. I’ve now completely eliminated all of my home’s subscription services to proprietary services. I’m now self-hosting my own home’s sensors via Home Assistant and the Zooz 700 series door and window sensors. The only thing I still need to do is create a system where it creates the sounds effects when a door/window is open/shut to have the exact same functionality. I’ll be doing that on the site and covering it before too long here.
I investigated DIY (do-it-yourself) options with door and window sensors using ESP modules. That’s a great solution I’ve used for many other parts of my home such as air quality sensors. It’s clear though that for door and window sensors that are extremely small and run off a coin cell battery that DIY would have required too many sacrifices/tradeoffs.
I’d imagine in a couple of years this will be much cheaper to do yourself as ESP modules continue to grow in capabilities. There are ESP modules that have Zigbee included now but you’d still need a board / kit to use it and there’s not a lot available that I’ve seen that would be good candidates to replace a Zigbee/Z-Wave window sensor like this.
In this current market I’d highly recommend a solution like the Zooz Z-Wave 700 series window sensors. There’s no subscription and it’s not hosted in the cloud. It integrates perfectly with Home Assistant acting as a Z-Wave hub. The unit is high quality and compact and runs off a tiny battery.
I’ll be doing more Z-wave Home Assistant coverage on the site including how to set up the USB stick that will give Home Assistant Zigbee and Z-Wave capabilities. Stay tuned!
Other Resources
I’ve also used the Kauf RGB smart lights with my Home Assistant setup here
You can also make a IoT button you can use in Home Assistant using a Adafruit QT Py
All of my Home Assistant related articles are available here


")

I use Ring as a security system, where I can arm/disarm it and so forth. How do you have that setup and did you also have cameras or a video door bell that you migrated to a different system? If so what system? The Ring door sensors are zwave and can be used with Home Assistant directly too.
Hey Charles,
Welcome and great question! So I took my doorbell and some of my cameras to Unifi (when I built my network + WiFi infrastructure for the home). I also have several cameras that use Home Assistant though that I’ve covered on the site in places like here (I’m a big fan of ESPHome).
So as far as using the Ring devices with Home Assistant it’s pretty clunky. Ring themselves says not to do it and to use their app. One of the replies:
The Unifi cameras support RTSP and integrated pretty well with Home Assistant. I do have 24 hour video recording/archiving based on motion and proximity alerts programmed in my Unifi Dream Machine that runs the home’s network/security. The Unifi integration worked pretty well with Home Assistant and I am using it (even though they will work without it, you could set them up as pure RTSP streams like any other camera that supports it).
I’m shocked how good the Unifi integration is. It even imports all my motion detections into Home Assistant’s “Media” tab and I can view them all in there. It gives me a ton of different ways to view (like by camera, types of events, etc.). Very handy and easy to write automations around.
It’s still not as ideologically pure as my ESPHome-style cameras I linked earlier of course but I primarily wanted to eliminate the subscription fees. The Unifi cameras were more expensive up front but there are no subscription fees of any kind. They’re just yours once you buy them. I’ve completely eliminated my Ring subscription and at this point I’ve saved something like $200 since I had the full security/alarm subscription too and I believe it was $199/yr for Ring Protect Pro.
Hopefully that helps!
Hi James,
Thanks for sharing yet another highly detailed guide of what looks to be a valuable upgrade to your home setup. I’ve been dismissive of home automation in the past due to the perceived costs, size of equipment and subscription services so its encouraging to see a self-servicing model available that looks fairly easy to setup and the 5 year warranty is reassuring as nobody want to be upgrading every couple of years.
You’ve given me something to think about now yet the only stumbling block I can see is finding a local supplier as the Z-wave range tends to sell out quickly and ensuring the correct version will work in Australia due to frequency restrictions resulting in sellers marking up the costs. These guides have been super helpful so thanks again and I look forward to a future instalment where you cover the USB stick as your earlier comments convinced me to do some research and judging by the applications it would be a wise investment adding one to my modest Home Assistant setup. Take care!
Hey Razor Burn,
Thank you so much for your kind words, those are always appreciated! So you’re absolutely right and smart to be checking these frequencies by country. It looks like:
Australia AS/NZS 4268 919.8 MHz, 921.4 MHz 230 V 50 Hz H ANZUSA FCC CFR47 Part 15.249 908.4 MHz, 916 MHz 120 V 60 Hz U US
We are indeed on different frequencies it looks like for sure! I’m not sure if you’ve ran across this yet but it looks like the AEOTEC Z-Wave USB stick is the king of Australia when it comes to this. It’s compatible with Home Assistant / ZWave JS as well. When I search for Australian Z-Wave USB stick it’s pretty much every result though and this one would work great for that portion of it. It looks like amazon.com.au has one as well which honestly looks like an even newer version (but specifically names itself as compatible with Home Assistant).
They also seem to be carrying the Zooz 700 series USB stick for Australia. I really love the Zooz Z-Wave gear. I’ve had some of this for years like those old ZEN25 Zooz double plugs (an obsolete model now). If Zooz is available to you in Australia (and it looks like it is) then as long as you can find the right frequencies for sure (and reasonable prices) you can’t go wrong with the Zooz stuff. They’ve been making it for a long time (and always with Z-Wave plus, improved security). That USB stick is basically the companion USB stick that Zooz would offer.
I’ve had this Nortek one for many years which is why I recommended it but I would strongly consider the Zooz one if I was buying fresh as well. The advantage of the Nortek is that it gives you both Z-Wave and Zigbee so you can truly mix and match kind of whatever products are available and make sense for you to buy that use the technology. If there isn’t an equivalent dual-mode product easily available though then catching something like that Zooz 700 USB adapter when it’s in stock would make a lot of sense (especially since it was on sale for only $32 vs. $50 for the other one). You can always get a Zigbee stick later if the need comes up.
I am definitely going to cover the USB stick in it’s own article. I have some Z-Wave plugs that just came today I’m testing too. Even if the exact equipment ends up being different due to frequencies I think they’ll be interesting to see how they look implemented in Home Assistant (and around the house hardware-wise) as then you can get an idea of how you might be able to use similar technology.
I’m planning on putting the smart plugs in a couple of key places such as my entire home’s networking. That’s just connected to a regular outlet right now. It will also give me a one-click network reboot by just toggling the power on and off. I’ll show a little bit more of that in that article for sure.
The ones I’ll be reviewing also have power monitoring as well (not all models have it). The Sense energy monitor can only pick up major appliances that have a signature like the oven, heat, AC, washing machine, anything that has a weird power signature. Electronics tend to have a very clean power signature that is really hard to read so none of the networking equipment can be individually identified by the Sense one (to clarify the Sense can still see it, it knows the power is being used, it just can’t individually identify the devices so it shows up in an “Always On” category). I have like 4 or 5 draft articles right now and the Sense integration/coverage is one of them that is in the works and for sure coming as I work through my drafts.
The nice thing about going with the Z-Wave / Zigbee Home Assistant hub is that it’s totally feasible if you only end up having a few Z-Wave devices for a few key things. Like I gave my network rack example as one I’d like to have a smart plug on. That can make it worth it for a few key areas / appliances like that. You don’t necessarily have to do the whole house. There’s also so many other types of Z-Wave devices including environmental sensors and all sorts of crazy stuff.
Z-Wave devices are able to relay messages through each other (essentially a mesh network) so they have incredible range and are great at reaching places WiFi doesn’t. If they can see even a single other Z-Wave device it will be relayed to the hub even if the original sending device can’t see the hub at all. My hub is in my basement and a lot of the sensors are upstairs and in the garage. Because of Z-Wave’s mesh networking though it’s never a problem. The sensors in the garage can find their way through the garage entry door sensor and from that door the next “hop” might be a window sensor downstairs right below it through the floor. Then that window sensor will finally relay it to the hub (if it has to, this is just an example of a how a bad signal/range situation would typically get worked out by Z-Wave itself).
Thanks for your comment and take care!
Hi James,
Thanks for the reply as these Zigbee/Z-Wave sensors are completely new to me and it was only by chance that I saw a reference to frequency differences for the different regions and I noticed similar differences when researching LoRa boards/modules so it helps to know for your audience.
I did some searching and found the ones you linked to and AEOTEC Z-Wave seems the alternative choice in Australia as the Zooz 700 series USB is either sold out or more expensive yet judging by the specifications they both do similar functions so I will certainly look at adding one to my setup and knowing that both companies sell accessories is handy if I ever wanted to expand by adding security devices or proper CCTV.
I’ll admit my initial expectations for these Home Assistant posts was that you’d be demonstrating some sensors, microcontrollers and the odd smart gadget but you’ve covered so many different applications that I had overlooked such as door/window/garage door sensors and with energy prices sky rocketing it makes sense (pardon the pun) looking at adopting ‘smart plugs’ that monitor energy consumption as my current solar setup tracks consumption and production throughout the day but having accurate data from a single device is convenient and I like the idea of grabbing one of those usb dongles that you referred to in a comment in one of the Orange Pi 5 post that measure the output of a usb port as perfect for testing SBCs and various peripherals.
Luckily my home setup is modest compared to yours but having a reference point to different examples is greatly appreciated so thanks again for the time spent writing the complimentary guides as they’re interesting and really helpful for newbies such as myself. Keep up the outstanding work as the setup looks top notch!
Hey Razor Burn,
No problem at all! That one does look like a good choice for Australia. It looks like one that you’d be able to buy as well as it seems to be in stock.
I honestly thought the same thing when I started covering Home Assistant to be honest with you. That’s because I had looked into Home Assistant a few years ago and had my expectations from back then. Boy has it changed though since my original examination of it. There are integrations for almost everything.
Technically there are even integrations for my Ring subscription service but in that case I wanted to get rid of the subscription fee. I always try to go for the completely open-source solution first (including the hardware if possible). The next “tier” I suppose would be devices that don’t depend on the cloud and that you can completely manage yourself with Home Assistant. The tier below that would be cloud services that integrate with Home Assistant well (and don’t have a subscription fee).
Most of the Z-Wave gear gets you to the second tier at least. It may not be open source hardware but it is highly supportive (and often depends upon) having a open-source management system such as Home Assistant for it to work at all. It’s definitely a system that you completely own and control (and host and manage). Thanks for your thoughts, I should have some more out soon to check out here!