
I’ve been building out various sensor arrays for use with Home Assistant in my home using ESP32 modules and ESPHome and it has been working really well. One challenge though is that you have a limited number of connections (even when using expansion boards). This can be dealt with a few different ways but buying a whole bunch of individual sensor boards one at a time and connecting them can get messy to say the least.
Fortunately Seeed Studios has a unit powered by Sensirion that has 7 environmental sensors all in one: the SEN54! This includes measurements for particles of PM1.0/2.5/4/10, temperature and humidity and VOC (volatile organic compounds). All in one unit with a single connection.
In this guide I’ll show what adding a sensor like this to Home Assistant looks like using ESPHome and a ESP32-C3 module. Let’s get started!
Hardware Used
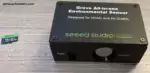
The Seeed Studios SEN54 All-in-one Environmental Sensor includes measurements for particles of PM1.0/2.5/4/10, temperature and humidity and VOC (volatile organic compounds).
Links: AliExpress*, SeeedStudios.com
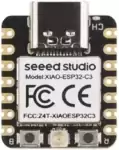
The Seeed Studios XAIO-ESP32-C3 is a microcontroller board that uses the RISC-V architecture. It has Bluetooth and WiFi capabilities and includes an external antenna.
Links: Amazon.com*, AliExpress*, *Amazon.ca*, Amazon.co.uk*, Amazon.com.au*, Amazon.de*, Amazon.es*, Amazon.fr*, Amazon.it*, Amazon.nl*, Amazon.pl*, Amazon.se*, Amazon.sg*

The Seeed Studios XAIO series Grove expansion board gives you a lot of ports to connect Grove sensors and other devices to your XAIO device
Links: Amazon.com*, AliExpress*, Amazon.ca*, Amazon.co.uk*, Amazon.com.au*, Amazon.de*, Amazon.es*, Amazon.fr*, Amazon.it*, Amazon.nl*, Amazon.pl*
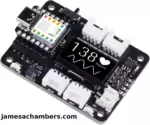
The Seeed Studios XAIO Expansion board has a screen and several expandable connectors. It also features a battery connector. Works with Adafruit QT Py boards as well.
Links: Amazon.com*, AliExpress*
Overview
This solution has a few different components to them. Let’s go over them now briefly. First we have the SEN54 unit itself:
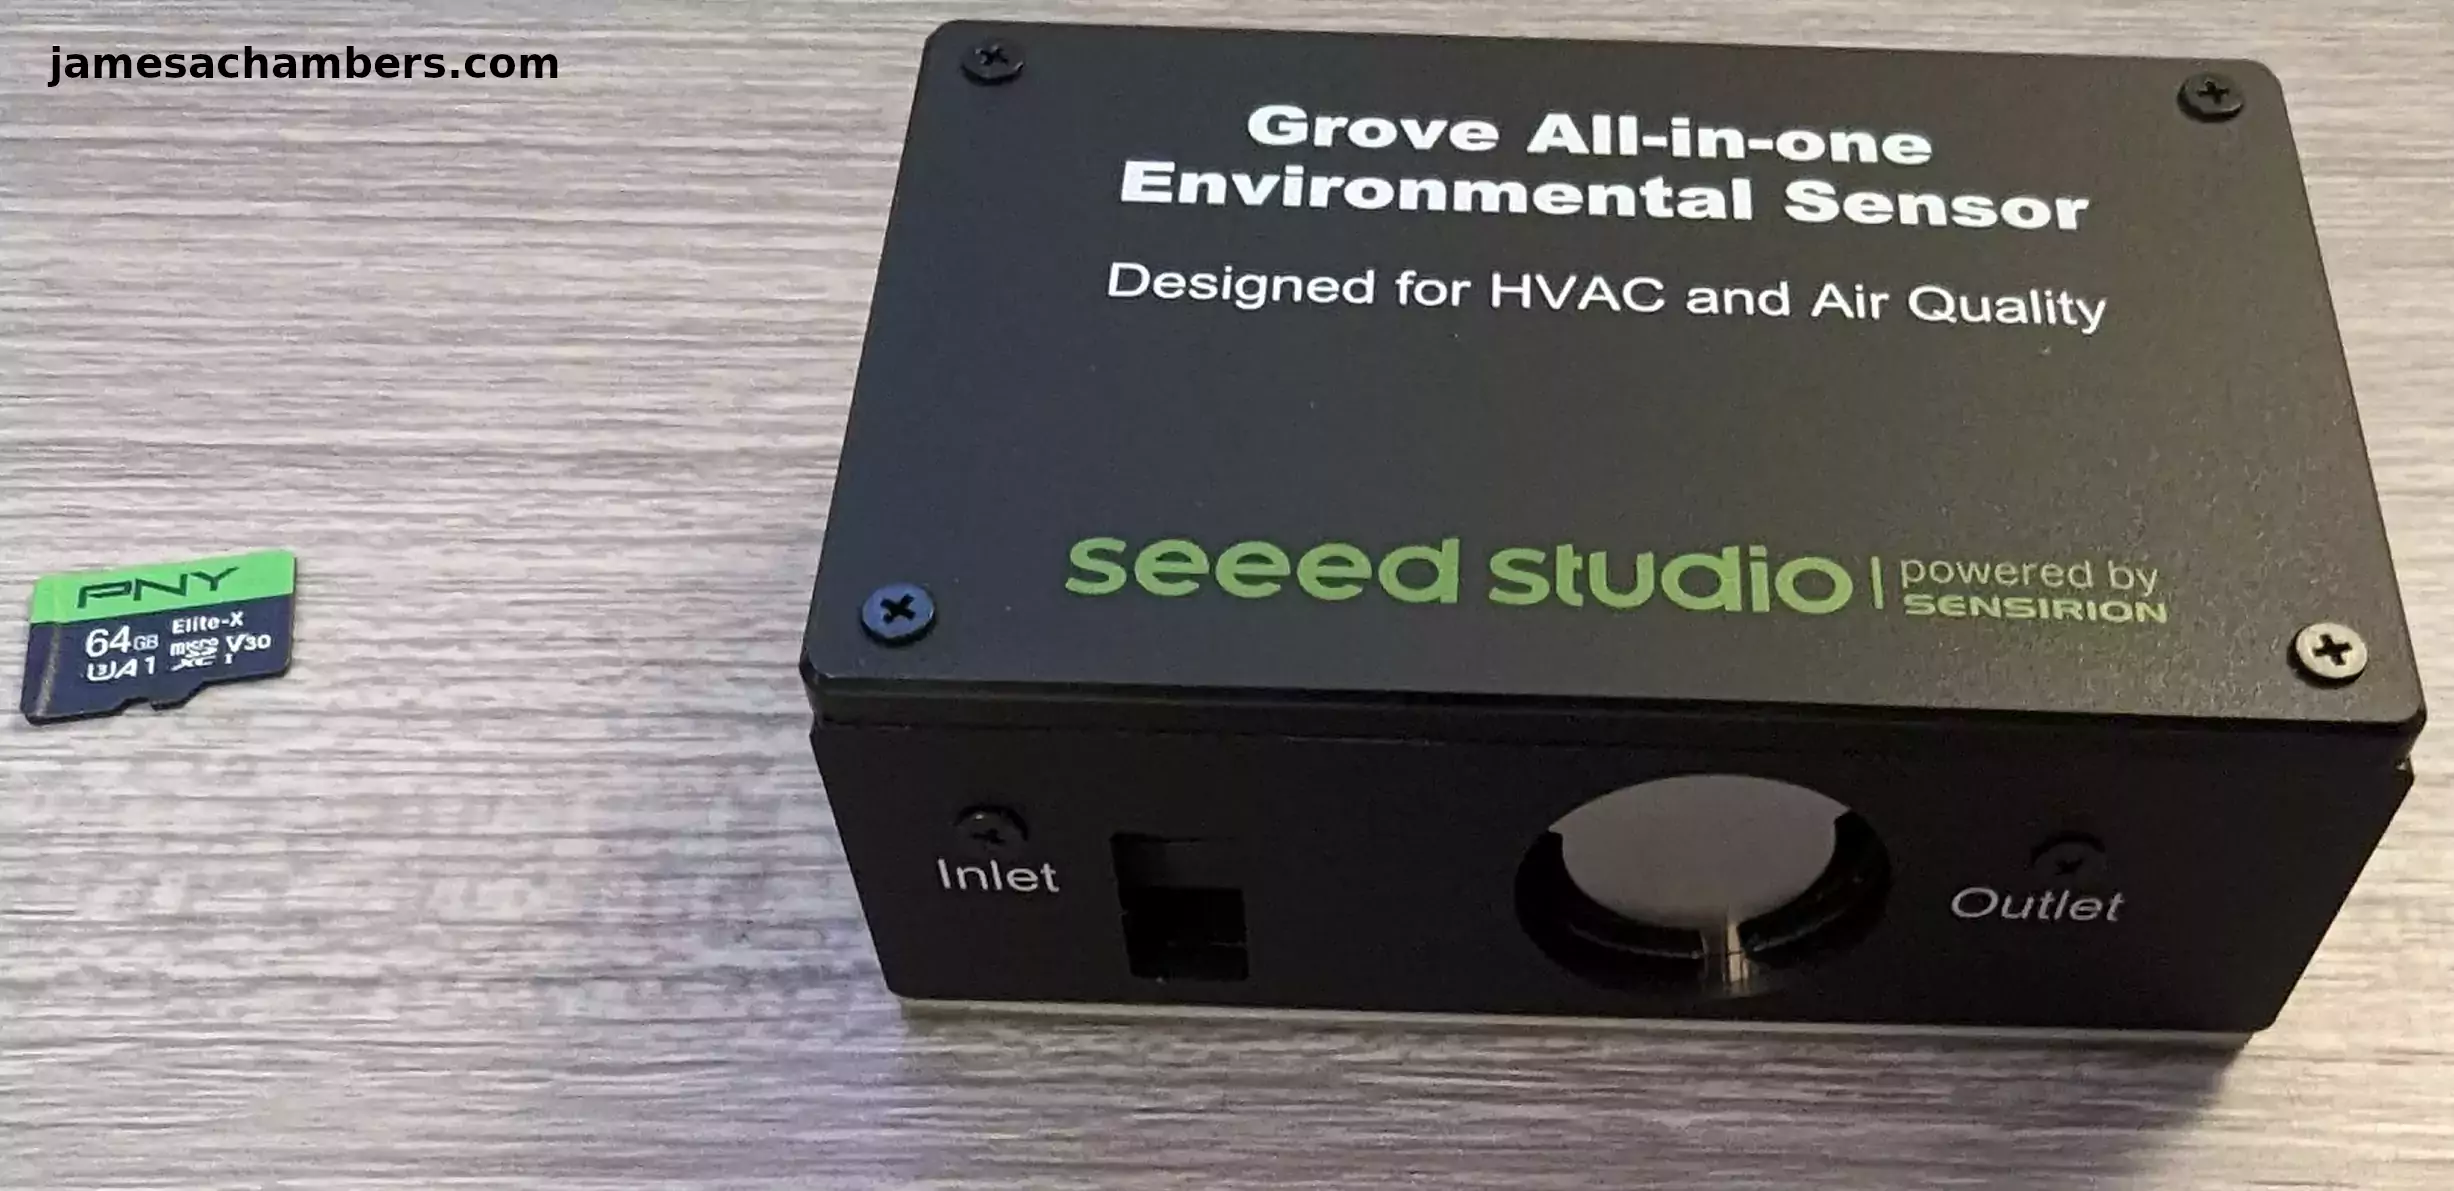
I included the micro SD card to give a better sense of scale. All of the sensors are housed inside this unit. You can see a inlet and outlet for airflow as there is an active fan in the unit to help circulate the air for the most accurate readings.
Next I’m using the XAIO ESP32-C3 module. This is a tiny module that has built in WiFi/Bluetooth and will communicate the sensor data to our home assistant instance. That looks like this:
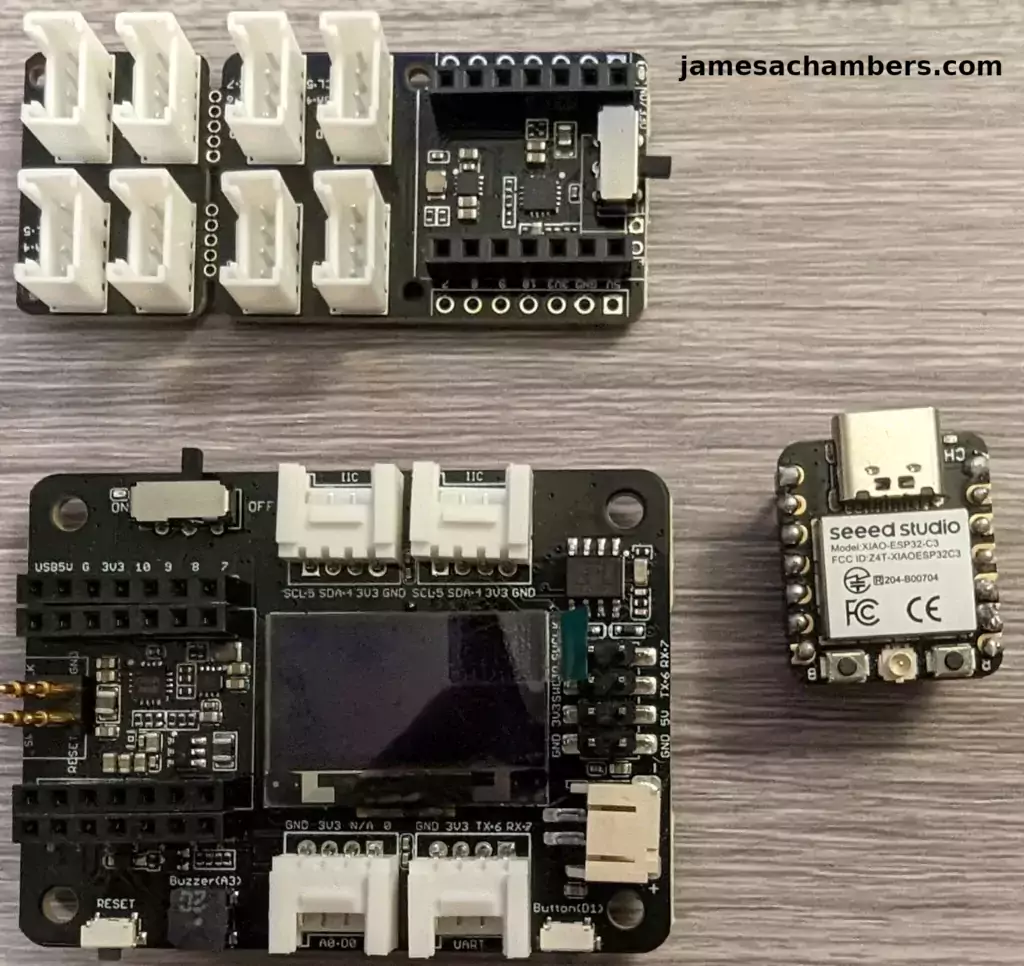
The XAIO module can be purchased pre-soldered but it’s pretty easy to solder to the pins. It’s the board on the far right of the above picture.
I also have covered a solderless version of this same setup using a Adafruit QT Py here.
The two boards on the left hand side are two different expansion board options. Both of them will work perfectly for a project like this. It’s particularly easy to attach a battery to the lower expansion board
My complete hardware setup for this guide looks like this:
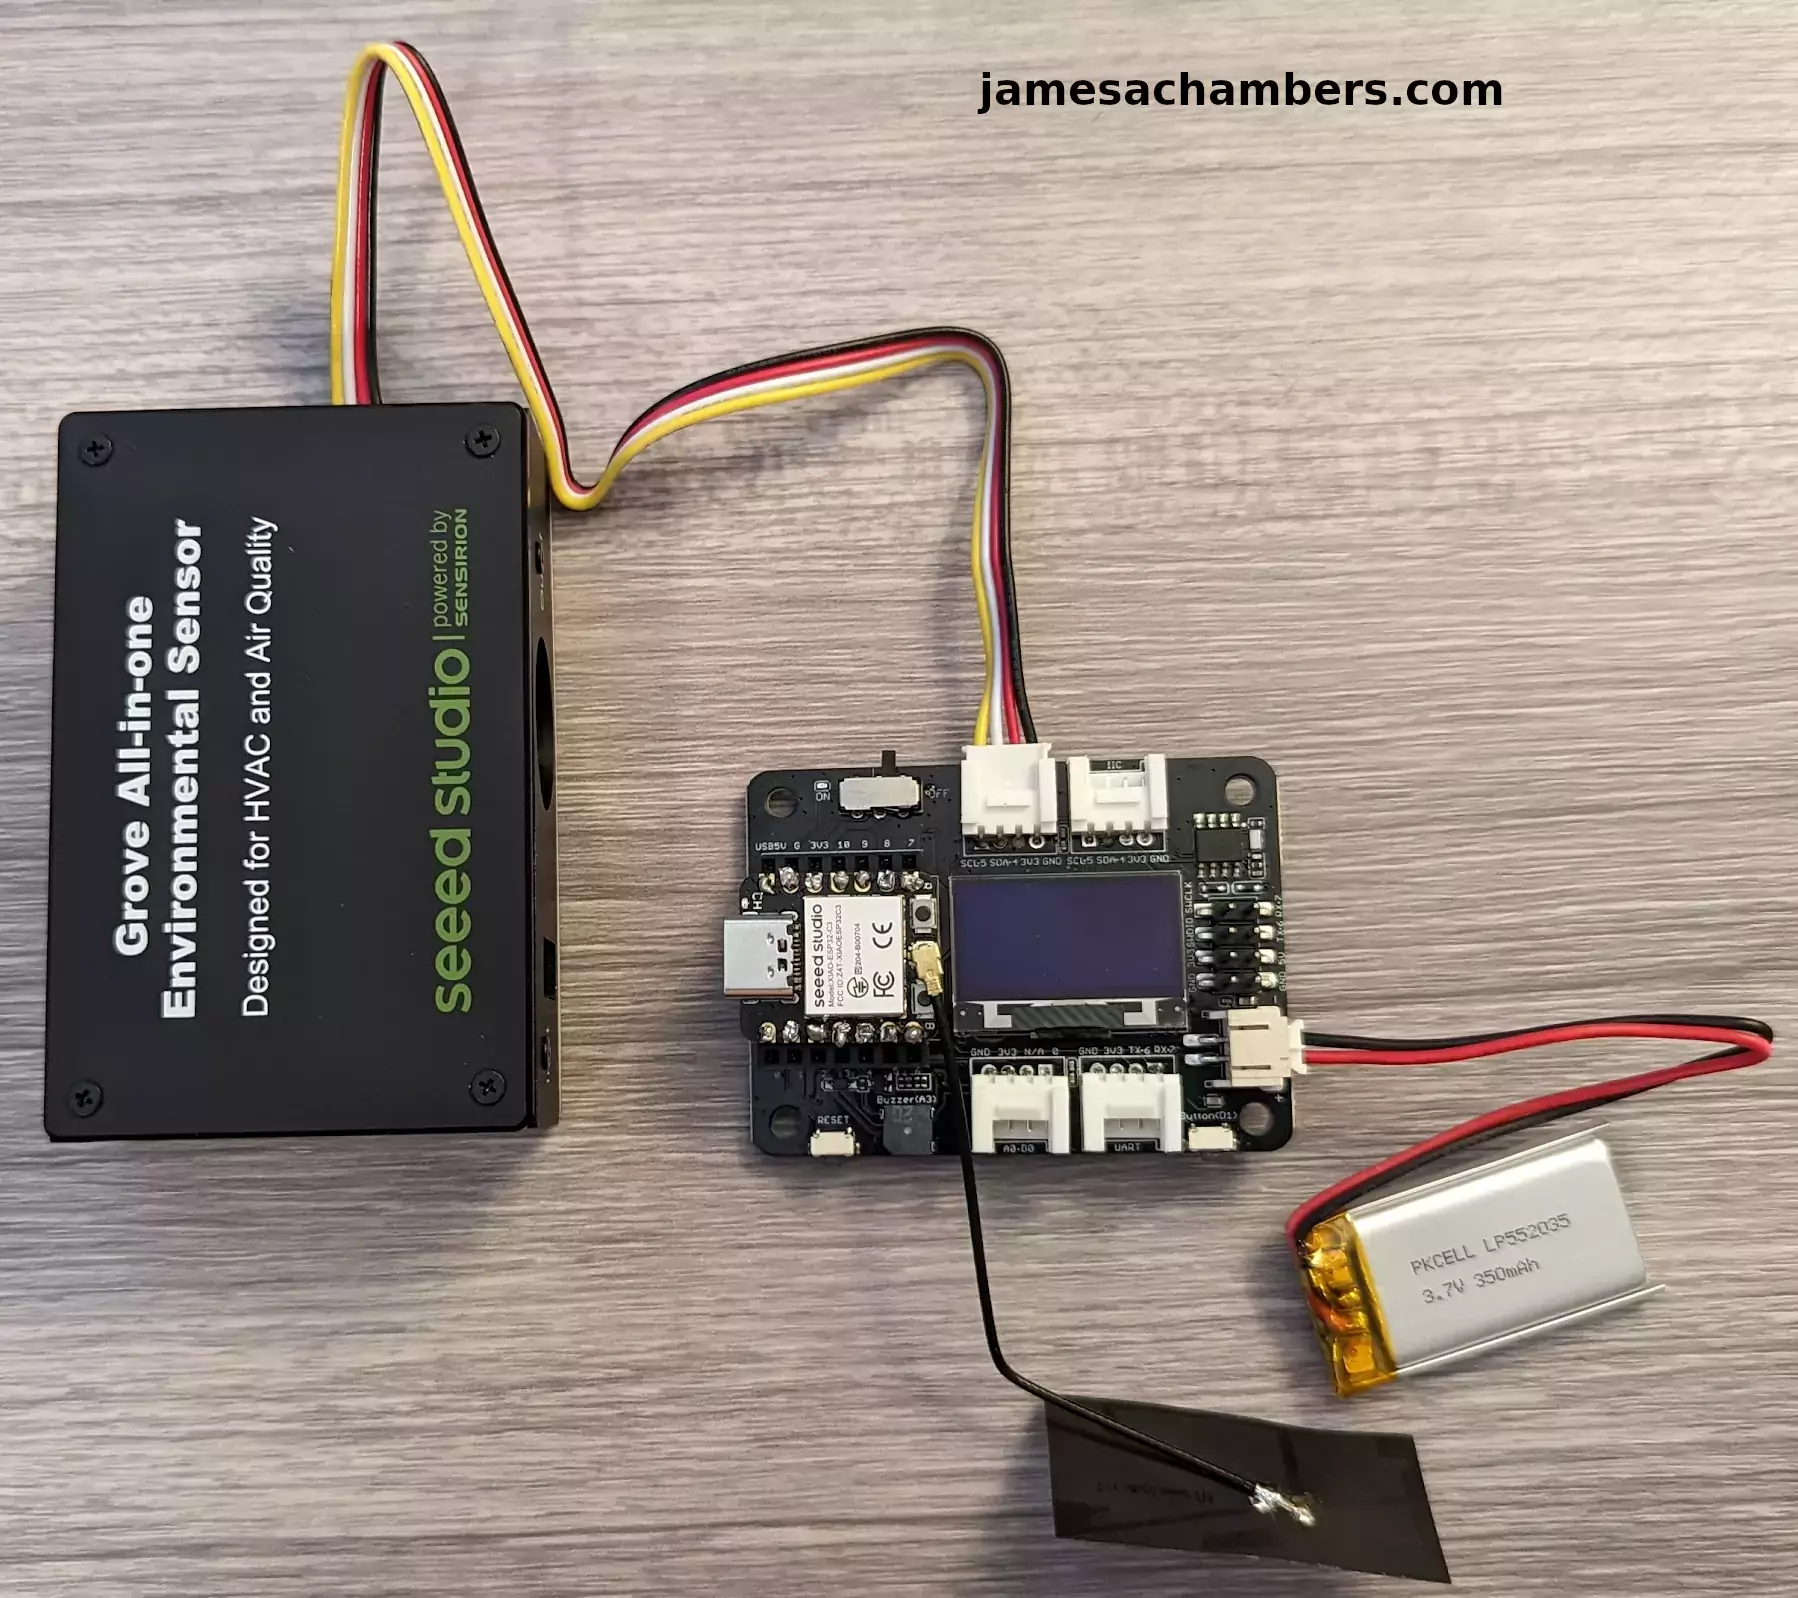
Here you can see my backup battery attached. My WiFi and most of my network continues to function for a few hours during a power outage due to having battery backups (and using PoE for the access points). The sensor unit will continue to function during a power outage with this battery attached.
The XAIO expansion board has the battery charging circuit that handles this all for us. All we have to do is connected it all together and it’s good to go!
The unit is actually portable with the battery as well. If you wanted to take measurements in a specific area that would absolutely work. It would wirelessly transmit the measurements to Home Assistant and display them as you move around with the device.
Adding ESPHome to Home Assistant
We are going to assume you have Home Assistant installed as installing Home Assistant is outside the scope of this guide. You can absolutely follow along though and see if it looks like something you’d like to explore. I have it installed as a supervised installation on an Orange Pi 5.
Sign into your Home Assistant instance and go to “Settings” and then “Add-ons”. Next click the “Add-on Store”.
ESPHome has it’s own section like this:
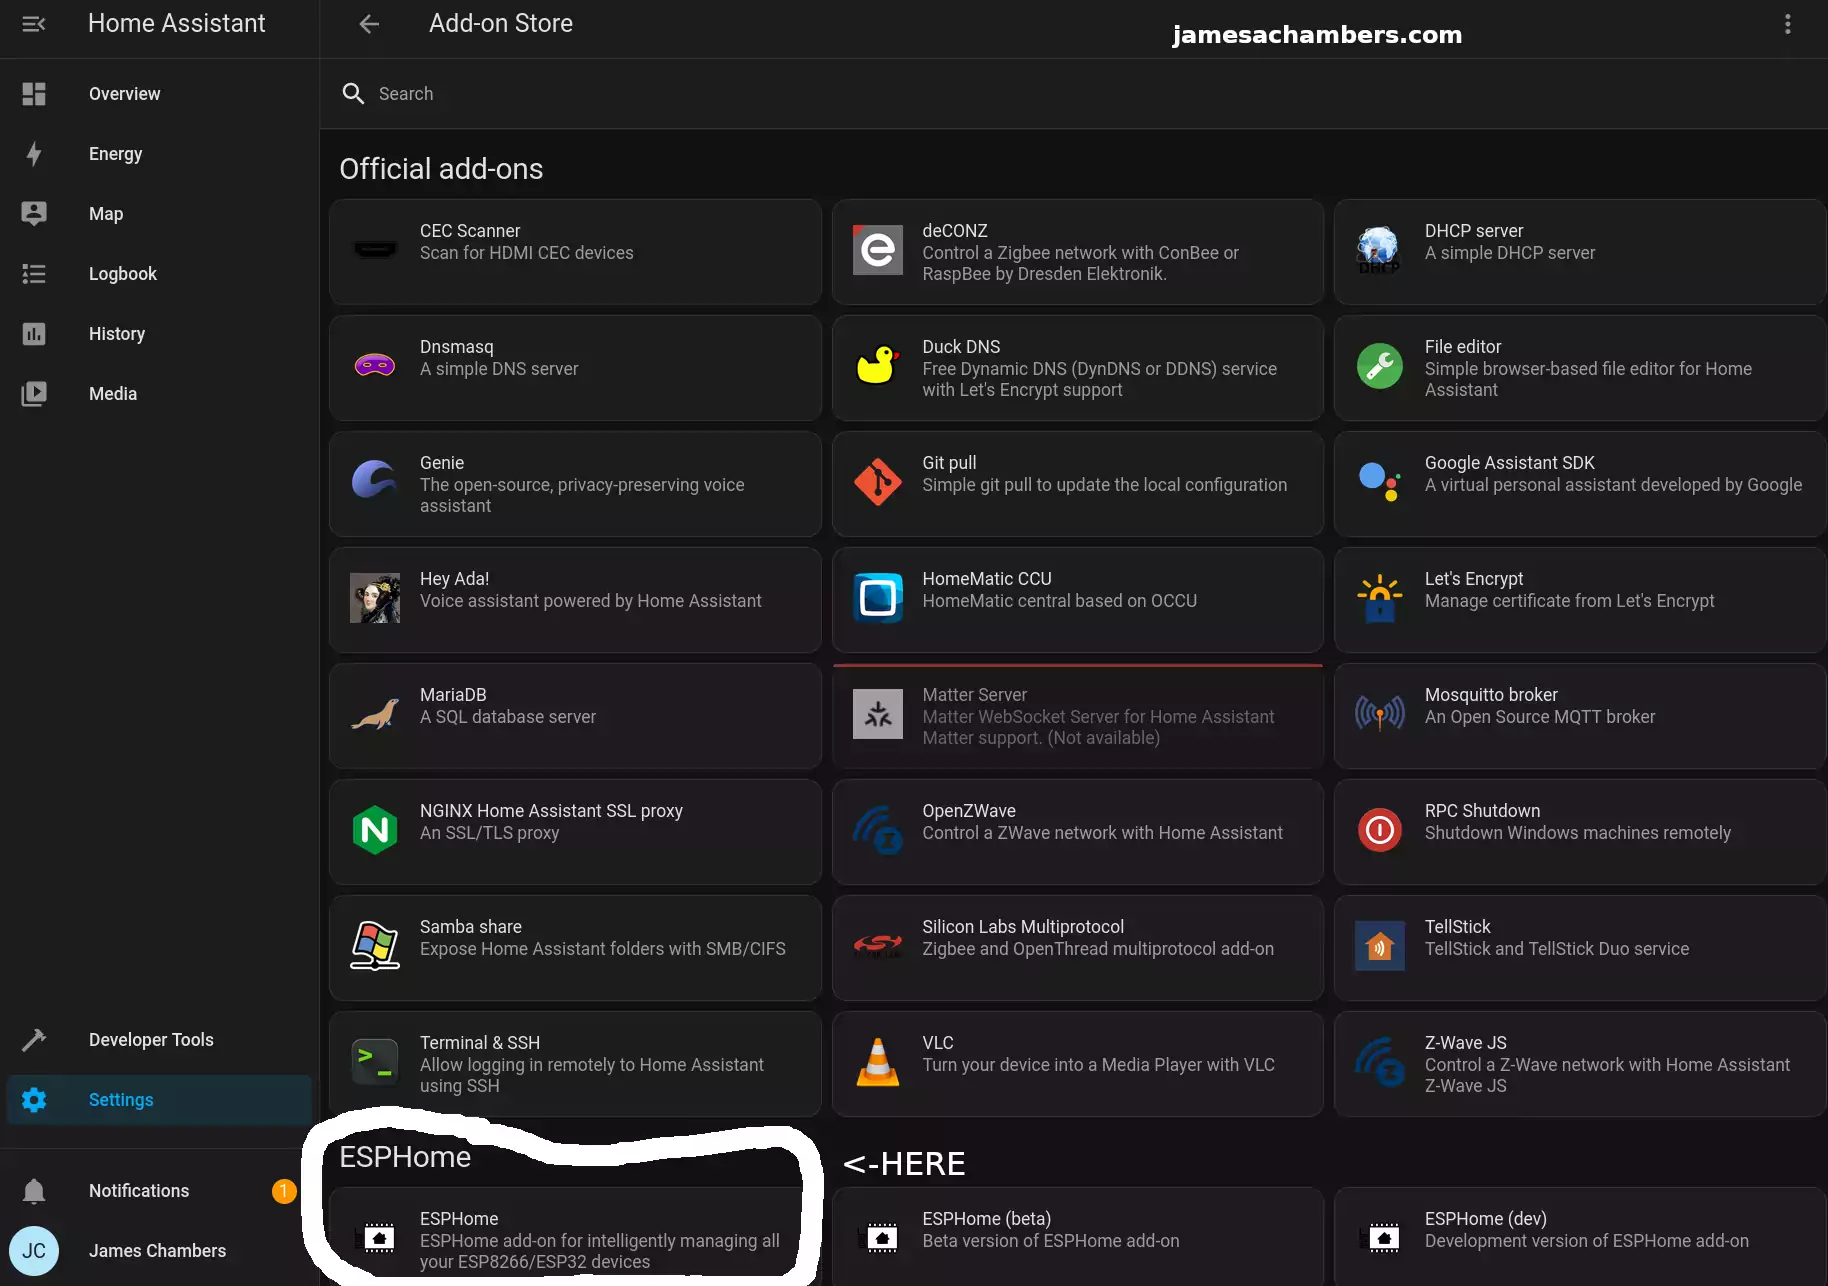
Select ESPHome and then click “Install”. Once the installation is finished you can click “Start” to start the service.
To make things easier choose to add the ESPHome option to your sidebar. That way you’ll see a menu choice specifically for ESPHome going forward.
Configuring ESPHome
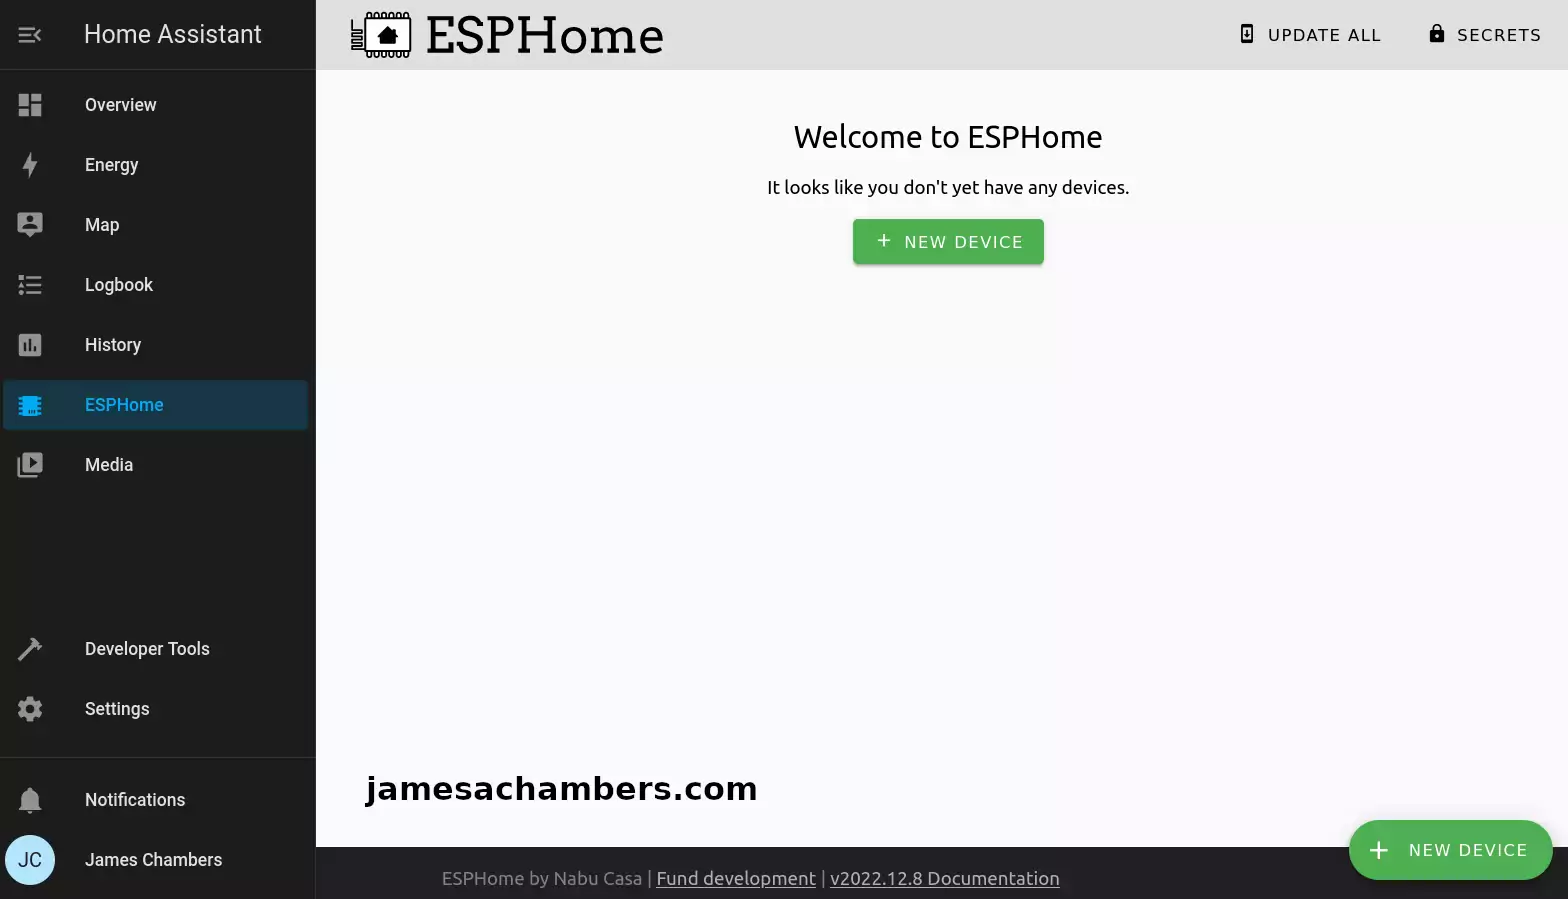
First head to the ESPHome menu option:
If you don’t see the ESPHome menu option then go back to the “Add-on Store” from the previous step. Select ESPHome and enable “Show in sidebar”.
For setup we need to connect your XAIO-ESP32-C3 to your device running Home Assistant with USB. This is only required for setup. It will communicate wirelessly after you’ve completed setup (if you configure it that way).
You also have the option of connecting it to a different computer but *only* if your Home Assistant instance is configured to run in HTTPS. For this guide I didn’t have HTTPS enabled and chose to connect it directly to the Tinker Board running Home Assistant for this step.
Click to add a new device. The first step will ask you for a configuration name and your wireless network SSID and password. Enter that and it will take you to the step to select your device type:
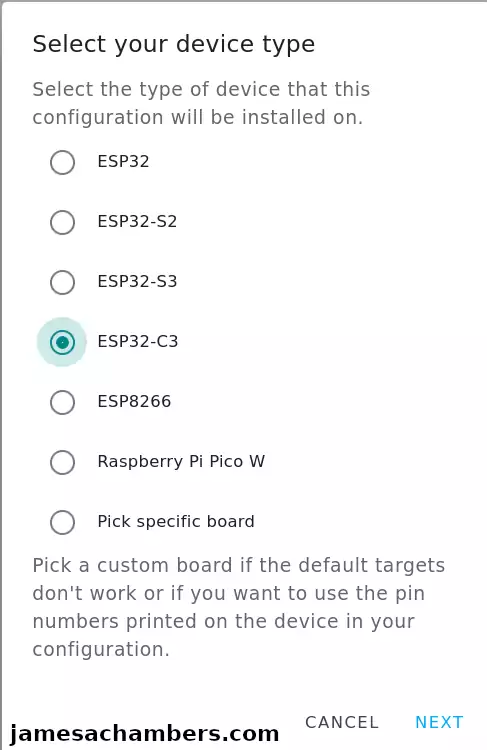
Select ESP32-C3 if you are using the same device as me. It’s fine if you are using another type and are using this guide to follow along.
It will ask you how you want to connect the device to the computer for the first time and give you an encryption key. I recommend using the “Connect to the server running Home Assistant with USB” option. It will then have you select your device. Mine showed up as a USB serial debug device on /dev/ttyACM0.
Once you select next it will give you the option to start the configuration or to skip. Choose skip. We are going to edit the configuration manually first.
Editing YAML Configuration
Click “Edit” on the new sensor/device you created. We are going to change the esphome and esp32 sections to this:
esphome:
  name: sensors-office
  platformio_options:
    board_build.flash_mode: dio

esp32:
  board: seeed_xiao_esp32c3
  variant: esp32c3
  framework:
    type: arduino
    version: 2.0.5
    platform_version: 5.3.0

logger:
   baud_rate: 0
This is as per the Seeed Studios wiki page for Home Assistant integration.
Note that YAML is very sensitive to spacing. The editor will underline errors in red for you which definitely helps to spot them as long as you’re watching for them.
While we are in here you should save your encryption key to your clipboard or keep it handy for reference. We are going to need it in the step to add the device to Home Assistant later.
Install Configuration to Device
Finally you can begin programming the device. Click to “Install”. Select the device type and your USB device again and with any luck:
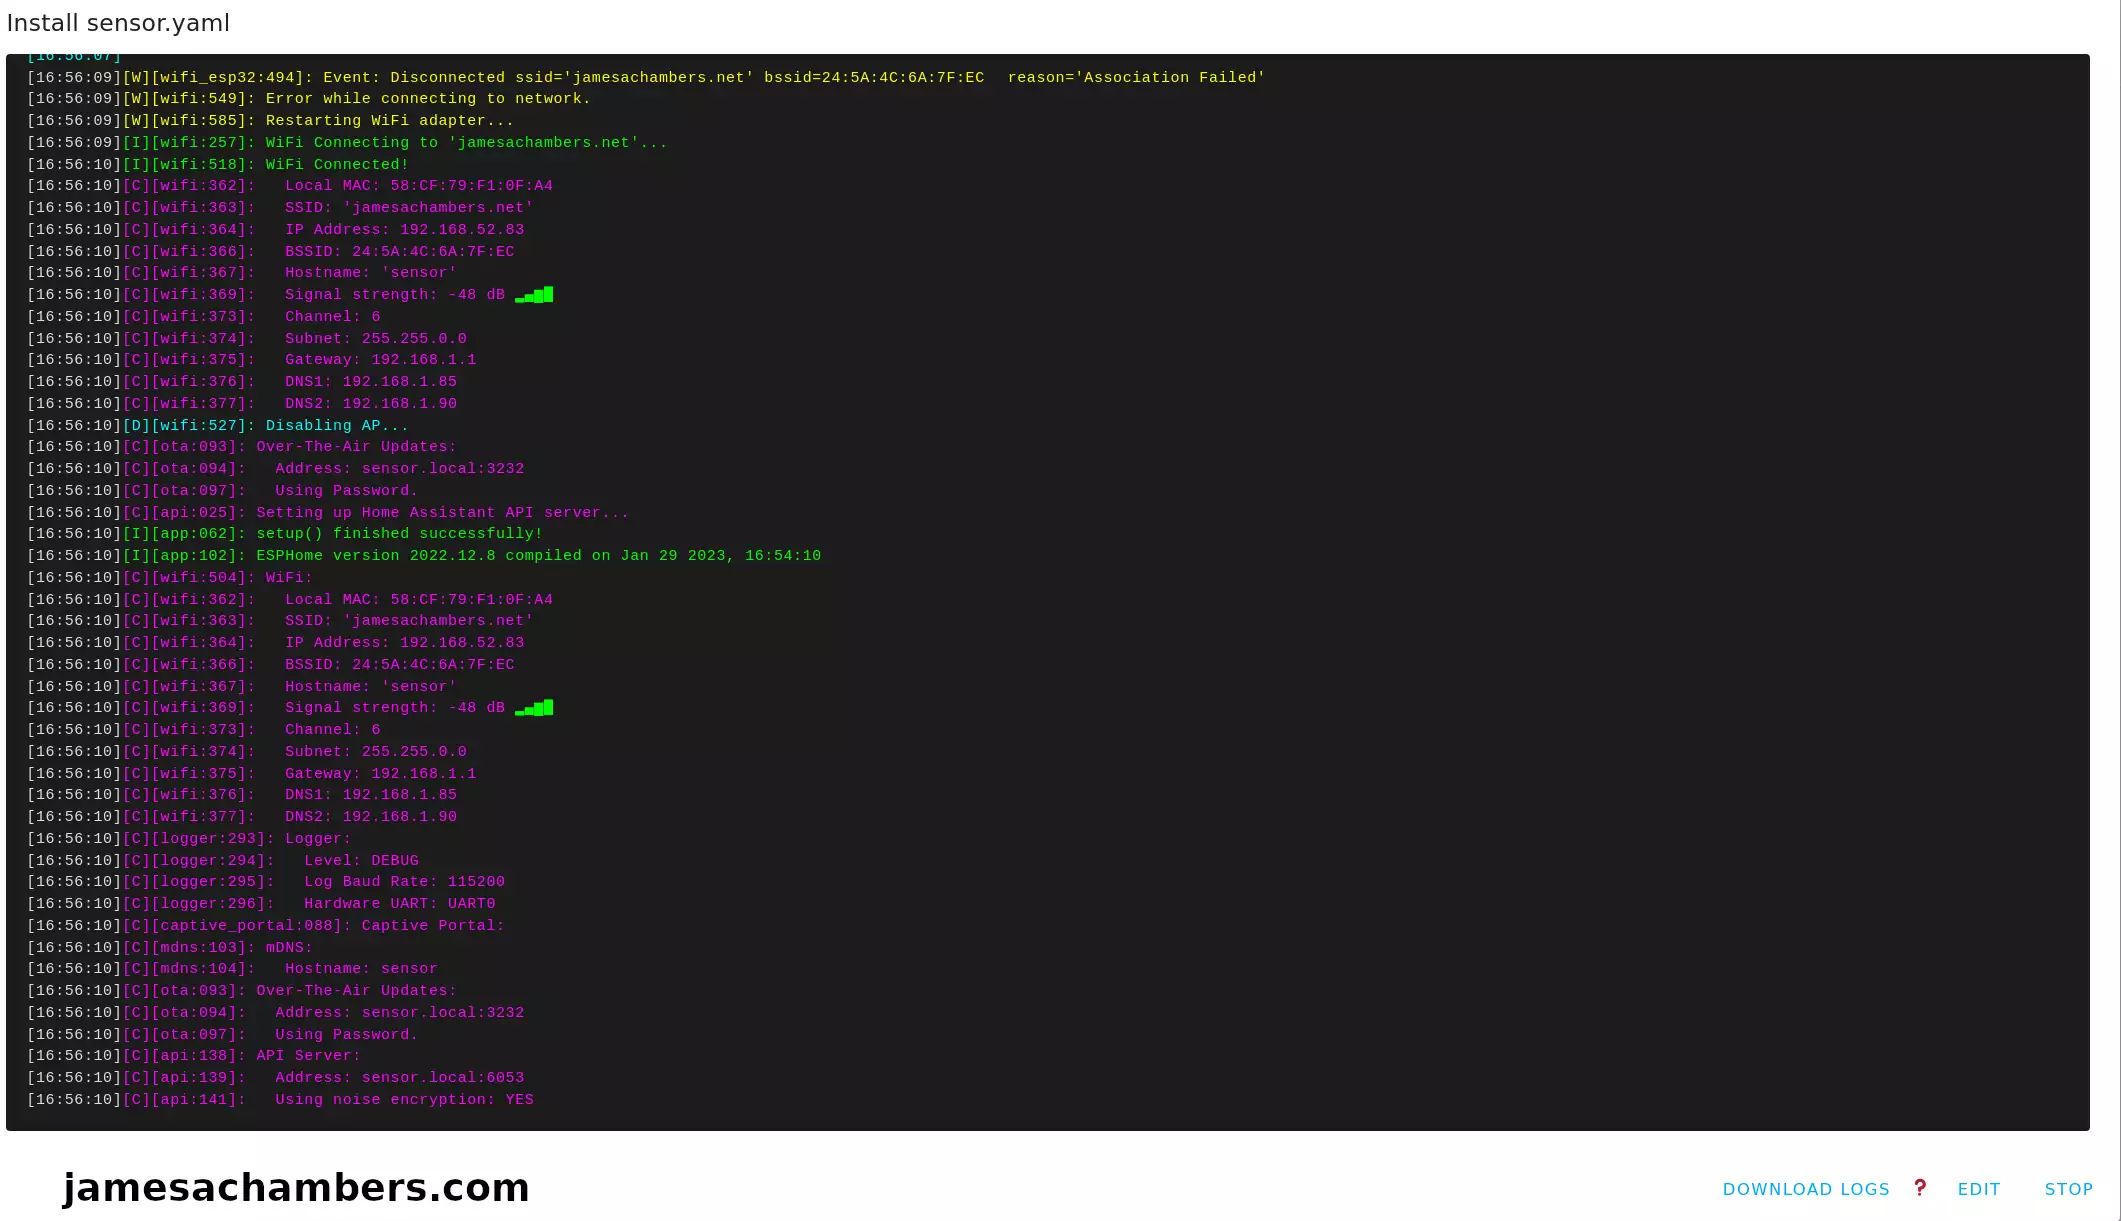
Above you can see it connected to my WiFi point and that everything ran successfully. That is without ever programming the ESP32. ESPHome did all of the programming for us!
Adding Device to Home Assistant
Now head back to your “Settings” menu for Home Assistant and click “Devices”. You should see your new sensor with the name you specified in the configuration.
Check to see if the sensor is online. With any luck it is like my example above. Now click “Configure”:
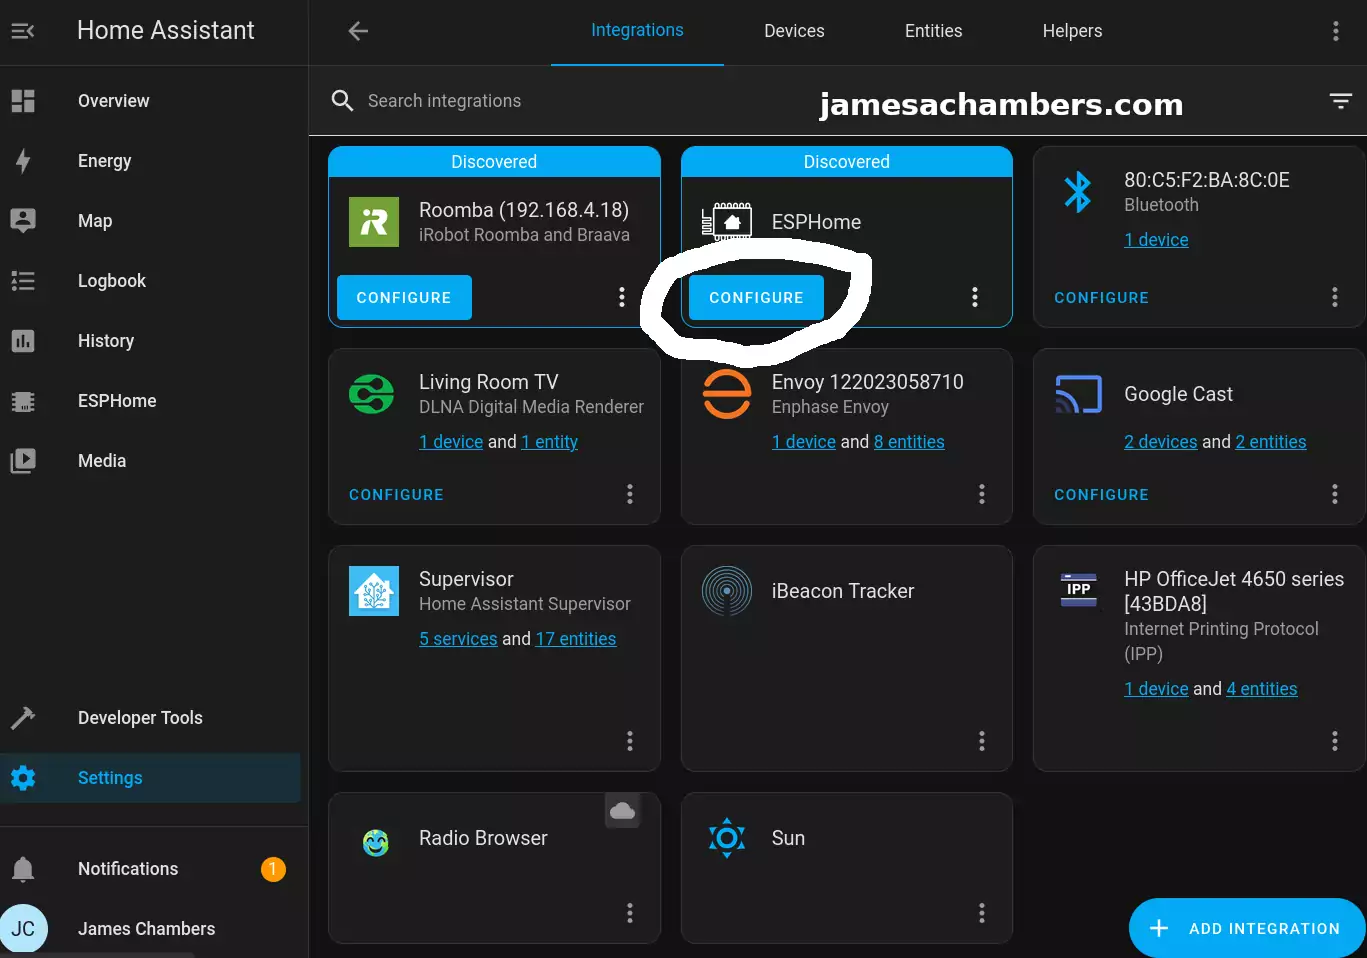
It should ask you if you want to add the node to Home Assistant. Select “Submit” and then it will ask you for your encryption key it gave us earlier. If you don’t have this just go back to the ESPHome menu and select “Edit”. You will see the key in plain text under “encryption” and then “key”.
If everything goes well the device should come online and be successfully paired with Home Assistant. From this point forward we will be able to update and push the configuration wirelessly to the device.
You won’t be able to see any sensors yet though. We are going to add those next.
Adding Sensors to YAML Configuration
To my surprise when I googled what the YAML configuration for this device would be I found an official Home Assistant resource here that has all of the YAML for us.
If we integrate that into the changes we made earlier the final configuration looks like this:
esphome:
  name: sensors-office
  platformio_options:
    board_build.flash_mode: dio
  friendly_name: sensors-office

esp32:
  board: seeed_xiao_esp32c3
  variant: esp32c3
  framework:
    type: arduino
    version: 2.0.5
    platform_version: 5.3.0

# Enable logging
logger:
   baud_rate: 0

# Enable Home Assistant API
api:
  encryption:
    key: "XXX"

ota:
  password: "XXX"

wifi:
  ssid: !secret wifi_ssid
  password: !secret wifi_password
  power_save_mode: none

i2c:
  sda: 6
  scl: 7

sensor:
  - platform: sen5x
    id: sen54
    pm_1_0:
      name: " PM <1µm Weight concentration"
      id: pm_1_0
      accuracy_decimals: 1
    pm_2_5:
      name: " PM <2.5µm Weight concentration"
      id: pm_2_5
      accuracy_decimals: 1
    pm_4_0:
      name: " PM <4µm Weight concentration"
      id: pm_4_0
      accuracy_decimals: 1
    pm_10_0:
      name: " PM <10µm Weight concentration"
      id: pm_10_0
      accuracy_decimals: 1
    temperature:
      name: "Temperature"
      accuracy_decimals: 1
    humidity:
      name: "Humidity"
      accuracy_decimals: 0
    voc:
      name: "VOC"
      algorithm_tuning:
        index_offset: 100
        learning_time_offset_hours: 12
        learning_time_gain_hours: 12
        gating_max_duration_minutes: 180
        std_initial: 50
        gain_factor: 230
    temperature_compensation:
      offset: 0
      normalized_offset_slope: 0
      time_constant: 0
    acceleration_mode: low
    store_baseline: true
    address: 0x69
    update_interval: 10s
You can see we actually have some configurable options here such as the update_interval. You can configure these if you wish but these are the suggested defaults from Home Assistant.
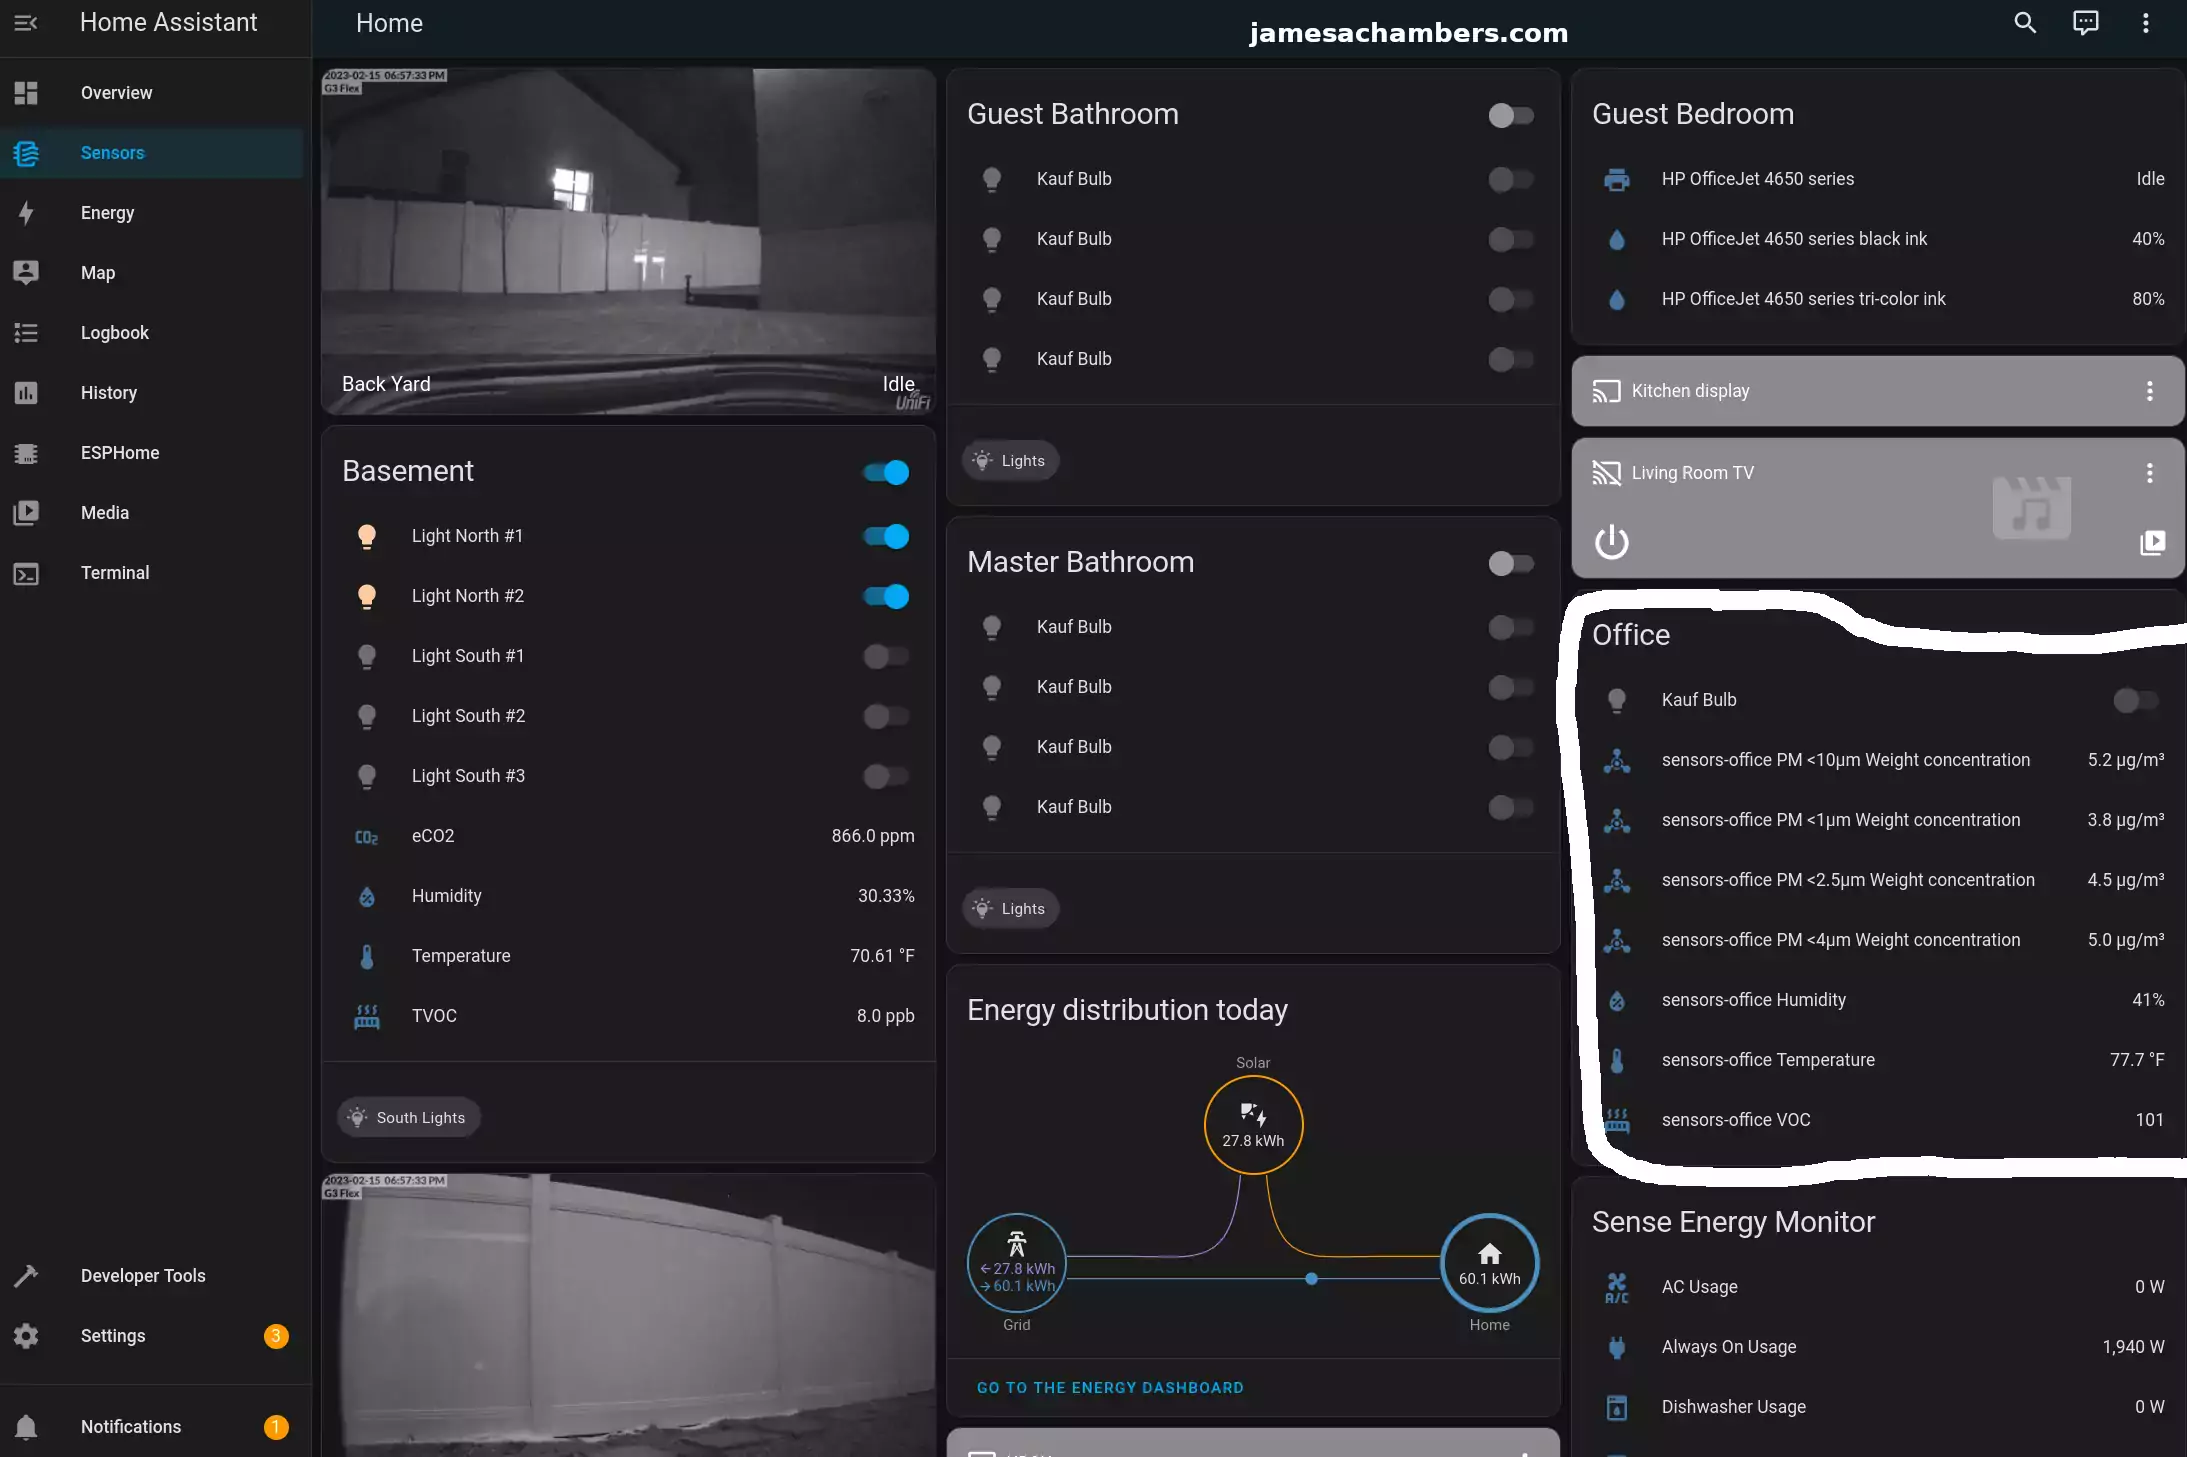
Final Result
You can see it really starting to come together here. On the right hand side we have the new SEN54 sensors! On the left hand side you can see my basement sensors I installed in this guide here.
You can also see the lights starting to populate for my rooms as I get them installed and configured. Those are the Kauf smart lights I’ve covered here.
Conclusion
I’m really happy with the SEN54 unit and I ordered a couple more to use throughout the house. They just make things a lot easier. A single connection got all of that data in one self-contained unit. The cost is $49 so it’s pretty inexpensive relatively speaking vs. buying all of those sensors yourself. Just the dust sensor is pretty expensive alone.
I should also mention there is a SEN55 unit that also measures NOx (nitrous oxide). I have not seen this version in stock for the past month or so I’ve been investigating these. I just wanted to mention it’s out there. I’d like to get one for the garage eventually that has that extra sensor when it’s in stock.
I’m definitely not finished with my build and will be adding more sensors and writing more guides as that happens! I still have door and window sensors to do as well as remotely controlling opening/closing the garage door. I’ll also cover some of my other integrations I haven’t talked about such as my solar panels (Enphase) and Sense energy monitoring systems. Stay tuned!
Other Resources
I have made a solderless version of this same sensor here using the Adafruit QT Py
You can see my guide on the Kauf smart lights I’m using with Home Assistant here
Don’t miss my other sensors guide using the ESP32-C3 here


Wow what a truly professional setup there James as you’ve managed to integrate so many cool features and the inclusion of the SEN54 unit makes perfect sense as it saves on the need for singular sensors and the accuracy looks to be better so sensible move.
The price seems fair as once you factor in the cost of a few individual sensors plus board/cables you’re creeping near the same price for one beefy unit and seeing it running off the XIAO ESP32-C3 is insane as I have seen similar setups using more powerful devices struggle to process all that data from such a big sensor!
I really appreciate the written guides as you cover all the important steps making it super easy to follow which is perfect for beginners like me and you’ve inspired me to start my own project based off something similar using ESP32-CAM boards, a bunch of Grove sensors and simple solar monitoring yet knowing I can expand things at a later date is really exciting. I’m hoping to add some LoRa as well to give it that extra dimension yet still in its infancy as I await delivery of some missing components from suppliers.
I can appreciate that this project of yours is still a work in progress but I’m really impressed and look forward to the next instalment as I’m intrigued to see what you do with the solar/energy monitoring and the remote garage idea is fun as I’ve seen others try with mixed success yet Jeff Geerling proved its possible using a Pico W so best of luck and congrats on the awesome job so far! Thanks from Australia.
Hey Razor Burn,
Thanks so much! You’re definitely right here about everything you’ve said for sure. The individual sensors are generally cheap but if you add up all of the sensors this unit has they would add up to significantly more than $49. It’s really nice that getting all of those environmental sensors only takes up a single I2C connector for sure. That leaves me another open I2C connector open on the expansion boards to easily connect another set of sensors.
It’s definitely not an exaggeration to say I have more coming with this type of gear. Check out how my desk looks right now:
I’m not sure if all of it will end up being used in builds but I wanted to have enough parts to try some different things. You can see a speaker in here, soil sensors, potentiometers, rotary angle sensors as well as magnetic switches (which I’m going to test for doors and windows). There’s some Grove LED modules and displays here. Lots of Adafruit gear mixed in as well. There’s an IoT button that is meant to be soldered or socketed with a QT Py / XAIO chip.
I do have a lot of soldering to do but it’s only headers. That’s the nice thing about the Grove / Stemma QT ecosystems. You really don’t have to do a lot of soldering other than the headers. Traditionally working with stuff like this you have to solder *everything*. You would literally wire your sensors together one at a time soldering each wire. That’s the beauty of Grove/Stemma for sure. It makes it plug and play.
You can actually get away with zero soldering with the QT Py because you can use the Stemma QT connector already soldered on the board. You could connect to one sensor at least (or a hub or mux board which I do have a couple of in the picture still in the bags) without even soldering the headers. The XAIO chip definitely can’t do that so that’s an upside of the QT Py fitting a Stemma connector right on the board itself. I could have done this entire 7 sensor unit without soldering if I used a Stemma to Grove cable with it (and a QT Py). It would eliminate the need for an expansion board entirely if you didn’t want to connect anything else.
I got a lot of these primarily to test using with sensors. Having some controls like buttons and potentiometers could be pretty interesting. I’m sure I could literally make a portable wireless Home Assistant garage door opener system using only that IoT button (as well as Home Assistant being able to control it of course). You can see I have a few different battery size modules to test. It’s hard to tell but that 150mAh battery is tiny. It’s almost as small as the QT Py / XAIO modules (almost).
I’m definitely not mentioning all of them in the picture and I have more stuff coming. I do not have any Stemma QT connectors for the QT Py for example. They’re slightly smaller than the normal Grove connectors which you can absolutely tell by looking at the size of the white connectors on the expansion boards vs. the little black Stemma QT connectors on the QT Py. I ordered like 6-8 of those Stemma QT to Grove connectors (they’re dirt cheap).
Yes Jeff’s work on this is actually really interesting. I can’t believe he did it with a Pico! I don’t mean that in a snarky way either. I have a Pico and that’s really a totally cool and legitimate use for one. He actually used ESPHome with it as well if I’m not mistaken. It’s very likely I will reference some of Jeff’s work when I do this even though I’m not planning on using a Pico to do it myself. What he is doing is very very similar to what I would like to do with mine as well.
If I were to say why I am not using a Pico for mine it’s because I’m really valuing being able to get my gear from different companies and have it all play nice together. It’s really that simple. I’m mixing and matching Chinese and American gear here and it’s all playing nice together just fine. I don’t have to worry about supply issues or availability nearly as much. I want to participate in ecosystems to get all of the benefits that come from ecosystems. I just don’t want to be locked into an *exclusive* ecosystem is all. I’ve been hurt/burned too much by the Pi over the past few years to want to build up my entire home’s infrastructure using their gear even though the Pico is a lot easier to get than any Pi (precisely because so many people are using ESP32 and other solutions).
He also has done some air quality monitoring stuff as well. I can’t remember if he integrated that one with Home Assistant/ESPHome though but he was one of the people that convinced me it was worth doing this with his video. It really does have impacts on your health when the CO2 levels and other things are really high. I’ve found that mine often is in my basement so I’ve started ventilating it.
You can see in some of my screenshots the basement CO2 level is still over 1000ppm. My home is brand new too (only 3 years old). The basement has never had HVAC though so it’s poorly ventilated. If I didn’t have my custom fans I installed to get heat out from servers (and former mining rigs) there would be no ventilation down there. You can also see the humidity down there is 30% and upstairs it’s 41%. That’s because I have a humidifier but the basement has no HVAC so it doesn’t get humidified. It only gets whatever rushes in when we open the doors going downstairs for humidity and is otherwise bone dry. It would probably still be 10% less humidity down there if it wasn’t indirectly getting moisture from upstairs.
My wife and I were getting headaches when working downstairs and it’s because the CO2 levels were really high due to the lack of ventilation down there. It’s already benefited me to have these sensors and I’m excited to start using them in the other parts of the home as well. I’ll also personally admit I have asthma so I’m sensitive to air quality. It impacts everyone though whether they’re aware of it or not.
Thanks so much for your comment, I promise to keep more coming and take care!
That’s a nice collection of goodies you have there and inline with my own modest collection and I agree the appeal of using the Seeed/Adafruit devices is the little requirement for complex soldering as there’s a expansion board for most needs and not having to rely on one sole vendor is great as you can mix and match or find an affordable solution for most things as they share designs and components making for some fun Frankenstein projects but you’re right to note that sometimes you need to use a different cable as not all the makers stick to a uniform standard but for the most part they’re cheap and readily available.
https://jamesachambers.com/wp-content/uploads/2023/02/RazorBurnGear.jpg
As you can see from the image, I have a mixed collection of various devices yet stayed away from automation (servos/switches) for now as its above my comfort zone but I do have an Arduino Starter kit that I hope to do some learning with and take those skills into the Home Assistant environment but that’s a long way off and I’m already down the rabbit hole and looking to get out before its too deep!
You convinced me to try some more Adafruit gear so I’m waiting on a few more QT Py boards as much prefer their size over the Pico and also ordered an ESP32-C9 Dev board as its supposed to be all the rage with Wifi 6 and RISC-V yet no real support and only a couple of places have it for sale so thought I’d get ahead as we’re certain to see more devices in the near future using the ESP32-C6 module.
It’s hard to argue with your comments regarding exclusivity and relying solely on one ecosystem is a mistake as the past few years have shown us that popular devices such as the RPi can become super expensive and largely unavailable to the general market so having alternatives is important which is why I am happy to support the Adafruits, DFRobots, Sparkfuns, Core Electronics out there as the quality is top notch and most of the companies are made up of passionate people who want to share their love for electronics and DIY projects which suits me perfectly.
I know from my own limited testing how bad the air quality can get in the average home as we tend to keep everything closed up for warmth or keeping out the excess heat with regular ventilation but hopefully this kit can allow me to set up a more permanent monitoring solution and having the ability to use a few of the portable options is fantastic as I can move them around and keep the air inside fresh and clean and eliminate the harmful CO2 and VOC from my garage and kitchen areas as those bad smells really do contribute to feeling unwell and can have long term health effects on the body. Its great to see your setup coming a long so nicely and what’s so impressive is having all that important data easily accessible so if I can get my setup half as good as yours I’ll be delighted! Keep up the great work and stay safe good sir…
Hey Razor Burn,
That’s an incredible selection you have going so far! I recognize some stuff there like the ESP32-CAM. My understanding is that is still the best one. Seeed recently made their own ESP32-CAM but I saw people ribbing them on the Tweeter for not including a light/flash.
One thing they got right though? It’s as small as the XAIO boards / QT Py. It’s tiny. There’s no flash though so there’s a tradeoff for sure. It’s definitely interesting to see them expanding into that area though as ESP32-CAM has to be one of the most popular ESP devices ever made if not the most popular. I’d love to hear about your experience with them. I have mostly Unifi cameras but my goodness are those expensive. It costs more than the entire pile of gear from my last shot combined for a single Unifi camera. I have lots of places like my garden boxes where a ESP32 cam would do just fine. I don’t need ultra high res for that.
I see you also got the MONSTER Grove expansion board, that is awesome! I did see the listing for that one. That looks like it has a TON of I/O so that should be really fun to work with.
So about the automations within Home Assistant: I did show a really, really easy way to do these with my Adafruit IoT button article. It’s purely GUI based but wait until you see the section on automations. You could probably even skip to it as a lot of the earlier article is the stuff you’ll have seen before like installing the ESPHome add-on but after that you’ll start to see me do some automations. It’s pretty much a GUI-based click system to set up automations.
I think you’ll really enjoy that one when you get a chance to see it. I did finally dive into the automations and there’s literally no code involved. You just add the actions, conditions and triggers and I cover that in the new Adafruit IoT button article in a way that I haven’t in these other ones yet. It’s the “Button Automation” section. The even better news is it is probably the easiest thing we do in that article. I did an automation where if you simply press the button my mopping Roomba (Brava) goes to mop the floor. It’s simple to change it to run any action on any device or entity you have set up within Home Assistant fortunately!
It’s also simple to expand them to be more complex. You can add conditions. For example when I do my garage door opener I will have conditions to change the LED color on the device to red if the garage door is open and when the button is pressed with those conditions it would close the garage. The condition would be based on whether the door is open or not. The light would then turn green (for the closed state) and pressing the button would open it again. No code involved. Just simple conditions/logic for sure. You can absolutely code them as well but I’d definitely recommend just clicking around with a blank automation. I haven’t had to go to code yet to do anything I’ve done so far.
For most people following the guide I’d be most concerned about them soldering the headers. I’m definitely not concerned with that with you though. That would have been the part that scared me before getting the Pinecil and I’m positive it’s the part that will scare the most people away from that IoT button. Hopefully Adafruit is making a Stemma QT version of that button right now that is solderless. It’s a no-brainer for them to offer that as the IoT button sold out since I bought it a couple of weeks ago or whenever it was.
I can’t wait to see more of what you end up doing with it! I think you’re building out a pretty robust system here. I see stuff from everyone in your picture just like mine. That’s such a smart way to do it. If any of the parts you’re using here become unavailable at any point there are so many drop-in replacements/alternatives that you will always be able to get something that is compatible. You’ll always be able to get some sort of ESP module that will be able to go into ESPHome. I’m so happy seeing yours come together like this and very excited for you. Thanks and take care!
Hi James,
Thanks again for the kind words as they mean a lot and your written guides continue to inspire me as they’re full of important detail and easy to follow so you’re doing awesome work educating your audience.
Some how every time I open the blog Brave browser doesn’t show the latest article so I need to search view the tabs and only caught the Adafruit IoT Button Review before going to bed and I’m certainly going to order a few once they’re restocked as sold out everywhere as far as I can tell?! You really have to hand it to Adafruit as they’re pumping out so much cool stuff and I believe they’re looking at selling gear pre-soldered so might be worth reaching out to them and asking as they seem like a cool bunch of people?
I’m glad to see your Pinecil is making easy work of the soldering as I can only imagine the nightmare you had using your old iron and things don’t need to look factory perfect, as long as there’s a connection and no bridging you’re sweet and most people shouldn’t be afraid to give it a go as its not as intimidating as one would think.
I started out with the ESP32-CAM as its dirt cheap and there are hundreds of tutorials showing its usage as a Security Camera and so far its been easy to setup and you can power it by USB powerbank but its still low quality 2MP image so nothing compared to a proper CCTV application but I’m hoping to set them up around the place and and have them integrated into ESPHome/Home Assistant.
I’m truly buzzing to see what you do with the garage remote as using the IoT Button looks like such a clever idea as other tutorials I have seen looked overtly complicated in comparison and as you say once you factor in the price of the button, female headers and a controller its super cheap and I love how simple the commands are for the button as its basically plug and play with very little programming. Here I was scared of giving ‘automation’ a try as the code has always looked complicated yet you’ve demonstrated how easy it is to have it command your robo mop so I’m sold and hope Adafruit manage to get them restocked soon as its really soe cool kit! Take care and can’t wait to see what you do next…
Hey Razor Burn,
Thanks so much, I would say right back at you for the kind words, you’ve inspired a lot of my articles / writing lately (truly)! That’s a great point about contacting Adafruit. They’re pretty easy to contact. They even do live streams weekly such as “Ask an Engineer” where you could just show up and ask something like this and I’m sure they’d cover it and let you know if they’re working on it.
One thing I’ve been watching though is their new products page here. This is where I’ve been finding a lot of their coolest stuff nobody else has really ever covered before. What you will notice pretty quickly is that at least 50% of them are all Stemma / QT versions of their existing boards. I definitely think they’re trying to move to that as soon as possible for everything they can. I’m sure they’ll still have the solder versions of all of them available but this seems to be the standard connector they are trying to move on with all of their boards. You’ll even see a lot of non-ESP boards like ATTinys and things like that are even coming with them as well.
I think you made the right choice with the ESP32-Cam for sure. I do have one of the Grove camera modules and there are other options but honestly the ESP32-Cam is as popular as it is for a reason. It’s tried and true and we have a really good understanding of it’s capabilities and limitations (widely as a community). It looks like the competitors are starting to step up their own efforts so maybe a year from now there will be a clear successor. Today I don’t know of a better one than what you picked still today. If I do more cameras it will probably be some of those that I try (especially for things like my garden boxes or maybe a indoor utilities monitor camera)!
My wife really liked the idea of kind of a “panic button” for her to press to lock all of the doors in the house. She’s always worried she forgot to lock the doors before she goes to sleep so I’d love to make her a little button that shows red if any doors are unlocked and when she presses it everything locks itself. I would put it right on her night stand (with the LED brightness turned to like 5% or less). She would absolutely love that. This would of course require me to integrate all of my door locks into Home Assistant somehow which I would like to do. I’m just not sure how to do that yet or what I want to use. Unifi might honestly be the easiest for me to go to some sort of electronic door locking as I already have all that integrated and have all of the equipment for it.
The garage door opener idea is kind of a similar thing. It’s more than just a button. It’s also a status LED that I can control in Home Assistant via automations. That means it does more than just automate. It informs / notifies about the status of something in your house. This really extends how useful it is. I’ve kind of been dragging my feet on doing the garage door because it’s 36 degrees outside here today (which is an improvement from how cold it has been). It’s almost time though.
I also thought about having a small panel of something like these plugged into a USB hub. It would just be a row of buttons plugged straight into a USB hub basically. It would give you a very tiny control panel of as many status LEDs / buttons like this as you want. You would have one labeled for the doors maybe, the garage door, whatever you wanted to set it up as. You can even control the lights and your TV with it and all of that.
I’m very glad you enjoyed it! I was hoping you might get lucky and that one of your more local redistributors might have some of these still even though they’re out of stock at the moment on the main site. I’m waiting for some of my Stemma to Grove connectors and a few more orders and I have some SSD boot guides to catch up on for things like the Radxa Zero but stuff will continue to arrive and get built out here I’m sure. Thanks again!
Valuable points and I’m more than happy to help as you’re writing style makes for a fun and enlightening read and this blog has quickly become my go-to site for tech reviews! Till next time stay well good sir…
I’ve been building out various sensor arrays for use with Home Assistant using ESP32 modules and ESPHome, and the experience has been excellent overall. One ongoing challenge, however, is the limited number of available connections even when using expansion boards. While there are several ways to work around this, purchasing and wiring individual sensor boards one by one can quickly become messy and hard msn games to manage.