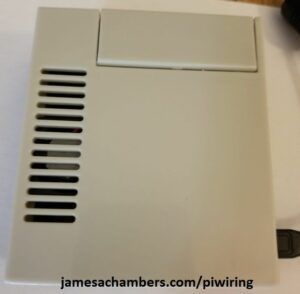
This is a followup to my Old Skool NES Classic RetroPie build. When I posted my build on Reddit several users that already had the case noted that the case tends to get very hot.
That’s not good, but since the case is so awesome I was determined to find a solution. This mod requires no soldering, no drilling, and is dead simple and cheap. It also does not modify the look of your NES Classic RetroPie setup at all.
We will use the preexisting vents in our case to create air displacement and pull the heat out of our case and let the cool air flow in from the lid gaps across the board. Without further disposition:
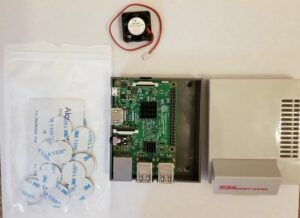
NES Classic Fan Mod Equipment

The Raspberry Pi 4 is available in different memory configurations all the way up to 8 GB. It’s about the size of a credit card and uses an extremely low amount of power making it ideal for all sorts of projects and ideas!
Links: Amazon.com*, AliExpress*, Amazon.ca*, Amazon.com.au*, Amazon*.co.jp*, Amazon.co.uk*, Amazon.de*, Amazon.es*, Amazon.fr*, Amazon.it*, Amazon.nl*, Amazon.pl*, Amazon.se*, Amazon.sg*
- Old School NES Classic Case*
- 5v 25mm X 25mm X 10mm Small Brushless Cooling Fan*
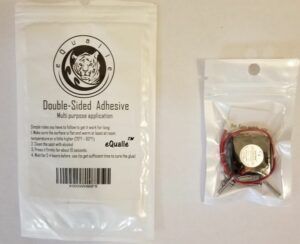
- 3M Adhesive Double-sided Foam Tape High Bond Dots*
Fan Mod Preparation
Use rubbing alcohol to thoroughly clean the surface of both the fan head and the side of the case. We will be putting mounting tape here and to achieve a strong bond the surfaces need to be clean. Alcohol pads are included in the 3M kit or you can use a q-tip with rubbing alcohol. We need to remove all oil/debris to make sure that we get a strong solid mount to our Old Skool NES Classic case.
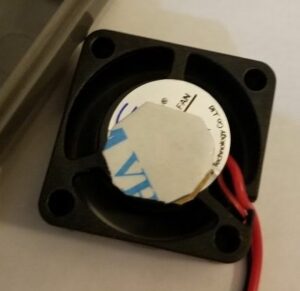
Now use scissors or a precision cutting knife to cut the 3M dots down to size. We do not want to obstruct the airflow of the fan so the 3M dot should be the same size or slightly smaller than the label on top of the fan. Do not remove the double sided protective tape yet. It will look something like this:
Side Adhesive Preparation
Next cut a second adhesive dot in half giving a crescent moon shape. We will use this to give further stability to the side of the fan to ensure that we have a solid mount. This also has the benefit of keeping of preventing any fan noise or ratting of the fan against the case. The 3M dot material acts almost as a soundproofing material which will give you extremely quiet operation.
Now that you have cut the material and cleaned the surfaces thoroughly with rubbing alcohol (let the alcohol evaporate off before placement) you are ready to place the adhesive dots.
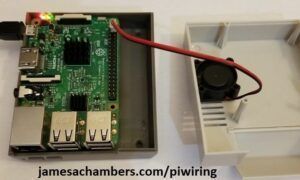
Room in this case is *very* tight so you need to place the fan away from the GPIO pins where we are going to be plugging into the fan. The fan can sit above the GPIO pins but you need to have it far enough away from the top corner that you won’t bump into the wires we plug into the GPIO pins in the next step.
Right near the middle of the ventilation slots is the sweet spot. Here is a picture to see where I placed it:
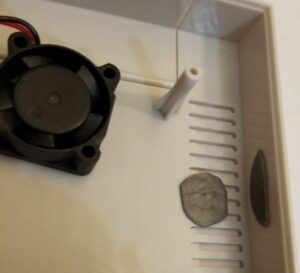
Now line up the fan with the center dot and then firmly press it down and to the side against our half dot on the side. It is useful to rotate the top part of our case around so you can see down through the ventilation slots. This allows you to get the adhesive dot right in the middle of the fan sticker and not obstruct the airflow with a bad alignment. It will stick right to them.
You don’t need to put a tremendous amount of pressure and risk breaking the case. Just a nice firm press for about 30 seconds and it will be firmly in place.
Fan Mod Wiring
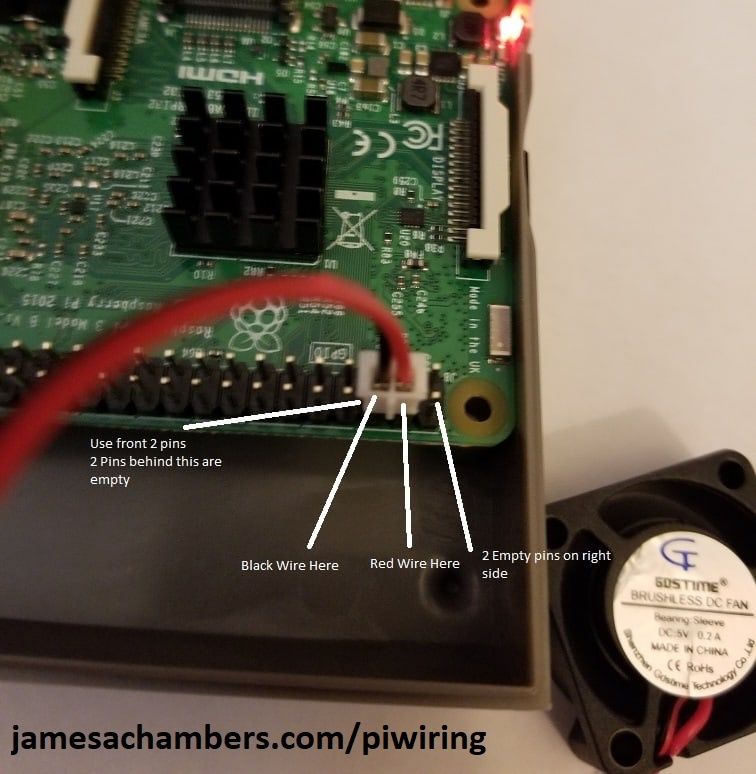
Wiring the fan for the mod is dead simple, but you do need to get it right. I have made a diagram to show you exactly how to wire the fan to the GPIO pins. You simply plug them right in there.
Don’t push down too hard as the connector doesn’t go very far down before it is secure and if you push too hard you could bend your GPIO pins. If the pins are going in and you start feeling resistance you can stop pushing as you have made a solid connection.
One more warning: The Pi is on in this picture because I have already mounted the fan (the fan is actually spinning in this picture). The Pi should be turned OFF when you do your initial wiring just in case.
Here is the wiring diagram:
Wrapping Up
Keep the lid separate for the time being and plug in the Raspberry Pi. We want to make sure that the fan is spinning. If the fan is spinning you are ready to assemble the case. First make sure the red wire is well out of the way of where the fan is going to be. I suggest wrapping it around the back of the GPIO pins so that it doesn’t make it’s way to the bottom of the fan and obstruct it.
Once the red cable is out of the way slowly and gently place the top of the case on making sure there is no contact with the wire or any parts of the board. If you mounted the fan in the proper place the case will snugly fit and you will feel airflow coming up through the top of the case.
Congratulations, you have successfully installed a fan in your Old Skool NES Classic case! Expect your temperatures to drop dramatically. Even though the fan isn’t extremely powerful the true cooling power is the air displacement.
The hot air will rise to the top and be blown out with the fan and you will have cool air flowing in from the back of the case across all of your Pi’s components. This is exactly how your PC’s case works. The fan in the back of the case exhausts hot air and displacement brings cool air in through the front.
I still believe this is the best looking case and with this mod all temperature concerns go away. Let me know in the comments what temperature reductions you have seen!