
I’ve covered how to get the right type of storage adapter for your Raspberry Pi for years on this site and cataloged storage adapters that both work and don’t work with the Raspberry Pi. Over the years we’ve learned that many of these adapters can be “fixed” with a firmware update to work with the Raspberry Pi.
In this article I’ll put together an evolving list of firmware adapters that can be fixed with these updates from my own experience as well as comments people have left over the years!
Overview
The preferred and safest way to identify your device is by brand name. This will work if you have a “popular” or “name brand” storage adapter.
If you have a generic / unbranded adapter then the next best way is by chipset. We can identify your chipset by using the following command:
sudo lsusb
This yields the following result:
pi@pi:~ $ lsusb
Bus 002 Device 002: ID 174c:55aa ASMedia Technology Inc. Name: ASM1051E SATA 6Gb/s bridge, ASM1053E SATA 6Gb/s bridge, ASM1153 SATA 3Gb/s bridge, ASM1153E SATA 6Gb/s bridge
Bus 002 Device 001: ID 1d6b:0003 Linux Foundation 3.0 root hub
Bus 001 Device 003: ID 04d9:0007 Holtek Semiconductor, Inc.
Bus 001 Device 002: ID 2109:3431 VIA Labs, Inc. Hub
Bus 001 Device 001: ID 1d6b:0002 Linux Foundation 2.0 root hub
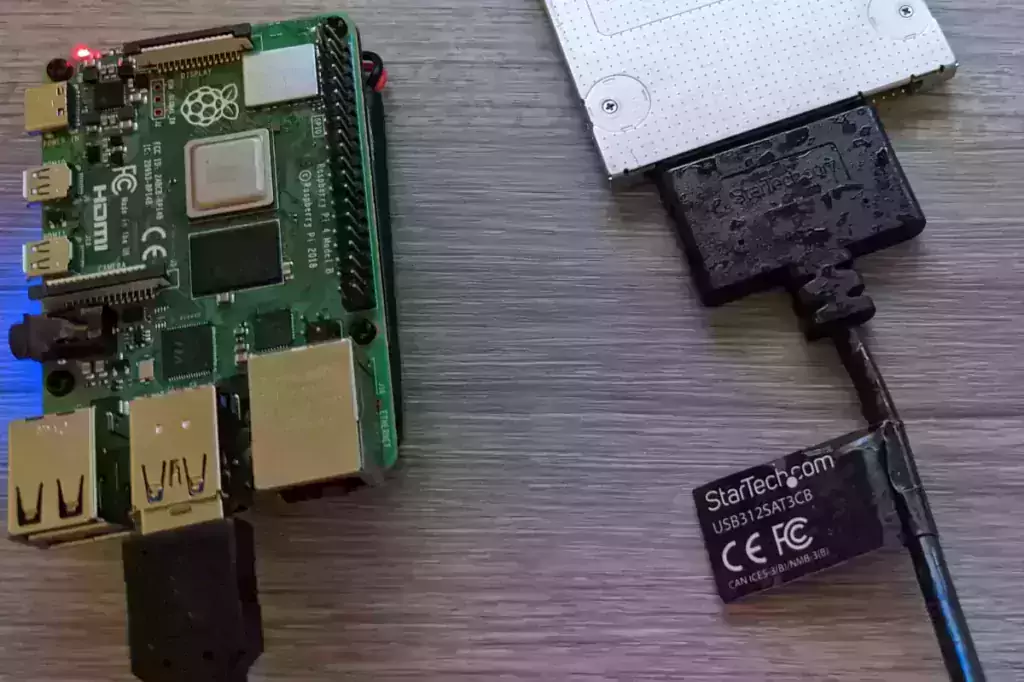
Yours will look similar to mine. I’ve bolded the important line which is our storage adapter. The above result is for the StarTech 2.5″ SATA to USB 3.1 (USB312SAT3CB) adapter. This example is a name brand adapter that will be on the list but if it wasn’t the generic chipset would be the ASMedia ASM1153E chipset for this adapter. Other common chipsets include JMS-578, etc.
If you’re confused about which is which use this version of the command to get a lot more detail (including device properties that often make it much easier to identify):
sudo lsusb -v
This will yield something like this:
Bus 002 Device 002: ID 174c:55aa ASMedia Technology Inc. Name: ASM1051E SATA 6Gb/s bridge, ASM1053E SATA 6Gb/s bridge, ASM1153 SATA 3Gb/s bridge, ASM1153E SATA 6Gb/s bridge
 Device Descriptor:
   bLength                18
   bDescriptorType         1
   bcdUSB               3.10
   bDeviceClass            0
   bDeviceSubClass         0
   bDeviceProtocol         0
   bMaxPacketSize0         9
   idVendor           0x174c ASMedia Technology Inc.
   idProduct          0x55aa Name: ASM1051E SATA 6Gb/s bridge, ASM1053E SATA 6Gb/s bridge, ASM1153 SATA 3Gb/s bridge, ASM1153E SATA 6Gb/s bridge
   bcdDevice            1.00
   iManufacturer           2 asmedia
   iProduct                3 ASMT1051
   iSerial                 1 123456799FA6
   bNumConfigurations      1
   Configuration Descriptor:
     bLength                 9
     bDescriptorType         2
     wTotalLength       0x0079
     bNumInterfaces          1
     bConfigurationValue     1
     iConfiguration          0
     bmAttributes         0xc0
       Self Powered
     MaxPower                0mA
     Interface Descriptor:
       bLength                 9
       bDescriptorType         4
       bInterfaceNumber        0
       bAlternateSetting       0
       bNumEndpoints           2
       bInterfaceClass         8 Mass Storage
       bInterfaceSubClass      6 SCSI
       bInterfaceProtocol     80 Bulk-Only
       iInterface              0
The above example didn’t give us the name “StarTech” anywhere but it did give us some clues. This is identified as a “Mass Storage” interface class device which definitely narrows things down. Your other peripherals will show as the category they are from like mouse, keyboard, etc. You should be able to narrow things down by unplugging everything else from your Pi if you are still having trouble identifying which is which.
Many of these updates need to be applied using a Windows machine as that will be the only platform these updates will be offered on from their web site. Some manufacturers have update utilities for multiple platforms available but from what I’ve found if you’re lucky enough they offer them at all it will usually be for Windows.
Warning / Disclaimer
This is not an entirely risk free procedure. If something goes wrong during a firmware update it is possible to brick it. This doesn’t happen very often but understand it’s possible. If you lose power at the moment you are updating the firmware for example that could definitely do it.
There is less risk for the “branded” adapters as these are the manufacturer’s tools intended for the manufacturer’s devices. It’s as safe as it gets but even in these cases things can go wrong (like the examples I mentioned above). There is also some risk that even chipsets identifying as the same chip may have slight variations in how they are actually implemented or which revision they are.
Make sure you understand this is not a completely risk free procedure (and carries the same risk as firmware updates on any other device, and a little bit extra risk even for the generics since they may not have been intended for that exact device) before proceeding!
StarTech Adapters
StarTech 2.5″ SATA to USB 3.1 Adapter
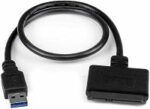
The USB 3.1 variant of the StarTech 2.5″ SATA adapter works well with the Pi 4. The USB 3.0 variant doesn’t have firmware updates available and is not recommended.
Links: Amazon.com*, Amazon.ca*, Amazon.com.au*, Amazon.co.jp*, Amazon.co.uk*, Amazon.de*, Amazon.es*, Amazon.fr*, Amazon.it*, Amazon.nl*, Amazon.pl*, Amazon.se*, Amazon.sg*
There are a few different variants. Check the tag on your cable to see which exact model you have.
usb312sat3cb – USB 3.1 Gen2 Version
usb31csat3cb – USB 3.1 Gen1 Version
usb3s2sat3cb – USB 3.0 Version – No updates available
Click the “downloads” tab and choose “firmware.zip”. This must be ran on a Windows machine. It will update the firmware almost instantly when you launch the program with the adapter plugged in and say “SUCCESS – UNPLUG AND REPLUG THE DEVICE”.
Sabrent Adapters
Sabrent and Orico both have the worst track records for working storage adapters for the Pi. I don’t recommend them at all but they can sometimes be fixed.
The following Sabrent JMicron adapters can be updated with their official tool:
Important Note: After the update the Sabrent adapters often work but usually only with quirks mode enabled (see bottom Quirks section of article).
For Sabrent’s version of the JMicron firmware update tool: Sabrent JMicron Update Tool
EC-SNVE*
PSiler has reported that you can fix UAS support on the EC-SNVE* with a firmware update available at: Sabrent EC-SNVE Download Page
For the general Sabrent adapters firmware update list (check if your adapter is listed): Sabrent Firmware Update Download Page
Generic Adapters
Note with generic adapters there is some risk. These may not necessarily be by the same manufacturer of your device. It usually doesn’t matter as these all have the same storage controller but due to slight variations in the way some manufacturers implement this technology it’s possible it could cause an issue / brick it. Make sure you understand that there is some risk before proceeding!
JMicron JMS578 Firmware
This is a copy of the JMS578 firmware that has fixed this issue for many people (but not everyone) on the Raspberry Pi. You may still need to enable “quirks mode” (see quirks mode section) even with the updated firmware in some cases.
It’s a little bit trickier to use than some of the other ones but not too extraordinarily difficult. You will need the updater utility and the .bin file.
Here is the updater utility: ODroid – jms578fwupdater.tgz
Here is the JMS578 firmware update: ODroid – jms578_fw_update
And finally the how to use the updater utility / instructions here: ODroid Wiki – How to use jms578_fw_update
This thread is worth a read as well to see the different types of adapters/chipsets people tried with this and their different results: Raspberry Pi Forums – Topic 245931
Watch Out For Power Issues
If you are using a drive that has high power demands a common solution I’ve been recommending for years is to use a Sabrent powered USB hub to power the drive. This eliminates your Pi from having to use it’s own power to power the drive at all. This is often required for higher performance NVMe drives.
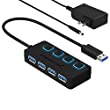
The Sabrent powered USB hub delivers a whopping 2.5A of dedicated power for your USB attached devices. This is almost as much as the Pi adapter itself is rated for (3.0A). It will easily power the most thirsty of setups such as NVMe enclosures.
Links: Amazon.com*, Amazon.ca*, Amazon.com.au*, Amazon.co.uk*, Amazon.es*, Amazon.it*, Amazon.nl*, Amazon.pl*, Amazon.se*
Note: Make sure Amazon doesn’t try to take you to the non-powered version and that it’s the one with the AC adapter that plugs in to provide extra power
Verify Drive Performance
You can make sure everything is running correctly (and as fast as it should be) by running my quick storage benchmark. You can run the benchmark with the following one-liner:
sudo curl https://raw.githubusercontent.com/TheRemote/PiBenchmarks/master/Storage.sh | sudo bashThis will give you a score you can compare to the other Raspberry Pi Storage Benchmark results and make sure that you are getting an equivalent speed to your peers with the same device!
Benchmarking / Testing Storage
If you want to verify your drive’s performance you may want to run my storage benchmark with:
sudo curl https://raw.githubusercontent.com/TheRemote/PiBenchmarks/master/Storage.sh | sudo bash
If you search for the model of your drive on Pi Benchmarks you can compare your score with others and make sure the drive is performing correctly!
Fix (some) USB Adapter Problems Using Quirks
Some adapters can be made to work by using USB quirks to disable UAS mode on the drive. This lowers performance, but it’s still much faster than a SD card and your adapter won’t go to waste. Some adapters also require it even with the updated firmware!
To find out the quirks we need to find the device ID string for your adapter and then add an entry to cmdline.txt telling the kernel to apply them on boot.
Find Your Adapter
To apply the quirks we first need to get the adapter id. We will use the sudo lsusb command:
$ sudo lsusb
 Bus 003 Device 001: ID 1d6b:0002 Linux Foundation 2.0 root hub
 Bus 002 Device 002: ID 174c:55aa ASMedia Technology Inc. Name: ASM1051E SATA 6Gb/s bridge, ASM1053E SATA 6Gb/s bridge, ASM1153 SATA 3Gb/s bridge, ASM1153E SATA 6Gb/s bridge
 Bus 002 Device 001: ID 1d6b:0003 Linux Foundation 3.0 root hub
 Bus 001 Device 002: ID 2109:3431 VIA Labs, Inc. Hub
 Bus 001 Device 001: ID 1d6b:0002 Linux Foundation 2.0 root hub
On line 2 we can see my ASM1051E SATA 6Gb/s bridge adapter (it’s the known working StarTech.com 2.5″ SATA to USB 3.0* adapter). You will see something very similar to mine when you run the command and it shouldn’t be too hard to figure out which device it is. If you need more information add a -v switch to make the command sudo lsusb -v. This can sometimes add some additional details to make it easier to figure out which one is your adapter.
If you’re still not sure, we have another command that between the two that can narrow things down. Type / paste the following:
sudo dmesg | grep usb

 [0.828535] usb usb3: New USB device found, idVendor=1d6b, idProduct=0002, bcdDevice= 4.19
 [0.828568] usb usb3: New USB device strings: Mfr=3, Product=2, SerialNumber=1
 [0.828597] usb usb3: Product: DWC OTG Controller
 [0.828620] usb usb3: Manufacturer: Linux 4.19.75-v7l+ dwc_otg_hcd
 [0.828644] usb usb3: SerialNumber: fe980000.usb
 [0.830051] usbcore: registered new interface driver uas
 [0.830182] usbcore: registered new interface driver usb-storage
 [0.836488] usbcore: registered new interface driver usbhid
 [0.836511] usbhid: USB HID core driver
 [0.971598] usb 1-1: new high-speed USB device number 2 using xhci_hcd
 [1.154217] usb 1-1: New USB device found, idVendor=2109, idProduct=3431, bcdDevice= 4.20
 [1.154254] usb 1-1: New USB device strings: Mfr=0, Product=1, SerialNumber=0
 [1.154281] usb 1-1: Product: USB2.0 Hub
 [1.301989] usb 2-1: new SuperSpeed Gen 1 USB device number 2 using xhci_hcd
 [1.332965] usb 2-1: New USB device found, idVendor=174c, idProduct=55aa, bcdDevice= 1.00
 [1.332999] usb 2-1: New USB device strings: Mfr=2, Product=3, SerialNumber=1
 [1.333026] usb 2-1: Product: ASM105x
 [1.333048] usb 2-1: Manufacturer: ASMT
 [1.333071] usb 2-1: SerialNumber: 123456789B79F
This is the dmesg log showing the hardware detection as hardware is activated on the Pi. If your log is really long you can generate fresh entries by just unplugging a device and plugging it back in and running the command again. Here we can clearly see that the ASM105x is what our StarTech adapter is being detected as.
Now we can go back to our first lsusb command and we want the 8 characters from the ID field that comes right after the Device:
Bus 002 Device 002: ID 174c:55aa ASMedia Technology Inc. Name: ASM1051E SATA 6Gb/s bridge
Our adapter’s ID is: 174c:55aa
Applying Quirks
To apply the quirks to our USB adapter we are going to edit /boot/cmdline.txt. Type:
sudo nano /boot/cmdline.txt
We are going to add the following entry into the very front of cmdline.txt:
usb-storage.quirks=XXXX:XXXX:u
In place of the X’s above you will put in your adapter’s ID that we got before. With the example commands I gave above mine would look like this: usb-storage.quirks=174c:55aa:u. After this my cmdline.txt looks like this (everything should be one continuous line, no line breaks!):
usb-storage.quirks=174c:55aa:u console=serial0,115200 console=tty1 root=PARTUUID=d34db33f-02 rootfstype=ext4 elevator=deadline fsck.repair=yes rootwait
Now reboot the Pi. If the Pi fails to boot you can plug the SD card into the computer and go to /boot/cmdline.txt and undo the change we did so you can boot back in with your SD card.
Verifying Quirks
Once you have rebooted after changing cmdline.txt we can verify the quirks have been applied by doing another dmesg | grep usb command:
sudo dmesg | grep usb
 [1.332924] usb 2-1: New USB device found, idVendor=174c, idProduct=55aa, bcdDevice= 1.00
 [1.332957] usb 2-1: New USB device strings: Mfr=2, Product=3, SerialNumber=1
 [1.332983] usb 2-1: Product: ASM105x
 [1.333006] usb 2-1: Manufacturer: ASMT
 [1.333028] usb 2-1: SerialNumber: 123456789B79F
 [1.335967] usb 2-1: UAS is blacklisted for this device, using usb-storage instead
 [1.336071] usb 2-1: UAS is blacklisted for this device, using usb-storage instead
 [1.336103] usb-storage 2-1:1.0: USB Mass Storage device detected
 [1.336479] usb-storage 2-1:1.0: Quirks match for vid 174c pid 55aa: c00000
 [1.336611] scsi host0: usb-storage 2-1:1.0
This time we can see in dmesg that UAS was blacklisted for the device and it has loaded with the usb-storage driver instead. This driver tends to be more compatible with the “problematic adapters” but the performance is usually significantly lower. It’s definitely worth a try though as some adapters do better with the quirks performance-wise. The only way to know for sure is to run a benchmark (see “Verify Drive Performance” section).
Other Resources
For the CM4 (Compute Module 4) check out Raspberry Pi Compute Module 4 and using real PCI-Express/NVMe on the Pi
To find out where to get the 64 bit Raspberry Pi OS beta check out my Where to get 64 bit Raspberry Pi OS article here
If you are looking for storage adapters or the best SSDs to use for Raspberry Pi my Best Storage Adapters / SSDs for the Pi 4 / 400 guide should be able to be of some assistance


The sabrent tool has been moved to here
Hello James!
Great website! Thanks for your work! 👍
In the Firmware for the ‘StarTech 2.5″ SATA to USB 3.1 Adapter’ (USB312SAT3CB) is *malware* detected!
File downloaded *today* 803/11/20249 from Stratech.com website: https://www.startech.com/en-us/hdd/usb312sat3cb
Look at this:
1. Virustotal-check of file ‘firmware.zip’
==> 2/63 security vendors and no sandboxes flagged this file as malicious
—
2. Virustotal-check of file ‘XY_135xFWUpg2030_150708B10103_V3.exe’ (unzipped from ‘firmware.zip’)
8/72 security vendors and no sandboxes flagged this file as malicious
—
I don’t dare to carry out this firmware update on my ‘StarTech 2.5″ SATA to USB 3.1 Adapter’!
Hey Peter,
That’s incredibly common for utilities involved in sensitive operations like updating firmware to be flagged by security software. We deal with it every day at my job.
2/63 is pretty low. Here’s what VirusTotal themselves has to say about it:
VirusTotal only aggregates data from a variety of vendors. We produce no verdicts of our own and as such, we can’t modify these results. We are not intended to be an authoritative reputation engine, but rather provide intelligence and context to users so that they can make the best decision. 1/60 and even 5/60 doesn’t automatically mean “Bad”, and 0/60 doesn't always mean good. Each decision on whether something is malicious ultimately the responsibility of users or the security vendors who use the data to improve their services.They themselves admit that 1/60 or even 5/60 doesn’t automatically mean bad. The decision is ultimately the responsibility of users and security vendors.
So let’s use some common sense here. Your links are to the official StarTech web site. I’ve personally sold through my affiliate code like 10,000 of these over the years. They’ve been around for a long time, are well established and make a TON of other gear. Does StarTech wants to infect their paying customer’s machine with some virus? Does it seem like a logical thing that StarTech would target their own users who have purchased their product to infect with malware? They’re a hardware manufacturing company. The second they infect their customers with a virus they’d be absolutely ruined and it would be all over the news.
Or does it make more sense that there’s a couple of really lazy security product vendors that are flagging a utility that is updating firmware as “suspicious/malicious”? This is what terrible AV products do. It’s super, super common. They’re a constant headache for administrators and I hate it when we have to work with clients that actually use those lower quality AVs that falsely flag everything in their production environment. It’s a constant headache.
I’ll give you an example. There’s a really common tool made by Sysinternals that has been around for decades. It’s called PSExec. It helps you run scripts against machines remotely or using alternative user credentials. You can also get a “root” terminal on Windows (as NT AUTHORITY/SYSTEM) using the utility. Sysinternals is a PART of Microsoft. The utilities are signed by Microsoft and are well known to be legit.
So what does VirusTotal think of the PSExec utility, a completely legitimate utility from Microsoft and Sysinternals? Go ahead and take a look if you want to see a scary one. And it’s not even a virus!
4/63 security vendors and no sandboxes flagged this file as malicious
LOL! Of course. Signed by Microsoft and known legit? Doesn’t matter to 4 of them. Some of them are even saying it’s a trojan (by some random AV I’ve never even heard of called Zillya):
Zillya - Trojan.Patched.Win32.186019I literally downloaded PSTools.zip from my Microsoft learn link above and uploaded it fresh for that report. Zillya thinks it’s a straight up trojan! So what is happening? Incompetence. The AV programs are detecting it’s an incredibly powerful utility and the security vendors are detecting that it has the capabilities to seriously damage your system. The *good* security products are smart enough to recognize it as a legitimate tool. Bad ones won’t be able to tell the difference.
And that’s exactly what is happening here. PSExec trips up bad AVs because it has very powerful code inside of it and those products aren’t smart enough to tell the difference. Similarly a firmware update utility is accessing system APIs and functions that are very sensitive because it’s literally updating the code running on a HARDWARE device for you. That’s a very low level operation. Lazy AV companies will detect and flag it often without investigating further or if there are legitimate reasons to be doing so.
My suggestion to you would be to follow VirusTotal’s own advice they tried to give you. Don’t get so worked up about 2/60 or even 5/60 detections. That literally does not mean it’s malicious and that is coming from VirusTotal themselves. Security vendors have false positives all the time. That’s why it’s called VirusTOTAL. You aren’t looking for 2 detections. You’re looking for a lot more before you even get concerned.
You could upload *any* firmware utility and you’ll get a few false positives like this. It’s because the security product is detecting it has code to change your firmware. Go ahead and try downloading some other firmware update utilities and running them through there. They’ll all pull a few false positives because they are running low-level code that if used improperly could damage or overwrite your firmware. Just that fact alone will cause some security products to trigger.
VirusTotal wants these vendors (and yourself) to report and fix these:
Below are the steps to take if you want to fix a false positive report.If the false positive is for a File or a URL try re-scanning first.
If the false positive persists please reach out to the vendor that is producing it providing a link to the VirusTotal report. List of vendor contacts can be found at the table below.
If you do reach out to us, we will tell you to reach out to the vendors, as we will not be able to modify any results of scans.
We cache some URL results. If vendors have confirmed removal but a URL is still detecting, please reach out to us along with evidence that the vendor has removed your URL from the blacklist, as we may be able to speed up propagation.
Sorry for such a long post but I wanted to not only explain why not only do I think that this is improper usage of VirusTotal, but that VirusTotal themselves are also telling you that you are using VirusTotal incorrectly. This is an obvious false positive. No, StarTech is not trying to put viruses on your computer. It’s just terrible AV products detecting that the code can update firmware on a device and saying “DURRR THAT’S DANGEROUS CODE, VIRUS!”.
Does this mean that you should never update firmware on any of your devices ever again because a couple of the bottom-of-the-barrel AV companies that probably don’t even review false positive reports flag them? No. Please do not do that. False positives are a constant battle with these products and that is nothing new. When you use a product like VirusTotal without understanding that this is what happens. Don’t be misled. Read their own warnings.
The appropriate way to interpret these results are that 60 / 62 security vendors said this file was CLEAN *despite* the fact that it updates firmware (something we would very much expect to trigger false positives). From my perspective that is actually remarkably *low*. My guess is that a lot more vendors probably detected it as a virus initially but that all of the responsible AV companies have removed this from their list as a virus. The 2 left are probably, again, ones that don’t review false positive reports or don’t care.
96.82% of the world’s major security vendors just told you that file was clean. I’m surprised from my perspective that you’re listening to the 2 outliers and believing them and not once did it cross your mind that those are the incompetent ones. That’s exactly what I see. I see 2 companies that I know don’t keep up on their AV definitions and false positives and I would not use those 2 products because I’ve now seen with my own two eyes that those two are the only ones that got it wrong.
As for why when you try to upload the deeper files to VirusTotal you get more matches it’s quite simple. Most people will just upload the base file. Then some percentage of those people will report them as false positives to the vendor. Then those get fixed. Far less people are going to extract the files and then start uploading *those* files to VirusTotal. That’s why you got more matches. Fewer people have reported those files as clean and fixed them. It’s just a numbers game.
Of the 100% of people who uploaded the download to VirusTotal how many people do you think unzipped it and uploaded the files inside? We can guess from you getting 8 results from the inner files vs 2 from the outer file that it’s a very small percentage of people. It’s simply a result of less people testing and then less people reporting them as false positives. If you scan the file 6 months from now you’ll get less matches because some of those will have been fixed. I doubt it will ever go to 0 though because like I said, the AV companies vary widely in their quality and how they handle false positives. Some of them will never fix them.
Hopefully that helps!
So I ran into issues with the USB312SAT3CB cable from startech. When using this cable my raspberry pi started rebooting when lots of data was being written. I could never really find why and never really found a clear error message. I did however think I found a solution. I found that the raspberry pi also can update the Raspberry Pi OS kernel and VideoCore firmware using the
sudo rpi-update. I’m only a few days in but I haven’t had any issues. If anybody runs into this issue try it out and let me know if it fixes the problem for you.Hey TechSpartan,
Excellent comment and tip! Yes, I have heard of the Raspberry Pi firmware updates fixing these types of issues before. I think it’s worth it for others having issues as well!
Lots of data being written = maximum power draw peak (correct me if I am wrong, James). This is where devices which are under-powered will show the issues – NOT in idle or light use. I stress-test ALL my PCs and gear for this reason, to weed-out faults and especially ones that are more subtle, like power component related or heat (poor cooling design) related. I also use f3 to test my flash media rather than blindly trust it is safe to write to. Did you not read the bit about using a POWERED USB HUB, above? The power design of the Pi is a bit weird, I cannot even remember if it passes-through ALL the current that a high-amperage USB PSU feeds it, or if there is a 3A limit (~15W) or what? So a powered hub is a workaround for shit USB 3.0 under-spec ports (should be 900mA EACH MINIMUM, right? Meaning 1.8A BEFORE the other power needs of the system, plus 500mA per USB 2.0 port on a Pi4 = 2.8A PLUS the SoC power draw (~2.5A IIRC). I hate USB, what should have been a set of standards with some flexibility in design for tiny appliances etc – became a f—— nightmare of praying a given combination of pretty standard kit would work together. Then there is BadUSB which is another nightmare for security. The sods who run the USB Consortium or whatever it is called, in charge of this mess – have had 25 YEARS (25 MONTHS would have been reasonable) to plug this huge security hole. Yet they left it WIDE open (even on Apple Mac hardware at premium prices). That is Microsoft, Intel, HP and the like. Not under-funded entities, are they?
That tells you all you need to know about how much you and me matter in this equation.
Conclusion: NEVER EVER TRUST HARDWARE TO PERFORM UNTIL PROVEN.
Hello Longshanx,
Yes, that is true. Here’s a source:
2.5-Inch SATA SSDs: These SSDs consume between 0.25-2 watts when idle, 4-8 watts when reading data, and 5-8 watts when writing data.mSATA SSDs: These devices have a power consumption range of 0.21-1.20 watts when idle, 2-5 watts when reading data, and 5-8 watts when writing.
M.2 SATA SSDs: These SSDs consume between 0.30-2 watts in idle mode, 2-6 watts when reading, and 3-9 watts when writing data.
M.2 PCI-Express NVMe SSDs: These devices consume around 0.50-3 watts when idle, and 2-8 watts and 3-10 watts when reading and writing, respectively.
You can see here that writing data always consumes the most power. Reading data really intensively can get close though averaging 1-2 watts less on most drive types than intense writing.
You’re right to call out Apple here as well. Their M1/M2/M3 chips just were found to have an unpatchable hardware-based vulnerability. After the news broke Apple is now running a huge sale (i.e. eroding the premium prices). They’re now selling at record low prices.
At any rate I totally agree, take care!
UGREEN USB 3.0 to SATA Adapter, 2.5 Hard Drive Reader. Worked on USB 2 but not USB 3. Quirks made no difference.
UGREEN SATA to USB C Adapter Cable. Worked on USB 2 and USB3, no quirks required. USB 3 read write tests were not fast. 33MB/s for both. Benchmark score 2603.
SABRENT SATA to USB C 3.2X2, SSD HDD Hard Drive Adapter. Worked on USB 2 and USB3, no quirks required. USB read & write speeds c.330MB/s. Benchmark score 8818.
Excellent, thanks for the report James!
After buying three of these for my RPI4s:
USB 3.1 to 2.5″ SATA Hard Drive Adapter – USB 3.1 Gen 2 10Gbps with UASP External HDD/SSD Storage Converter
They seem to work ok, however the drive becomes randomly disconnected from the OS. lsusb -t yields a Startech device. I attempted to apply the firmware on Startech’s website however, it says “Incorrect configuration”. Seems that when I revert back to USB2.0 all is stable.
Hey Curtis,
They sound fake to be honest with you. The download page for the USB312SAT3CB firmware is located here. You shouldn’t need it though. The stock firmware works just fine on this adapter.
I would look very closely at your tag and make sure it says USB312SAT3CB. Everyone who has had this issue actually ended up buying the USB3S2SAT3CB (the cheap one that sucks). There are no firmware updates available for that adapter and it’s known to have issues.
It’s also possible you have a fake. StarTech gear is widely faked. Did you get it from Amazon? If it’s from AliExpress it’s definitely fake and lots of people have got fake ones from AliExpress and had the same issues. The firmware tool not identifying your adapter is a pretty big red flag. If it was $10-15 it’s not the right one. The real one is $18 on Amazon and $21 directly from StarTech. If you paid less than that then I guarantee it’s not real.
Hopefully that helps!
Hi James, this is the exact one I bought.
It does have the proper tag on it as you list above so I am not sure why it is having issues. So far when I plugged them into USB2.0 ports they have been stable (at the lower speed). Of the list of known working adapters would would be a recommended second choice?
Curtis
Hey Curtis,
Do you have any other drives to try with it? I almost wonder if it’s a firmware issue with the drive. There are sometimes firmware updates available that can take care of issues like this.
Hopefully that helps!