
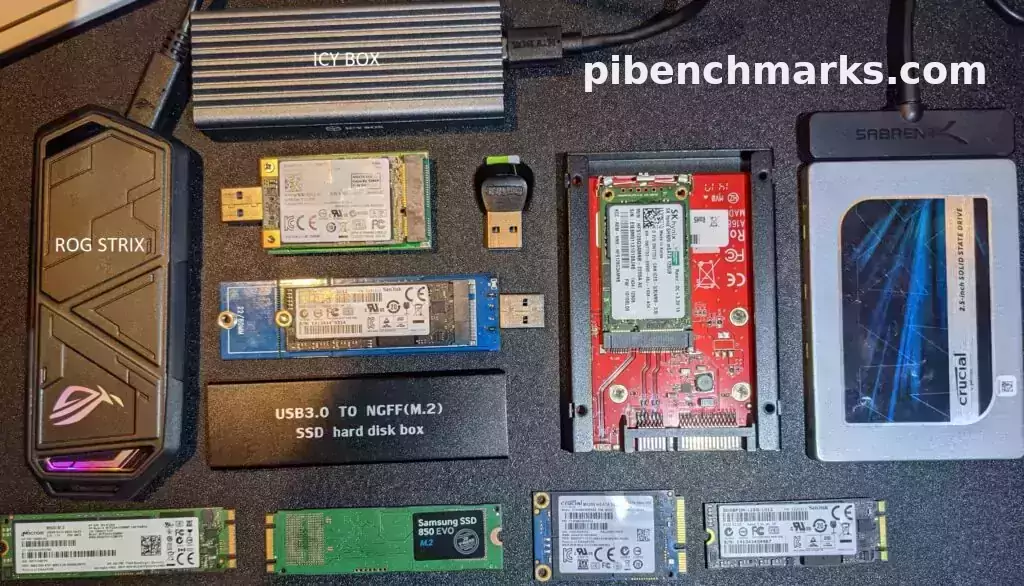
To this day it can still be treacherous to buy a storage adapter for your Raspberry Pi 4. There are many that will not work properly and perform very poorly.
I’ve covered which adapters work and don’t work in my Native USB Booting Guide as well as my old “workaround” SD + SSD method guide and over the years people have submitted hundreds of comments about which adapters do and don’t work.
From everything we’ve learned together in the comments and adapters I personally own/use I wanted to compile this information into a new “Best Storage Adapters for Raspberry Pi 4” list. Let’s get started!
How to choose a Pi SSD storage solution
There are a few different considerations and tradeoffs you need to weigh when you’re choosing a storage adapter/enclosure as well as the drive itself. The main considerations are:
- Specific project requirements
- Power
- Performance
- Budget
The easiest place to start is with your specific project requirements. Is this Pi going to be somewhere where you are okay with having an extra adapter/enclosure and SSD laying around? If you’re going to be using the Pi in something like a drone/vehicle then you may want to go with a USB thumbdrive style ultracompact SSD that plugs directly into a USB port and has no wires or adapters/enclosures. There are also lots of cases available specifically for the Pi that add an additional storage slot (such as M.2 SATA, the older m-SATA style, etc.) to the Pi that may work better with a tightly integrated build.
How much power is going to be available? Is your Pi going to be running off a battery where you want to use as little energy as possible? Do you have AC outlets around? Are you willing to add a powered USB hub to your setup? If your Pi is going to be sitting in a corner in the basement / a closet / some place like that then you can plan to have a powered USB hub and plentiful reliable power around. The lowest power options are going to be 2.5″ SATA drives WITHOUT an enclosure (using just an adapter instead with the drive laying in the open). I have never over years of usage used a powered USB hub with a 2.5″ SATA adapter but many enclosures won’t even boot without one.
What level of performance do you require? If your Pi is going to be running a server or hosting a database then you need a drive that has high random I/O performance as well as large throughput. Performance has a cost though both in power and budget. The highest performance NVMe drives are the most expensive and the NVMe enclosures are the most power hungry class of storage adapters and almost universally require a powered USB hub to be integrated into your setup but we’ll cover this more later in the “Power Requirements” section.
And finally what type of budget do you have? If you are looking to save money you may be wanting to reuse an old SSD or get one used for very cheap. NVMe is the most expensive and 2.5″ SATA / mSATA SSDs are the cheaper options. Places like eBay can be a great source of very cheap drives as well.
The bottom line is choose the type of solution that meets your project’s needs and your budget!
Top Performing Drives
M.2 NVME
This is the top performing (and most expensive) drive class! They require more power than other types of drives and the NVMe enclosures often bump the requirements up to potentially requiring a powered USB hub to boot (especially with an enclosure). See the “Power Requirements” section below for more information.
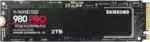
The Samsung 980 Pro (NVMe) is a professional grade SSD and one of the fastest in the world. The Samsung NVMe drives have been at the top of this category for a long time and are well trusted for both their performance and reliability / long life.
Links: AliExpress*, Amazon.com*, Amazon.ca*, Amazon.com.au*, Amazon.co.jp*, Amazon.co.uk*, Amazon.de*, Amazon.es*, Amazon.fr*, Amazon.it*, Amazon.nl*, Amazon.pl*, Amazon.se*, Amazon.sg*
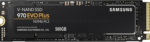
The Samsung 970 EVO Plus is a fantastic drive and has fallen in price substantially. It’s widely available around the world. The smaller capacities (such as the 250GB version) of this drive are perfect for the Pi! This is the top performance option without going into the “Pro” series of the lineup which are much more expensive.
Links: AliExpress*, Amazon.com*, Amazon.ca*, Amazon.com.au*, Amazon.co.jp*, Amazon.co.uk*, Amazon.de*, Amazon.es*, Amazon.fr*, Amazon.it*, Amazon.nl*, Amazon.pl*, Amazon.se*, Amazon.sg*

The KingSpec 3D NAND M.2 NVMe drive is another very affordable choice that is widely available. It performs well and works great with the Pi!
Links: AliExpress*, Amazon.com*, Amazon.ca*, Amazon.com.au*, Amazon.co.uk*, Amazon.de*, Amazon.es*, Amazon.nl*, Amazon.pl*, Amazon.se*, Amazon.sg*
M.2 SATA
M.2 SATA does not have the transfer rates that M.2 NVMe does but they are quite a bit cheaper and still a fantastic choice for the Pi.
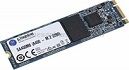
The Kingston A400M is a cheap and reliable M.2 SATA SSD that has over 170 benchmarks on pibenchmarks.com. It’s extremely cheap and may even be cheaper than the recommended 2.5″ SATA drives in some countries!
Links: AliExpress*, Amazon.com*, Amazon.ca*, Amazon.com.au*, Amazon.co.jp*, Amazon.co.uk*, Amazon.de*, Amazon.es*, Amazon.fr*, Amazon.it*, Amazon.nl*, Amazon.pl*, Amazon.se*, Amazon.sg*
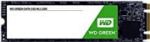
The Western Digital Green M.2 SATA drive is the #26th most popular storage device overall on pibenchmarks.com so it definitely works well and is very affordable. This is another great budget option that can often come in at a lower cost (depending on availability, country and other market factors) than 2.5″ SATA SSDs often do while having a much lower profile!
Links: AliExpress*, Amazon.com*, Amazon.ca*, Amazon.com.*a*u*, Amazon.co.jp*, Amazon.co.uk*, Amazon.de*, Amazon.es*, Amazon.fr*, Amazon.it*, Amazon.nl*, Amazon.pl*, Amazon.se*, Amazon.sg*
2.5″ SATA
2.5″ SATA drives are limited by the transfer speed of the SATA interface like the M.2 SATA drives. On the Raspberry Pi this is not as important as on desktop. This is usually the cheapest option and performance is still fantastic!

The Kingston A400 has been a great drive to use with the Pi for years. It’s reliable, widely available around the world, has low power requirements and performs very well. It’s also very affordable. This drive has been benchmarked over 1000 times at pibenchmarks.com and is the #1 most popular SSD among the Pi community!
Links: AliExpress*, Amazon.com*, Amazon.ca*, Amazon.com.au*, Amazon.co.jp*, Amazon.co.uk*, Amazon.de*, Amazon.es*, Amazon.fr*, Amazon.it*, Amazon.nl*, Amazon.pl*, Amazon.se*, Amazon.sg*

The Crucial BX500 is another great choice for a drive to use with the Pi. It’s the 2nd most popular SSD benchmarked with over 840 benchmarks submitted. Low power requirements and widely available!
Links: Amazon.com*, Amazon.ca*, Amazon.com.au*, Amazon.co.jp*, Amazon.co.uk*, Amazon.de*, Amazon.es*, Amazon.fr*, Amazon.nl*, Amazon.pl*, Amazon.se*, Amazon.sg*
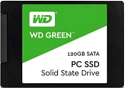
The Western Digital Green 2.5″ SATA SSD is another option to investigate. Depending on your country and other market factors this may come in as the best deal. It’s a solid performer and commonly shows up on the storage benchmark.
Links: AliExpress*, Amazon.com*, Amazon.ca*, Amazon.com.au*, Amazon.co.jp*, Amazon.co.uk*, Amazon.de*, Amazon.es*, Amazon.fr*, Amazon.it*, Amazon.nl*, Amazon.pl*, Amazon.se*, Amazon.sg*

The XrayDisk SSD is popular worldwide and available relatively inexpensively from AliExpress
Links: AliExpress*
Portable
Portable SSDs are ones that are designed to be used through USB and aren’t meant to be installed internally. The nice thing about these is they do not require a storage adapter. They are also extremely fast. The ones recommended here will beat 2.5″ SATA drives on the performance benchmarks since internally they are usually M.2 SSDs inside a fancy outer shell. They’re usually more expensive than internal drives but not quite as expensive as the top performing internal NVMe drives. Tends to be cleaner than a adapter/enclosure setup but not as clean as the ultracompact setup.
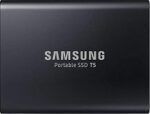
The Samsung T5 Portable is one of the most popular USB SSDs for the Raspberry Pi with over 350 unique benchmarks. It’s also one of the fastest with an average score of over 8300 points! No storage adapter required for this one, it is a USB based drive and will plug right in.
Links: AliExpress*, Amazon.com*, Amazon.ca*, Amazon.com.au*, Amazon.co.jp*, Amazon.co.uk*, Amazon.de*, Amazon.es*, Amazon.fr*, Amazon.it*, Amazon.nl*, Amazon.pl*, Amazon.se*, Amazon.sg*
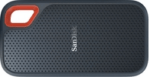
The SanDisk Extreme Portable is a very small portable SSD that can easily be put on a keychain or a loop with the built in notch. It’s also very fast with an average score of over 8,000. The drive has been tested over 147 times making it one of the more popular ones to use with the Raspberry Pi.
Links: AliExpress*, Amazon.com*, Amazon.ca*, Amazon.com.au*, Amazon.co.jp*, Amazon.co.uk*, Amazon.de*, Amazon.es*, Amazon.fr*, Amazon.it*, Amazon.nl*, Amazon.pl*, Amazon.se*, Amazon.sg*
Ultra Compact
The cleanest possible setup option. The drive will only plug into your USB port and stay there taking up no extra footprint and adding no extra cables. These recommendations are both actually faster than 2.5″ SATA drives (internally they are M.2 NVMe drives and they perform at that level). You pay a premium for this option vs. something like a 2.5″ SATA setup but lower capacities are much more affordable.

The Orico GV100 is a portable NVMe usb-stick style drive. It’s extremely fast due to actually being a true NVMe drive in a very compact form. This is an excellent choice if you are building a setup that has very limited space or having a dangling adapter/enclosure would be problematic.
Links: AliExpress*, Amazon.ca*, Amazon.com*, Amazon.com.au*, Amazon.co.jp*, Amazon.co.uk*, Amazon.de*, Amazon.fr*, Amazon.it*, Amazon.nl*, Amazon.se*, Amazon.sg*
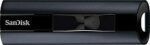
The SanDisk Extreme Pro USB SSD is a true solid state drive. This is different than a typical “flash drive” which uses extremely cheap memory and has very low random I/O performance/throughput compared to a real solid state drive. I’ve used both the USB 3.1 and USB 3.2 variants with the Pi successfully and they benchmark very well!
Links: AliExpress*, Amazon.com*, Amazon.ca*, Amazon.com.au*, Amazon.co.jp*, Amazon.co.uk*, Amazon.de*, Amazon.es*, Amazon.fr*, Amazon.it*, Amazon.nl*, Amazon.pl*, Amazon.se*, Amazon.sg*
Recommended Adapters / Enclosures
M.2 NVMe

The ICY BOX is basically a giant heatsink that you mount a high performance M.2 NVMe drive inside of. This enclosure is really fast but requires a powered USB hub. Not even the 3.5A adapter can reliably power it! The enclosure works well and will physically feel warm to the touch as it is pulling the heat off your NVMe drive!
Links: Amazon.com*, Amazon.ca*, Amazon.com.au*, Amazon.co.uk*, Amazon.de*, Amazon.es*, Amazon.fr*, Amazon.it*, Amazon.nl*, Amazon.pl*, Amazon.se*, Amazon.sg*
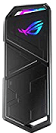
If you really want to take things over the top the ASUS Rog Strix M.2 NVMe enclosure uses the latest USB 3.2 Gen2 specification, is RGB capable and works with the Pi! Unsurprisingly, adding the extra lighting does take extra power! A powered USB hub is also required for this enclosure. More widely available than the ICY BOX but tends to be on the expensive side.
Links: Amazon.com*, AliExpress*, Amazon.ca*, Amazon.com.au*, Amazon.co.jp*, Amazon.co.uk*, Amazon.de*, Amazon.es*, Amazon.fr*, Amazon.it*, Amazon.nl*, Amazon.pl*, Amazon.se*, Amazon.sg*
M.2 SATA
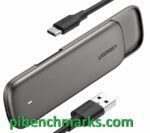
The UGREEN M+B enclosure is a great enclosure for the Pi for M.2 SATA 2280 NGFF drives. It supports both B-key and M-key drives. Does not support newer NVMe drives. As with other types of enclosures it requires more power than other options!
Links: AliExpress*, Amazon.com*, Amazon.ca*, Amazon.com.au*, Amazon.co.jp*, Amazon.co.uk*, Amazon.de*, Amazon.es*, Amazon.fr*, Amazon.it*, Amazon.nl*, Amazon.pl*, Amazon.se*, Amazon.sg*

The Argon ONE M.2 is a M.2 SATA Pi 4 case / storage solution. With the case and M.2 SATA expansion board you can completely enclosure your Pi 4 and have a built in M.2 slot! The M.2 SATA board is sometimes sold separately from the case itself and can be used as well. Does not support NVMe, this is for SATA M.2 drives only!
Links: Amazon.com*, AliExpress*, Amazon.ca*, Amazon.com.au*, Amazon.co.jp*, Amazon.co.uk*, Amazon.de*, Amazon.es*, Amazon.fr*, Amazon.it*, Amazon.nl*, Amazon.pl*, Amazon.se*, Amazon.sg*
2.5″ SATA
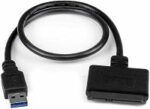
The USB 3.1 variant of the StarTech 2.5″ SATA adapter works well with the Pi 4. The USB 3.0 variant doesn’t have firmware updates available and is not recommended.
Links: Amazon.com*, Amazon.ca*, Amazon.com.au*, Amazon.co.jp*, Amazon.co.uk*, Amazon.de*, Amazon.es*, Amazon.fr*, Amazon.it*, Amazon.nl*, Amazon.pl*, Amazon.se*, Amazon.sg*
m-SATA
mSATA adapters are getting less common but they are still incredibly useful. Lots of old laptops that came with SSDs have this older style from before the M.2 style slot existed and took over. Often these drives are still very fast and are available for very cheap since they use an obsolete connector that no longer comes on new motherboards. The VL716 isn’t a brand but is instead the name of the chipset that lots of these adapters use. This chipset works great with the Pi!
The VL716 mSATA enclosure lets you connect micro SATA drives to the Pi. These drives are an older type of SSD (usually seen in laptops) predating the M.2 slot but are still widely available and perform extremely well!
Links: AliExpress*, Amazon.com*, Amazon.ca*, Amazon.com.au*, Amazon.co.jp*, Amazon.co.uk*, Amazon.de*, Amazon.es*, Amazon.fr*, Amazon.it*, Amazon.nl*, Amazon.se*, Amazon.sg*
Power Requirements
Most types of adapters can be powered by the Pi itself. One notable exception is NVMe enclosures. Throughout the years we have had hundreds of comments from people who had no trouble powering 2.5″ SATA enclosures but couldn’t get a NVMe one to work at all without a powered USB hub.
Very large older 3.5″ SATA drives are known to require more power than the Pi can provide as well as some types of very high performance models that were designed to burn more power to get extra performance gains.
For solid state storage older models of solid state drives (SSDs) are also known to draw more power than their newer counterparts. If you have a drive that you think may fall into this category then definitely be on the lookout for power related issues and extra cautious about your power setup. High end “extreme” performance models also tend to draw more power (Samsung 970 NVMe drives* are some of the fastest in the world but also pretty power hungry for the Pi).
Insufficient Power Symptoms
Symptoms of a lack of power to the drive can include the system only booting sometimes (or not at all) or working for a while and then locking up. Just because the drive boots does not mean it is getting enough power. Some commenters on previous articles have described this as working fine until there was a sudden spike in CPU usage while they tried to do several things at once (high CPU, accessing storage, activating various hardware all at once) and then they would get a lockup/crash.
This is because the Pi is teetering on the edge of not having enough power and that spike caused it to drop enough where the drive actually lost power (likely only for tiny fractions of a second). This is enough instability to easily cause a crash and worse if it happened to be in the middle of writing something important! Usually nothing will happen other than you’ll have to restart the Pi but because of the risk of data loss and eventually corrupting files. That being said, if you’re particularly unlucky you will have to fsck the drive or potentially even reimage it if fsck is unable to repair the damage!
The best answer is to test for stability. Do this by stressing out the Pi and make sure you are doing activities that stress the CPU and storage at the same time like browsing the web, etc. and if you can do that for a few hours/days without a lockup/crash then you have a stable power setup!
Powered USB Hub Solution
For NVMe enclosures and power hungry drives I personally use this Sabrent powered USB hub and have been recommending it here on the blog for a long time:
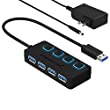
The Sabrent powered USB hub delivers a whopping 2.5A of dedicated power for your USB attached devices. This is almost as much as the Pi adapter itself is rated for (3.0A). It will easily power the most thirsty of setups such as NVMe enclosures.
Links: Amazon.com*, Amazon.ca*, Amazon.com.au*, Amazon.co.uk*, Amazon.es*, Amazon.it*, Amazon.nl*, Amazon.pl*, Amazon.se*
Note: Make sure Amazon doesn’t try to take you to the non-powered version and that it’s the one with the AC adapter that plugs in to provide extra power
If this hub isn’t an option for you and you don’t have one already you can try with it then look in the reviews for people saying that it is working with Raspberry Pi. Some powered USB hubs will not play nice with the Pi so before buying one definitely check reviews and do some careful research about what to expect with the Raspberry Pi!
Oversized Power Adapter Solution
This solution will work for setups that are right on the border of having enough and not having enough power. An example would be if you can get a stable boot but are getting occasional lockups/freezes when the power dips just below the threshold it needs.
If you are using a powerful NVMe drive/enclosure combo like the ICY BOX with a high performance Samsung NVMe drive even with the extra 500 mA it will still not even boot. I have had these oversized adapters and they are great but for a very powerful drive/adapter combination you are going to need more than 500 mA.
It’s a lot less extra wires and one less AC plug though if you are right on the border and just need a little bit more. It will depend on your individual drive/adapter combo whether it’s enough or you will have to go full powered USB hub!
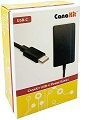
The CanaKit 3.5A adapter has an extra half an amp (500 mA) of capacity to give some breathing room to your accessories. This is bigger than the official Pi power supply which provides 3.0A.
Links: Amazon.com*, Amazon.ca*, Amazon.com.au*, Amazon.sg*
Look for a USB-C power supply rated to supply around 3.5A. 3.0A or lower won’t do much good as that is almost certainly what you already are using. You can use a higher one (at your own risk). The largest one I’ve ever used is my Dell laptop’s 30W USB-C power adapter. It’s probably not a good idea to go too much bigger than this or to even use one this big over the long term (I didn’t, just for occasional testing and as a emergency backup) but USB-C does have some specification improvements related to power management that seem to provide some flexibility here.
Power Limits
The Pi can only pass through a limited amount of extra power. On the Pi 4 this is up to 1.2A of extra power for peripherals (combined) on top of the board’s 3.0A power rating. This is much more than the Pi 2 and some other previous models could do which was only around 0.5A. This also means that getting a power adapter bigger than about 4.2A of rated current is pointless because the Pi won’t allow any more power to flow through to the board to the peripherals through USB anyway even if it’s available.
I’m oversimplifying a little bit to illustrate the point but if you want the full technical details they are available here in the Raspberry Pi USB documentation. The important takeaway is that going much above 3.5-4.0A or so will not actually provide any more power to the Pi because of these limits. If you’ve hit this ceiling and it still isn’t enough you need to go powered USB hub.
I’ve also used ones that charge cell phones to power Pis before and these ones are the most likely to fall into a range close to what the Pi uses. Most of the ones I had around the house for phones were 2.5A (just barely not enough) or 3.0A so it was enough for a backup spare but not enough to provide extra power. Nevertheless, it’s definitely worth it to check what you already have around and see if there are USB-C chargers around to test with!
Note that a powered USB hub essentially bypasses these limits because the power for your peripherals such as your USB storage will come from the AC adapter connection to the powered USB hub instead of the Pi having to provide that power.
Powered USB Hub Troubleshooting
Most hubs including the Sabrent one above can feed back power into the Pi which can cause it to not boot when the power is connected. The reason for this is that the Pi is detecting power and is trying to power on using that source but the current provided isn’t enough for the Pi to actually boot.
The solution to this is to remove the USB hub’s connection from your Pi momentarily and then connect the power. Plug your USB hub back in quickly after reconnecting the Pi’s power (if you have native USB booting set up) and unless you really fumble with reconnecting it you will have it plugged in well before it tries to boot from the SSD!
If this trick doesn’t work then unfortunately you may have a powered USB hub that is not going to work with the Pi. It’s worth checking to see if there are any firmware updates available for your USB hub before you give up on it as some readers have let me know in the comments of previous articles that they were able to get some hubs working after a firmware upgrade!
Full Storage Adapters Compatibility List
These lists are compiled from my two USB booting posts here and here.
Known Working Adapters
This is a compiled list of known working adapters built by myself from adapters I’ve purchased and commenters from ones they have purchased in this article and my newer guide that utilizes the new Raspberry Pi 4’s native bootloader for USB booting.
| StarTech 2.5″ SATA to USB 3.1 Adapter* | 2.5″ SATA to USB 3.1 | Verified working in comments (thanks Fredrick) |
| StarTech 2.5″ SATA to USB 3.0 Adapter* | 2.5″ SATA to USB 3.0 | Verified working great by myself and others on Pi 4 |
| Inateck FE2004 2.5″ SATA to USB 3.0 Hard Drive Enclosure* | 2.5″ SATA to USB 3.0 | Mirco reports that this enclosure is working but trim is not supported |
| Samsung 2.5″ SATA to USB 850 EVO Kit /w Adapter* (Alternate amazon.de link*) | 2.5″ SATA to USB 3.0 Kit | This is a kit that comes with a drive and adapter. Rene confirms the adapter works including with non-Samsung drives. |
| CSL 2.5″ SATA to USB 3.0 Adapter* | 2.5″ SATA to USB 3.0 | The CSL SL adapter is confirmed to be working by Krikitt in the comments. Available in Europe. Not available in US. |
| UGREEN 2.5″ SATA to USB-C 3.1 Enclosure Drive Caddy* | 2.5″ SATA to USB-C 3.1 | Confirmed to be working by CAProjects in the comments. Available in both Europe and US |
| UGREEN 2.5″ SATA to USB-C 3.1 “Protect What You Love” Case* (AliExpress Listing* – Make sure to select USB-C 3.1) | 2.5″ SATA to USB-C 3.1 | Reported working by Michal in the comments, thanks! |
| UGREEN 2.5″ to USB 3.0 “SATA USB Converter” Adapter* (AliExpress Listing*) | 2.5″ SATA to USB 3.0 | Also reported by Michal as working in the comments, thanks again! |
| UGREEN 2.5″ SATA to USB 3.0 Adapter Cable with UASP Converter* | 2.5″ SATA to USB 3.0 | This adapter is reported to be working by Mirco in the comments |
| SABRENT 2.5″ SATA to USB-C 3.1 Type A Adapter* | 2.5″ SATA to USB-C 3.1 Type A | The new USB-C 3.1 Type A version of the Sabrent adapter is reported as working in the comments by UEF. DO NOT get the USB 3.0 version as that one is below on the naughty list and won’t work! |
| SABRENT 2.5″ SATA to USB 3.0 Dual Bay Docking Station* | 2.5″ SATA to USB 3.0 | One of very few Sabrent adapters/enclosures to work. Reported working well by William Grey in the comments. Has two bays! |
| AliExpress Generic 2.5″ SATA to USB 3.0 3 colors Hard Disk Case* | 2.5″ SATA to USB 3.0 | Reported as working with UASP support by pierro78 in the comments |
| Orico 2.5″ 2139C3-G2 2.5 inch USB 3.1 Gen 2 10Gbps Transparent Enclosure* | 2.5″ SATA to USB 3.1 Gen 2 10Gbps | Make absolutely sure it’s the 10Gbps USB 3.1 Gen 2 version. There is another one that looks identical that is a USB 3.1 Gen 2 6Gbps that will not work. Confirmed working by RRT in the comments. |
| ASUS ROG STRIX Arion Aluminum Alloy M.2 NVMe SSD External Portable Enclosure Case Adapter* – (AliExpress Listing*) | M.2 NVMe (B+M Key) to USB/USB-C 3.2 Gen 2 | It’s bold. It’s beautiful. It’s also confirmed working by TADRACKET and Steve B. However, be warned, it takes a *lot* of power! Steve B. reports that even with the oversized 3.5A CanaKit adapter* it does not work. If you have the standard 3.0 adapter you can be practically certain it won’t power this enclosure. Does work with a powered USB hub*. |
| ICY BOX M.2 NVMe (M Key) to USB-C 3.1 Gen 2 Enclosure* (Alternate amazon.de listing*) | M.2 NVMe (B+M Key) to USB-C 3.1 Gen 2 | Returning legendary commentary Frank Meyer reports: Does not work with a 3.0A power adapter (also reported by TTE). It’s not enough power for this enclosure. Does work with a powered USB hub*. |
| TDBT M.2 NVMe (B+M Key) to USB-C 3.1 Gen 2 Enclosure* | M.2 NVMe (B+M Key) to USB-C 3.1 Gen 2 | Confirmed to be working well by WorkHard in the comments |
| AliExpress Generic M.2 NVMe (B+M Key) to USB 3.1 “M2 SSD Case NVME Enclosure”* | M.2 NVMe (B+M Key) to USB 3.1 Type A | Confirmed working by Jens Haase, thanks Jen! |
| SSK Aluminum M.2 NVMe (M Key) to USB 3.1 Gen 2 SSD Enclosure* | M.2 NVMe (M Key) to USB 3.1 Gen 2 | Brian L reports this is working well with beta firmware upgrades, but that it did not work at all without them! |
| ORICO M.2 NVMe SSD Enclosure, USB 3.1 Gen 2 (10 Gbps)* (AliExpress Listing*) | M.2 NVME to USB 3.1 Gen 2 | M.Yusuf has given the first ever report of a working Orico adapter! Make sure it’s the USB 3.1 Gen 2 version that says “Support UASP for NVMe SSD”. This is the way. |
| DELOCK 42570 M.2 SATA (B Key) to USB Micro-B 3.1 Gen 2 SSD Enclosure* | M.2 SATA (B Key) to USB Micro-B 3.1 Gen 2 | Andreas Franek reports that the enclosure works with a 3.0A power adapter (gets a little warm) |
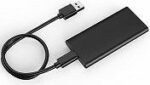
| Shinestar M.2 NVMe (M Key) to USB 3.0 Adapter* | M.2 NVMe (M Key) to USB 3.0 | This is the adapter I’m using in the picture at the top of the article. It is for NVMe M.2 drives only and is getting hard to find |
| UGREEN M.2 NVMe (B+M Key to USB-C 3.1 Gen 2 SSD Enclosure* | M.2 NVMe (B+M Key) to USB-C 3.1 Gen 2 | Confirmed working in comments by Chad D |
| UGREEN M.2 SATA (B+M Key) to USB 3.1 Enclosure* | M.2 SATA (B+M Key) to USB 3.1 Enclosure | Reported as working well in the comments by John H. Reinhardt with a ASM1051E chipset |
| QNINE M.2 SATA (B Key) to USB 3.0 Enclosure* | M.2 SATA (B Key) to USB 3.0 | I used this enclosure to benchmark M.2 SATA Lite-On and SanDisk drives — working great in 3.0 ports |
| Argon One M.2 SATA (B+M Key) Pi 4 Case* | M.2 SATA (B+M Key) Pi 4 Case | This case gives you a M.2 SATA port for your Raspberry Pi and is also a case! Confirmed working by Frank. |
| Tanbin mSATA to USB Adapter* | mSATA to USB 3.0 | I used this mSATA to USB adapter for my Crucial M550 benchmark — working in 3.0 ports |
| Generic mSATA to USB 3.0 Adapter (fe2008)* | mSATA to USB 3.1 | Confirmed working in comments by Nico |
| Canakit Raspberry Pi 4 Power Supply (USB-C)* | 3.5A USB-C Power Supply | Canakit has been making very reliable power supplies for several Pi generations now. Using a 3.5A power supply will give enough extra power for your Pi to power the drive without causing instability |
| Simplecom SE502 M.2 SSD Adapter* | M.2 SATA (B Key) to USB 3.0 | Quirks required, reported working by alan but only with quirks |
| Delock #61883 SATA to USB 3.0 Converter* | 2.5″ SATA to USB 3.0 | Reported working well by Joerg_H |
| Vantec SATA/IDE TO USB 3.0 Adapter* | 2.5″ SATA to USB 3.0 | Reported as working by JeffG but with an ugly messy appearance |
Known Problematic Adapters (Naughty List)
Here is a list of common USB adapters that are known to have problems with the Raspberry Pi 4. You can get some of these adapters working by using quirks mode (see the “Fix (some) USB Adapter Problems Using Quirks” section below).
| FIDECO M207CPS USB3.2 to M2 NVME/SATA SSD Enclosure* | M.2 NVME to USB 3.2 Gen 2 | Lee Myring reports that the FIDECO M207CPS has issues working with the Pi |
| UGREEN 30848 2.5″ SATA to USB 3.0 Hard Drive Enclosure* | 2.5″ SATA to USB 3.0 | Reporting as not working properly and disconnecting often by Mirco, thanks! |
| Sabrent USB 3.0 to 2.5″ SATA adapter* | 2.5″ SATA to USB 3.0 | Only works in the USB 2.0 ports. Will not boot in a USB 3.0 port. I have two of these and can confirm they don’t work. RIP to Sabrent, our previous king of the Pi 3 era of adapters. |
| Sabrent USB 3.0 to 2.5″ SATA Tool-Free External Hard Drive Enclosure* | 2.5″ SATA to USB 3.0 | Another nonworking Sabrent adapter reported by Alex, thanks Alex! |
| ELUTENG 2.5″ SATA to USB 3.0 Adapter* | 2.5″ SATA to USB 3.0 | Despite earlier reports as working Ryan and one other have reported this adapter does not work unless you enable quirks mode! Don’t make Ryan’s sacrifice in vain and avoid this one. |
| USB 3.0 to 2.5″ SATA III Hard Drive Adapter UASP Support-20cm, Black* | 2.5″ SATA to USB 3.0 | reported by dzm in the comments as having very poor I/O performance |
| ORICO 2.5″ SATA to USB C 3.0 Enclosure (Transparent)* | 2.5″ SATA to USB 3.0 | Several commenters have stated the transparent ORICO is not working. Avoid! |
| ORICO 2.5″ SATA to USB 3.0 Enclosure (Black) 2588US3-BKT* | 2.5″ SATA to USB 3.0 | Commenters report that the USB-C variant of the transparent ORICO enclosure also does not work |
| ORICO 2.5″ SATA to USB 3.0 Enclosure (Black/White) 2520U3* | 2.5″ SATA to USB 3.0 | Reported as not working by by Richon in the comments |
| ORICO 2.5″ SATA to USB-C 3.1 Gen 1 Enclosure (Transparent)* | 2.5″ SATA to USB-C 3.1 Gen 1 | Confirmed as not working by Andrea De Lunardi in the comments (thanks!) |
| Vantec 2.5″ SATA to USB 3.0 USB Adapter with Case* | 2.5″ SATA to USB 3.0 | Does not work after hours of testing and frustration by Moshe Katz in the comments! |
| AliExpress Generic 2.5″ SATA to USB 3.0 “New USB 3.0 To 2.5in SATA 7+15Pin Hard Drive Adapter”* | 2.5″ SATA to USB 3.0 | Extremely cheap adapter from AliExpress — MADATALIEXPRESS bought 5 of them and none worked, PPCM had one working, very unreliable and slow when it does work, not recommended even if you get lucky! |
| EWENT USB 3.0 to SATA EW7017 | 2.5″ SATA to USB 3.0 | Does not work – reported by Wouter in the comments, thanks! |
| CableCreation USB 3.0 to SATA Adapter Compatible 2.5″ SATA III HDD Hard Disk Driver, 0.5FT, Black* | 2.5″ SATA to USB 3.0 | Morgon reports not working in the comments — I also recognize this adapter as the “fake” StarTech adapter that is sold on AliExpress, thanks Morgon! |
| JSAUX USB 3.0 to SATA Adapter, USB 3.0 to 2.5 Inch SATA III Hard Drives/SSD/HDD Adapter* | 2.5″ SATA to USB 3.0 | Reported as not working by Bennie in the comments, thanks! |
| EZCast M.2 NVME SSD Enclosure Adapter* | M.2 NVMe to USB 3.1 Gen2 | Reported as problematic due to duplicate USB ids — best to avoid — thanks MikeC |
| Sabrent 2.5″ Aluminum Enclosure* | 2.5″ SATA to USB 3.0 | Reported as not working by JeffG |
Verify Drive Performance
You can make sure everything is running correctly (and as fast as it should be) by running my quick storage benchmark. You can run the benchmark with the following one-liner:
sudo curl https://raw.githubusercontent.com/TheRemote/PiBenchmarks/master/Storage.sh | sudo bashThis will give you a score you can compare to the other Raspberry Pi Storage Benchmark results and make sure that you are getting an equivalent speed to your peers with the same device.


Hey, is the Samsung T7 ok or better to take an adapter + Samsung SSD 2.5 ?
Hey gompali,
Great question! So the T7 if you take it apart is actually a M.2 NVMe drive. That’s why it scores really well and definitely better than a 2.5″ since those are generally just SATA. Hopefully that helps!
ICYBOX IB-273StU3 USB 3.0 Enclosure 2.5″ HDD/SDD not working, even with quirks enabled.
Hey TheDiveO,
Thanks for leaving this! I definitely don’t have that one on the list yet. I have that and a few others to get added on the list here which I’ll be doing in the next few days for sure (I try to do them in “batches” when a few have built up just for efficiency/sanity purposes).
I’ve definitely found that the ones most likely to have the problems seem to be USB 3.0. The USB 3.1 Gen 1 ones also have a lot of problems and then with USB 3.1 Gen 2 they seemed to have got a handle on compatibility issues and they seem much less likely to have a problem. The USB 3.2 ones hold true with this as well.
To be clear the Pi cannot use USB 3.1 or 3.2 (it will still run it in USB 3.0 since that is the version that the Pi’s ports are) but the changes in those version of USB seem to vastly improve compatibility and be less prone to problems even though the Pi 4 can’t currently utilize the fancy new features like USB power delivery.
It is also probably partly due to the Pi’s success as smart manufacturers would theoretically try to be more careful about Pi compatibility to lower the return rate / protect their profits. The newest Orico ones for example (which is NOTORIOUS for having problems on their older 3.0 and 3.1 Gen 1 adapters/enclosures) seem to all be working pretty much 100% after that USB 3.1 Gen2 and up cutoff I discussed earlier.
Thanks again for letting me know about this one!
Pi4 8GB stop working with Unitek Adapter SSD 2,5 Y-1039 and UGREEN 2.5″ SATA to USB-C 3.1 adapter after latest firmware update…
Hey Marcin,
Well that is certainly strange. Was the firmware update for the Pi for for the adapters/enclosures? I haven’t heard of this happening yet but maybe you were one of the earlier people to get the updates and there is some kind of conflict!
I am also experiencing problems with another adapter after recent updates. I think is something power related. I’m swamped this days, will update with something actually usefull next week.
Hey Emanuele,
That is interesting for sure. This has happened a few times in the past. It’s definitely possible that recent firmware updates for the Pi or updates coming through apt may have had an impact. In the past they made some changes that broke some Sabrent adapters and then later they actually fixed those same Sabrent adapters completely in another firmware update.
Which adapter was impacted? Are there any firmware updates available for it by chance from the manufacturer? Sometimes you can roll back your Pi firmware to do it. If it’s apt related it’s a bit trickier. Definitely let me know which models you’re using and I can see if I can help further for sure!
Hi, thanks for the reply. Unfortunately I’ve been super busy lately. I took the hard road and just reinstalled everything and it’s working. the adapter is the JMS578, I think it was something apt related…
Hey Emanuele,
Welcome back! I’m very glad you got this going. Sometimes the hard road is the best/smartest road and I think this is one of those cases. It could have also been firmware updates (if apt was broken you may have not been getting firmware updates but reinstalling fixed this).
Enjoy and take care!
I can confirm that the adapter “BENFEI SATA to USB Cable, BENFEI USB 3.0 to SATA III Hard Driver Adapter Compatible for 2.5 inch HDD and SSD” does NOT work – basic usage works fine but if you attempt to transfer from the SSD to another USB device, the drive will keep dropping off and dmesg has errors “uas_eh_device_reset_handler” similar to this thread
Hey Taylor,
Thanks for the heads up, I had not heard about this one!
Thanks for the great article! I’m trying to boot with SanDisk Extreme Portable SSD and its not going well. maybe I’m doing something wrong – are you sure that this drive can work for booting the OS on RPIs? or did you mean just for storage?
Hey ilan,
Welcome! So that one is definitely a great drive to use with the Pi. We have about 180 benchmarks submitted at PiBenchmarks.com for the SanDisk Extreme Portable.
Did you use the Pi Imager to image this drive or did you use something like Etcher? If it was formatted as an OS drive before (especially with anything weird) Etcher will definitely not clean off those old partitions for you (and neither will the Pi Imager in the case of zfs which we have documented here).
In other words it’s most likely something that was on there before or it’s missing the updated bootloader firmware (common). I’d first recommend making sure your Pi firmware is fully up to date by creating the firmware recovery SD card image. In this case I’m specifically talking about the bootloader firmware. If you don’t see a BIOS/UEFI-looking startup screen when the Pi turns on you don’t have this (old revisions have nothing like this).
To clean the drive off completely in Windows you’d use diskpart and run a “clean” on the drive. This wipes out all partitions completely. You can do the same thing in Linux but you do actually want to completely delete everything off there before imaging including the partitions so it’s completely blank. Bonus points for using SanDisk’s official tools to both wipe and trim all free space (the only true way to clean them usually is with the manufacturer tools but you can get close enough with diskpart or fdisk in most cases).
I’d give those a try first and let’s see if we can get it going for you!
Hey James, thank you so much for helping!
It’s great to know that I don’t need to change my drives 😅
I did use the Sandisk official tools and I also tested the following:
1. wrote the same image of RPI OS LITE 64 Bit to SD card and it boot successfully!
2. tried to format the Sandisk SSD twice (with fdisk and with Sandisk tools)
3. wrote the same image to the SSD and it did boot when I connected HDMI to the RPI
but when the boot started, a strange pattern of the RPI’s green light started to appear (3 very fast blinks)
I’m sending you two videos if you can have a look on that (the second one is slo-mo to see the blinks).
Hey ilan,
No problem at all! So that really helps including that you got the blink codes. I found someone having this issue here.
It looks like in that case there was some sort of imaging problem. How are you writing the image? I would suggest using the Pi Imager or Win32DiskImager. I definitely would not recommend Etcher for this task or dd directly. This may not seem like it’s impacting it but yours is an actual designed external USB drive and this can make some things “weird”. The Pi Imager should be able to detect it and image it still but it is definitely worth double checking this by trying a couple of different utilities if only to rule it out (you don’t want to investigate some of the things we’re about to jump into and then find out later this was the problem).
You’ve established that there’s nothing wrong with your image file (the download of it) for sure. I think we should try Win32DiskImager or the Pi Imager on it (if you aren’t using those already). If you’ve blanked it with SanDisk’s tools then that would suggest to me that the problem/corruption is happening when the image is being written (it seems like the only place left).
If we look at the Raspberry Pi Diagnostic Codes here we can see that the 3 blinks just means “Generic failure to boot”.
I did have a thought while watching your video. Years ago I remember someone here having an issue like this and it turned out to be one of those little adapters/elbows that converts the USB port to a different type. On yours it looks like one taking it from USB 3.0 “A” style ports (regular) to USB-C. I wonder if that is causing a problem somehow. It’s really a long shot but do you use that when it’s plugged into the PC or do you use USB-C when you plug it into the computer?
If you have any cables you can borrow from something else that go from straight USB-A to USB-C without using an adapter I would strongly recommend trying it as a test. Maybe nothing is wrong with the image at all and this is an electrical/wiring issue.
It could also be power related but I don’t recall anyone reporting power issues with this drive. It seems to be able to handle it normally. Do you have a different power adapter you can try like a cell phone / laptop charger? It will be safe to do as a test because USB-C has power regulation built right into the spec so even if you plug in a USB-C laptop adapter the Pi will only take as much power as it’s supposed to.
I take it you ran my bootloader firmware recovery guide instructions I linked to before. I can’t stress enough how many boot issues like this it fixes. People try to tell me all the time the firmware is up to date etc. We are talking about the bootloader firmware though in this case and it’s extremely common for them to be stuck on old versions. Your video looked like it had the BIOS/UEFI bootloader to me when you booted from SD card but I wanted to mention that the SD card bootloader recovery image has fixed countless issues like this especially when they are really weird/tough like this one.
I don’t think it will end up being related to the drive itself as so many people use that and it’s not one that people have had to fight with a lot. This may end up being something like a cable / adapter but this is definitely an unusual experience for the SanDisk Extreme Portable which implies this is not going to be related to your specific drive.
Does SanDisk have any firmware updates available for the drive? That is one way it actually could end up being drive related that we haven’t really covered. Your drive looks like you’ve had it for a while. In this scenario it’s possible there’s an update for it that people who bought it more recently already had that yours may not have if you’ve never done any SanDisk firmware updates on it (most people won’t have and there usually isn’t much of a reason to but this would qualify).
I checked SanDisk’s site here and I don’t see downloads. Does the SanDisk SSD dashboard work with it? That would probably be the way to get firmware updates on it although maybe it’s different for the Portable version but their official page didn’t imply this. You can try this official utility here if you don’t already have it (you may have used this to blank it or I saw there was a separate tool for that as well called Secure Erase and there was even another one for other versions of the drive so things get quite confusing as it varies by model even which one you should use).
This is definitely a tough one. Can you investigate some of those briefly and let’s see if we can get any closer!
thank you so much James!
* I am using the Pi Imager
* I didn’t get you right – I didn’t manage to erase with Sandisk Dashboard software because I couldn’t find the drive’s PSID
* I tried to write the image from my Mac with a USB C to USB C cable with no adapters – didn’t help 🙁
* I tried to connect the drive to the pi with USB-C to USB-A cable with no adapters – didn’t help either 🙁
* power adapters – I tried to use other adapters, and still had the same blinks. anyway, I’m using the original adapter so should be ok right?
and one more thing, I think that these SSDs don’t support sanitizing like in the link you shared.
seems like the only way is to open it, get the PSID and erase it with the software, but do you really think that I should do it? because the drive is working and booting… but I’m here to do whatever you suggest 😅
Hey ilan,
Dang, I’d found some things that suggested that it did such as here. As I’m searching now I also found this though.
This person went all the way to SanDisk Technical Support and they said they don’t have a utility that does this for external drives. If this were me I would probably try to trick it using this software.
This is the software linked to from your official product page. It’s not meant to do this though, it’s meant to set up encrypted access. To accomplish that though it has to securely erase the device and they have warnings about this all over to protect from data loss. You could probably do this to wipe everything out and then delete whatever partitions it puts on there using fdisk/diskpart.
The important part will it will have blanked/zeroed the drive before setting that up so if this is previous-partitioning related this should solve it. I’d basically be “tricking” it to do this for me so that the drive would get zeroed out/trimmed and then whatever secure stuff they set up afterward I would just delete in fdisk/diskpart (or tell the software to undo it and turn it back into a normal drive, after all it just already performed the secure erase for us and that can’t be undone, it would just come out a blank drive from this process).
I then found this forums post. They actually linked to my site in this thread funny enough because they thought this was about enclosures but the SanDisk Extreme Portable doesn’t need an enclosure of course. The one that caught my attention though was the very last post. That person posted a specific variant (with the exact model) of one they claim doesn’t work with the Pi 4 either.
Now we know that can’t be true and that the vast majority of these work because of the 180 benchmarks. There does seem to be something weird happening though and it doesn’t seem like you’re the only one it has happened to. Maybe it is possible there are some very specific models that don’t work with it. He said E81.
Most of them seem to look like this (but not all, if you go to the brand’s page you can see some of them identify more generically like SanDiskExtremePortable or something like that and there’s a few other models but most of the different models are the “Pro” variants that are separate).
Notice that the model # doesn’t have anything like a E81 in it. Can you look at your specific drive’s model and see if it matches anything in pibenchmarks.com or if it looks like the “E81” model that this person is mentioning? With the model maybe we can find some more specific information about what is happening here!
I checked the benchmark and this is my model: SDSSDE61-500GB, and seems like it should work
one more thing regarding my SSDs, I used them with success on my RPI cluster (formatted to ext4) and they worked properly until I started booting from them.
Hey ilan,
Oh man, that is a great find. That is exactly what we wanted to find so that we know we’re not chasing a model that physically can’t work here!
Especially given the fact that these have previous partitioning that goes double for using the SanDisk encryption setup software to have it securely wipe your drive and then undo it (through the software or with a fdisk/clean). It will securely wipe your device when setting up encryption and this can’t be undone even if you turn off the encryption immediately after.
It’s silly they don’t have a utility that does this available but this utility has to do what we want in the course of doing what it’s supposed to be used for (which can just be turned off after). It’s meant for flash drives so I’m not surprised that external SSDs got roped in here (operating systems flag internal and external drives differently and it’s why I was so thorough on checking the imaging software to an absurd extent from past experience).
The utility your drive links to used to be called something else. It used to be called “SecureAccess” but it was replaced/superceded with this newer version which has documentation that implies flash drives a lot more but I think it’s really the “external” part that is roping you into having to do it this way. You can see what I mean in the link where they explain it has been replaced by this newer utility but the SecureAccess one is the version your drive actually linked to. You could still try that version of the software for it (maybe that’s why they keep it around).
I’ve seen this before especially with zfs and other types of shared/cluster-style partitioning. Check out this thread for back in the day when I first saw this and started putting the pieces together (this comment helped me crack a half dozen or so of these odd partitioning cases).
That was when I first learned that for some reason some of these types of partitioning can survive literally being repartitioned/reimaged. I don’t even fully understand how. That was what I meant earlier where we had documented cases of previous partitioning doing things that seem like shouldn’t happen (how is it happening, why isn’t the data and old partitioning overwritten?).
There’s an answer but I never dived in deep enough to reach it but it’s super, super weird. We’ve definitely had great success though by figuring out how to do a “real” secure wipe on a device which once you can do that you can fix this very easily but that’s not always easy to do and this device is an example of that. With SD cards you need to use the SD card association’s tool to do it. OS tools won’t do it.
Let’s see if we can get it going with that!
now I’m a bit confused now 😅
thanks again for helping me 🙏🙏
so until now, I checked the following:
* cables with no adapters, different power adapters
* checked the SSD model benchmarks – should work
* checked the bootloader firmware – it’s up to date
here I have a few more screenshots of booting Ubuntu server 22.04 64 bit from the SSD (the light is still blinking)
I didn’t get it from the message that I replied to – what do you suggest to do next?
Hey ilan,
It’s this thread here.
You’d want to try “SecureAccess” which turns on encryption (securely wiping the drive in the process) and then turn it back off basically! You can’t recover data from this operation and if you did this unintentionally SanDisk would tell you it’s gone. That’s exactly what we want though. We want all the data gone and then you can turn off encryption again afterward (being left with a blank drive).
checked this “SecureAccess” app, I ran it on the SSD and it automatically updated to “PrivateAccess” app which has no option to erase the SSD, just backups and restores 🙁
I also didn’t find a way to turn on and off the encryption as you mentioned
I was afraid you’d say that! Okay, I already had found something here.
Try with SanDisk Security available here (look for the downloads in the middle of the page). This apparently works fine with older versions of the drive as well supposedly according to the link above (from late 2020ish).
PS definitely don’t do this and encrypt it with a 26 character key you don’t remember (you will need to know the password to unencrypt it).
This activates security features in the drive and requires a secure wipe. You can’t undo it without using the same software (wiping the partitions won’t work and in fact you will lose the installed copy of the software on the drive, it’s in the first link above I mentioned where they admit to doing this and what happened). This is the only reason why it works for wiping the drive (you’re activating on-device encryption hardware which requires the drive to be blanked to securely set itself up).
SanDisk doesn’t directly provide a utility that does this. We’re using another one of their utilities meant to do something else to accomplish the same thing basically if that makes sense. It’s because encryption requires a blank slate so for this technology to work the software/drive has to be able to do it (even if they won’t give us a secure wipe standalone version for external drives).
Since that can’t be undone once you unencrypt the drive it won’t go back to how it was before. It will just be blank because the data is permanently gone (you will have to click through multiple warnings telling you exactly that before you start any of the operations). Hopefully that clarifies!
Hey James!
I managed to download “SanDisk Security” app and make it work.
* encrypted the drive with a password
* removed the password
* wrote the Ubuntu image again
and still, same blinking on boot
and one more thing, did you notice that in the post you found the guys are saying that this blinks are OK and not indicating any error? sound reasonable to you?
Hey ilan,
It should do exactly the same thing as the SD card image. Completely identical if that makes sense. It should work the same way it worked before basically with zfs (it probably started right up the first time, as it should this time if the disk wasn’t essentially poisoned).
There’s definitely still something left behind on these disks. You’ll probably have to go further than I ever have to get them cleaned off. Here’s a reddit thread with a bunch of different ways to clean it off.
I couldn’t tell you which one of these will work exactly (it looks like you have to do a dd, then repartition it with a regular partition table and THEN run wipefs if I’m understanding correctly?
This is a pretty crazy problem to be honest. Your SanDisk Extreme Portables are basically just “burned” once they’ve had zfs imaging otherwise and can never be used again with the tools SanDisk gives us. I think you’ll have to do some low-level disk magic here to get them “cured” again.
This shouldn’t be a thing but you appear to have a disk that to simply clean you will have to go extremely low level on the disk. More low level than I’ve ever gone!
thanks James!
yea this is really annoying…
I really don’t know what to do, if it is so low level I’m afraid to mess up.. maybe I should go on with this blinking and ignore it.. IDK 🤷🏻♂️
Hey ilan,
I reread your messages and caught something I missed before! I think I may know what is happening. I wrote an article a while ago about fixing 1% CPU usage on the Pi by disabling SD card polling while SSD booting.
I think that may be what is happening. Can you try adding:
dtparam=sd_poll_onceto your config.txt file? This will make it only check for the SD card once upon booting up instead of constantly.
It looks like you may be able to control these LEDs even more according to this site:
act_led_trigger Choose which activity the LED tracks.Use "heartbeat" for a nice load indicator.
(default "mmc")
act_led_activelow Set to "on" to invert the sense of the LED
(default "off")
N.B. For Pi 3B, 3B+, 3A+ and 4B, use the act-led
overlay.
act_led_gpio Set which GPIO to use for the activity LED
(in case you want to connect it to an external
device)
(default "16" on a non-Plus board, "47" on a
Plus or Pi 2)
N.B. For Pi 3B, 3B+, 3A+ and 4B, use the act-led
overlay.
pwr_led_trigger
pwr_led_activelow
pwr_led_gpio
As for act_led_*, but using the PWR LED.
Not available on Model A/B boards.
I wonder if the issue is that the power LED indicators are probably in mmc mode. It says mmc is the default mode. I bet this LED activity is SD card polling!
Let’s try the “heartbeat” mode as a test. Can you try adding this to your config.txt as well:
dtparam=act_led_trigger=heartbeatIf this changes the behavior of the LED we are on the right track. Thank you for the tip as well, I saw you sent that this morning and woke up with a great start to the day. Thanks! I almost feel a little bad because I think we actually fixed the disk issue several steps ago and that I didn’t realize we were dealing with the LEDs primarily now. I had to reread it with fresh eyes this morning and I caught a couple of things I missed.
This would make sense. I was thinking about how it’s possible that what we did with the SanDisk security software wouldn’t have done a clean wipe. The answer is it’s not, that is not possible. I’d missed something and I think what I posted above is it! Basically the disk is good to go for sure and we are dealing with configuration/options at this point. If you have several of these you should be able to repeat the same operation on each to clean them initially as this worked and we just need to clean up the LED behavior now (through config.txt).
This has been one of the toughest cases in recent memory but after rereading your messages I think we are close here and I’ve already learned several new things investigating this!
Hey James,
I really appreciate your help, thanks again!
you should put the “buy me a coffee” button in a more central place – I’m sure that everyone would like to buy you a coffee for your help. this is really not taken for granted! 🙏
regarding the config.txt file, I believe you’re talking about RPI OS, which file should I edit in case of Ubuntu server 22.04?
Hey ilan,
No problem at all! So on 22.04 it should be:
/boot/firmware/config.txtSome past versions of Ubuntu named this different things and split this into different files but it was very confusing and it looks like for 22.04 they went back to a regular config.txt (it may have been 20.04 they want back). I found this information here.
Putting them in there and then rebooting the Pi should let us test these out and see if we can get these LEDs to cooperate!
OMG this is it!!! 😂
found the Ubuntu file in your article
thank you so much James!!
Hey ilan,
No problem, thanks again for sticking through all those posts! Hopefully this will help others that are struggling with it as well. Take care and enjoy!
did the bootloader firmware update – it was already up to date and didn’t help, still with the same issue
Hey ilan,
Thanks for the update! Check out my latest reply on the SanDisk utility to use. This is definitely the zfs/cluster partitioning issue (there’s no way to wipe it out without using the manufacturer’s utilities, not even the Pi Imager can fix that one, I’ve only seen secure erase work).
This has apparently been an issue forever. There are some other ways that may be able to specifically clean whatever mark zfs leaves behind off. wipefs sounds promising or some of the other possibilities in there. I haven’t tried these yet but if you have no choice definitely let me know what it takes to get rid of this.
I did mention it earlier on but most people aren’t using cluster setups that use this type of partitioning (so I looked in some of the more likely places first) but definitely we have seen it before. What is unusual about your device is how hard it is to get a clean wipe.
Someone pulled up the partitioning table in gparted and was able to spot weird stuff from zfs before (which once I told him to wipe he never came back which 90% of the time means it’s fixed). This was after multiple reimages. It survives.
It has nothing to do with the SanDisk Extreme Portable though and this can happen on SD cards and regular SSDs as well (some of the places I’ve seen it are x86_64 in my Minecraft Bedrock server threads) but I think I have a method for you in my other reply!
ok I see that you’ve edited your reply, let me review it and I’ll post again 😄
Hey ilan,
Sorry about the live edit while you were reading! I’m not used to people being live on the site when I write them usually. It definitely sounds like we’re slowly getting there and the bootloader update shouldn’t do anything but help here!
so after reading the addition to your post.
* I’m going to try your bootloader firmware update
* the drive didn’t have any firmware updates
Wow, thanks for looking into this James!!
I managed to find the site you mentioned but it looked somewhat sketchy to say the least – and I honestly thought it would be some “driver mamager” installer of the some-what-sketchy.inc and figured it was nothing actually part of the device.
However, since you have been very brave in your quest to help, where would I be if I didn’t follow though and see what we can do!!!
Besides, I have a DMZ’d tux box under my fingertips and a new CSL USB3.0 to SATA 3 comming tomorrow…. lets see what we can do 😉
A sincere thanks for all your help and this resource!!!
Z
Hello fellow testers I thought I would share my experience with the following device Adaptor – “VIA Labs, Inc. VL701 SATA 3Gb/s bridge” —————————————————-
System – RPI 400
POWER – Argon One ( 5.25v @ 3.5 amp )
VIA Labs, Inc. VL701 SATA 3Gb/s bridgeConnection USB 3.0 Device
Kingston 60gb SSD Intermittent detection
Integral 120GB SSD Intermittent detection
Both Devices Hang on Detection and are non-bootable.
Raspberry Pi OS 32 Bit ( Hanging post screen )Raspberry Pi OS 64 Bit ( Failure to boot / reboot )
Twister OS ( Black screen )
POP OS ( Black Screen )
DeviceToshiba Travel Star 40GB
2.5" SATA HDD Detected
Raspberry Pi OS 64 Bit OS Loaded ( < USB 2.0 Speed )
All devices were formatted and written via Raspberry Pi Imager from a Windows PC and the PI 400. I have not been able to find any firmware updates for this adapter and or chipset. I have not attempted "quirks command line" configuration so these devices may boot, however my goal is to get SATA3 speeds both in Sequential and Ramdom IO
Hope the above helps
Z.
Hey Z,
Thanks for posting that detailed information! I looked into this a little bit starting with a generic Google search.
The first thing that caught my eye was the first (nonpaid) result was the official Via-Labs site where they call this a EOL (end of life) product and didn’t have any firmware updates available for it.
Then I started noticing that some of these sites have some promising looking links like here which appears to be a Russian website that has them. I tried downloading some files and I had to right click and copy the link into a new tab (otherwise it would open a new tab that would just close without downloading). I can’t imagine someone trying to distribute malware using obscure USB firmware downloads but it’s theoretically possible. Other sites have this as well that you’ll see on there from my linked search but they didn’t look as good of a match as this one without going to page 2 or 3 of Google.
It looks legit though without trying it / scanning it personally but if it’s fake they went through a great deal of effort to make it look real (it’s a real archive with original timestamps and correct filenames and usually the spam/malware downloads all link to the same base file) with the potential of fooling maybe a few thousand people that will ever find it or even see/hear the chipset name the entire time they own the product.
There’s probably some risk to doing this. People have tried them before for sure here in the comments with varying results. This looks like what you could try if you are feeling brave.
The translation for this file:
You definitely don’t need to try this if you don’t want to risk it. That is definitely the most promising thing I see though to possibly get it working as it is the “VLI VL70X USB3 SATA FWUpdate” tool which seems to sound like what we want. It could also be your option of last resort. We haven’t had one brick yet trying this but it’s always possible.
Definitely don’t try it though if it’s the only adapter you have and getting another one will take forever / be a problem for sure. I always recommend in that case that you get another adapter first before trying this on it so you aren’t hung out to dry.
Basically for you that would look something like you absolutely can’t get it to work at full speed in which case it’s probably worth replacing it but it would still be great to try this and document if it works. Hopefully that helps and thanks for leaving the info!
Thanks so much for all that effort, very much appreciated!!
Unfortunately, every time I attempt to load the link, and this includes after I have searched it again via Google – I get the notification of “403 Forbidden, do not have access” – which is a tad rude 😉
I have also tried a VPN as it may be blocked due to being in the UK – Sadly still the same issue accessing the site.
I will hunt about a bit more to see what I can find – will post back
Hey Netizen,
Sorry for the slow reply! I’ve been busy at work publishing my new Minecraft Bedrock Docker Container pretty much all day/evening here.
I have something for you to try. I ran this file through VirusTotal to make sure and it came out squeaky clean,
I’ll try rehosting it for you here.
Definitely let me know how it turns out!
Greetings James, a bit of a bust with getting this working directly on the PC, but here are most of the results of tonights efforts, I will say that I received my new USB 3.0 to SCSI Bridge and that has worked straight out of the box – onto the tests
*NB ( sorry for the potential wall of text )
On Windows PC
OS : Win10CPU: Ryzen 5 2600x
RAM: 16GB DDR4 3600
STOR:
512GB Crucial NVME
2TB Hitachi Deskstar 7200 rpm
Adapter VIA Labs, Inc. VL701 SATA 3Gb/s bridge
Device 3.0 ( Motherboard Asus Prime B450 )
Segate 40GB HDD LD25 OEM NOT DETECTED
Segate 120GB HDD Momentus NOT DETECTED
HGST HTS 1TB 541010A9E680 NOT DETECTED
Kingston 60GB SSD NOW 300 V NOT DETECTED
Firmware Update Attempt : USB 2.0
COM ( Admin Mode )"Usb3Sata2FWUpgrade.exe"
FWUpdateToolName V.911
Error:
Can't find any device, Please attache the device or
make sure it has been connected with hard drive !!
Firmware Version does not match
Adapter VIA Labs, Inc. VL701 SATA 3Gb/s bridge
Device USB 2.0 ( Motherboard Asus Prime B450 )
Segate 40GB HDD LD25 OEM NOT DETECTED
Segate 120GB HDD Momentus NOT DETECTED
HGST HTS 1TB 541010A9E680 NOT DETECTED
Kingston 60GB SSD NOW 300 V NOT DETECTED
Firmware Update Attempt : USB 2.0
COM ( Admin Mode )"Usb3Sata2FWUpgrade.exe"
FWUpdateToolName V.911
Error:
Can't find any device, Please attache the device or
make sure it has been connected with hard drive !!
Firmware Version does not match
—————————————————-
On TuxTop ( x86 Laptop )
OS : Xubuntu 64bit + Twister UI
CPU : I7 Quadcore 4500U
RAM : 8GB DDR 3 1600
STOR: Integral 120GB SSD
Adapter VIA Labs, Inc. VL701 SATA 3Gb/s bridgeDevice USB 3.0
Segate 40GB HDD LD25 OEM DETECTED
ST940211 5AS (3.01)
AVG. READ 26.8MB/s
AVG. ACCESS 20.88 msec
Segate 120GB HDD Momentus DETECTED
ST912081 7AS[3.AA]
AVG. READ 39.9MB/s
AVG. ACCESS 15.95 msec
HGST HTS 541010A9E680 (JAO0) 1TB DETECTED
AVG. READ 43,6MB/s
AVG. ACCESS 18.51 msec
Kingston 60GB SSD NOW 300 V NOT DETECTED
Firmware Update Attempt : USB 3.0
"Usb3Sata2FWUpgrade.exe" via WINEFWUpdateToolName V.911
Error:
Can't find any device, Please attache the device or
make sure it has been connected with hard drive !!
Firmware Version does not match
Device USB 2.0
Adapter VIA Labs, Inc. VL701 SATA 3Gb/s bridgeSegate 120GB HDD Momentus DETECTED
ST912081 7AS[3.AA]
AVG. READ 32.9MB/s
AVG. ACCESS 16.18 msec
Kingston 60GB SSD NOW 300 V NOT DETECTED
Firmware Update Attempt : USB 2.0
"Usb3Sata2FWUpgrade.exe" via WINEFWUpdateToolName V.911
Error:
Can't find any device, Please attache the device or
make sure it has been connected with hard drive !!
————————————————————–
New USB3.0 to SATA Bridge Cable ( CSL )
ASMedia Technology Inc. ASM1153 SATA 3Gb/s bridgeDevice USB 3.0
Segate 120GB HDD Momentus DETECTED
ST912081 7AS[3.AA]
AVG. READ 52.3MB/s
AVG. ACCESS 15.76 msec
Kingston 60GB SSD NOW 300 V DETECTED
AVG. READ 364.5MB/s
AVG. ACCESS 0.28 msec
———————————– Phew!
Some notes, despite my best efforts the VL701 USB3.0 / SATA Bridge simply would not be detected on the Windows 10 PC despite this working *albeit intermittently* the day prior. It didn’t matter if it was connected to a hard disk or SSD or USB3.0 or USB 2.0 – while the indicator led’s do indeed light up, that seems to be the only thing that they do.
I checked under Device Manager, sadly the adaptor was not discovered, nor was and device detected via DISKPART or DISKMANAGEMENT under Windows 10.
Connected to the Raspberry Pi 400 :
While the VL701 adaptor did appear in the “lsusb” list, it simply would not detect any device or initialize anything connected to it. I did notice that there were some video / HDMI artifacts / Sparkles / Interference when attempting to boot with this device – which is quite often indicative of a lack in power.
———————————– New USB3.0 to SATA Bridge ‘CSL’ “ASMedia Technology Inc. ASM1153 SATA 3Gb/s bridge”
This new device worked with all hard disk and solid state device right out of the box, speed tests were almost the same as my x86 Linux Laptop, with the exception that the AVG. Read was a little lower to around 120MB MB/s on the Kingston V300 60GB SSD however the IOPS were pretty good –
Random Write Speed 7,500 IOPSRandom Read Speed 11,000 IOPS
If you or anyone would like to try their luck with the VL701 USB3.0 to SATA Bridge – then just drop me an email and I can pop it in the post ( no cost or charge : freebie ).
I do have some M.2 Drives and adaptor(s) arrive next week to try out so I post here that adventure too =)
Thanks for all your efforts here James, if there is anything you might want me to try with this adaptor, just let me know.
Z.
—– Update
I have notice that the VL701 USB3.0 to SATA 3Gbs Bridge looks identical to this one – this is mentioned above by Morgon. – here is the Amazon link for the adapter – £5.59 Inc. postage – While I am only able to get this device to recognize SATA Hard Disk devices ( under Linux ), I cannot seem to get this adaptor to recognize any SATA based Solid State Device.
At the time of writing, this device is not working in Windows 10
——– Alternate Adaptor
I did recently receive the following device – £7.98 Inc. postage – has worked straight out of the box and is detected by both Windows 10 x64 / Linux x64 / Raspberry OS 64bit – ASMedia Technology Inc. ASM1153 SATA 3Gb/s bridge
Hey Netizen,
That is a fantastic find on your second adapter there. I definitely do recognize that VL701 you linked above mentioned by Morgon. That’s very interesting that it won’t work in Windows at all.
It sounds like the firmware flash isn’t recognizing that chipset/adapter. It was worth a shot at least but thanks for letting me know whether it had any effect / worked or not. That’s a great price for the last adapter as well. Thanks for sharing all your results!
Hey Netizen,
That was definitely worth a shot. If it’s not detecting the adapter then it’s probably using a different USB ID or something like that and isn’t being detected. I’ll definitely keep that in mind for sure and thanks for testing that!
I replied to your other post in the other thread as well. Thanks again for posting all this information / detailed writeup. This will definitely help a lot of people finding this through Google!