
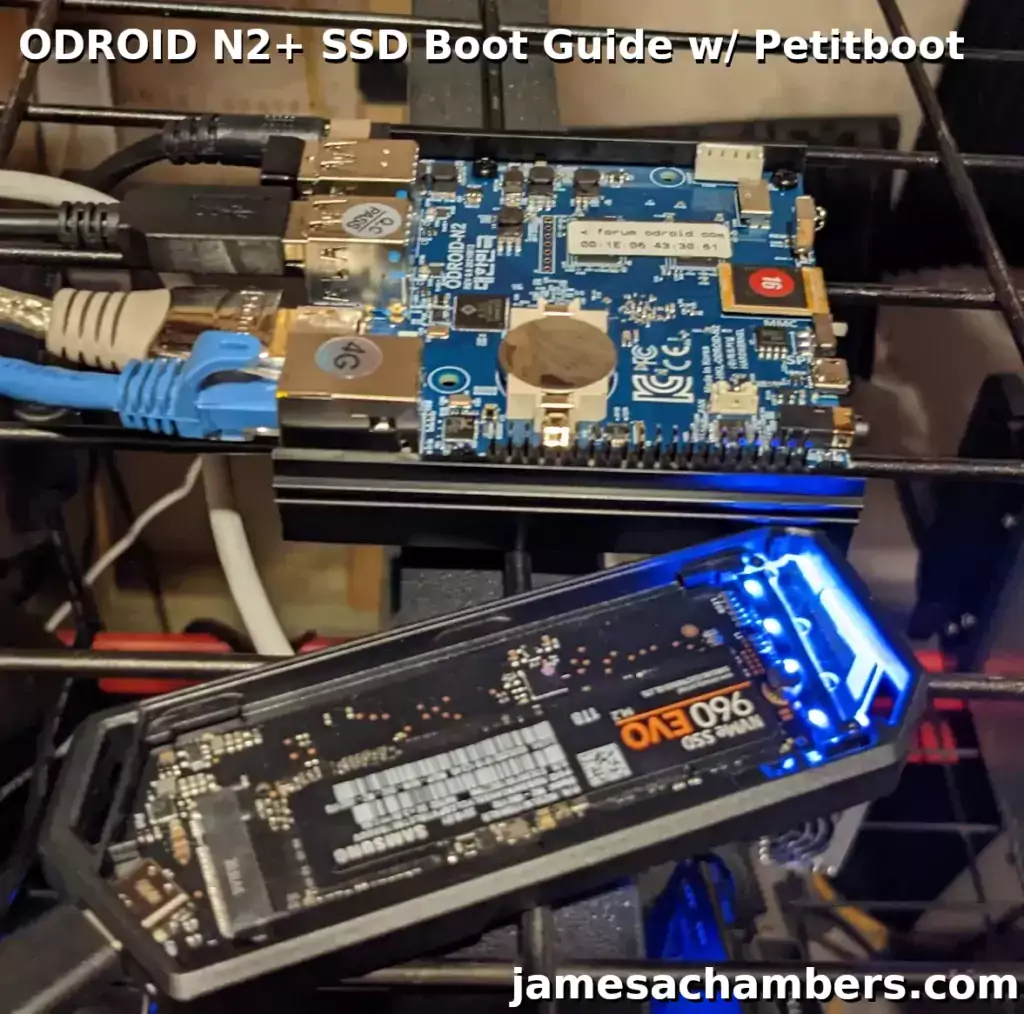
Configuring the ODROID N2+ for USB booting can be a little bit tricky. There are guides out there that will both use a SD card to bootstrap the SSD booting and other guides that use Petitboot but have complex setup instructions.
Today I want to show you a simple method that I used to get SSD booting set up on the ODROID N2+ so I could perform my storage benchmarking on the device for my review. I will be using a NVMe SSD but you may use other types of SSDs as well. Let’s get started!
Hardware Used
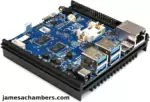
The ODROID N2+ is a great board with a built-in Petitboot bootloader capable of booting from SSDs and other types of devices. The N2+ is an overclockable board which is one of the advantages it has over the M1. Available in 2GB and 4GB variants.
Links: Amazon.com*, Amazon.ca*, Amazon.com.au*, Amazon.co.jp*, Amazon.co.uk*, Amazon.de*, Amazon.es*, Amazon.fr*, Amazon.it*, Amazon.nl*, Amazon.pl*, Amazon.se*, Amazon.sg*
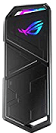
If you really want to take things over the top the ASUS Rog Strix M.2 NVMe enclosure uses the latest USB 3.2 Gen2 specification, is RGB capable and works with the Pi! Unsurprisingly, adding the extra lighting does take extra power! A powered USB hub is also required for this enclosure. More widely available than the ICY BOX but tends to be on the expensive side.
Links: Amazon.com*, AliExpress*, Amazon.ca*, Amazon.com.au*, Amazon.co.jp*, Amazon.co.uk*, Amazon.de*, Amazon.es*, Amazon.fr*, Amazon.it*, Amazon.nl*, Amazon.pl*, Amazon.se*, Amazon.sg*
First Step: Install OS to SD Card/eMMC
For this method the first thing you will need is an already working copy of the OS you would like to install to the SSD installed on either a eMMC or SD card.
If you want to install your existing N2+ installation onto a SSD you can skip to the next step.
You should fully update the image before proceeding to the next step with:
sudo apt update && sudo apt full-upgrade -yOnce you’re fully upgraded you’re ready for the next step.
Copy eMMC / SD card to SSD
Now it’s time for the magic of this method. We are going to completely clone your working installation to your SSD.
Connect your SSD to the running ODROID. You should see devices pop up for /dev/sda in lsblk:
odroid@odroid:~$ lsblk
NAME   MAJ:MIN RM   SIZE RO TYPE MOUNTPOINTS
sda      8:0    0 931.5G  0 disk
├─sda1   8:1    0   128M  0 part /media/usb0
│                                /media/boot
└─sda2   8:2    0  14.4G  0 part /media/usb1
First clean off the SSD by running:
sudo fdisk /dev/sda
Delete all partitions until it is completely blank.
Now we can copy the entire memory card to our SSD with the following command:
sudo cat /dev/mmcblk0 > /dev/sda
Wait for the operation to complete (there won’t be any output but you will have a cursor again and be able to type new commands).
If you are having any trouble with permissions try becoming “root” first with:
sudo su
Now try running the command again and as the superuser you should not encounter any permission errors.
Run fsck
Now unplug the SSD and plug it back in so it reads our new partition table from the device.
Before we reboot run e2fsck on the drive like this:
sudo e2fsck -yf /dev/sda2
NOTE: Some images for the N2+ only have a single root partition. This is fine since the “boot” partition is unnecessary with Petitboot but many images still have it. If yours doesn’t then you will use /dev/sda1 instead here and for the rest of the guide.
This will prevent you from having to run fsck on the CLI the first time you try to boot.
Configuring Petitboot
Now change the switch on the side of the N2+ from eMMC to SPI flash (if you were using a eMMC for the first steps). This will tell the N2+ to boot the Petitboot bootloader.
You should remove your SD card / eMMC at this point as they will have the same partition IDs as your SSD installation (these can be changed and /etc/fstab and boot.ini can be updated accordingly but I recommend getting it working first by taking out the SD/eMMC).
When the ODROID boots it should look like this:
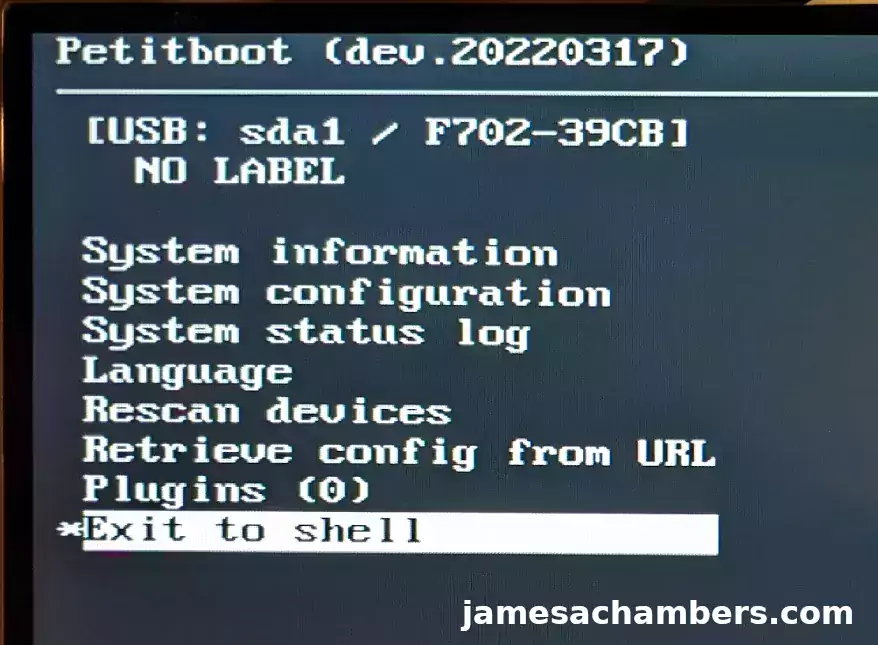
Notice at the top we have our SSD drive as the only boot option showing. We aren’t ready to boot it just yet though. First we need to make a change.
Scroll up to the entry below “USB: SDA1 / F702-E9CB” (but don’t press enter). On my setup it says “NO LABEL” but if your drive has a label (or you applied one) it may show that instead. Now press the letter “e” to edit the boot line.
This part is a little annoying but you only need to do it once the first time you set up your SSD. We need to edit the boot parameters which are currently pointing to /dev/mmcblk0p2. We are going to change this to /dev/sda2.
It’s really tricky to edit the line we need to edit. Let me show where/what we need to edit first:

You can see that we need to edit the “Boot arguments” line. This is not as easy as it looks. You need to scroll down to that entry with the arrow keys but because it goes off the screen it won’t be obvious that you have it highlighted.
The way to make sure you are on the right entry is once you have it highlighted (or you think you do) start holding the left arrow key. After a few seconds you should see it start scrolling to the left. The entry we need to edit is literally all the way at the beginning. It’s the very first entry.
On your ODROID before making this change the very beginning of the line should show:
root=/dev/mmcblk0p2
Change this to:
root=/dev/sda2
Once this is done you’re ready to boot. Press enter to accept the changes and then choose the same entry we just edited and press “Enter” to select it. Your OS should fire up completely booted from your SSD!
Conclusion
That is it! Provided you edited the Petitboot entry for the SSD to point to /dev/sda instead of /dev/mmcblk0 you are all done!
I should note that my performance score on Pi Benchmarks running the SSD through USB 3.0 was 7,476. You can view my benchmark for the ODROID N2+ with a SSD here.
As a comparison the M1 got a score of over 16,000 with the exact same drive. What does this mean? It means that the USB 3.0 bus is actually limiting your maximum speeds. Therefore it doesn’t really make sense to use M.2 NVMe with this board. A regular 2.5″ SATA or M.2 SATA drive will be plenty to hit the USB 3.0 bottleneck / cap.
The overclocking capabilities on this board (vs the M1 which does not have any) did not make up for being limited by the USB 3.0 bus. Not even close. The M1 more than doubled it using a real M.2 socket instead of a USB to NVMe adapter. The USB 3.0 speeds are the bottleneck.
It’s still about 40-50% faster than using an eMMC so it’s a fantastic upgrade nonetheless! It’s especially worth it if you already have older 2.5″ SATA or M.2 SATA drives laying around. This will give you a nice 40-50% performance boost as well as typically a lot more storage capacity (considering the largest official eMMC available is 128GB which is among the smallest of available SSD sizes you can buy).
In other words a SSD is worth using on this board but it is not worth buying or even wasting a fancy NVMe SSD in it because the USB 3.0 bus will limit your speeds to ones that are easily achievable with even mid-range 2.5″ SATA and M.2 SATA drives. Use an older / cheaper one with it and it’s a great / economical choice!
Other Resources
I highly recommend the M1 over the N2+ if you are trying to do NVMe. It’s just much faster without having to use the USB bus
If you have the M1 already I highly recommend my Ubuntu 22.04.1 Legendary ODROID M1 image
If you’re looking for eMMC information definitely see my ODROID eMMC Guide here
If you’re a retro gaming fan and an ODROID fan you should see my ODROID Go Super review here!


Hi, I am just trying this with my N2 and it works when cold booting, but when warm booting it lands on petiteboot very reliably…
It seems the USB-NVME is shutting off and not getting scanned so petitboot comes on first rather than waiting for the USB device. After 20-30 sec petitboot sees the USB-NVME but its too late of cource..
Any ideas how to make this more reliable? I am building a headless device that I remotely deal with, wont do if I cant send a reboot command via SSH and I cant pop in for a power cycle easily…
Thanx
Any advice? Thanks!
I’m guessing that you did everything right here and that the issue is with DietPi. Have you tried this with any other OS just to make sure it works for you? It may be worth it just to narrow things down specifically to DietPi.
It doesn’t look like it’s finding the dtbs either on the SSD *or* on the SD card. You aren’t the only one who has had issues with it. There’s an open issue here with a bunch of replies on the DietPi GitHub page:
I just bought Odroid N2+ and I am trying all kinds of way to try to boot dietpi from SSD only without SD or eMMC. I managed to boot from SSD when in Petitboot editor by editing the following boot options for the SSD partition:Device tree: /usr/var/petitboot/mnt/dev/sda1/boot/dtb-5.10.123-meson64/amlogic/meson-g12b-odroid-n2-plus.dtb
Boot arguments: root=/dev/sda1 (leave the rest of the parameters untouched)
The problem is these parameters can only work one time. I have to modify the Petitboot every time when it boot up. Is there any way or option to get the correct parameters from the boot.scr or save these options in Petitboot without using SD or eMMC?
Thanks
P.S. I read that DietPi does not support direct booting from SSD for Odroid N2+ but i hope this issue can be resolved easily.
Just from looking at this issue you may want to try root=/dev/sda1 instead of root=/dev/sda2. I didn’t see what you are using to boot yours or if you are editing the line like in this guide. That’s a difference between DietPi and the OS I used in this guide so the partition layout might be different.
They did a bunch of troubleshooting on this issue but it’s still open/unresolved. I don’t think this works for the N2+. His hopes that this issue would be easily resolved do not look like they have panned out here.
It looks like they are able to get it to boot one time with that special command though. That at least might let you boot into it once (or by editing it each time). It sounds like this is a known/reported issue with DietPi though. Hopefully that helps!
Hello, firstly just wanna thank you for the fast reply and your contribution to the community.
I am currently using sda1 as i dont have an sda2 partition already. ive also tried: /usr/var/petitboot/mnt/dev/sda1/boot/dtb-5.10.123-meson64/amlogic/meson-g12b-odroid-n2-plus.dtb as the device tree (but revised to fit my hardware and version) but minus the “plus” as i have the “original” odroid N2, but i get I guess i wouldnt mind having to input it everytime on boot, as ive been pretty desperate to make it work. I guess i wait for more support to be or workarounds people might have/create. Thank you!
Hey iFap2Surveys,
Yes, that additional detail helps, that may vary your command line. I think the best thing to do would be to go in there.
What I would recommend doing is dropping to the Petitboot shell. You do this when the Petitboot menu starts up go to the very bottom and do “Exit to Shell”.
Once you are in the shell let’s take a look around. What files are in there? If you go into the Petitboot shell and do a:
ls /usr/var/petitboot/mnt/dev/sda1/boot/dtb-5.10.123-meson64/amlogic/That should get us a list of all of the dtbs. It should also tell us if there’s some sort of other path error happening along the way.
When I look in the Linux kernel tree here I do see a:
meson-g12b-odroid-n2.dtsThat seems like you had the right idea. The file name should be right if you dropped the plus. When you try it that way does it still say it can’t find the file?
Another thing you may want to try is try putting your boot device as /dev/mmcblk0p1 (or it might be /dev/mmcblk1p1). The method in this guide kind of uses SD card boot strapping to boot from the SD card. I think that may be worth a try as well. Maybe that’s where it needs to look for the boot files.
Hopefully that helps!
Your instructions are great for the ODROID-N2+, but I got a little hung-up on change from “root=/dev/mmcblk0p2” to “root=/dev/sda2” in Petitboot. Every time I changed it the system would revert back on a restart. Hopefully I can make it easier for the next person. For the record, I have an ODROID-N2+. I used these instructions to flash Armbian directly to the emmc module so I skipped the microSD card altogether. Once I was happy with Armbian running on the eMMC, I used your guide to transfer everything over to the USB HDD and followed all instructions to the very end. Once I was in Armbian I switched to the /boot directory and edited boot.cmd with nano editor:
cd /bootnano boot.cmd
I edited the “setenv rootdev” line to match your instructions so it looks like this (my drive is sda1, not sda2):
setenv rootdev "/dev/sda1"If you scroll all the way to the bottom of this file before you exit you’ll see the following notes:
# recompile with:# mkimage -C none -A arm -T script -d /boot/boot.cmd /boot/boot.scr
I copied that line, exited the nano editor with control-X, and saved the file when prompted.
Back at the command line I entered the compile command from above. I rebooted the system and it started right up as expected.
Hey Brad,
Excellent work, I’m glad you were able to navigate the process to rebuild the boot.scr file for Armbian! That’s very nice to get it directly on the eMMC module as well. That’s a little bit different of a variation than we’ve seen here so thanks for sharing.
Thanks for leaving your instructions as well. Enjoy and take care!
Brad,
that was a great help for me, trying to achieve the same on armbian.
I wonder, though, did you figure out how to persist the change to boot.cmd? Mine gets overwritten by armbian-config and I’m left with an unbootable system (which is an issues as I’d like to run it headless).
Probably related to the fact, that the file says “do not change this file, use armbianEnv.txt instead” – however, setting bootenv in armbianEnv.txt seems to be ignored when SPI booting.
Would anyone have a some further hints for me?
Hey Stefan,
The instructions on how to make /boot/boot.cmd changes persist are at the bottom of the file:
# Recompile with:# mkimage -C none -A arm -T script -d /boot/boot.cmd /boot/boot.scr
That single line will rebuild boot.scr from boot.cmd. Normally when you modify boot.cmd nothing will happen. You need to rebuild the boot loader with mkimage as per the instructions in the file.
This is an Armbian thing for the most part but you will find some other OS flavors using the boot.cmd/boot.scr system from time to time. You won’t have to deal with this with the official operating systems. I replied to one of your other posts with the link to some newer images for those.
Armbian is the hardest of all of them and to be honest with you that’s true on any board. It’s the one OS that you literally have to recompile the boot loader from source with mkimage to even change a small thing like this. Almost everything else will actually use a text file (or even better there won’t be any hard-coded junk like this at all in a lot of the official ones and they will use a more friendly and compatible boot process). Armbian is usually hard coding all of your stuff into these files making it much harder to do tricks like this (or at least it requires additional tricks / obscure knowledge like this to fix it).
In other words Armbian is hard mode. It can be done though. You just have to do it their way which won’t be like anyone else’s way. It’s also the most complicated way to cover and teach people which usually will only involve text files (or not even that). Unfortunately that menu/wizard almost never works. My Orange Pi 5 SSD is full of people saying writing the boot loader never works no matter what version they’re using so this is a constant headache on any board.
I think it’s a lot more surprising when the Armbian menus are working without any assistance on any board basically. That’s actually rare for it to work without any help in my experience or at least trying to have to fiddle with it 4-5 times and then have it start working not being sure which weird tweak actually got it. It always seems to get one or two things wrong in boot.cmd on many boards at least and you’ll have to go in and fix it with mkimage.
If you are talking about it changing from apt updates that is going to be harder to deal with. It should be smarter than that. I haven’t had much trouble with this once you get it going but it’s not unheard of. In that case you might need to go deeper within the Armbian boot system to find where the original files it is being generated from are coming from. It’s unusual to have to deal with this though once it’s working. Usually the updates will find the right partitions / paths afterward in my experience when doing updates.
Hopefully that helps!
Thanks for clarification. Indeed I had figured the mkimage part, but some Armbian script keeps overwriting boot.cmd, and I haven’t figured out yet which one exactly.
I was fine with Armbian up until that point. But I don’t wan’t to mess too much with that, I’d rather go for the alternative image, as per your suggestion further down here – hoping to get the UART issue fixed as well.
And, I caught an eye on the new H3, which sound incredible interesting as well. Saw someone stating an idle power consumption (headless) < 2W!
Hey Stefan,
Yes, indeed, it’s an absolute nightmare to deal with this within Armbian. It’s the most primitive, nasty boot system of any operating system I’ve ever seen. On all of my SSD boot guides across something like 12 different boards or so nobody has trouble with anything else like Armbian (and it makes no difference which board we’re talking about, a $30 one or a $300 one). It’s absolutely terrible with this stuff. Soooooooooooooo much hard coded boot code. It’s so gross. Literally anything else would be a cakewalk.
I couldn’t even tell you what is overwriting boot.cmd. I take it you mean the script is literally changing itself back and not that it’s ignoring your changes (which may be as simple as just putting them in armbianEnv.txt instead). The boot process is such a mess for that one.
I can’t give you an example of an operating system that it’s harder to do what should be a simple task with than Armbian. There isn’t one. Anything else will be easier and will have less hard-coded junk. It really is disgusting that an operating system can’t boot from simple UUIDs in 2023. That’s why this is so easy with Ubuntu, or real Debian, or anything else. They boot off UUIDs. They don’t have all this hard-coded garbage like Armbian. Almost nobody else has for like 3-4+ years (even longer for x86_64, it took longer in the SBC world but almost all of them have modernized). Armbian just never evolved with them and works the same way it did 5+ years ago.
It’s too bad because Armbian is still hands down the best one to run on many boards (because as bad as Armbian’s boot process is the manufacturer’s stock images are often worse or nonexistent even for some boards). It doesn’t make it not worth using in certain cases or that it’s bad all around. It just objectively has a really antiquated and bad boot process. That’s all I’m saying. I still use Armbian on a lot of boards where it’s still the best choice to do so.
Literally everyone removed this method of booting from their operating systems years ago. All the reputable / big ones at least. You can see why. This is a anachronism / a relic of a boot process. We changed away from this system of hard-coded boot device paths almost universally across Linux for a whole bunch of very, very good reasons which you are experiencing first hand. Only Armbian didn’t change. The new method is so much better just using UUIDs. It makes cloning and operations like this a snap. It’s how modern operating systems work. Just not Armbian which will not modernize for whatever stupid reason they’d give for it which I don’t care about or accept.
There’s a lot of positives for Armbian as well. You’ve just encountered in my opinion the biggest downside of the entire Armbian OS and that is the baffling/messy boot process. I really wish they’d fix this and modernize the Armbian boot process so it would be as easy as everything else. Even on boards/operating systems that still use hard-coded paths like Armbian (and they are rare indeed) it’s usually something like config.txt to change it or something like /boot/extlinux/extlinux.conf. It will be a text file on the few operating systems and boards left that boot this primitively. There is nothing else like Armbian where you have to remake it with mkimage. That’s literally terrible and I can’t give you another example of it anywhere off the top of my head (at least for anything that came out in the past 3+ years).
I’m interested to see if the newer kernel might resolve your UART issue. If not let me know and I will investigate this a bit more for you for sure and see what I can find.
The H3 sounds really interesting for sure, thanks for mentioning that! The #1 and #2 fastest scores on pibenchmarks.com belong to the H3. That definitely got my attention as well. Take care!
Thanks for this write-up James. You (and your recent discussion with Douwe) clearly pointed out the steps I needed to boot my new Odroid N2+ from a SSD. I hope to use it to replace the RPi 4 that runs my telescope. Your notes got me past the first hurdle – booting reliably from the SSD. This application requires storing hundreds of ~50MB files during an imaging session, just not something an SD card will handle. (Ubuntu 22.04 easy, Arbian (just because), less so. I will likely stick with Ubuntu.
Hey David,
No problem at all, I’m glad it helped! I think you’ll be pretty pleased with it (especially using a SSD). The Armbian one is tricky since it has it’s own boot loader / settings. Ubuntu was so much easier to set this up with as it has a much simpler boot loader that only looks for the root partition’s UUID.
Thanks for sharing your experience, I think your build will be successful, thanks for sharing!
James,
are you using vanilla Ubuntu or hardkernel images? I’m currently on Armbian, which runs smoothly, generally speaking, but SPI boot is a pain and there seems to be issues with UART on the pin header.
I was considering hardkernel images, but I’m reluctant with that pretty old 4.x kernel (EOL actually end of January 2023)…
Hey Stefan,
Ahh yes, so I can definitely explain the issue here. There’s multiple download pages for the ODROID N2+. Check out this one here.
Here you should see Ubuntu 22.04 in both MATE Desktop and the server/minimal image. These will be much much newer kernels than anything 4.x. Hopefully that helps!
Hey James,
thanks a lot for your quick reply. Maybe it’s just too late over here, but following your link and selecting the 22.04 version, all I find is “Linux Kernel LTS 4.9.312” in the features section. Any advice?
Hey Stefan,
No worries, I see what you’re talking about here. I’d try using these images instead then for it.
Here’s a description from the site:
The document in this page provide instructions to install and manage Linux mainline kernel for the ODROID SBC (Single Board Computer) of Hardkernel which has been built to avoid the complication of using different kernel versions - Hardkernel's official Linux kernel vs unofficial mainline Linux kernel. The instructions and contents in this documents are limited to ODROID only and they would not work with other SBC (Single Board Computer).Please use the official ODROID Wiki page if you are using Hardkernel's stock OS images, Ubuntu 18.04/20.04 server or Mate version.
The commands in the document are not compatible or equivalent to the contents in the ODROID Wiki since the OS images provided through this page offer the Linux upstream kernel; consequently its configuration and features are different.
When I investigated more about where the images came from:
Where do the packages are from?In order to provide ODROID specific features with the provided OS, a private package archive server is running from - https://ppa.linuxfactory.or.kr - and this server provides the customized packages for ODROID only.
In other words this is basically just the ODROID image with the mainline kernel. This is essentially what you are looking for. I’d try using one of those mainline kernel images instead to get a newer kernel version than ODROID is currently offering.
There’s probably other ways to change it through apt (I’ve done this before with my ODROID M1 updated images). For your situation though I would try just using that image with the mainline kernel. I recognize a lot of the repositories. This site either is ran by ODROID or is ran by someone associated/closely connected with them I’d guess since I recognize a lot of their repositories and have used them before.
Hopefully that helps!
Now that is what I’m looking for! Thanks!
Need to figure out how much I’m going to trust in an unknown repository, but I like what you’re saying. Definitely will give this a try.
Hey Stefan,
Definitely let me know how it goes!
Hello!
I tried this method to boot from an SSD and I have some questions.
I didn’t understand very well how I make the changes to stick in Petitboot. In my case, Petitboot reverts always to root=/dev/mmcblk1p1. Therefore, I am wondering if the systems reboots it will always revert the changes and will try to boot from SD card and not SSD?
If you don’t mind I have another question. If I see in my Petitboot root=/dev/mmcblk1p1 should I change it to root=/dev/sda1 or root=/dev/sda2 as you described in your case?
Hey premarsor,
Great questions. You are definitely on the right track here! So you should see your SSD as a boot option after you do the guide here.
The easiest way to get it to select this by default is simply to take the SD card out. You don’t actually need it at this point anymore and it will just be a second copy of the OS if that makes sense.
However, you can do exactly what you are saying. You can change the Petitboot options to boot from the SSD by default by editing the menu options for sure. It’s just a slightly different process to get them to stick.
When you go in the options “Autoboot” will be enabled. You can disable this and set your own boot options override and these should stick. If you scroll to the bottom of that article you should see a screenshot and description of how to disable autoboot and set your own boot option that will stick.
Hopefully that helps!
Thank you very much, James! I will try this and I hope it works. Regarding my second question, is it correct that I should go with root=/dev/sda1 instead of root=/dev/sda2? I didn’t understand in your guide why you used sda2 instead of sda1. In my case, the difference is that I cannot see any sda2 listed and for my SD card I have mmcblk1p1 (block 1, partition 1) instead of mmcblk0p2 (block 0, partition 2) in your case. Probably , you had 2 partition and I have only one.
Hey premarsor,
Yes, you’re exactly right! So the reason mine was different was it depends on which OS you are installing. On the N2+ many of the images won’t have a “boot” partition because these boards have Petitboot so it’s not really necessary to have one. Some OS images still will have one though but this is a great question as I’m sure others will run into this and your comment will help for sure.
If your OS only has a single partition that’s totally okay and you will indeed use that one instead as the root partition. Hopefully that clears that up as well!
Brilliant! Thanks again! I will follow again your guide and if I run into problems, hoping you don’t mind, I will ask you some more questions. Cheers!
I definitely would not mind at all! There’s so little information out there relatively about these boards (or for any single board computer other than like, the Pi). Any questions you have or come across will be questions thousands of others will come across as well. Let’s give them a place to go to find the answer!
I actually added a couple of things to the article based on our conversation to help make the article more clear on these points. The article is not very old yet and this thread is giving me an idea of what else I needed to cover that may have been left out.
James, I’m glad I could help even without intending to and thank you for being so kind and patient!
So, let’s provide some more help.
What exactly autoboot means? It means the OS will be automatically booted? It means that Petitboot will be loaded and than the OS will be started, after the timeout specified? It also means that if in case of power outage my board will automatically boot after the power comes back? I am asking this because I do not want to disable autoboot and be left out of Petitboot and not being able to re-enable it in case my OS is not properly installed and will give me errors at boot, or prevent my board from rebooting after a power outage. Sorry for asking too many questions, but I want to be sure that switching to SSD and changing the Petitboot will not somehow make my board unusable.
Hey premarsor,
Great questions! So the autoboot setting will not disable Petitboot for sure. In fact you will probably want to leave autoboot enabled and change the boot device priority. Autoboot gives you 10 seconds to interrupt the boot process and then will boot the device you have configured in the Petitboot screen I linked to earlier.
Disabling Petitboot altogether is by going into the Petitboot shell and typing:
fw_setenv skip_spiboot trueThat is the only way to completely disable it (that I’m aware of). Changing these selections will not disable it. I know that you can’t disable it from the menus since to use the NPU with the ODROID M1 you have to disable Petitboot and you can’t do it from the screens (you need to drop into the shell). You are only changing the boot device basically from these screens so there’s no danger of doing this fortunately without dropping into the shell and hammering out commands.
It’s basically the same as changing your boot selection for Windows or Linux basically within your BIOS/UEFI. That’s exactly what you are doing here as Petitboot is stored in the SPI flash of the device so nothing about it is on the SD card or SSD if that makes sense. Think of Petitboot like your computers BIOS/UEFI where you set the OS startup selection. That’s what you need to do in Petitboot for sure and there’s several ways to do it. Set the SSD’s operating system to boot first in the priority. You can remove the SD card entirely from the boot priority if you’d like to for sure.
Is there a reason you are leaving the SD card in? None of this matters unless you have multiple drives with an OS installed connected to the device which isn’t typical. Even if you wanted to use the SD card you should just reformat it so you can use all of the free space and then it would not show up on Petitboot because it wouldn’t be a bootable drive. Do you still want to boot off a separate copy on the SD card or something? They will always be completely out of sync as changing one will not change the other so the SD card is kind of going to waste in there. It’s completely unused after finishing the process.
There are situations where you will have multiple OS drives connected and that is where changing the priorities will come into play. I have the external eMMC module as well so when I was SSD booting I did actually have multiple bootable drives connected and had to tweak the priorities. Setting the device you want as the first boot priority device should take care of it. Most people won’t encounter this though as you’d take the SD card out after you’ve finished creating the SSD. If you wanted to boot off the SD again you’d just put it back in the device or if you wanted to use the storage if you do a clean format of the SD card it won’t show up in Petitboot (because it won’t have the boot files that Petitboot looks for).
In other words most people shouldn’t have to deal with this but if you do have multiple OS drives connected (and that’s not going to change) then changing these is a lot like doing it on a PC essentially (which is a really nice ODROID feature on their newer boards, most single board computers do not have anything like this, it was only until I started thinking of it more like a BIOS/UEFI that it started to make more sense).
Hopefully that helps!
James, thank you for this very clear explanation. It was exactly what I expected!
I do not want to keep the SD card in. It’s just I have a lot of stuff installed on that server (on the SD card) which took me a lot of time and I don’t want to mess things up. After I succeed, with your kind help, to boot my server from the SSD, the SD card is history. Now, I just need to find a way to replicate the SD card on the SSD. I tried couple of methods (including yours using cat command, but doing it on my computer plugging both the SD card and SSD. By the way, the method with cat command was a little bit slow for me while copying a 130 GB SD card on a 500 GB SSD. A fast method I found was using partclone), but it seems that Petitboot (with cat and partclone methods) does not want to dicover the SSD after I replicate the SD card on it. With the clean same OS installed on SSD, Petitboot recognizes the SSD, but with a replica of my SD card not. I think it has something to do with the SDD partition table which in my case should be msdos. With your valuable information about the Petitboot, I think I will be able to finally succeed of booting from the SSD. Thanks again for your help!
Hey premarsor,
No problem at all, that is excellent that you were able to get the clean one going! I can confirm that it will for sure be very slow copying a 130GB SD. When I’ve been cloning my 64GB cards for some of my other recent SSD booting guides for other devices it has been taking upwards of 30-40 minutes. It’s about half that time on a 32GB card (which was a lot less noticeable/painful) and a 128GB card I’d guess would be an hour (which would drive me crazy).
It would actually be faster to do the cat operation on another PC if possible just using a SD to USB adapter (or a real SD card slot if you have a laptop/tablet that has one running Linux or a live USB boot of Linux) along with the SSD connected to the PC (probably through another USB adapter or directly or however depending on the drive type). I’m pretty sure this is how I’m going to do it going forward as it will save a *lot* of time for sure but you can always do it on the device itself (with the speed and capability limitations the device has but if time is an important factor using a PC will eliminate the most time from the process of anything you could do).
One thing I added to the guide after we started talking (and I realized this one was before I started adding it to all of my guides as a mandatory step) was the fsck section. When you are cloning drives a lot of the time they won’t boot until you have ran fsck on the drive. I have instructions in here on how to do that now. This can often fix weird partition table issues and things like that.
Clearing all of the old partitions off before the cat operation can help as well but from what you’re describing it probably needs fsck (on both partitions if that other one does have a boot partition). If there is supposed to be a MSDOS or FAT (pretty common) partition then you should fsck that as well. I’ve seen those marked dirty before and fsck will clear the dirty bit on the MSDOS partition and get it happy again sometimes. I helped someone who was actually doing something similar with a nearly 1TB emulation image not too long ago and she had the dirty bit set on her boot partition. It wouldn’t boot until fsck was taken care of on both sda1 and sda2.
I should also note that the fsck will take a while on larger partitions. Hers took all night but that was for 1TB. It does need to check every bit of the data on the drive for this which is why it takes longer. It will again be faster to do this step from a PC than from the ODROID if possible due to having access to things like PCIe 3.0-5.0 as well as USB 3.1+ and just much higher I/O performance in general.
Thank you for asking such a great series of questions. We’ve covered a ton that wasn’t originally in the guide (and I even made some updates) so thank you for trying this and sharing how it turned out!
Hello James! Unfortunately, I need again help.
It was impossible for me to boot the SSD with the partition copied in order to keep all my server settings. I can elaborate on that if you want me to.
So, instead I installed a new OS on SSD (Armbian) and I tried again to follow your guide. This time, I can see my sda1, I can select NO LABEL, I insert the root=/dev/sda1 in the Boot arguments line, and than, in order to make the root=/dev/sda1 stick I notice that I have to select OK and press enter, otherwise it doesn’t stick. I exit with escape and I enter again with e (for edit) in NO LABEL in order to check if root=/dev/sda1 is there and it is. Then, I exit the NO LABEL that I edited and I hit enter in order to boot the machine. It starts booting, but after some lines listed on the screen I can see the message ALERT /dev/mmcblk1p1 does not exists! Dropping to a shell! What am I doing wrong?
I can setup a new device for boot in System configuration, my SSD, and this sticks, but it was impossible to make root=/dev/sda1 to stick and not getting the message about /dev/mmcblk1p1 missing. Can you help me? Thanks a lot!
Hey premarsor,
That’s an Armbian specific problem basically. The first thing is you don’t ever have to manually edit those start lines. If it’s saying no label and you can’t just boot from it then it’s not working. When I clone the drive it will appear in Petitboot as another choice that I can just scroll to and hit enter. Something is wrong.
For Armbian you will probably have to follow their special process. You will need to boot into the SD card and run:
sudo armbian-installTheir instructions say: “Use armbian-install utility to transfer live image to fixed storage”. I don’t think Armbian supports Petitboot very well from what I’m seeing on Google!
I can tell you the technical reason this is happening but it’s honestly quite difficult to fix. If you look at /boot/boot.cmd you can see Armbian has it’s own bootloader stuff like this:
setenv rootdev "/dev/mmcblk1p1"You can’t just change this file. If you edit it you have to recompile it with
mkimage -C none -A arm -T script -d /boot/boot.cmd /boot/boot.scrand this is honestly harder than using Armbian’s built in scripts (mostly because of how many things can go wrong and how hard they are to troubleshoot/diagnose). That might be all it needs but I’d be willing to wager there’s a couple of other things that need tweaks too and the scripts will take care of all of these.Any other image should work normally with this process but Armbian is known to not play nice with Petitboot. It doesn’t sound like Petitboot can even read it correctly if it’s just showing NO LABEL. It should be an exact clone of the drive we copied with a cat command so you may need to use the Armbian specific commands for this one. The Armbian scripts should put the correct boot device in for you if that makes sense!
For the record I have nothing against Armbian whatsoever and actually use it in a lot of my other SSD boot tutorials but for this one I didn’t (I used Ubuntu 22.04 images) so I actually didn’t realize it had so many problems with getting set up using Petitboot. Fortunately in the case of Armbian though there are built in scripts to assist with this.
I almost didn’t want to say this but I keep seeing it. You may have to shut off Petitboot to use Armbian (at least with USB storage). A *lot* of people on reddit are saying they are running Armbian with Petitboot shut off (as recently as 6-7 months ago). In a thread from the ODROID forums about Armbian on the N2+:
This sounds true to me. Your device shouldn’t be showing up as NO LABEL and requiring those edits like this.
You may need to update your Petitboot firmware if you have had your N2+ for a long time but it’s not clear to me if the latest one will fix the types of issues you are seeing with Armbian yet. The native scripts should be able to pull this off though (although you may have to disable Petitboot but it’s easy to turn back on by just booting a stock image and running
sudo fw_setenv skip_spiboot false). Hopefully that helps!James, thank you very much for all your effort and I am sorry for dragging you into a mess like this. It seems that I am very unfortunate picking the worst case scenario for my Odroid N2+.
Anyway, I got the idea about Armbian. I will have to decide which other distribution I can use in order to run it from SSD. After I decide and try again your guide, I will let you know about the result. Furthermore, I have to figure out if it is possible to transfer all my files and settings of my server from the SD card to the server on the SSD. If not, I have to reinstall everything I have on the server on SD card (Openmediavault, Docker, Portainer, Wireguard etc.) to the server on the SSD. It will be a lot of work, but fortunately, in the meantime, I can still run the server from the SD card. I am determined not to give up on using my Odroid N2+ with an SSD, so I might need your help in the future. So, I promise I will keep in touch! Again, many thanks for all your effort to help me and for your kindness and solicitude. Cheers!
Hey premarsor,
It’s totally fine, no worries at all! I believe this is a good decision for now. It’s possible to get it working for Armbian but you are right that it just so happens to be maximum difficulty mode with that one.
If you are doing a completely clean image you can also just put the .img on a flash drive and image through Petitboot like I do in my ODROID M1 guide. You could follow that one to try that method and just pretend it’s for the N2+. There are several different ways to image when using Petitboot (and you can do it the old fashioned way when Petitboot is turned off as well or the images don’t support Petitboot).
I look forward to hearing your results!
I used minitool on my pc to clone my odroid sd to an ssd (well an usb adapter for a nvme card actually)
I have tried for an hour various variation of what you suggested but it simply will not stick for me. It always reverts back to /dev/mmcblk1p1. Very frustrating. May I ask are you too on petitboot version 20220317 (hardkernel too often break things during updates).
Hey douwe,
Can you do a:
sudo blkidDo you have multiple devices with matching UUIDs? Or is it doing it with only the SSD connected?
Mine is running the official Ubuntu 22.04 image and has 2 partitions. There is no mention of /dev/mmcblk0p1 in /media/boot or /boot on mine. Is this Armbian? I believe Armbian comes as one big partition and will not work with Petitboot (I was helping someone not too long ago that was having this happen to them with Armbian).
Petitboot tries to read the entries from the operating systems and I’m guessing that if you look in your /boot partition that you will find something that is referencing /dev/mmcblk0p1 that isn’t present in mine here. The simplest solution in your case may be to turn Petitboot off depending on which OS this is!
Thanks for your lightning fast reply. True, this is armbian. Thanks to your reply I now realize that I did not quite follow that somehow armbian does not allow the changes to be saved. I changed in boot.ini mmcblk0p1 to /dev/sda1, did the mkimage thing which gave me a new boot.scr and now it boots fine from the usb stick. Note that in my case first petitboot shows up, and after 1 second (I changed the timeout from 10 to 1) it executes kexec and then my retriopie image runs!
Btw fw_setenv skip_spiboot true has no effect for me. Petitboot always shows up. All this is on an ODROID N2+, Armbian with retropie.
Thanks so much for all the information. It’s great.
Hey douwe,
Fantastic results and great work! That sounds right to me. I wasn’t absolutely positive which file you needed to change but I was hoping that getting you to the “boot” folders would get you close enough to find the culprit and it looks like you’ve done it!
This should be helpful for people doing Armbian specifically but there’s going to be other distros that have something similar where you need to update some file on the boot partition (or folder in the case of distros that only have a single root partition and no boot partition) that is being read by Petitboot (that’s why it’s not sticking). Petitboot is reading that from your OS boot files and isn’t saving the changes into it’s own storage as those files are actually a part of your OS and fall outside Petitboot’s jurisdiction to safely modify/change.
For
fw_setenv skip_spiboot truespecifically it needs to be typed in the Petitboot console. You get to this by going to “Exit to Shell” in the main menu before booting your OS. You can sometimes do this from your OS but I haven’t had a lot of luck using those commands inside the OS and usually get something about my firmware configuration file being wrong or corrupt (unless you are using like, the most basic stock official image which is what you have to do to turn it back on, Android is best). You can always do it from inside Petitboot though to turn it off initially and that was how I did it on the M1.I’m not sure disabling Petitboot would have helped in retrospect and may have actually broke it altogether since the boot files were pointing to /dev/mmcblk1p1. Petitboot was actually saving the day by letting you override it. If we had shut it off I think it would have failed to boot entirely until we updated the Armbian-specific boot configuration file (as well as rebuild a new boot.scr with the mkimage command given at the bottom of the file as you did).
Thank you for sharing your results and detailed instructions, enjoy and take care!
Worked great for me. i bought the M1 just for the nvme but this is a nice bonus for the N2 thanks
Hey Brad,
Excellent, I’m glad it went well! I totally agree with you. NVMe for sure should go with the M1 but it is a nice bonus that you get a nice 40-50% boost from even the eMMC and quite a bit more than that from any SD card.
Given that the types of drives that are perfect to use with it are likely the type of drives you have in your older computers that may be getting retired (or are very cheaply available from other people’s PCs retiring) I think this is worthwhile. Thanks for taking the time to leave this!